Sewing and Fabric Crafts

Sewing and Fabric Crafts

Top Sewing Projects for Beginners

FAQ

Q: What are some easy sewing projects for beginners to start with?

A: For those new to sewing, starting with simple projects is the best way to build skills and confidence. Some top sewing projects for beginners include making a tote bag, a simple pillowcase, or a drawstring pouch. These projects require minimal pattern pieces and straightforward construction, making them perfect for practicing basic sewing techniques like straight stitching and hemming.

Q: What sewing skills are required for a beginner-friendly project?

A: Beginner-friendly sewing projects typically require basic skills such as understanding how to thread and operate a sewing machine, ability to sew straight lines, and knowledge of how to backstitch to secure seams. Additionally, being able to press fabrics as you sew and understanding the basics of pattern reading can be helpful but are not necessarily required for the simplest projects.

Q: How do I choose the right fabric for my beginner sewing project?

A: Choosing the right fabric for your sewing project can make all the difference in the outcome. For beginners, it’s best to start with fabrics that are easy to work with, such as cotton or linen. These fabrics are forgiving, easy to cut, and simple to sew. Avoid starting with slippery or thick fabrics like silk or leather until you have more experience. Also, consider the season and the intended use of the item when selecting your fabric.

Q: What tools and equipment do I need to get started with sewing?

A: To start sewing, you’ll need a few basic tools and equipment. First, a sewing machine is necessary for most projects, but you can start with a simple, mechanical model. Other necessities include a variety of needles, threads to match your fabrics, scissors dedicated to cutting fabric, pins, and a sewing gauge or seam guide. An iron and ironing board are also must-haves for pressing your fabrics as you sew, helping you achieve professional-looking results.

Q: Where can I find patterns and tutorials for beginner sewing projects?

A: There are numerous resources available for finding patterns and tutorials tailored to beginner sewing projects. Online platforms like YouTube, Pinterest, and sewing blogs offer a wealth of free tutorials and patterns. Additionally, sewing books and magazines can provide detailed instructions and inspiration. Many pattern companies also offer beginner-friendly patterns that include step-by-step instructions and sometimes even video tutorials to help guide you through the sewing process.

How to Make Fabric Flowers

You can create beautiful fabric flowers to embellish your clothing, accessories, or home decor. With basic sewing skills and simple materials, you can make your own unique flowers. Your creativity will shine as you choose fabrics, colors, and styles to suit your projects. In this guide, you will learn the steps to make fabric flowers, from preparing materials to finishing touches, and discover how to add a personal touch to your creations.

Key Takeaways:

To create beautiful fabric flowers, consider the following points:

  • Use high-quality fabric that is suitable for the type of flower you want to make, as it will affect the overall appearance and durability of the flower.
  • Master the petal shaping technique, as it is crucial for creating realistic and delicate-looking flowers that resemble real blooms.
  • Experiment with different assembly methods, such as gluing, sewing, or using floral wire, to find the one that works best for your fabric flower project and skill level.

Gathering Materials

A good starting point for making fabric flowers is to collect all the necessary materials, including fabrics, threads, and tools, to ensure a smooth and enjoyable creative process, as you launch on this project, you will need to have these items readily available.

Essential Tools

Acquiring the right tools is vital, as you will be using them to shape and craft your fabric flowers, you will need scissors, glue, and a hot glue gun to bring your creations to life.

Fabric Selection

Tactfully choosing the right fabric is key to creating beautiful flowers, you will need to select fabrics that are suitable for the type of flower you want to make, considering factors such as texture, color, and weight.

And as you examine deeper into the world of fabric selection, you will discover that different fabrics can evoke varying emotions and atmospheres, allowing you to customize your flowers to fit your desired aesthetic, you can experiment with different patterns, colors, and textures to create unique and personalized flowers that reflect your style and creativity.

Preparing the Fabric

If you want to make beautiful fabric flowers, you need to start with the right fabric. Choose a lightweight fabric that can hold its shape, such as cotton or silk. You will also need scissors, a needle, and thread to prepare your fabric for flower making.

Cutting Out Petals

Among the various steps in making fabric flowers, cutting out petals is the first step. You will need to cut out multiple petal shapes from your fabric, depending on the type of flower you want to make. Use a template or pattern to get the desired shape and size.

Shaping the Petals

Any excess fabric can be trimmed away as you shape your petals. You will need to use a technique such as gathering or curling to create a natural, curved shape. This will help your flowers look more realistic and delicate.

To achieve the perfect petal shape, you will need to experiment with different techniques and tools. You can use a hot tool to curl the edges of the petals or a needle and thread to gather the center. As you shape your petals, you can adjust the amount of gathering or curling to get the desired effect, and you will see your fabric flowers start to take shape under your hands.

Creating the Flower Center

Now that you have your fabric and tools, it’s time to create the center of your flower. This step is vital in giving your flower its shape and dimension. You will have two options to create the center: using a template or the free-hand method.

Using a Template

Around this point, you’ll need to decide on the size and shape of your flower center, and a template can help you achieve uniformity and precision. You can use a pre-made template or create your own using a piece of cardboard or paper.

Free-Hand Method

For a more organic look, you can try creating the flower center without a template. This method allows you to be more creative and flexible with your design, and you can adjust the size and shape as you go along.

Template or not, your goal is to create a circle or a shape that resembles the center of a flower. When using the free-hand method, you can use a needle and thread to help you create a circular shape, or you can simply cut out a circle from your fabric. As you work on your flower center, you’ll start to see your flower take shape, and you can adjust your technique to achieve the look you want.

Assembling the Flower

Unlike other crafting projects, assembling a fabric flower requires patience and attention to detail. You will need to carefully arrange your petals and center to create a beautiful, realistic bloom.

Attaching the Petals

Pertaining to the petals, you will need to attach them to the base of the flower, working your way around the center. You can use a hot glue gun or a needle and thread to secure them in place.

Adding the Center

Behind the beautiful petals, the center of the flower is what gives it depth and dimension. You will need to choose a center that complements your petals and attaches securely to the base.

Adding a center to your fabric flower can be as simple as gluing a small button or bead to the middle, or as complex as creating a intricate design using embroidery floss or yarn. You can choose a center that matches your petals or contrasts with them, depending on the look you want to achieve. As you add the center, you will see your flower come to life, and with a few final touches, you will have a beautiful, handmade bloom.

Finishing Touches

Despite the flowers being almost complete, you can add some final details to make them more realistic and visually appealing. You can use techniques like layering, shaping, and arranging to create a beautiful fabric flower.

Adding Leaves or Stems

Before you start adding any embellishments, you can attach leaves or stems to your fabric flowers to give them a more natural look. You can use wire, glue, or thread to secure them in place, and adjust them to your desired shape and position.

Embellishing the Flowers

Among the many ways to embellish your fabric flowers, you can use beads, sequins, or rhinestones to add a touch of sparkle and elegance. You can also experiment with different textures and colors to create a unique and personalized design.

Finishing the embellishing process, you will notice that your fabric flowers have transformed into beautiful, intricate creations. You can now use them to decorate your clothes, accessories, or home decor items, and enjoy the satisfaction of having created something beautiful with your own hands. You can also experiment with different embellishing techniques and materials to create a wide range of effects and styles.

Tips and Variations

After creating your fabric flowers, you can enhance them with various techniques. Consider the following:

  • Adding embellishments
  • Using different petal shapes

. Thou can customize your flowers to fit your style and project needs.

Experimenting with Colors

By exploring different color combinations, you can create unique fabric flowers that match your desired theme or decor. You can mix and match various hues to create ombre effects or contrasting colors to make your flowers stand out.

Mixing Fabric Textures

On the other hand, combining different fabric textures can add depth and visual interest to your flowers. You can pair smooth fabrics with lace or velvet to create a captivating contrast.

Also, when mixing fabric textures, you can experiment with layering different fabrics to achieve a dimensional look. You can use your fabric flowers to create beautiful brooches, hair clips, or embellishments for your clothing and home decor items, allowing you to express your creativity and personalize your projects.

To wrap up

Hence, you now have the basic knowledge to create your own fabric flowers. You can experiment with different fabrics, colors, and techniques to make your flowers unique. With practice, you will refine your skills and be able to create beautiful flowers to adorn your clothes, accessories, or home decor. Your handmade fabric flowers will add a personal touch to any project, and you will be proud of your creations.

FAQ

Q: What materials do I need to make fabric flowers?

A: To make fabric flowers, you will need a few basic materials, including fabric of your choice (cotton, silk, or satin work well), a pair of scissors, a hot glue gun, a wire stem or floral tape, and any additional embellishments you’d like to add, such as beads or rhinestones. You may also want to use a template or pattern to help you cut out your flower shapes.

Q: What types of fabric are best suited for making fabric flowers?

A: The type of fabric you choose will depend on the look and feel you want to achieve with your fabric flowers. Delicate fabrics like silk and chiffon work well for making realistic, petal-like flowers, while thicker fabrics like cotton and fleece can be used to create more rustic, textured flowers. You can also experiment with different fabric textures, such as velvet or lace, to add depth and interest to your flowers.

Q: How do I cut out the flower shapes from the fabric?

A: To cut out the flower shapes, start by tracing the template or pattern onto the fabric using a pencil or marker. Then, use a pair of sharp scissors to carefully cut out the shapes, making sure to follow the lines of the template. You can also use a craft knife or rotary cutter to cut out the shapes, but be careful not to cut yourself. If you’re using a intricate design, you may want to use a pair of embroidery scissors to get into the small areas.

Q: How do I assemble the fabric flowers?

A: To assemble the fabric flowers, start by gathering the cut-out flower shapes and arranging them in the desired order. Then, use a hot glue gun to attach the shapes together, starting from the center of the flower and working your way outwards. Make sure to apply even pressure to avoid creating wrinkles or creases in the fabric. You can also use a needle and thread to sew the shapes together, but hot glue tends to be faster and more convenient.

Q: How do I add the finishing touches to my fabric flowers?

A: To add the finishing touches to your fabric flowers, start by fluffing out the petals to create a natural, curved shape. Then, use a wire stem or floral tape to attach the flower to a base, such as a hair clip or brooch. You can also add embellishments like beads, rhinestones, or sequins to give your flowers a bit of sparkle and shine. Finally, use a spritz of fabric stiffener or hairspray to help hold the flower’s shape and prevent it from wilting or losing its shape over time.

The Art of Hand Embroidery

As you investigate into the world of needlework, you will discover the delicate charm of hand embroidery, an art form that requires patience, dedication, and a gentle touch. Your fingers will dance with the needle, weaving intricate patterns and designs that tell a story of elegance and refinement. With each stitch, you will uncover the beauty of this traditional craft, and your appreciation for the meticulous details will grow, much like the delicate threads that intertwine to create a masterpiece of elegance and sophistication.

Key Takeaways:

  • The foundation of hand embroidery lies in understanding the various stitches and techniques involved, which can be mastered with practice and patience.
  • Design and pattern selection play a significant role in hand embroidery, as they can greatly impact the overall aesthetic and visual appeal of the final product.
  • The choice of materials, including fabrics, threads, and needles, is vital to achieving the desired texture and color in hand embroidery pieces.

History of Hand Embroidery

To research into the world of hand embroidery, you must first understand its rich history, which spans thousands of years and traverses numerous cultures. As you explore this traditional craft, you will discover the intricate techniques and beautiful designs that have been passed down through generations.

Origins and Evolution

For centuries, hand embroidery has been a beloved craft, with its origins dating back to ancient civilizations in Egypt, China, and Greece. As you learn about its evolution, you will appreciate the skill and artistry that have gone into creating exquisite embroidered pieces, from delicate lace to intricate tapestries.

Influence of Culture and Society

One of the most fascinating aspects of hand embroidery is its reflection of the cultural and social context in which it was created. As you examine the various styles and techniques, you will notice how they reveal the values, traditions, and aesthetics of different societies, inviting you to ponder the significance of this craft in your own life.

It is intriguing to consider how hand embroidery has been shaped by the social and cultural norms of different eras, with various techniques and designs emerging in response to the needs and tastes of specific communities. As you explore this aspect of hand embroidery, you will gain a deeper appreciation for the ways in which this craft has been influenced by the world around it, and how it, in turn, has influenced the world of art, fashion, and culture, allowing you to develop your own unique perspective on this traditional craft.

Basic Techniques

Clearly, the foundation of hand embroidery lies in mastering the fundamental techniques that have been passed down through generations. As you begin your journey, you will discover the beauty of creating intricate designs and patterns with your own hands.

Stitches and Patterns

Besides the basic running stitch, you will learn various other stitches, such as the satin stitch and the French knot, which will enable you to create a wide range of patterns and designs, from simple to complex, to adorn your embroidered pieces.

Tools and Materials

Any enthusiast of hand embroidery will tell you that having the right tools and materials is important to producing exquisite work. You will need a few basic supplies, including embroidery hoops, needles, and threads, to start creating your own embroidered masterpieces.

To acquire the necessary tools and materials, you may visit a craft store or search online for specialty suppliers. As you explore deeper into the world of hand embroidery, you will discover the vast array of options available to you, from luxurious silks and linens to delicate cotton threads and intricate needles, all of which will help you to refine your skills and bring your embroidery projects to life, allowing you to create truly unique and beautiful pieces that reflect your personal taste and style.

Design and Composition

Not unlike a beautiful painting, a well-designed hand embroidery piece requires careful consideration of various elements. You will find that a harmonious blend of patterns, shapes, and lines creates a visually appealing composition, drawing your eye to the focal point of your artwork.

Color and Texture

Along with the choice of thread and fabric, you must consider the interplay of colors and textures in your design, as these elements can greatly enhance the overall aesthetic of your embroidery, allowing you to create a rich and intricate piece that invites your gaze.

Balance and Proportion

Beside the careful selection of colors and textures, you should also think about the balance and proportion of your design, ensuring that each element is in harmony with the others, creating a sense of stability and visual equilibrium in your artwork, which will undoubtedly please your eye.

Another aspect to consider when thinking about balance and proportion is the negative space in your design, as you will find that a thoughtful use of empty space can create a sense of lightness and airiness, allowing your embroidery to breathe and your eye to wander through the composition with ease, taking in the intricate details of your handiwork.

Advanced Methods

Keep exploring the world of hand embroidery, and you will discover various techniques to enhance your craft.

  1. Stem stitch
  2. French knot
Stitch Description
Stem stitch Basic outline stitch
French knot Textured, knotted stitch

Specialized Stitches

Albeit simple, these stitches can be combined to create intricate designs, as you will find that your embroidery skills improve with practice, allowing you to tackle more complex projects.

Complex Designs

The art of embroidery offers endless possibilities, and as you progress, you will be able to create stunning, intricate designs that showcase your skill and patience.

Considering the various stitches and techniques you have mastered, you can now attempt to create complex designs, such as floral patterns, landscapes, or even portraits, and you will find that your embroidery hoop becomes a canvas for your imagination, as you weave threads of different colors and textures to bring your vision to life.

Tips and Tricks

Many enthusiasts of hand embroidery have discovered that with a few simple techniques, your stitches can become more even and your project more enjoyable. Consider the following:

  • using good quality threads and needles
  • practicing regularly
  • This will help you to develop your skills and build your confidence in embroidery.

    Common Mistakes to Avoid

    Between the intricate stitches and delicate fabrics, it is easy to make mistakes, yet you can avoid them by being patient and diligent in your work, thus ensuring your embroidery remains beautiful and flawless.

    Improving Skill and Speed

    Behind every skilled embroiderer lies a commitment to consistent practice and a willingness to learn, and as you dedicate yourself to this craft, you will find your skills growing and your speed increasing.

    Due to the nature of hand embroidery, which requires patience, dedication, and attention to detail, you will find that as you continue to practice, your hands will move more deftly, your stitches will become more evenly spaced, and your overall skill will improve, allowing you to complete projects more efficiently and effectively, thereby enhancing your enjoyment of this most delightful and rewarding craft, and enabling you to create truly beautiful and intricate pieces that reflect your growing proficiency.

    Preservation and Display

    Your hand-embroidered pieces are treasures to be cherished, and proper preservation and display techniques will ensure their beauty endures for generations.

    Caring for Embroidered Pieces

    Around the house, you will want to handle your embroidered pieces with utmost care, avoiding exposure to direct sunlight and moisture to prevent fading and damage.

    Showing Off Your Work

    Cautiously, you will want to select a method to showcase your finished embroidery, choosing a frame or display case that complements the piece and protects it from environmental stressors.

    Embroidered pieces can be displayed in a variety of ways, and you may consider creating a beautiful linen-lined box or a decorative hoop to showcase your work, allowing you to admire your handiwork while keeping it safe from harm, and enabling you to proudly share your creations with others, showcasing your skill and artistry.

    Conclusion

    As a reminder, you have discovered the delightful world of hand embroidery, and now your appreciation for this art form has grown. You may wish to explore further, and for that, you can refer to The Art of Embroidery: Inspirational Stitches and Textures to refine your skills and indulge your passion. Your newfound interest will undoubtedly bring you joy and serenity as you create beautiful, intricate designs.

    FAQ

    Q: What is the best way to get started with hand embroidery for a beginner?

    A: To get started with hand embroidery, it’s vital to invest in a few basic tools such as a needle, embroidery hoop, and some embroidery floss. Choosing a simple design or pattern is also advisable, as it will help build confidence and skills. Online tutorials and classes can provide a comprehensive introduction to the various stitches and techniques involved in hand embroidery.

    Q: What are the most common mistakes beginners make when learning hand embroidery?

    A: One common mistake beginners make is not tightening the fabric sufficiently in the embroidery hoop, leading to uneven stitching. Another mistake is not using the correct needle size for the specific type of fabric being worked on. Additionally, failing to follow the pattern or not keeping the tension of the floss consistent can also lead to disappointing results. Practicing regularly and paying close attention to these details can help avoid such mistakes.

    Q: How do I choose the right fabric for my hand embroidery project?

    A: The choice of fabric for hand embroidery depends on the desired effect and the level of difficulty. Cotton and linen are popular choices due to their stability and ease of use. For beginners, Aida cloth or evenweave linen are great options because they have a clear, evenly spaced weave that makes it easy to count stitches. The thread count of the fabric and the type of embroidery floss to be used should also be considered to ensure compatibility and achieve the best results.

    Q: What are some tips for creating intricate and detailed designs in hand embroidery?

    A: To create intricate and detailed designs in hand embroidery, it’s helpful to use a variety of stitches and techniques. Understanding how to blend colors and shading can add depth and dimension to the design. Using high-quality embroidery floss that has good colorfastness is also important to prevent fading. Working in good light and using magnification tools if necessary can help in achieving precise stitches. Lastly, taking breaks to avoid eye strain and maintaining patience are key to producing high-quality, detailed work.

    Q: Can hand embroidery be used to embellish or repair existing clothing and textiles?

    A: Yes, hand embroidery can be a beautiful way to embellish or repair existing clothing and textiles. It can be used to add decorative elements such as monograms, motifs, or patterns to clothing, accessories, or home furnishings. For repair, embroidery can be used to reinforce weakened areas or to cover small tears and holes, extending the life of the item. The technique and type of floss used should be chosen based on the type of fabric and the intended use of the item to ensure durability and aesthetic appeal.

DIY Patchwork Quilt Ideas

You can create a unique and cozy patchwork quilt with your own hands, and it’s easier than you think. As you explore your creativity, you’ll find that making a patchwork quilt is a fun and rewarding project. You’ll have the opportunity to choose your favorite fabrics and patterns, and with some basic sewing skills, you can bring your vision to life. Your patchwork quilt will be a one-of-a-kind treasure that reflects your personal style and adds warmth to your home.

Key Takeaways:

To get started with DIY Patchwork Quilt projects, consider the following points:

  • Choose a color scheme that complements the room where the quilt will be used, and select fabrics that fit within the chosen palette to create a cohesive look.
  • Experiment with different patterns and techniques, such as strip piecing or appliqué, to add visual interest and texture to the quilt.
  • Consider using repurposed materials, like old clothes or scrap fabric, to create a unique and ecofriendly patchwork quilt that tells a story and reduces waste.

Choosing Fabrics

Your fabric selection will set the tone for your entire patchwork quilt, so take your time and have fun with the process. You’ll want to consider a variety of factors, including color, pattern, and texture.

Selecting Colors and Patterns

Fabrics with complementary colors and patterns will add visual interest to your quilt. You can choose a few statement fabrics and then select others that complement them, creating a cohesive look that reflects your personal style.

Mixing Textures and Thicknesses

Against a backdrop of smooth cotton, you can add texture with velvet, linen, or wool fabrics. You’ll create a unique and engaging quilt that invites touch and exploration.

Patterns will also play a significant role in mixing textures and thicknesses. You can combine large-scale prints with smaller ones, and smooth fabrics with woven or embroidered ones, to add depth and visual interest to your quilt. As you experiment with different textures and thicknesses, you’ll find that your quilt takes on a life of its own, and you’ll be eager to see the finished product.

Tools and Materials

Some basic supplies are necessary to get started with your DIY patchwork quilt project, including fabric, threads, and sewing tools, which you will use to bring your design to life as you work on your quilt.

Essential Sewing Tools

The tools you need for sewing include a sewing machine, rotary cutter, and sewing needles, which you will use to piece together your quilt blocks and sew your quilt layers.

Additional Supplies for Embellishments

One of the ways you can add unique touches to your quilt is by using embellishments, such as buttons, ribbons, or appliques, to give your quilt a personalized look that reflects your style.

Indeed, as you explore the world of embellishments, you will find that the possibilities are endless, and you can use your creativity to add beautiful details to your quilt, such as embroidery floss, fabric paint, or even quilt batting with unique textures, to make your quilt truly special and treasured for years to come, and with these supplies, you will be able to create a one-of-a-kind quilt that showcases your personality and skill.

Designing Your Quilt

Keep in mind that designing your quilt is a personal process, and you should feel free to experiment with different patterns and styles to create a unique piece that reflects your taste and personality.

Traditional Patterns

Besides the classic log cabin and nine-patch designs, you can also explore other traditional patterns, such as the hexagon or star quilt, to add a touch of nostalgia to your project.

Modern and Abstract Designs

Typically, modern quilts feature bold colors and geometric shapes, and you can use these elements to create a contemporary look that suits your home decor and personal style.

But as you investigate deeper into modern and abstract designs, you’ll find that the possibilities are endless, and you can experiment with unusual fabrics, textures, and colors to create a truly one-of-a-kind quilt that showcases your creativity and skill.

Piecing the Quilt Top

Not every quilt top is created equal, and the piecing process can be as unique as you are. As you initiate on this journey, you’ll discover various techniques to bring your design to life.

Basic Techniques for Beginners

One of the first things you’ll need to master is the basic sewing and piecing techniques, which will serve as the foundation for your quilt top. You’ll learn to sew straight lines, piece blocks, and assemble your quilt top with ease.

Advanced Techniques for Complex Designs

Across the various quilt designs, you’ll encounter different techniques that will help you achieve the desired look. Here are a few:

  1. Complex block patterns
  2. Intricate sewing designs
Technique Comparison

Technique Description
Foundation Paper Piecing Allows for precise sewing and intricate designs
Free-Motion Quilting Enables you to create complex patterns and designs

You’ll find that as you practice these techniques, your skills will improve, and your quilt tops will become more sophisticated.

Techniques such as foundation paper piecing and free-motion quilting will become your go-to methods for creating complex designs. Here are a few more techniques to explore:

  1. Appliqué
  2. Embroidery
Advanced Techniques

Technique Description
English Paper Piecing Perfect for creating intricate, precise designs
Hand Quilting Allows for delicate, handmade stitching

As you master these techniques, you’ll be able to create stunning, complex quilt designs that reflect your unique style and creativity.

Adding Batting and Backing

For a finished quilt, you’ll need to add batting and backing. This step gives your quilt warmth, texture, and stability. You’ll choose materials that complement your patchwork, ensuring a cohesive look.

Choosing the Right Batting

About the type of batting, consider factors like loft, material, and insulation. You’ll select one that suits your quilt’s purpose and your personal preference, thinking about how you want your quilt to feel and function.

Selecting a Coordinating Backing Fabric

Below your patchwork top, the backing fabric will add an extra layer of beauty. You’ll pick a fabric that complements your quilt’s colors and patterns, considering how it will enhance the overall design.

Understanding your backing fabric options, you can choose a single solid color, a subtle print, or an elaborate design. You’ll think about how the backing will interact with the front of your quilt, creating a harmonious and balanced look that showcases your patchwork skills, and makes your quilt truly special and meaningful to you.

Quilting and Finishing

Unlike other sewing projects, quilting and finishing a patchwork quilt requires patience and attention to detail. You will need to decide on a quilting pattern, choose a thread color, and prepare your quilt for binding.

Hand Quilting versus Machine Quilting

At this stage, you can choose between hand quilting and machine quilting, considering your skill level and the desired look. You can opt for hand quilting for a more traditional and personal touch or machine quilting for a faster and more uniform result.

Binding and Finishing Touches

Finishing your quilt with a beautiful binding is the final step. You can choose a coordinating fabric for the binding and attach it to the quilt using a sewing machine or by hand, making sure to fold the edges neatly.

Even after attaching the binding, you can add additional finishing touches, such as a label or a hanging sleeve, to make your quilt truly special. You can also consider adding a layer of batting to give your quilt extra warmth and texture, making it a cozy and inviting piece for your home. As you complete your quilt, you will feel a sense of accomplishment and pride in your handmade creation.

Summing up

Taking this into account, you now have a solid foundation to start your DIY patchwork quilt project. You can explore various designs and patterns to create a unique piece that reflects your style. For more inspiration, visit Easy Patchwork Quilt DIY tutorials, and get ready to showcase your handmade quilt with pride, enjoying the fruits of your labor in your cozy home, surrounded by your loved ones, and the warmth of your handmade creation.

FAQ

Q: What is a DIY patchwork quilt and how do I get started with making one?

A: A DIY patchwork quilt is a type of quilt that is made from small pieces of fabric sewn together to create a larger design. To get started, you will need a few basic sewing supplies, including a sewing machine, rotary cutter, and fabric scraps. You can begin by choosing a pattern or design, selecting your fabrics, and then cutting and sewing the pieces together. There are many online tutorials and YouTube videos available to help guide you through the process.

Q: What types of fabric are best suited for a DIY patchwork quilt?

A: The type of fabric you choose for your DIY patchwork quilt will depend on the look and feel you are trying to achieve. Cotton fabrics are a popular choice because they are soft, breathable, and easy to work with. You can also use a combination of cotton and other fabrics, such as wool or silk, to add texture and interest to your quilt. Consider choosing fabrics with a variety of colors, patterns, and textures to add depth and visual appeal to your quilt.

Q: How do I choose a pattern for my DIY patchwork quilt?

A: There are many different patterns to choose from when making a DIY patchwork quilt, from simple and traditional to complex and modern. You can find patterns online or in quilting books, or you can create your own design using graph paper and a pencil. Consider the skill level required for the pattern, as well as the amount of time and fabric you have available. Some popular patterns for beginners include the simple square patchwork and the strip quilt.

Q: What are some tips for sewing a DIY patchwork quilt?

A: One of the most important tips for sewing a DIY patchwork quilt is to use a consistent seam allowance throughout the quilt. This will help ensure that your pieces fit together evenly and that your quilt lies flat. You should also press your seams as you go to help the quilt lie flat and to prevent bulkiness. Additionally, use a walking foot or even feed foot on your sewing machine to help guide the fabric and prevent bunching or dragging.

Q: How do I finish and bind a DIY patchwork quilt?

A: Once you have completed the patchwork top of your quilt, you will need to layer it with batting and a backing fabric, and then bind the edges. You can choose from a variety of binding methods, including traditional double-fold binding, single-fold binding, or a decorative stitch. You will also need to add a label or signature to the back of the quilt, which can include your name, the date, and any other information you want to include. Finally, you can add any additional embellishments, such as quilting or appliques, to complete your DIY patchwork quilt.

The Joy of Fabric Crafts

As you explore the world of fabric crafts, you’ll discover a wide range of creative possibilities. You can express your personality and style through various techniques, from sewing and embroidery to quilting and patchwork. With your own two hands, you can transform simple fabrics into unique and functional items, such as clothing, accessories, or home decor. Your imagination and skills will guide you as you explore into this rewarding hobby.

Key Takeaways:

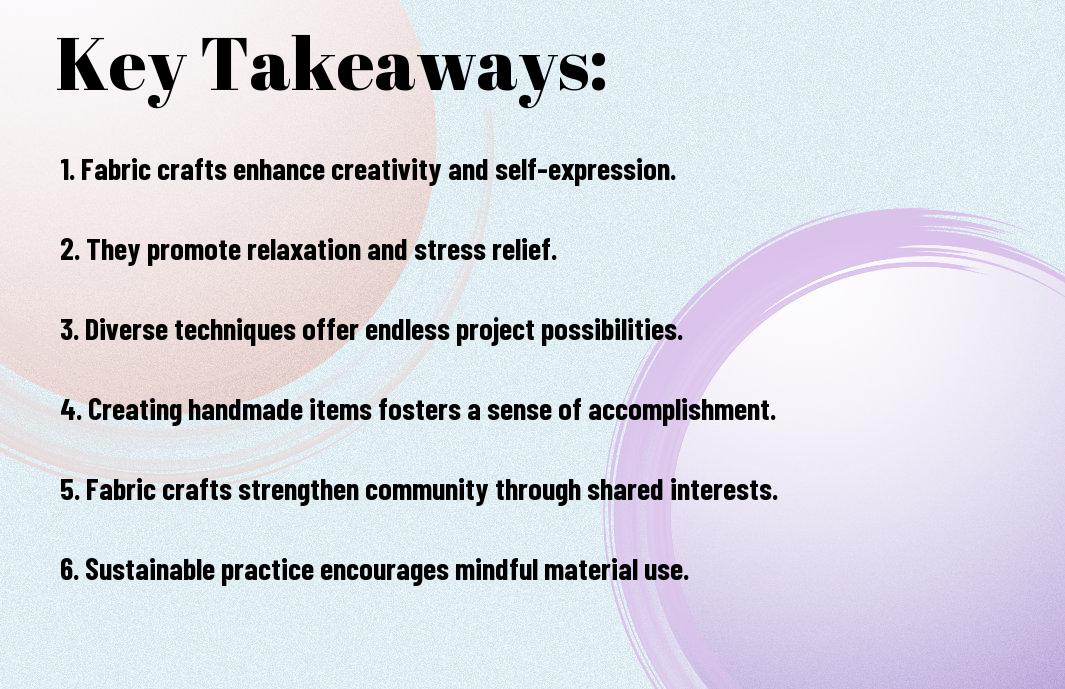
  • The therapeutic benefits of fabric crafts are numerous, as they provide an outlet for creativity and self-expression, allowing individuals to unwind and relax while producing something tangible and meaningful.
  • Fabric crafts offer a wide range of techniques and materials to explore, from sewing and embroidery to quilt-making and upcycling, making it easy to find a project that suits your skills and interests.
  • Engaging in fabric crafts can be a social activity, providing opportunities to connect with like-minded individuals through classes, workshops, and online communities, and to share ideas and inspiration with others who appreciate the art of fabric crafting.

Getting Started

The world of fabric crafts is waiting for you to explore, and it’s easier than you think to get started. You can begin with simple projects like sewing a tote bag or creating a quilt, and as you gain confidence, you can move on to more complex tasks.

Choosing the Right Fabric

By selecting the appropriate fabric for your project, you ensure that your final product turns out as expected. You will want to consider factors such as texture, color, and durability when making your selection, as these elements can greatly impact the overall outcome of your craft.

Essential Tools and Supplies

An investment in basic tools and supplies is necessary to begin your fabric craft journey. You will need items like a sewing machine, scissors, and thread to get started, and as you progress, you can add more specialized tools to your collection.

Plus, having a dedicated workspace with good lighting and storage for your supplies will help you stay organized and focused on your projects. You can set up a sewing station in a corner of your home and keep your fabrics, threads, and tools within easy reach, making it simpler for you to work on your crafts whenever inspiration strikes.

Sewing and Embellishments

One of the most satisfying aspects of fabric crafts is the ability to create unique and personalized items through sewing and embellishments. You can use your skills to make a wide range of items, from clothing and accessories to home decor and gifts. As you explore the world of sewing and embellishments, you’ll discover the many ways to express your creativity and bring your ideas to life.

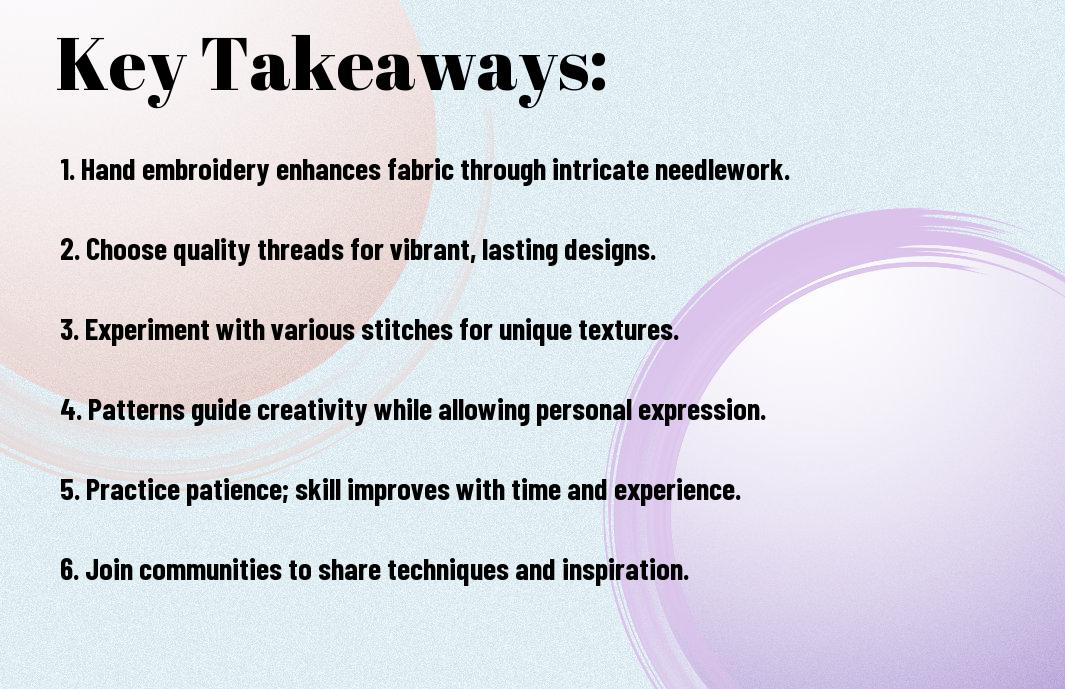
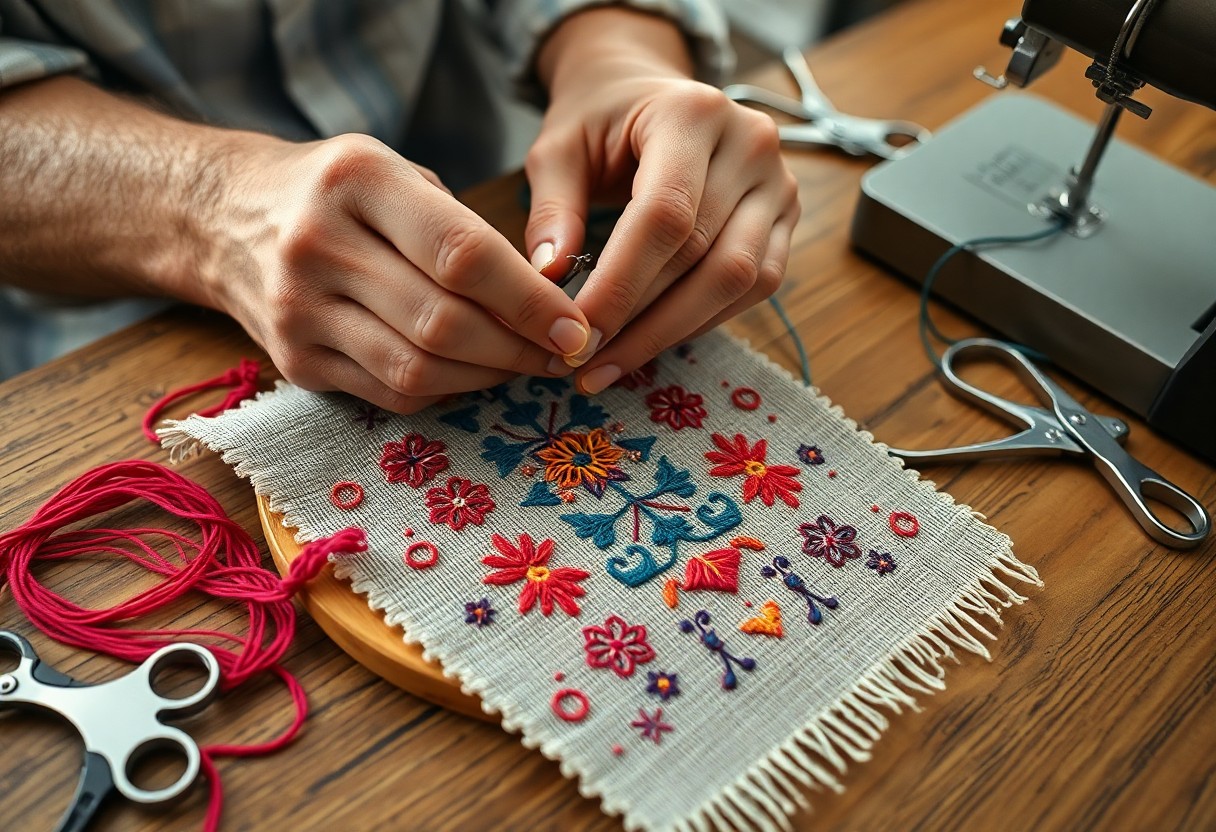
Basic Stitches and Techniques

Along with the basics of sewing, you’ll learn various stitches and techniques that will help you to create professional-looking projects. You’ll master the straight stitch, backstitch, and running stitch, among others, and learn how to use them to construct a variety of items. Your sewing skills will improve with practice, and you’ll be able to tackle more complex projects as you gain confidence.

Adding Decorative Touches

Around the edges of your projects, you can add decorative touches such as ribbons, buttons, and embroidery floss to give them a personalized look. You can use these embellishments to add color, texture, and interest to your creations, making them truly unique and reflective of your personal style. Your ability to add these decorative touches will elevate your projects and make them stand out.

Also, as you experiment with different embellishments, you’ll find that you can use them to convey meaning and tell stories through your fabric crafts. You can choose embellishments that hold special significance, such as a button from a favorite garment or a piece of fabric from a memorable event, and incorporate them into your projects to make them even more meaningful. This will allow you to infuse your creations with emotional value and make them truly special.

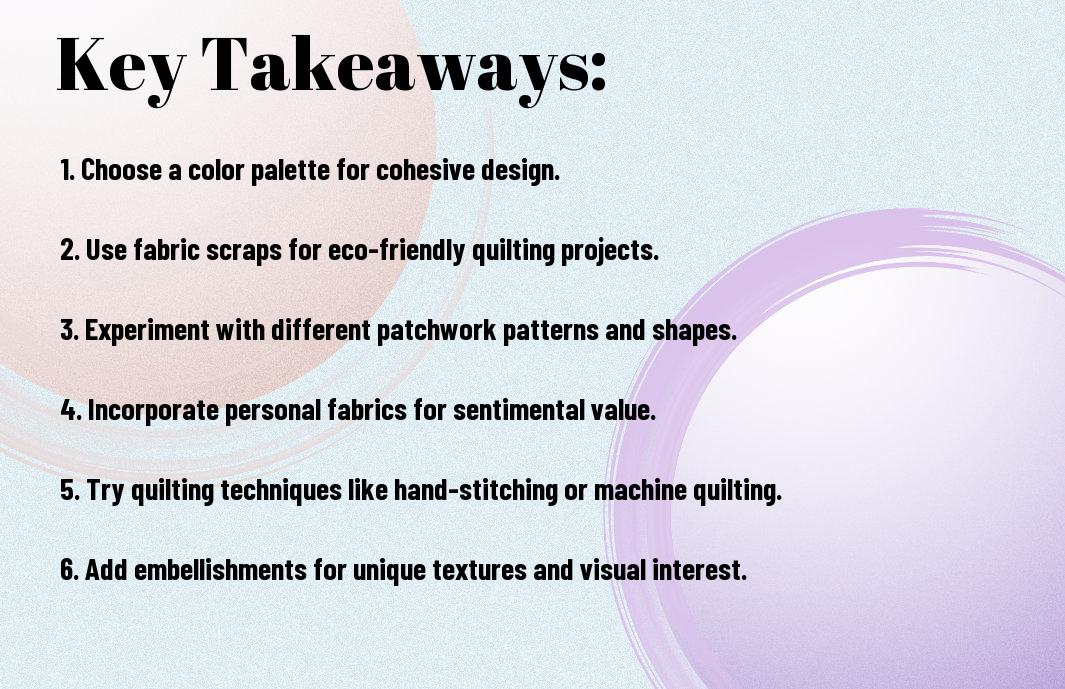
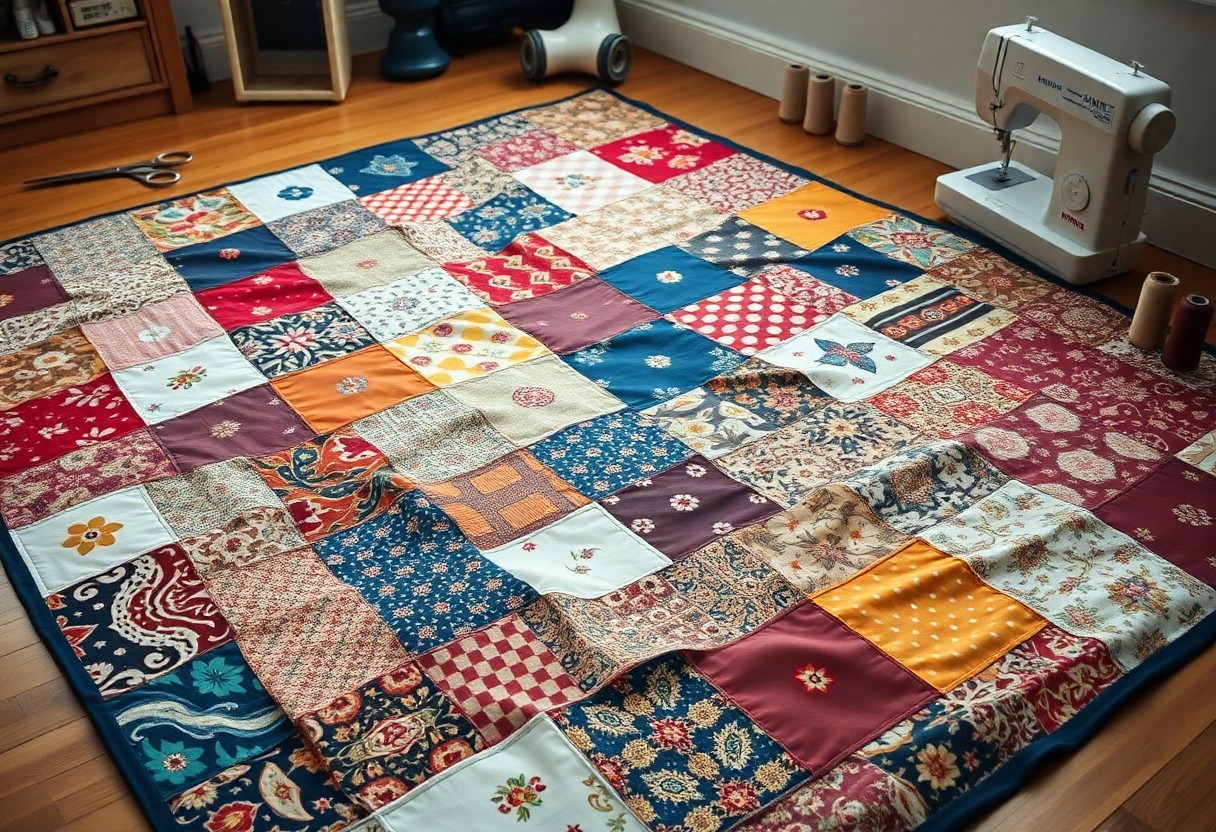
Quilting and Patchwork

Now that you’ve discovered the world of fabric crafts, you can explore the delightful realm of quilting and patchwork, where you can create stunning textiles with your own hands.

Introduction to Quilting

Behind the scenes of every beautiful quilt lies a story of dedication and skill, as you will learn the basics of quilting and how to bring your unique vision to life.

Creating Unique Patchwork Designs

Between the varied fabrics, colors, and patterns, you can find endless inspiration for your patchwork designs, and as you experiment with different combinations, your creativity will flourish.

Creating unique patchwork designs allows you to express your personal style and add a touch of personality to your quilts, and as you become more confident in your skills, you can try more complex patterns and techniques to take your quilting to the next level, making each project a reflection of your artistic vision and your ability to bring it to life with your own hands.

Crafting with Felt and Yarn

Not only are felt and yarn versatile materials, but they also offer a wide range of creative possibilities. You can use them to make decorative items, accessories, and even functional objects, allowing you to express your personality and style.

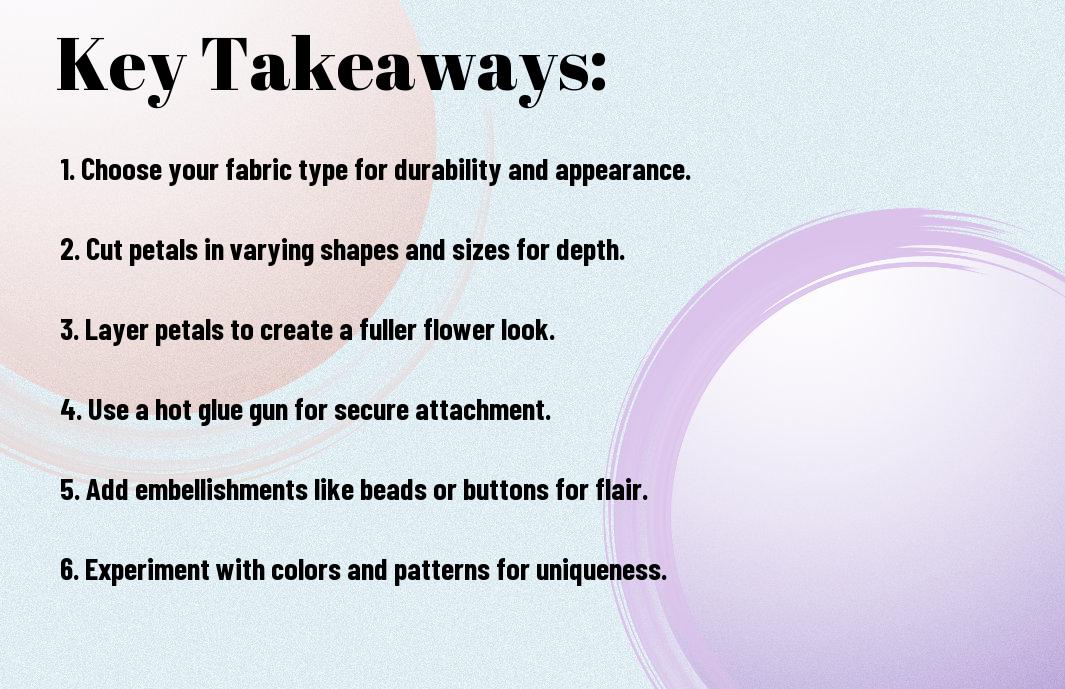
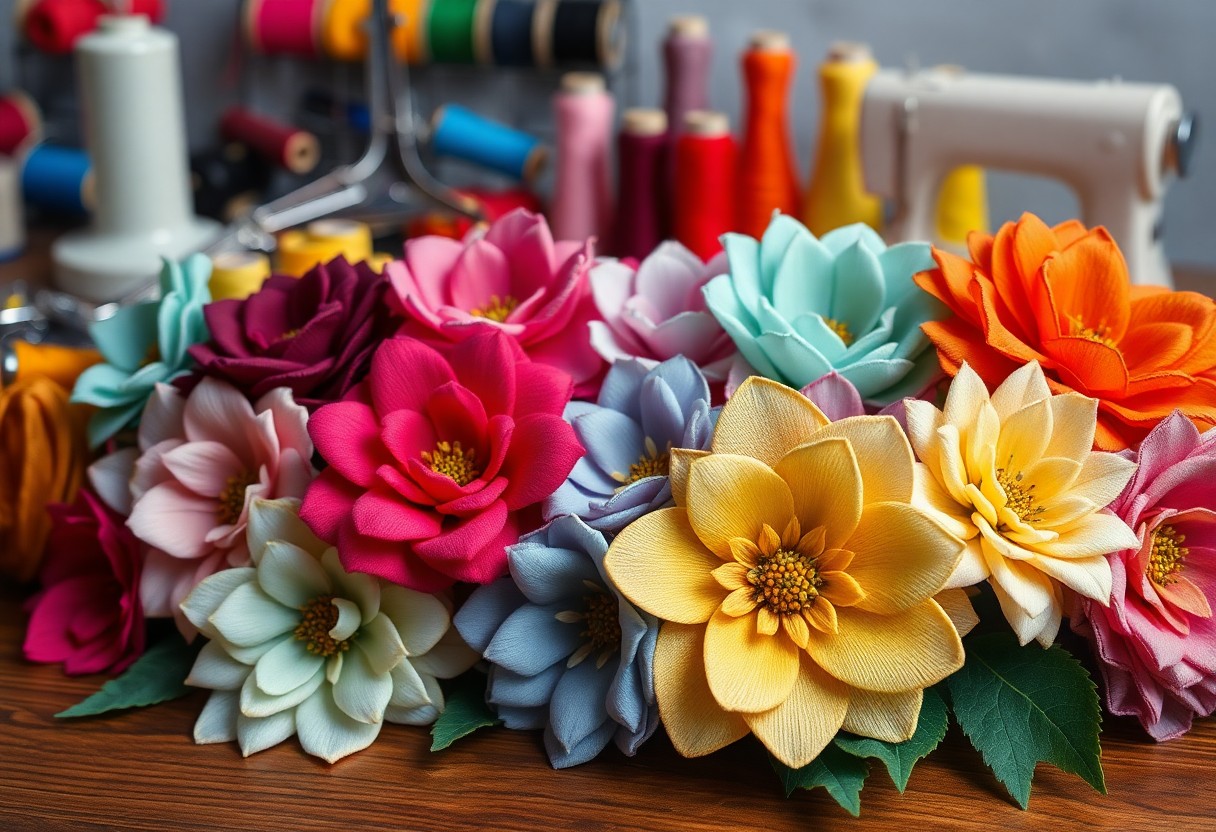
Making Felt Flowers and Shapes

Filling your space with handmade felt decorations can be a great way to add a personal touch. You can create beautiful flowers, shapes, and designs using felt, and use them to embellish your clothing, accessories, or home decor, giving you a sense of accomplishment and pride in your creations.

Knitting and Crochet Essentials

Aside from felt, you can also explore the world of yarn by learning the basics of knitting and crochet. You will need to familiarize yourself with the necessary tools and materials, such as needles, hooks, and yarn types, to start creating your own projects, and as you progress, you can experiment with different techniques and patterns to create unique items.

Crocheting or knitting can be a fun and rewarding hobby, allowing you to create something with your own hands. As you research deeper into the world of knitting and crochet, you will discover the various types of yarn, needles, and hooks available, and you can choose the ones that suit your projects and preferences, enabling you to bring your ideas to life and enjoy the process of creating something from scratch.

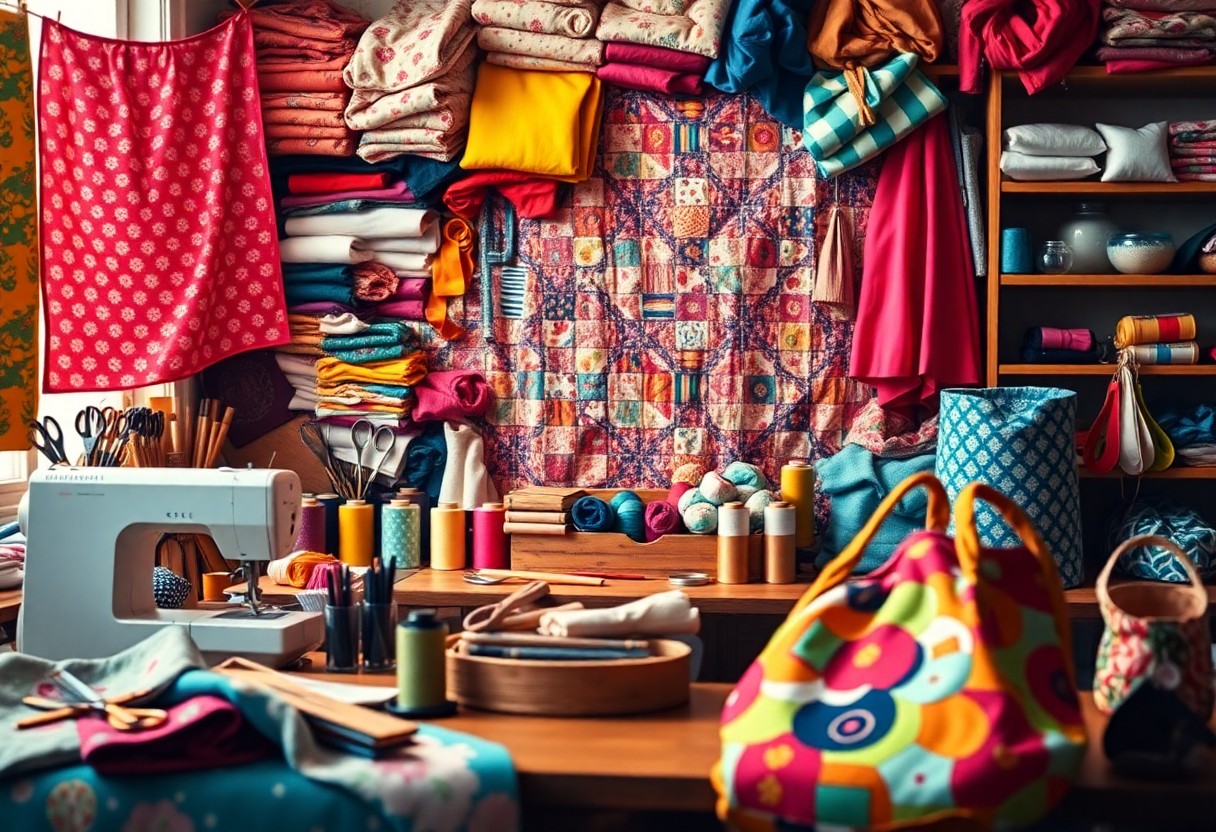
Upcycling and Repurposing

Unlike traditional crafting methods, upcycling and repurposing allow you to breathe new life into old fabrics. You can find inspiration for SCRAP FABRIC SEWING PROJECTS on SCRAP FABRIC SEWING PROJECTS and get creative with your fabric scraps.

Turning Old into New

After collecting your fabric scraps, you can start transforming them into unique items, such as quilts, bags, or home decor.

Creative Ways to Reuse Fabric Scraps

Across various crafting communities, you’ll find numerous ways to reuse fabric scraps, from patchwork to embroidery, and you can experiment with different techniques to find your favorite.

Also, you can explore various textures, colors, and patterns to add depth and visual interest to your upcycled projects, making each item truly one-of-a-kind and reflecting your personal style, as you explore into the world of fabric upcycling and repurposing, you’ll discover the joy of giving old fabrics a new purpose.

Displaying and Sharing

All your hard work on fabric crafts deserves to be showcased, and there are many ways to do so. You can display your creations in your home, share them with friends and family, or even sell them online or at local markets.

Showcasing Your Creations

Exhibiting your fabric crafts can be a great way to add a personal touch to your home decor. You can hang your quilts or embroidery pieces on walls, or use decorative baskets to store and display your smaller items.

Gift-Giving and Selling Your Crafts

About the process of sharing your crafts with others, you’ll find that it’s a wonderful way to connect with like-minded people. You can give your crafts as gifts or sell them to those who appreciate handmade items.

In fact, selling your fabric crafts can be a lucrative hobby, and you can start by setting up an online shop or participating in local craft fairs. You’ll be able to share your passion with others and earn some extra income, which can be a very rewarding experience for you as a crafty person.

Conclusion

As a reminder, you have discovered the joy of fabric crafts and how it can enrich your life. You have learned various techniques to create unique items, from clothing to home decor. Your fabric craft journey can be a rewarding and creative outlet, allowing you to express yourself and produce beautiful pieces. You can continue to explore and develop your skills, enjoying the satisfaction of creating something with your own hands.

FAQ

Q: What is fabric crafting and how do I get started with it?

A: Fabric crafting, also known as textile crafting, is a fun and creative hobby that involves working with fabrics to create unique and personalized items such as clothes, accessories, home decor, and more. To get started, you’ll need some basic supplies like fabric, thread, scissors, and a sewing machine. You can find plenty of tutorials and patterns online or in craft books to help you learn various techniques and projects. Start with simple projects like making a tote bag or a pillowcase, and as you gain confidence and skills, you can move on to more complex projects.

Q: What types of fabric are best suited for beginners?

A: As a beginner, it’s best to start with fabrics that are easy to work with and forgiving, such as cotton, polyester, or blends. These fabrics are versatile, durable, and can be used for a variety of projects. Avoid working with delicate or slippery fabrics like silk or chiffon until you have more experience. You can also experiment with different fabric textures and weights, like fleece, flannel, or canvas, to add variety to your projects.

Q: What are some vital tools and materials needed for fabric crafting?

A: Some vital tools and materials needed for fabric crafting include a sewing machine, scissors, rotary cutter and mat, sewing needles, threads, and fabric glue. You’ll also need a measuring tape, seam ripper, and iron to help you with cutting, sewing, and finishing your projects. Depending on the specific project, you may also need additional materials like zippers, buttons, or ribbons. It’s a good idea to invest in good quality tools and materials to ensure that your projects turn out professional-looking and durable.

Q: Can I use fabric crafting to make gifts for my loved ones?

A: Absolutely! Fabric crafting is a great way to create personalized and thoughtful gifts for your loved ones. You can make items like customized t-shirts, tote bags, pillowcases, or blankets that are tailored to their interests and preferences. You can also add special touches like embroidery, appliques, or quilting to make your gifts truly unique and meaningful. Fabric crafted gifts are not only functional but also show that you care and are willing to put in the time and effort to create something special just for them.

Q: How can I join a community of fabric crafters and stay inspired?

A: There are many ways to join a community of fabric crafters and stay inspired. You can join online forums, social media groups, or local craft clubs to connect with other crafters, share ideas, and learn from their experiences. You can also attend workshops, classes, or conferences to learn new techniques and stay up-to-date with the latest trends. Follow your favorite craft bloggers, YouTube channels, or Instagram accounts to stay inspired and motivated. Additionally, you can participate in craft challenges, swaps, or charity projects to stay engaged and give back to the community.

Skip to content