The Beauty of Handmade Pillows

As you wander through your home, your eyes settle upon the textures and hues that bring you serenity. You notice the way a single, exquisite element can transform a space, and your thoughts turn to the understated elegance of handmade pillows. Imagine wrapping your senses around a plush, carefully crafted pillow, its unique beauty a testament to the human touch. To Elevate Decor with Handmade Pillow Covers and discover the enchantment they can bring to your surroundings.

Key Takeaways:

  • The unique charm of handmade pillows lies in their personalized touch, making each one a one-of-a-kind piece that reflects the creativity of the maker.
  • Handmade pillows offer a sustainable alternative to mass-produced products, as they are often made from eco-friendly materials and produced in limited quantities, reducing waste and minimizing environmental impact.
  • The artisanal quality of handmade pillows makes them a valuable addition to any home decor, as they add a touch of humanity and character to a space, setting it apart from more generic and mass-produced designs.

The Art of Creation

A handmade pillow is a testament to the human desire to create something beautiful and unique. As you explore into the world of handmade pillows, you’ll discover the intricate details and craftsmanship that go into each piece, making every pillow a one-of-a-kind treasure.

The Joy of Crafting

Constructing a handmade pillow is an act of devotion, where every stitch and every fold is a labor of love. You’ll find that the process of creating something with your own hands is a deeply satisfying experience, allowing you to express your personality and style in every thread and fiber.

The Importance of Unique Details

Ultimately, any handmade pillow is defined by its unique characteristics, from the choice of fabric to the subtle nuances of texture and pattern. You’ll notice that these distinctive elements elevate the pillow from a simple decorative item to a true work of art, imbuing your space with a sense of warmth and personality.

Consequently, as you run your fingers over the intricate embroidery or soak in the vibrant colors of your handmade pillow, you’ll appreciate the value of these unique details, which not only reflect your personal taste but also tell a story of craftsmanship and dedication, making your pillow a truly treasured possession.

The Beauty of Handmade Materials

There’s something uniquely captivating about handmade materials, don’t you think, as you run your fingers over the intricate stitching and feel the texture of the fabric? The imperfections and quirks that come with handmade craftsmanship add a depth and character to your pillows that mass-produced materials simply can’t replicate.

The Charm of Natural Fabrics

The tactile sensation of natural fabrics, such as cotton, linen, or silk, is a true delight, as you wrap your hands around a pillow made from these materials, feeling the softness and gentleness against your skin.

The Allure of Vintage Textiles

One of the most enchanting aspects of handmade pillows is the incorporation of vintage textiles, which transport you to another era, as you imagine the stories and histories woven into the fabric of your pillow.

With vintage textiles, you can almost feel the weight of history in your hands, as you touch the delicate patterns and faded colors that have been carefully preserved and repurposed into a one-of-a-kind pillow, inviting you to revel in the beauty of the past, and to bring a touch of nostalgia into your home.

The Comfort of Handmade Pillows

All that you need for a restful night’s sleep is a handmade pillow, tailored to your every need. You sink into its softness, feeling your worries dissipate with each gentle yield of the filling.

The Softness of Down Fillings

Along with the gentle lapping of a summer breeze, the softness of down fillings envelops you, transporting you to a world of serene slumber. You feel the delicate wisps of down conforming to the shape of your head and neck.

The Support of Firm Fillings

By the time you settle into your pillow, you appreciate the support of firm fillings, which provide the perfect counterpoint to the softness. You notice how your neck and spine align, feeling the subtle yet firm buoyancy that cradles your head.

In addition, as you explore the world of firm fillings, you discover the diverse array of materials and textures available, each one carefully crafted to provide the ideal balance of support and comfort, allowing you to awaken feeling refreshed and rejuvenated, with your senses alive and your spirit renewed.

The Aesthetics of Handmade Pillows

Despite the abundance of mass-produced pillows, handmade ones possess a unique charm that sets them apart, inviting you to experience the beauty of human craftsmanship in your daily life.

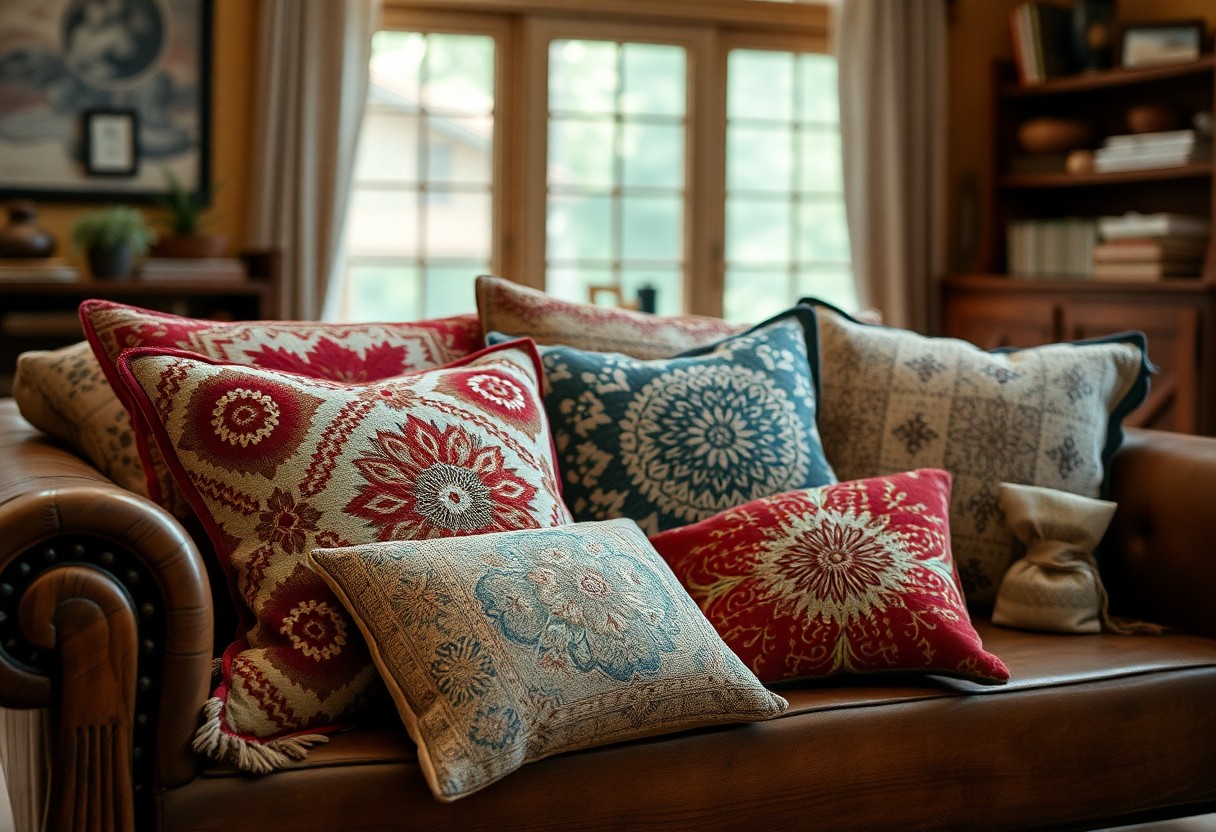
The Beauty of Colorful Patterns

Around the vibrant hues and intricate patterns of handmade pillows, you find a world of creativity and self-expression, as if the maker’s soul has been woven into every thread, allowing you to envelop your space in a kaleidoscope of colors and textures.

The Elegance of Simple Designs

The subtle beauty of minimalist designs on handmade pillows draws you in, creating a sense of serenity and understated sophistication, as your gaze lingers on the gentle play of light and shadow on the carefully crafted fabric.

Considering the serene ambiance that simple designs evoke, you begin to appreciate the elegance of restraint, where every stitch and fold tells a story of the maker’s dedication to their craft, and the pillow becomes a testament to the beauty of understated luxury, inviting you to bask in the tranquility it brings to your space.

The Process of Making Handmade Pillows

For those who appreciate the art of handmade craftsmanship, the process of making handmade pillows is a journey of discovery. You witness the transformation of raw materials into a work of art, as skilled artisans pour their heart and soul into every stitch.

The Skill of Sewing and Embroidery

Across handmade pillows, you find exquisite examples of sewing and embroidery. You see the delicate dance of threads, as they intertwine to create intricate patterns and designs, a true testament to the artisan’s skillful hands.

The Patience of Hand-Quilting

Persevering through the tedious process, you come to appreciate the beauty of hand-quilting. You notice the meticulous attention to detail, as each stitch is carefully woven into the fabric, creating a unique and timeless piece.

Above all, the patience required for hand-quilting is a meditative process, allowing you to connect with the artisan’s dedication and passion. As you run your fingers over the quilted patterns, you feel the gentle texture, and the love that has been poured into every stitch, making the handmade pillow a true masterpiece, imbued with the essence of the artisan’s soul, and a reflection of your own personal taste and style.

The Value of Handmade Pillows

Now, as you examine into the world of handmade pillows, you’ll discover a realm where every stitch tells a story, and every fabric choice is a testament to the artisan’s skill. The value of these pillows lies not only in their aesthetic appeal but also in the love and dedication that goes into creating each one.

The Investment in Quality and Craftsmanship

Aside from the obvious beauty, along similar lines, you’ll find that handmade pillows are an investment in quality and craftsmanship, reflecting the artisan’s attention to detail and commitment to excellence, which you can appreciate in every thread and fiber.

The Appreciation of Unique and Personalized Items

With the rise of mass production, you may find that handmade pillows offer a refreshing respite from the uniformity of machine-made goods, allowing you to surround yourself with unique and personalized items that reflect your individuality.

At the heart of this appreciation lies a deep connection to the human touch, as you wrap yourself in the softness of a handmade pillow, feeling the gentle imperfections that make it truly one-of-a-kind, and sensing the craftsmanship that has gone into creating something just for you.

Summing up

From above, you have witnessed the enchanting world of handmade pillows, where every stitch tells a story. As you examine into this realm, you find your senses transported to a place of elegance and refinement. Your eyes feast on the intricate patterns, your fingers longing to touch the soft textures, and your heart sways to the gentle beauty that only handmade pillows can bring to your space, wrapping you in a sense of warmth and serenity.

FAQ

Q: What makes handmade pillows unique and special?

A: Handmade pillows are unique and special because they are crafted with love and care by skilled artisans who pour their heart and soul into every stitch and detail. Each pillow is a one-of-a-kind creation that reflects the artist’s individuality and style, making it a truly exclusive and personalized piece for any home or space.

Q: What types of materials are commonly used to make handmade pillows?

A: Handmade pillows can be made from a wide range of materials, including natural fibers like cotton, linen, and silk, as well as synthetic materials like polyester and nylon. Additionally, many artisans incorporate unique and exotic materials like vintage fabrics, embroidery floss, and even recycled materials to add an extra layer of character and charm to their creations.

Q: How do handmade pillows contribute to the aesthetics of a room?

A: Handmade pillows can greatly enhance the aesthetics of a room by adding a pop of color, texture, and pattern. They can be used to tie together disparate design elements, create a cohesive look, or add a bold statement piece to a neutral space. Additionally, handmade pillows can be used to add a touch of warmth and personality to a room, making it feel more inviting and welcoming.

Q: Are handmade pillows durable and long-lasting?

A: Yes, handmade pillows can be very durable and long-lasting if made with high-quality materials and constructed with care. Many artisans use time-tested techniques and methods to ensure that their pillows are built to last, and with proper care and maintenance, they can remain a beautiful and functional part of your home decor for years to come.

Q: Can handmade pillows be customized to fit my personal style and preferences?

A: Absolutely! One of the best things about handmade pillows is that they can be fully customized to fit your personal style and preferences. Many artisans offer bespoke services, allowing you to choose the fabric, color, pattern, and even the filling and size of your pillow. This means you can create a truly unique and personalized piece that reflects your individuality and complements your home decor perfectly.

How to Sew Simple Curtains

You can create your own curtains with ease, and this guide will walk you through the process. With basic sewing skills, you’ll be able to make simple curtains that fit your windows perfectly. You’ll learn how to measure your windows, choose the right fabric, and sew your curtains with precision. By following these steps, you’ll be able to give your home a personal touch and block out unwanted light with your newly sewn curtains.

Key Takeaways:

To create beautiful and functional window treatments, consider the following points:

  • Start by measuring your window size to determine how much fabric you need, and choose a pattern that suits your style and decor.
  • Use a sewing machine to hem the sides and bottom of the curtain, and consider adding a header or rod pocket for easy installation.
  • Finish your curtains with a straight stitch or blind hem, and add any decorative elements, such as ties or trim, to complete the look and achieve your desired style.

    Gathering Essential Materials

    For a successful curtain-sewing project, you will need to gather a few basic materials, including a sewing machine, fabric, thread, and a measuring tape. You will also need a pair of scissors, pins, and a sewing needle. Make sure you have all these items before you start your project.

    Measuring Your Windows

    Essentially, measuring your windows is the first step in making your curtains. You need to take accurate measurements of your window’s width and length to determine how much fabric you will need. You will use these measurements to calculate the amount of fabric to buy and to plan your curtain design.

    Choosing the Perfect Fabric

    For your curtain project, you need to select a fabric that suits your needs and complements your room’s decor. You should consider factors such as the fabric’s texture, color, and pattern when making your selection. You can choose from a variety of fabrics, including cotton, linen, or silk.

    A key aspect of choosing the perfect fabric is considering the level of light blocking and insulation you need. You may want to choose a thicker, heavier fabric for a room that needs more privacy or a lighter fabric for a room that needs more natural light. As you browse through different fabrics, you should also think about how easy they are to clean and maintain, as this will affect your curtains’ longevity and your overall satisfaction with your project.

    Preparing Your Tools

    It is vital to gather all the necessary tools before starting your curtain-sewing project. You will need a variety of tools to ensure a smooth and successful process. Your tools will be categorized into several groups, including sewing machine and notions, and measuring and cutting tools.

    Sewing Machine and Notions

    With your sewing machine as the primary tool, you will also need basic notions such as threads, needles, and fabric scissors to complete your project. You should ensure that your sewing machine is in good working condition and that you have the necessary accessories.

    Measuring and Cutting Tools

    Tools like a tape measure, ruler, and rotary cutter will be necessary for measuring and cutting your fabric accurately. You will use these tools to measure your window, calculate the fabric requirements, and cut the fabric to the correct size.

    Tools such as a cutting mat and quilting ruler can also be helpful in ensuring accurate cuts and preventing errors. You can use these tools to mark and cut your fabric with precision, making the sewing process easier and more efficient. By having the right measuring and cutting tools, you will be able to achieve professional-looking results with your curtains.

    Creating a Simple Curtain Pattern

    After deciding on the type of curtain you want to make, you can start creating a simple pattern. You will need to consider the size of your window, the style of your curtain, and the amount of fabric you have available.

    Determining the Curtain Style

    About the style of your curtain, you should think about the level of formality and the overall aesthetic you want to achieve. You can choose from a variety of styles, such as casual, formal, or rustic, to match your home decor.

    Calculating the Fabric Requirements

    Before you start cutting your fabric, you need to calculate how much you will need. You should measure your window and decide on the length and width of your curtain to determine the fabric requirements.

    Considering the type of fabric you are using and the style of your curtain, you may need to add extra material for hems, seams, and any other design elements. You can use a fabric calculator or consult with a sewing expert to ensure you have enough fabric for your project. This will help you avoid running out of fabric and having to make unnecessary trips to the store.

    Sewing the Curtains

    Despite the simplicity of the project, sewing the curtains requires attention to detail and precision. You will need to follow your pattern or design, ensuring that your stitches are even and your fabric is properly aligned. As you sew, you will begin to see your curtains take shape, and with each passing minute, you will be one step closer to completing your project.

    Besides the actual sewing, hemming the edges is a vital step in creating professional-looking curtains. You will need to fold the raw edges of the fabric over twice to create a hem, and then sew in place, making sure to backstitch at the beginning and end of your seam to secure it.

    Creating the Header and Footer

    Before you start sewing the header and footer, make sure you have the right measurements and fabric. You will need to cut two pieces of fabric to the desired length, and then sew them to the top and bottom of your curtains, creating a neat and tidy finish.

    Edges of the header and footer should be carefully aligned with the edges of the curtains, and sewn in place with a straight stitch. As you work on this step, you will see your curtains start to look more polished and finished, and you will be able to hang them in your window with pride, knowing that you created them yourself, with your own hands, and that they fit your window perfectly.

    Adding the Finishing Touches

    Once again, you’ll want to inspect your curtains for any imperfections or loose threads. Make any necessary adjustments to ensure a professional finish.

    Installing the Curtain Rods

    Although this step may seem straightforward, you will need to carefully measure and mark the wall to ensure your curtain rods are level and evenly spaced.

    Hanging and Adjusting the Curtains

    For a polished look, you will want to hang your curtains smoothly and evenly, making sure the folds are consistent and the hem is straight.

    In addition, to achieve the perfect drape, you will need to adjust the curtain hooks or drapery pins to the desired length, taking into account the type of curtain and the style you are aiming for, and you can also add decorative elements such as tiebacks or tassels to enhance the overall appearance of your curtains.

    Troubleshooting Common Issues

    All sewers encounter problems when making curtains, but don’t worry, you can easily fix them. You will learn how to resolve issues with uneven hems and length discrepancies.

    Dealing with Uneven Hems

    Although it’s frustrating, you can fix uneven hems by re-ironing and re-sewing the hem allowance. You will achieve a professional finish with a little patience and practice.

    Fixing Curtain Length Discrepancies

    About the time you notice a length discrepancy, you can adjust your curtains to match. You should re-measure and re-hem your curtains to ensure they are even.

    Considering your curtain length discrepancies, you should check your measurements and calculations. You can adjust the length by letting down or taking up the hem, and you will have evenly hung curtains that look great in your room.

    Conclusion

    Presently, you have gained the knowledge to sew simple curtains, enabling you to give your windows a personalized touch. You can now measure, cut, and sew your fabric with ease, creating beautiful curtains that suit your style. With your new skill, you can enhance your home’s decor and enjoy the satisfaction of having made something yourself, allowing you to take pride in your handiwork and admire your finished curtains.

    FAQ

    Q: What materials do I need to sew simple curtains?

    A: To sew simple curtains, you will need a few basic materials, including a sewing machine, fabric of your choice, measuring tape, scissors, threads that match your fabric, and a sewing needle. Additionally, you may want to use a liner or blackout fabric for better light control and insulation. The type and quantity of fabric will depend on the size of your windows and the style of curtains you want to make.

    Q: How do I measure my windows for curtain fabric?

    A: Measuring your windows accurately is vital for making curtains that fit perfectly. Start by measuring the width of your window from one side to the other, including any molding or framework. Decide how long you want your curtains to be, considering the length from the top of the window to the desired bottom hem. You should also decide on the fold or gathering style at the top, as this affects how much fabric you’ll need. It’s a good idea to add a few inches to your measurements to ensure a proper fit and for hemming purposes.

    Q: What type of stitch should I use for sewing curtains?

    A: For sewing simple curtains, a straight stitch or a zigzag stitch can be used, depending on the type of fabric and the desired finish. A straight stitch is suitable for most fabrics and gives a clean finish. However, if you’re using a stretchy or delicate fabric, a zigzag stitch may be more appropriate to prevent fraying and to allow for the fabric’s stretchiness. It’s also a good idea to backstitch at the beginning and end of your seam to secure it.

    Q: How do I create a simple hem at the bottom of my curtains?

    A: Creating a hem is one of the final steps in making curtains. To create a simple hem, fold the raw edge of the fabric up by about 1/4 inch and press. Then, fold it up again by the desired hem width (usually 2-4 inches) and press again. Place the folded edge under the sewing machine’s presser foot and sew along the folded edge to secure the hem in place. Make sure your hem is even and your stitches are straight for a professional finish.

    Q: Can I make curtains without a sewing machine?

    A: Yes, it is possible to make curtains without a sewing machine. You can use a needle and thread to sew your curtains by hand. This method is more time-consuming but can be just as effective. You can use a simple running stitch or a whipstitch to sew the sides and bottom of your curtains. For the top hem, where the curtain rod will be inserted, you might want to use a stronger stitch like the slipstitch or the blind hem stitch. While hand-sewing can be more tedious, it allows for a quiet, portable project that can be worked on in any setting.

The Basics of Watercolor Painting

You’re about to explore the world of watercolor painting. Your journey starts with the fundamentals. You’ll learn to mix colors, handle brushes, and apply techniques. Your goal is to create something beautiful with water and pigment. You’ll begin with simple exercises, gradually building your skills. As you progress, your unique style will emerge, and you’ll bring your artistic vision to life.

Key Takeaways:

  • Understanding the fundamentals of watercolor painting is important to creating beautiful and harmonious artworks, including the basics of color theory and brushstrokes.
  • Mastering the techniques of watercolor painting, such as wash, drybrush, and glazing, allows artists to achieve a range of effects and textures in their work.
  • Choosing the right materials, including paper, pigments, and brushes, is vital to producing high-quality watercolor paintings that will last over time and showcase the artist’s skills.

Materials

Before you start watercolor painting, you need to gather the right materials. This includes brushes, paints, and paper. You will also need a palette and a water container.

Brushes

The basics of brush selection are simple: choose brushes that feel right in your hand. You want brushes that move smoothly and evenly, applying the right amount of paint to your paper.

Paints

Beside your brushes, paints are the next vital tool. You can buy them in tubes or pans, and they come in a wide range of colors. You will need to choose a palette that suits your style.

Due to the wide range of watercolor paints available, you can experiment with different types to find what works best for you. You can try transparent, opaque, or mixed-media paints, depending on the effect you want to achieve in your painting. You will find that each type of paint has its own unique characteristics and uses.

Color Theory

If you want to master watercolor painting, understanding color theory is necessary. You need to know how colors interact with each other to create harmonious and balanced artworks.

Primary Colors

Around the core of color theory are primary colors: red, yellow, and blue. You’ll use these colors to create your palette and mix secondary colors.

Mixing Colors

Between the primary colors, you’ll find a world of possibilities. You can mix them to create secondary colors, such as green, orange, and purple, and develop your unique color palette.

At the heart of mixing colors is experimentation. You’ll discover that mixing colors is an art in itself, and the more you practice, the more you’ll understand how to create the colors you want. You can start by mixing equal parts of two primary colors and then adjusting the ratios to achieve the desired hue and shade.

Techniques

Your approach to watercolor painting will depend on the techniques you use. You’ll need to experiment with different methods to achieve the desired effects.

Wet-on-Wet

After applying wet paint to wet paper, you’ll create soft, blended edges. This technique allows you to merge colors and achieve subtle transitions.

Drybrushing

The drybrush technique involves dragging a almost-dry brush across dry paper, creating rough, textured effects. You’ll use this to suggest vegetation, tree bark, or rock surfaces.

Understanding drybrushing is key to adding depth and interest to your paintings. You’ll find that it’s particularly useful for creating detailed, high-contrast scenes, and with practice, you’ll master the subtle dance of brush and paper.

Composition

Unlike other art forms, watercolor painting relies heavily on composition to convey emotion and tell a story. You’ll need to consider the placement of elements, negative space, and visual flow to creating a cohesive piece.

Balance

By paying attention to balance, you can create a sense of stability in your painting. You’ll want to distribute visual weight evenly, using color, shape, and size to guide the viewer’s eye.

Harmony

Behind every great watercolor painting is a sense of harmony, achieved by selecting colors and elements that work together. You’ll want to choose colors that complement each other, creating a visually appealing and cohesive whole.

The key to achieving harmony in your watercolor painting is to experiment with different color combinations and techniques. You can try using analogous colors, complementary colors, or even a limited palette to create a sense of unity and coherence in your work. As you practice, you’ll develop an eye for what works and what doesn’t, and your paintings will become more balanced and harmonious.

Practice

To improve your watercolor skills, you need to practice regularly. Start with simple exercises and gradually move on to more complex ones.

Exercises

About the basics, you will learn various techniques, such as wet-on-wet and wet-on-dry. You will practice mixing colors and creating different hues.

Tips

Tips for better practice include:

  • using high-quality materials
  • watching online tutorials
  • Any practice is better than none, so keep at it.

    Tips like these will help you improve your skills. You can try:

    • practicing regularly
    • experimenting with different techniques
    • Any mistakes you make will be an opportunity to learn and grow.

      Also, as you practice, you will develop your own style and voice. You can try:

      • exploring different subjects
      • using your imagination
      • Any artist will tell you that practice is key to improving your watercolor painting skills.

        Common Mistakes

        For a beginner, watercolor painting can be a challenging medium to master. You’ll encounter mistakes, but learning from them is key to improving your skills.

        Overmixing

        With practice, you’ll find that overmixing your paints can lead to muddy, unappealing colors. You should aim to mix your colors just enough to achieve the desired hue.

        Incorrect Brushstrokes

        With a little patience, you’ll develop the right brushstrokes, but until then, you may struggle with inconsistent results. You need to apply gentle, smooth strokes to achieve the desired effect.

        Even when you’ve mastered the basic brushstrokes, you may still find that your paintings lack a certain finesse. You can improve this by paying attention to the pressure and speed of your brushstrokes, as these can greatly impact the final result of your painting.

        To wrap up

        Drawing together the basics of watercolor painting, you now have a solid foundation to build on. You’ve learned the fundamentals of materials, techniques, and color theory. Your understanding of this medium will continue to grow as you practice and experiment with your skills. With patience and dedication, you’ll master the art of watercolor painting and create beautiful pieces that reflect your unique style and vision.

        FAQ

        Q: What are the basic materials needed to start watercolor painting?

        A: To start watercolor painting, you will need a few basic materials, including watercolor paints, watercolor paper, a brush, a water container, and a palette. The quality of these materials can vary depending on your budget and personal preference. For instance, watercolor paints come in two forms: pan paints and tube paints. Watercolor paper is available in different weights and textures, and brushes come in various shapes and sizes. Understanding the characteristics of each material will help you make informed decisions when selecting your supplies.

        Q: How do I prepare my watercolor paper for painting?

        A: Preparing your watercolor paper is an important step before you begin painting. This typically involves stretching and securing the paper to a board using tape to prevent it from buckling when wet. You can also use watercolor paper that is already glued to a board or choose a heavy weight paper that does not require stretching. If you’re using a block of watercolor paper, it’s already glued on all sides, making it ready to use straight away. Proper preparation ensures your paper remains flat and stable throughout the painting process.

        Q: What is the difference between wet-on-wet and wet-on-dry watercolor techniques?

        A: In watercolor painting, two fundamental techniques are wet-on-wet and wet-on-dry. Wet-on-wet involves adding wet paint to wet paper, allowing for smooth blending and soft edges. This technique is great for creating subtle gradations of color and can be used for backgrounds or suggestive forms. On the other hand, wet-on-dry involves applying wet paint to dry paper, which produces sharper, more defined edges. This technique is ideal for details and creating contrast within a painting. Understanding and mastering these techniques can greatly expand your creative possibilities in watercolor.

        Q: How do I achieve vibrant colors in my watercolor paintings?

        A: Achieving vibrant colors in watercolor painting involves several factors, including the quality of your paints, the use of glazing techniques, and the amount of water used. High-quality watercolor paints will generally produce more vivid results. Glazing, which involves layering transparent washes, can deepen and enrich colors. It’s also important to use the right amount of water; too much can dilute the color, while too little can make it too opaque. Experimenting with different pigments and techniques will help you find the right balance to achieve the vibrant colors you desire.

        Q: Can I correct mistakes in a watercolor painting?

        A: While watercolor is a medium that can be unforgiving, there are several strategies for correcting mistakes. One approach is to lift off the color using a damp brush, which can remove some of the pigment from the paper. Another technique is to use masking fluid to protect areas you want to keep untouched before applying more paint. In some cases, you might need to start over, but this can also be an opportunity to explore new ideas or approaches. Practice and experience will help you navigate the challenges of correcting mistakes in watercolor painting, allowing you to make adjustments with confidence.

Top Acrylic Painting Projects

As you initiate on your artistic journey, you’re likely eager to explore the vibrant world of acrylic painting. Your creativity is waiting to be unleashed, and with the right projects, you’ll be inspired to bring your unique vision to life. You’ll discover a wide range of exciting projects that will nurture your skills and spark imagination, from abstract masterpieces to realistic landscapes, helping you to tap into your full artistic potential and have fun while doing it.

Key Takeaways:

  • One of the primary benefits of Acrylic Painting projects is the ability to create vibrant and colorful pieces that can add a personal touch to any room.
  • Technique and skill level play a significant role in determining the outcome of Acrylic Painting projects, and practice is necessary to achieve desired results.
  • Exploring different themes and subjects in Acrylic Painting projects can help artists develop their unique style and express their creativity in a variety of innovative ways.

    Getting Started

    While exploring the world of acrylic painting, you’ll discover a realm of creative possibilities. As you begin, you’ll find that your journey is filled with excitement and anticipation. Your artistic expression will unfold, and your unique voice will emerge through the vibrant colors and textures of acrylics.

    Essential Materials

    Around every corner, you’ll find the tools you need to bring your vision to life. Your basic supplies will include paints, brushes, canvases, and a palette, which will become your constant companions on this artistic adventure.

    Setting Up Your Space

    To create an ideal setting, you’ll want to consider the lighting, comfort, and flow of your space. You might envision a corner of your home transformed into a vibrant studio, filled with natural light, good ventilation, and all your supplies within easy reach. As you set up your space, you’ll begin to feel a sense of anticipation and excitement, knowing that this is where your artistic journey will unfold.

    Exploring Techniques

    If you’re looking to expand your artistic horizons, you can find plenty of inspiration on YouTube, such as Acrylic Painting Ideas and Tutorials that will help you get started.

    Brushstrokes and Texture

    Along with practicing various brushstrokes, you’ll discover the beauty of texture in your acrylic paintings, adding depth and emotion to your work.

    Color Theory and Mixing

    After understanding the basics of color, you’ll be able to mix and match hues to create stunning effects, taking your paintings to the next level.

    Color is a powerful tool in your artistic journey, and as you experiment with different combinations, you’ll find your unique voice and style emerging, allowing you to express yourself in ways you never thought possible, and guiding you to create truly beautiful and meaningful acrylic paintings that reflect your inner world.

    Project Ideas

    Not limited to traditional techniques, acrylic painting offers a wide range of creative possibilities. You can explore various styles and themes, from realistic to abstract, and express your unique vision. Your imagination is the only boundary, and with acrylics, you can bring your ideas to life.

    Landscapes and Seascapes

    Beneath the surface of acrylic painting lies a world of possibilities, and when it comes to landscapes and seascapes, you can create breathtaking views that transport you to another world. You can paint serene mountains, rolling hills, or dramatic coastlines, and experiment with colors and textures to capture the essence of nature.

    Abstract and Expressionist Art

    Similar to the freedom of acrylic painting, abstract and expressionist art allows you to tap into your emotions and intuition, creating unique and personal pieces that reflect your inner world. You can explore different techniques, such as layering, scraping, or dripping paint, to create intricate and expressive artworks.

    In addition to the freedom of expression, abstract and expressionist art with acrylics offers you the opportunity to experiment with different materials and tools, such as palette knives, sponges, or even household items, to create interesting textures and effects. As you explore this style, you’ll discover that your paintings can become a reflection of your thoughts, feelings, and experiences, making the creative process even more fulfilling and enjoyable.

    Tips and Tricks

    Unlike other painting mediums, acrylics can be unforgiving. To achieve success, consider:

    • using high-quality materials
    • practicing color theory

    . Recognizing your strengths and weaknesses will help you grow as an artist.

    Layering and Glazing

    Layering thin coats of paint allows you to build up colors and textures, creating a unique visual effect in your artwork.

    Adding Depth and Dimension

    Dimensionality is key to making your paintings pop. You can achieve this by playing with light and shadow, and experimenting with different brushstrokes.

    Understanding how to add depth and dimension to your acrylic paintings takes time and practice, but with patience and dedication, you can master these techniques and take your artwork to the next level, allowing you to express yourself in new and exciting ways, and bringing your creative vision to life.

    Common Mistakes to Avoid

    Despite your best efforts, mistakes can happen in acrylic painting. You’ll want to be aware of common pitfalls to ensure your projects turn out as envisioned. By understanding what to avoid, you’ll set yourself up for success and create beautiful, professional-looking pieces.

    Preventing Color Bleeding

    On the surface, color bleeding may seem like an insurmountable issue, but you can prevent it by using the right materials and techniques. You’ll find that using high-quality paints and priming your surface will help your colors stay vibrant and true.

    Avoiding Overmixing

    Overmixing can be a major obstacle in acrylic painting, but you have the power to avoid it. You’ll need to be mindful of your brushstrokes and blend colors carefully to achieve the desired effect.

    Understanding the concept of overmixing is key to avoiding it. You see, when you overmix, you’ll end up with a muddy, unappealing color that lacks depth and dimension. By being gentle with your brushstrokes and blending colors thoughtfully, you’ll create rich, vibrant hues that bring your painting to life. As you work, pay attention to the consistency of your paint and the way your colors interact, and you’ll be well on your way to creating stunning, professional-looking pieces.

    Advanced Projects

    For the more experienced artist, advanced projects offer a chance to explore new techniques. Consider:

    1. Mixed media
    2. Abstract art
    Project Description
    Portraits Use layers and textures

    Painting with Mediums

    Picturing the endless possibilities, you can experiment with different mediums to add depth and interest to your work, allowing you to push your creativity to new heights.

    Creating Complex Compositions

    Tackling complex compositions, you will find that your artistic voice and vision begin to emerge, as you learn to balance elements and create visual flow in your paintings.

    Consequently, as you examine deeper into complex compositions, you will discover that your artistic skills are growing, and your confidence is increasing, allowing you to tackle even more challenging projects and explore new ways to express yourself through art.

    Final Words

    Hence, as you commence on your acrylic painting journey, you’ll discover that your creativity knows no bounds. You’ll find that your unique voice shines through in every brushstroke, and your artwork becomes a reflection of your inner world. As you explore the top acrylic painting projects, you’ll unlock your full potential, and your passion will continue to flourish, guiding you toward new and exciting artistic expressions, and nurturing your soul in the process, allowing your creativity to soar.

    FAQ

    Q: What are the best surfaces for acrylic painting projects?

    A: The best surfaces for acrylic painting projects are those that are primed and have a smooth texture. This can include canvas, paper, or board specifically designed for acrylic paint. Canvas is a popular choice as it provides a flexible and durable surface that can withstand multiple layers of paint. Paper, on the other hand, is a great option for beginners or for creating smaller pieces. Board surfaces, such as wood or panel, offer a rigid and stable surface that is ideal for detailed work.

    Q: What are some popular techniques used in acrylic painting projects?

    A: There are several popular techniques used in acrylic painting projects, including layering, glazing, and impasto. Layering involves applying multiple layers of paint to achieve depth and texture, while glazing involves applying transparent layers of paint to achieve a sense of luminosity. Impasto involves applying thick layers of paint to create a raised, three-dimensional effect. Other techniques, such as drybrushing and sgraffito, can also be used to add texture and interest to acrylic paintings.

    Q: How do I choose the right colors for my acrylic painting project?

    A: Choosing the right colors for your acrylic painting project depends on the mood and atmosphere you want to create. Consider the color wheel and how different colors interact with each other. Cool colors, such as blues and greens, can create a calming effect, while warm colors, such as oranges and yellows, can create a sense of energy. You can also experiment with different color combinations and techniques, such as contrasting colors or analogous colors, to create a unique and interesting palette.

    Q: What are some common mistakes to avoid when working on acrylic painting projects?

    A: Some common mistakes to avoid when working on acrylic painting projects include using too much water, which can cause the paint to become too thin and transparent. Another mistake is not allowing each layer to dry completely before adding additional layers, which can cause the paint to lift or smudge. It’s also important to work in a well-ventilated area and use a palette or surface that is easy to clean, as acrylic paint can be difficult to remove from surfaces. Additionally, not using a primer or gesso on your surface can affect the paint’s adhesion and durability.

    Q: How do I properly care for and store my finished acrylic painting projects?

    A: To properly care for and store your finished acrylic painting projects, make sure they are completely dry and free of dust and debris. Avoid exposing your paintings to direct sunlight or extreme temperatures, as this can cause the colors to fade or the paint to crack. You can varnish your paintings to protect them from dust and UV light. Store your paintings in a cool, dry place, away from direct sunlight and moisture. If you need to transport your paintings, use a sturdy frame or box and handle them with care to avoid damage. Regularly dusting and cleaning your paintings can also help maintain their appearance and longevity.

How to Create Abstract Art

You stand in front of a blank canvas, eager to create something unique. Your mind is filled with ideas, but you’re not sure where to start. You’ll begin by experimenting with different materials and techniques, allowing your instincts to guide your brushstrokes. As you work, you’ll uncover your own style, and your abstract art will take shape. With each stroke, you’ll move closer to creating a piece that reflects your vision and emotion.

Key Takeaways:

To create stunning abstract art, consider the following points:

  • Start with a concept or emotion that inspires you, and let it guide your creative process to produce a unique piece of art.
  • Experiment with different techniques, such as layering, texturing, and color blending, to add depth and visual interest to your artwork.
  • Embrace spontaneity and intuition, allowing yourself to make bold and expressive brushstrokes or marks that convey your creative vision.

Preparing the Space

A clean and organized space is crucial for creating abstract art. You can find inspiration on how to start your project by visiting 8 Fun Ways to Start an Abstract Painting to get your creative juices flowing.

Gathering Materials

Materials needed for your abstract art project should be readily available, including paints, brushes, and canvas, so you can focus on the creative process.

Setting up the Environment

Before you begin, set up your workspace to promote productivity and comfort, ensuring good lighting and ventilation to help you stay focused.

And as you arrange your workspace, consider the flow of your creative process, keeping frequently used items within easy reach, allowing you to move freely and concentrate on bringing your abstract art vision to life, with your space now ready for you to express yourself.

Exploring Techniques

Now that you’ve started creating abstract art, it’s time to experiment with different methods to find what works best for you. You’ll discover various techniques to express your unique style.

Experimenting with Colors

With a wide range of colors at your disposal, you can create unique combinations that evoke emotions and convey meaning. You’ll find that certain colors work well together, while others clash, allowing you to refine your palette.

Playing with Textures

Along with color, texture plays a significant role in abstract art, adding depth and visual interest to your work. You can use various materials to create different textures, from smooth to rough, to enhance your art.

Finding Inspiration

After deciding to create abstract art, you need to find inspiration. Your surroundings, experiences, and emotions can spark ideas. Look for things that evoke feelings or stimulate your mind.

Looking at Nature

Above all, nature is a great source of inspiration. You can observe its patterns, colors, and textures to influence your art. Take note of the shapes and forms that appeal to you.

Drawing from Emotions

Around you, emotions are constantly shifting. You can tap into your feelings to create unique and personal art. Your emotions can guide your color choices and brushstrokes.

Finding your emotional state is key to creating authentic abstract art. You can explore your feelings by reflecting on your experiences, thoughts, and sensations. This will help you to express yourself honestly and create art that resonates with others.

Creating the Composition

Balancing Elements

The key to a great composition is balance. You’ll balance your elements, like color and shape, to create a sense of harmony in your artwork. You’ll place each element deliberately, considering how it affects your overall piece.

Considering Negative Space

Around your artwork, negative space plays a significant role. You’ll use it to create a sense of simplicity and focus attention on specific elements. Your negative space will help your artwork breathe, making it more dynamic.

Even when you think you’ve got your composition right, take a step back and look at your negative space. You’ll see how it affects your artwork’s overall feel and flow. You can adjust your elements to use negative space effectively, creating a more engaging piece that draws your viewer in.

Adding Layers and Depth

Once again, you’ll find yourself lost in the process of creating abstract art. You’ll add layers, building up your piece, and watching it evolve. Your colors will blend, your textures will deepen, and your art will take on a life of its own.

Building Up Colors

Among the many techniques you can use, building up colors is one of the most effective. You’ll start with a base coat, then add layers of paint, each one interacting with the last, creating a rich and vibrant palette that draws the viewer in.

Incorporating Patterns

For your art to truly come alive, you’ll need to incorporate patterns. You’ll use shapes, lines, and textures to create a sense of movement and energy, drawing the viewer’s eye through your piece.

This pattern work will add an extra layer of complexity to your art, making it more interesting and engaging. You’ll experiment with different patterns, finding the ones that work best with your colors and textures, and using them to create a sense of tension and balance in your piece.

Refining the Piece

All aspects of your abstract art piece should come together during this stage. You evaluate your work, making adjustments to create a cohesive whole.

Stepping Back and Evaluating

About now, you should take a step back and assess your piece. You are looking for balance, harmony, and a sense of completeness.

Making Final Adjustments

An eye for detail is necessary as you make your final adjustments. You tweak and refine, ensuring every element serves your artistic vision.

Indeed, making final adjustments is where your abstract art piece truly comes alive. You refine colors, textures, and composition, trusting your instincts to guide you. Your goal is to create a piece that resonates with you, and by extension, your audience, drawing them into the world you’ve created.

Final Words

Drawing together the threads of your creativity, you’ve learned to craft unique abstract art. Your brushstrokes now dance with purpose, guided by your intuition. You’ve discovered that abstract art is a journey, not a destination. With each piece, your style evolves, reflecting your inner world. You’ve taken the first steps, now keep creating, experimenting, and pushing your boundaries. Your art will continue to grow, a testament to your imagination and skill.

FAQ

Q: What is abstract art and how do I get started with creating it?

A: Abstract art is a form of art that does not depict recognizable subjects, but instead uses colors, shapes, and textures to create a unique visual language. To get started with creating abstract art, begin by experimenting with different materials and techniques, such as painting, drawing, or mixed media. Play with colors, textures, and patterns to develop your own style and express yourself creatively. You can also draw inspiration from other abstract artists, nature, or emotions to spark your creativity.

Q: What materials do I need to create abstract art?

A: The materials you need to create abstract art can vary depending on the technique and style you want to achieve. Some common materials used in abstract art include paints (acrylic, oil, or watercolor), canvases or papers, brushes, palette knives, and other tools for applying and manipulating the paint. You can also experiment with mixed media, incorporating materials like paper, fabric, or found objects into your artwork. Additionally, you may want to have a variety of surfaces, such as wood panels or boards, to create unique textures and effects.

Q: How do I develop my own unique style in abstract art?

A: Developing your own unique style in abstract art takes time and practice. Start by experimenting with different techniques, colors, and materials to see what works best for you. Look at the work of other abstract artists, but don’t try to copy their style – instead, use their work as inspiration to develop your own voice. Keep creating and pushing yourself to try new things, and you will eventually start to see a unique style emerge. It’s also important to trust your instincts and not overthink your process – abstract art is all about expression and intuition.

Q: Can I create abstract art without any formal training or experience?

A: Absolutely! Abstract art is all about experimentation and creativity, and you don’t need any formal training or experience to get started. In fact, many abstract artists are self-taught and have developed their skills through trial and error. The most important thing is to have a willingness to experiment and take risks – don’t be afraid to try new things and make mistakes. You can also find plenty of tutorials, workshops, and online courses that can provide guidance and inspiration as you develop your skills.

Q: How do I know when my abstract art piece is complete?

A: Knowing when an abstract art piece is complete can be subjective, as it’s often a matter of personal intuition. One way to determine if your piece is complete is to take a step back and look at it with fresh eyes – if it feels balanced and resolved to you, then it’s likely complete. You can also ask yourself if you’ve achieved the emotional or expressive effect you were aiming for. Another approach is to set a deadline or a specific goal for your piece, and when you’ve reached that goal, consider it complete. Ultimately, trust your instincts and don’t overwork your piece – sometimes, less is more in abstract art.

Skip to content