The Joy of Sketching Daily

As you pick up your pencil and begin to sketch, you’ll discover a sense of freedom and creativity that unfolds with each gentle stroke. Your daily sketching practice becomes a treasured ritual, a moment to breathe, observe, and express yourself. With each new day, your sketches will evolve, reflecting your unique perspective and style, inviting you to explore, experiment, and play, and uncover the joy that awaits in this simple yet profound daily habit.

Key Takeaways:

  • The therapeutic benefits of sketching daily can lead to a significant reduction in stress and anxiety, promoting a sense of wellbeing and relaxation.
  • Developing a daily sketching habit can improve creativity, enhance observation skills, and foster a greater appreciation for art and design.
  • By committing to regular sketching practice, individuals can experience personal growth, develop their unique style, and enjoy the fulfilling process of creating something new every day.

    Benefits of Daily Sketching

    To experience the full range of advantages that sketching has to offer, you’ll want to make it a regular part of your routine. By doing so, you’ll find that your creativity and overall well-being will flourish, leading to a more fulfilling life.

    Relaxation and Stress Relief

    Beneath the surface of daily sketching lies a powerful tool for calming your mind and soothing your spirit. As you sketch, you’ll find that your worries and cares slowly drift away, replaced by a sense of peace and tranquility that will stay with you long after you’ve put down your pencil.

    Improving Observation Skills

    Above all other benefits, daily sketching will help you develop your ability to observe the world around you with greater clarity and precision. As you practice, you’ll become more aware of the intricate details that make each scene unique, and your sketches will begin to reflect this newfound awareness.

    It is through this increased observation that you’ll start to notice the way light falls on a subject, the play of textures and colors, and the subtle nuances of expression and emotion. Your sketches will become more vibrant and alive, filled with the character and personality of the world you’re observing, and you’ll find that your daily sketching practice has become a source of inspiration and joy in your life, allowing you to see the world with fresh eyes and a deeper appreciation for its beauty.

    Getting Started

    While commenceing on your daily sketching journey, you’ll find that it’s easier to begin with the right resources, such as checking out A beginner’s guide to sketching the everyday, Russell Stutler book for tips and inspiration. This will help you set the tone for your creative adventure.

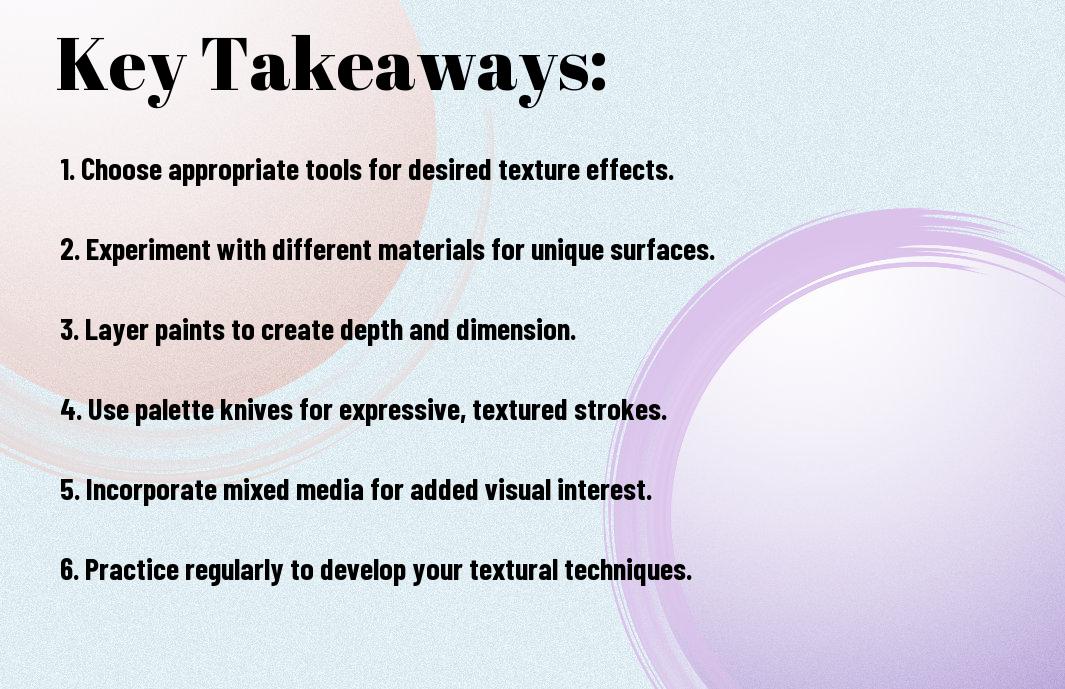
    Choosing the Right Materials

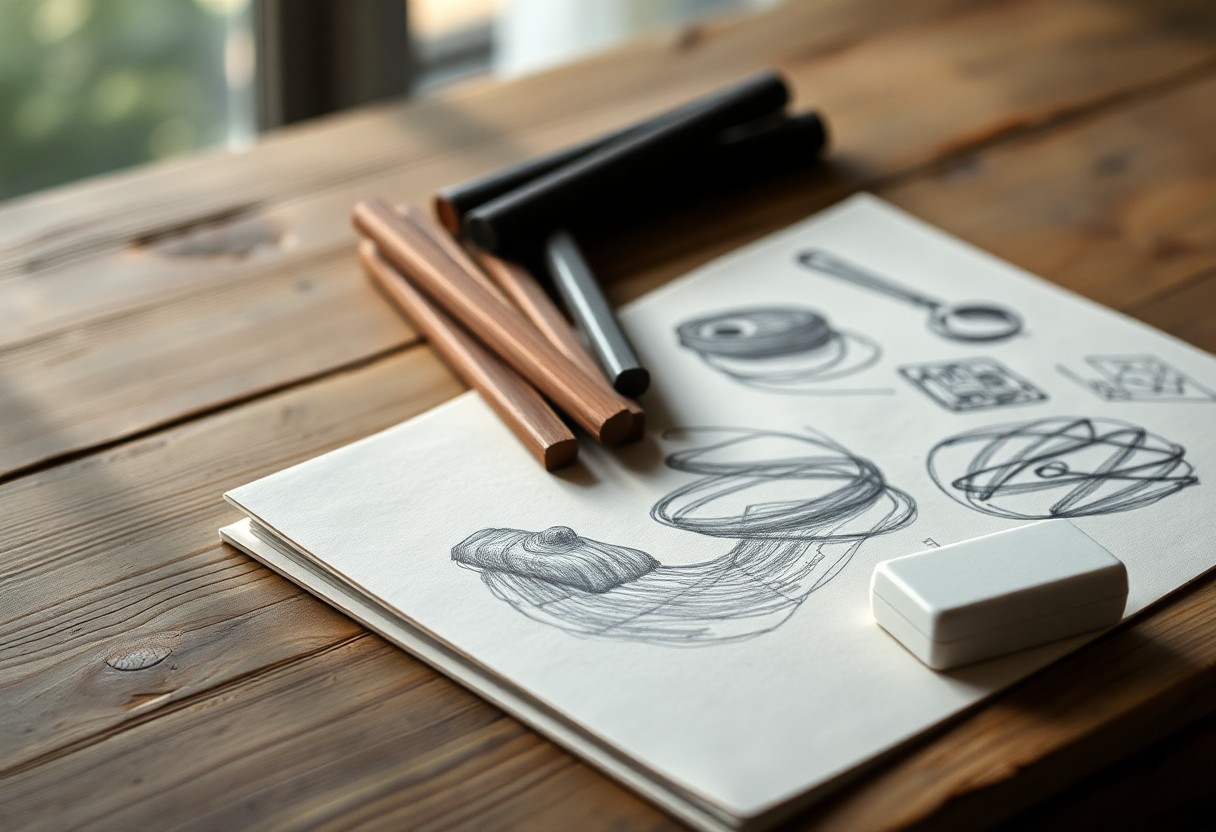
    For your sketching endeavors, you’ll want to gather a few vital tools, such as a sketchbook, pencils, and eraser, to get started on your artistic path, allowing you to express yourself freely.

    Finding Inspiration

    By looking to your surroundings, you’ll discover that inspiration is everywhere, from the beauty of nature to the simplicity of everyday objects, waiting to be sketched and brought to life by your unique perspective.

    Plus, as you continue to sketch daily, you’ll find that your inspiration will grow, and you’ll begin to see the world in a new light, noticing details and textures that you never noticed before, and your sketches will become a reflection of your unique vision and creativity, allowing you to express yourself in a way that’s authentic and fulfilling to you.

    Developing a Daily Habit

    Many people struggle to establish a daily sketching routine, but with persistence and dedication, you can make it a vital part of your daily life. As you start sketching daily, you’ll find your skills improving and your creativity soaring. Your unique style will emerge, and you’ll begin to see the world in a new light.

    Creating a Schedule

    Around the same time each day, set aside a few minutes to sketch, making it a non-negotiable part of your daily routine. You’ll find that having a set time helps you stay committed to your practice, and your mind will begin to anticipate this creative time, helping you to stay focused and inspired.

    Overcoming Procrastination

    Alongside your daily schedule, you’ll need to tackle procrastination, which can be a major obstacle to your sketching practice. You might find that you’re putting off sketching due to fear of not being good enough or lack of inspiration, but don’t let these thoughts hold you back.

    But as you continue to show up to your sketching practice, you’ll start to notice that your fears and doubts begin to fade away, replaced by a sense of excitement and curiosity. You’ll find yourself looking forward to your daily sketching time, and your creative voice will start to shine through, helping you to develop a unique style and perspective that’s all your own, and that’s where the true magic happens, and you’ll be amazed at the progress you’ll make, and the joy you’ll experience.

    Exploring Different Techniques

    Once again, you find yourself immersed in the world of sketching, eager to discover new ways to express your creativity. As you examine deeper, you’ll uncover a plethora of techniques to enhance your art, from line work and shading to color and texture, each one inviting you to experiment and play.

    Line Work and Shading

    Diversely, you can approach line work and shading, using varying strokes and pressures to create unique effects, adding depth and dimension to your sketches, and allowing your pencil to dance across the page with freedom and expression.

    Color and Texture

    Beneath the surface of your sketches, you can add layers of color and texture, bringing your art to life with vibrant hues and tactile elements, as you explore the endless possibilities of mixed media and creative expression.

    In fact, as you continue to experiment with color and texture, you’ll find that your sketches become more nuanced and engaging, reflecting your personality and style, and inviting you to explore new ways of seeing and interpreting the world around you, with your sketchbook as your trusted companion on this creative journey.

    Finding Joy in the Process

    Unlike other creative pursuits, sketching daily allows you to connect with your artistic side and tap into your imagination, bringing you a sense of joy and fulfillment. As you sketch, you’ll find that your worries fade away, and you become fully present in the moment, lost in the flow of creation.

    Embracing Mistakes

    Against all expectations, your mistakes can become a beautiful part of your sketching journey, teaching you to be kinder to yourself and to see the beauty in imperfection. You’ll learn to let go of self-criticism and instead, focus on the process, allowing your unique style to emerge.

    Celebrating Progress

    Anyway, as you continue to sketch daily, you’ll start to notice your progress, and that’s something to celebrate. You’ll see how far you’ve come, and your confidence will grow, encouraging you to keep creating and pushing yourself to new heights.

    But as you celebrate your progress, you’ll also discover that it’s not just about the end result, but about the journey itself. You’ll find that the act of sketching becomes a meditation, a way to calm your mind and soothe your soul, bringing you a sense of peace and clarity that stays with you long after you’ve put down your pencil.

    Staying Motivated

    Your daily sketching practice is a journey, and like any journey, it’s imperative to maintain your enthusiasm and interest to keep moving forward, so you’ll need to find ways to stay motivated and inspired every day.

    Setting Goals and Challenges

    To keep your sketching practice engaging, try setting achievable goals and challenges for yourself, whether it’s to sketch a certain number of days in a row or to focus on a specific technique, this will help you stay focused and motivated.

    Joining a Sketching Community

    For many artists, being part of a community can be a great motivator, so consider joining a local or online sketching group to connect with like-minded individuals and share your work.

    Understanding that you are not alone in your creative journey can be a powerful motivator, and being part of a sketching community can provide you with the support and encouragement you need to keep sketching every day, you’ll find that sharing your experiences and learning from others will help you grow as an artist and stay motivated to continue exploring your creativity.

    Conclusion

    From above, you’ve seen the transformative power of daily sketching. As you commit to this practice, you’ll discover your unique voice and style, unlocking a deeper connection to your creativity. Your sketches will become a reflection of your soul, a testament to the beauty and wonder you encounter each day. You’ll find that sketching daily brings joy, calmness, and clarity to your life, inviting you to see the world with fresh eyes and an open heart.

    FAQ

    Q: What is “The Joy of Sketching Daily” and how does it benefit me?

    A: “The Joy of Sketching Daily” is a practice that involves setting aside time each day to sketch, allowing you to develop your drawing skills, enhance your creativity, and establish a calming daily routine. By incorporating daily sketching into your life, you can improve your observation skills, boost your self-confidence, and enjoy a sense of accomplishment through the creation of something new each day.

    Q: Do I need to have prior drawing experience to start “The Joy of Sketching Daily”?

    A: No, prior drawing experience is not necessary to start “The Joy of Sketching Daily”. This practice is designed for individuals of all skill levels, from beginners to experienced artists. The focus is on the process of creating and expressing yourself daily, rather than on producing perfect drawings. It’s an opportunity to learn, grow, and enjoy the journey of artistic development at your own pace.

    Q: What materials do I need to get started with “The Joy of Sketching Daily”?

    A: To start “The Joy of Sketching Daily”, you’ll need a few basic materials. A sketchbook and a pencil are the crucials. You can also consider adding variety to your sketches with pens, markers, colored pencils, or any other drawing tools that inspire you. The choice of materials largely depends on your personal preference and the style of sketching you wish to pursue. Comfort and portability of your sketching setup can also be important factors, especially if you plan to sketch on the go.

    Q: How much time do I need to dedicate to “The Joy of Sketching Daily”?

    A: The amount of time you dedicate to “The Joy of Sketching Daily” can vary based on your schedule and goals. Even a short period, such as 10-15 minutes a day, can be beneficial and set you on a path of creative habit formation. Ideally, aiming for 30 minutes to an hour allows for a more immersive experience, enabling you to fully engage with your sketching and potentially explore more complex compositions or techniques. The key is to find a duration that fits comfortably into your daily routine and feels sustainable in the long term.

    Q: Can “The Joy of Sketching Daily” help with stress relief and mindfulness?

    A: Yes, “The Joy of Sketching Daily” can be a highly effective tool for stress relief and mindfulness. The act of sketching requires focus on the present moment, allowing you to shift your attention away from daily worries and concerns. This mindful engagement can lead to a sense of calm and relaxation. Additionally, the creative expression and satisfaction derived from sketching can enhance mood and overall sense of well-being, contributing to better emotional and mental health.

How to Paint with Textures

You stand in front of a blank canvas, brush in hand, ready to create. You’ve got the colors, the vision, but something’s missing – depth. That’s where texture comes in. You’ll learn to add grit, grain, and dimension to your work, making it pop. Your art will take on a life of its own, engaging the viewer on a new level. Now, let’s get started, and you’ll be painting with textures in no time.

Key Takeaways:

  • To achieve unique effects, use thick paints and heavy brushstrokes when painting with textures, allowing for a more expressive and dynamic visual outcome.
  • Experimenting with different materials and tools, such as sponges, palette knives, or even natural elements like leaves, can add depth and interest to your textured paintings.
  • Playing with layering and blending techniques can help to create a sense of dimensionality in your work, drawing the viewer’s eye into the textured world you’ve created.

Preparing the Surface

Your surface is the foundation of your artwork, and it needs to be ready for texture. You’ll need to clean and prepare it before you start painting.

Cleaning the Canvas

Above all, wash your hands, then gently wipe the canvas with a damp cloth to remove dirt and dust.

Applying a Primer

Canvas is your base, and a primer helps it accept texture and paint evenly. Apply a coat, letting it dry completely before proceeding.

Even if you’re using a high-quality canvas, a primer improves the adhesion of your textures and paints, allowing you to achieve the desired effects. You can choose between acrylic or oil-based primers, depending on your project’s requirements, and apply them with a brush or roller, covering the entire surface uniformly.

Choosing the Right Tools

Assuming you’re ready to start painting with textures, you’ll need to gather the right tools. Your choices will depend on the effects you want to achieve. Selecting the right brushes and texturing instruments will make all the difference in your work.

Selecting Brushes

Across various types of brushes, you’ll find ones that suit your needs. You’ll look for brushes with stiff bristles for thick textures and softer ones for smoother effects. Your brush selection will set the tone for your entire piece.

Exploring Texturing Instruments

On the surface of your painting, you’ll apply textures using various instruments. You’ll use these tools to add depth and interest to your work. Your texturing instruments will help you achieve unique effects.

Instruments like palette knives, sponges, and even household items will become your allies in creating textured paintings. You’ll experiment with different tools to find what works best for you, and your unique style will emerge from the textures you create. As you work, you’ll discover new ways to use these instruments to add complexity to your art.

Applying Texture Techniques

Keep your brushstrokes intentional, using heavy strokes to build up texture. You’ll achieve unique effects by layering paint and mediums, creating depth on your canvas.

Thickening Paint

Around the edges, you’ll find thickening agents that help you achieve your desired consistency. You can use these to build up layers of paint and create textured effects.

Using Sponges and Rags

For your next step, grab a sponge or rag and start applying paint in dabbing motions. You’ll be able to create interesting patterns and textures by varying your pressure and technique.

In addition, you can experiment with different types of sponges and rags to achieve unique effects, such as using a natural sponge for organic textures or a lint-free rag for smoother results. You can also try dipping your sponge or rag in paint and then wringing it out to create a more subtle texture.

Creating Dimension and Depth

Despite the challenges, you can achieve dimension and depth in your painting by experimenting with textures. You’ll find that different materials and techniques can add layers of interest to your work.

Layering Colors

Against a plain background, you can build up colors to create a sense of depth. You’ll start to see your painting take shape as you apply each layer, with your colors blending and merging to form a unique texture.

Building Up Texture

The key to texture is applying it in thin layers, allowing each layer to dry before adding the next. You’ll find that your paint starts to take on a life of its own as you build up the texture.

Consequently, you’ll be able to create a raised, almost three-dimensional effect on your canvas. You can use this technique to draw the viewer’s eye to a particular part of the painting, or to add emphasis to a specific element, and your unique texture will be the result of your experimentation and patience.

Experimenting with Different Materials

After mastering basic texture techniques, you’ll want to explore various materials to add depth to your work. You’ll discover new effects by combining paint with different substances, expanding your creative possibilities.

Incorporating Natural Elements

Alongside your paints, you can use natural elements like leaves, twigs, or sand to create unique textures. You can apply these elements directly to your canvas or mix them with paint for added effect.

Using Unconventional Objects

The objects you find in your daily life can become great tools for creating textures. You can use household items like sponges, fabric, or even kitchen utensils to create interesting effects on your canvas.

Understanding how to use unconventional objects in your texture painting takes practice, but it can lead to remarkable results. You can experiment with different objects, observing how they interact with your paint and canvas, and develop your own distinct style by incorporating these unusual tools into your creative process, allowing you to produce truly original work that reflects your unique perspective.

Enhancing with Finishing Touches

Many techniques can elevate your textured painting. You’ll find that adding a few finishing touches can make all the difference in the final product.

Adding a Varnish

Above all, applying varnish will protect your work. You apply it after the paint is dry, and it will give your painting a glossy finish.

Creating a Frame

Behind your painting, a frame can add depth and context. You choose a frame that complements your artwork, and it will enhance the overall effect.

At this stage, you consider the style and material of the frame. You want it to match your painting’s texture and tone, so your artwork looks complete and polished. You can choose from various options, such as wood or metal, and select the one that suits your piece best.

Summing up

With these considerations, you’ve got the basics to paint with textures. You’ve learned to choose your tools and materials, and how to apply them to create depth and dimension. Your brushstrokes, bold or subtle, will bring your artwork to life. Now, get to work and experiment with different textures, see what works for you and what doesn’t. You’ll find your own style, and your paintings will take on a life of their own.

FAQ

Q: What are the different types of textures that can be used in painting?

A: There are several types of textures that can be used in painting, including physical textures such as thick paint, gel medium, and modeling paste, as well as visual textures created through various brushstrokes and techniques. Physical textures can add a tactile element to a piece, while visual textures can create the illusion of texture through color and pattern. Some common textures used in painting include impasto, which involves applying thick layers of paint to the canvas, and sgraffito, which involves scratching through layers of paint to create a textured effect.

Q: What materials can I use to create texture in my paintings?

A: There are many materials that can be used to create texture in paintings, including paint, gel medium, modeling paste, and found objects such as paper, fabric, and natural materials like leaves and twigs. You can also use household items like sponges, cloth, and paper towels to create unique textures and patterns. Additionally, you can experiment with different brushstrokes and techniques, such as dragging, scraping, and dripping, to create a wide range of textures and effects.

Q: How can I prepare my surface for texture painting?

A: To prepare your surface for texture painting, start by priming your canvas or board with a coat of gesso or acrylic paint. This will create a smooth, even surface for you to work on. You can then apply a texture paste or medium to the surface, using a brush, palette knife, or other tool to create the desired texture. Alternatively, you can apply a layer of paint to the surface and then use a texture paste or medium to add texture on top. Make sure to allow each layer to dry completely before adding additional texture or paint.

Q: What are some common techniques for applying texture to a painting?

A: Some common techniques for applying texture to a painting include impasto, which involves applying thick layers of paint to the canvas, and glazing, which involves applying multiple thin layers of transparent paint to achieve a deep, luminous color. You can also use a palette knife to apply thick, heavy strokes of paint, or a sponge or cloth to create soft, mottled textures. Additionally, you can experiment with dragging, scraping, and dripping techniques to create unique, expressive textures and patterns.

Q: How can I balance texture with other elements in my painting?

A: To balance texture with other elements in your painting, consider the overall composition and visual balance of the piece. Texture can be used to create emphasis and draw the viewer’s eye to a particular area of the painting, or to add depth and interest to a background or secondary element. Balance texture with other elements such as color, shape, and line by creating a visual hierarchy, where the most important elements are given prominence and the less important elements are subdued. You can also use texture to create a sense of movement or energy in the painting, by applying it in bold, expressive strokes or patterns.

Top Canvas Painting Ideas

You stand before a blank canvas, your mind filled with possibilities. You want to create something that speaks to you, something that reflects your style and emotion. Your brush is poised, ready to bring your vision to life. As you contemplate your next move, consider the ideas that will guide your strokes, the themes that will emerge on your canvas, and the story you want to tell through your art.

Key Takeaways:

To get the most out of your canvas painting experience, consider the following points:

  • Start with a theme in mind, whether it’s abstract, landscape, or portrait, to help guide your creative process and give your painting a clear direction.
  • Experiment with different techniques, such as layering, blending, or texturing, to add depth and visual interest to your canvas painting.
  • Choose a color palette that evokes the mood and atmosphere you want to convey, and consider the emotional impact of different colors on the overall effect of your painting.

Simple Landscape Painting Ideas

A simple landscape painting can be a great way to start your artistic journey. You can begin with basic elements like skies, trees, and hills, and gradually add more details to create a captivating scene.

Seascapes

Among the many landscape options, seascapes are a popular choice, allowing you to explore the play of light on water and the emotions it evokes. You can paint a serene beach or a dramatic wave, depending on your mood and style.

Cityscapes

After selecting your cityscape subject, you can focus on capturing the urban atmosphere, with its vibrant colors and dynamic energy. You can depict a bustling street or a quiet alley, using your brushstrokes to convey the feeling of the scene.

Another aspect of cityscapes is the interplay of light and shadow, which you can use to add depth and interest to your painting. You can experiment with different techniques, such as layering or glazing, to achieve the desired effect and bring your cityscape to life.

Abstract Expressionism

Some of the most compelling canvas paintings emerge from abstract expressionism, where you can unleash your creativity without adhering to traditional forms. You’ll find that your emotions and thoughts are translated into vibrant colors and dynamic brush strokes, creating a unique piece of art.

Color Choices

About the colors you select, consider what emotions you want to evoke in your audience. You can opt for bold and bright hues to convey energy or softer pastels for a more subdued tone, allowing you to express your inner world.

Brush Stroke Techniques

Around the canvas, you can experiment with different brush strokes, from gentle sweeps to intense dabbing, which will add texture and depth to your painting. You’ll discover that your brush becomes an extension of your hand, moving freely to create a piece that’s truly yours.

But as you examine deeper into brush stroke techniques, you’ll notice that the way you apply paint can significantly impact the overall mood of your artwork. You can practice varying the speed, pressure, and direction of your strokes to achieve the desired effect, making your painting a reflection of your unique perspective and style.

Still Life Painting Ideas

Keep your creativity flowing with still life compositions, and learn from tutorials like Canvas Painting Step by Step (Easy Painting Ideas) to improve your skills.

Fruit and Flowers

Inspiring ideas can come from arranging a bowl of fruit or a vase of flowers, allowing you to practice color and texture in your painting.

Household Objects

By collecting vintage items, you can create unique compositions that reflect your personal style and tell a story through your art.

To capture the essence of household objects, you’ll want to pay attention to the play of light on their surfaces, and use your brushstrokes to convey the textures and emotions they evoke, making your still life painting a reflection of your inner world, as you bring these ordinary objects to life on your canvas.

Pop Culture Inspired Paintings

For a unique canvas painting idea, consider drawing inspiration from pop culture, allowing you to pay homage to your favorite movies, books, and music.

Movie and Book Characters

Similarly, you can bring your favorite characters to life on canvas, from superheroes to fictional heroes, making for a compelling piece of art that showcases your personality.

Music Icons

For instance, you can capture the essence of your favorite musicians, recreating their iconic styles and poses on your canvas, making for a memorable artwork.

But as you investigate deeper into painting music icons, you’ll find that it’s not just about capturing their likeness, it’s about conveying the emotion and energy of their music, allowing you to create a truly immersive piece that resonates with you and your audience.

Seasonal and Holiday Themes

Once again, you can draw inspiration from the world around you, using seasonal and holiday themes to guide your canvas painting ideas. You can create pieces that reflect your favorite time of year, from winter snowflakes to summer sunshine.

Winter Wonderland

One of the most magical times of year is winter, and you can capture its essence on canvas with snowy landscapes, frozen lakes, and cozy cabins. You can use soft blues and whites to create a serene atmosphere in your winter wonderland painting.

Summer Vibes

Above all, summer is a time of warmth and vitality, and you can convey this feeling in your artwork with bright colors and bold brushstrokes. You can paint sun-kissed beaches, vibrant flowers, and lush green forests to evoke the carefree spirit of summer.

For instance, you can start by brainstorming your favorite summer memories, and then use those as inspiration for your painting. You can think about the colors, textures, and emotions that come to mind when you think of summer, and use those to guide your creative process. As you work, you can experiment with different techniques and styles to capture the feeling of warmth and freedom that defines the season.

Mixed Media and Textures

After experimenting with traditional canvas painting, you can try combining different mediums to add depth and visual interest to your work. This involves incorporating various materials and techniques to create unique textures and effects.

Incorporating Fabric and Paper

On the surface of your canvas, you can attach fabric, paper, or other materials to create intricate layers and dimensions. You can use glue, stitches, or other adhesives to secure these elements, adding an extra layer of meaning to your art.

Using Unconventional Materials

After gathering your materials, you can start experimenting with unconventional items like found objects, natural materials, or recycled elements. You can incorporate these items into your canvas to create a one-of-a-kind piece that reflects your personal style.

Textures become your playground when using unconventional materials. You can combine rough and smooth elements, playing with contrasts to create a visually striking piece. As you work, you’ll find that your canvas transforms into a dynamic, tactile experience, inviting your viewer to touch and explore your art.

To wrap up

So, you’ve got a solid foundation for your next canvas painting project. You can now choose your idea, from landscapes to abstracts, and start creating. Your brushstrokes will bring your vision to life. Take your time, and don’t be afraid to experiment. You’ll find your unique style, and your art will be a reflection of your personality. Get started, and make your canvas your own.

FAQ

Q: What are the best canvas painting ideas for beginners?

A: For those new to canvas painting, some popular and easy-to-execute ideas include landscapes such as sunsets or simple skylines, abstract art which allows for a lot of creativity and freedom, and still-life compositions like fruits or flowers. These subjects are great for practicing brush strokes, color mixing, and composition without feeling overwhelmed by complex details.

Q: How do I choose the right colors for my canvas painting?

A: Choosing the right colors for your canvas painting can greatly impact the mood and aesthetic of your artwork. Consider the theme or subject of your painting and select colors that complement or contrast with it. For example, cool colors like blues and greens can create a calming effect, while warm colors like oranges and yellows can add energy. You can also use color wheels or online palettes to find harmonious color combinations.

Q: What are some unique canvas painting ideas for home decoration?

A: If you’re looking for unique canvas painting ideas to decorate your home, consider creating personalized maps with significant locations marked, geometric patterns that add a modern touch, or inspirational quotes in decorative fonts. You can also paint nature scenes like forests, mountains, or sea vistas to bring the outdoors in. Moreover, abstract pieces with bold textures and vibrant colors can add a striking focal point to any room.

Q: How can I achieve a textured effect in my canvas painting?

A: To achieve a textured effect in your canvas painting, you can use various techniques and materials. Applying thick layers of paint with a palette knife can create raised, three-dimensional effects. Incorporating mixed media like sand, gel medium, or modeling paste into your paint can add unique textures. Additionally, using different brush strokes, such as impasto or dragging, can also provide a textured look to your canvas.

Q: Can I use canvas painting as a form of therapy or stress relief?

A: Yes, canvas painting can be a highly therapeutic and stress-relieving activity. The process of creating art allows you to express emotions and thoughts in a non-verbal way, providing an outlet for stress and anxiety. The repetitive motions of painting can be meditative, helping to calm the mind and promote relaxation. Moreover, the sense of accomplishment from completing a painting can boost self-esteem and confidence, further contributing to mental well-being.

The Basics of Charcoal Drawing

As you begin to explore the world of charcoal drawing, you’ll discover a medium that offers expressive and versatile creative possibilities. You’ll learn to harness the unique characteristics of charcoal to bring your artwork to life. Your journey will start with understanding the fundamentals of charcoal, including the different types and tools available. You will learn how to handle the materials and techniques to achieve the desired effects, allowing you to unlock your full artistic potential and create stunning charcoal drawings.

Key Takeaways:

  • The fundamentals of charcoal drawing involve understanding the different types of charcoal, including vine charcoal, compressed charcoal, and white charcoal, and how to use them to achieve various effects.
  • Mastering techniques such as hatching, cross-hatching, and stippling is vital for creating texture, value, and depth in a charcoal drawing.
  • Practicing sketching and shading exercises can help artists develop their skills and learn to control the expressive qualities of charcoal, allowing them to create detailed and realistic drawings.

    Gathering Materials

    Before you begin charcoal drawing, it’s important to gather the necessary materials to ensure a smooth and successful creative process. You will need a range of tools and surfaces to achieve the desired effects and techniques.

    Essential Tools

    Across the spectrum of charcoal drawing, you’ll find various tools that will help you achieve your artistic vision. You’ll need charcoal pencils, sticks, and erasers to create a range of tones and textures in your artwork.

    Surface Preparation

    Tools aside, preparing your drawing surface is vital for a good start. You’ll want to choose a paper that suits your desired outcome, considering factors such as texture and tone to ensure your charcoal drawing turns out as envisioned.

    But as you prepare your surface, consider the specific qualities of the paper you’ve chosen, and how they will affect your charcoal marks. You’ll find that different papers respond uniquely to charcoal, offering varying levels of absorption and smudging, which will impact the overall look and feel of your artwork, allowing you to make informed decisions about your creative process.

    Basic Techniques

    While exploring charcoal drawing, you’ll discover various techniques to achieve desired effects. You’ll learn to manipulate charcoal to create unique textures and tones, enhancing your artwork.

    Hatching and Cross-Hatching

    Harmonizing lines and strokes, you’ll create depth and dimension in your drawings using hatching and cross-hatching techniques, allowing you to add volume and texture to your subjects.

    Blending and Shading

    Often, you’ll find that blending and shading are crucial for creating realistic and detailed drawings, as you learn to merge different tones and values to achieve a natural, three-dimensional appearance in your artwork.

    This technique allows you to soften harsh lines, creating subtle transitions between light and dark areas, and you can use your fingers, stumps, or blending tortillons to smooth out charcoal marks, achieving a more refined and polished look in your drawings.

    Value and Contrast

    All artworks rely on value and contrast to create visually appealing compositions. You will use charcoal to create a range of values, from light to dark, to add depth and interest to your drawings. By controlling the contrast between light and dark, you can guide the viewer’s eye through your artwork.

    Creating Depth and Dimension

    Around the subject, you will use varying degrees of value to create the illusion of depth and dimension. You can achieve this by applying different pressures and techniques to your charcoal, allowing you to convey volume and texture in your drawing.

    Balancing Light and Dark

    Across your composition, you will need to balance light and dark values to create a harmonious and engaging piece. You should consider the placement and proportion of light and dark areas, as this will affect the overall mood and impact of your artwork.

    The balance of light and dark is important to creating a compelling charcoal drawing. As you work, you will need to constantly evaluate your composition, making adjustments to ensure that the contrast between light and dark is effective in conveying your intended message. You can use your charcoal to make subtle adjustments, gradually building up or erasing values to achieve the desired balance, and ultimately, a stunning piece of art that draws the viewer in.

    Texture and Pattern

    For beginners, understanding texture and pattern is important in charcoal drawing, as it allows you to add depth and dimension to your artwork, making it more engaging and realistic.

    Renderings of Different Surfaces

    For instance, you can practice rendering different surfaces, such as wood, stone, or fabric, to develop your skills in capturing various textures and patterns, which will help you to create more realistic and detailed drawings.

    Expressive Mark-Making

    Before you start drawing, consider the type of marks you want to make, as expressive mark-making can add emotion and energy to your artwork, allowing you to convey your message more effectively through your charcoal drawings.

    A key aspect of expressive mark-making is experimentation, as you can try different techniques, such as hatching, cross-hatching, and stippling, to achieve unique textures and effects, and discover what works best for your style and the subject you are drawing, enabling you to refine your skills and develop your own unique voice in charcoal drawing.

    Composition and Placement

    Now that you have a good understanding of the basics of charcoal drawing, it’s time to think about composition and placement. You will learn how to arrange elements in your drawing to create a visually appealing piece of art.

    Rule of Thirds and Symmetry

    The way you divide your paper can greatly affect the overall composition of your drawing. You should consider using the rule of thirds and symmetry to create a balanced and harmonious piece.

    Negative Space and Focal Points

    The effective use of negative space and focal points can make or break your drawing. You need to think about what you want your viewer to focus on and use negative space to guide their eye.

    Even when working with a limited range of values, you can create a compelling drawing by using negative space to create contrast and define your focal points. You can use the white of the paper to create highlights and make your drawing pop, and your charcoal to create deep, rich shadows that add depth and dimension to your work.

    Practice and Development

    Not every artist starts out as a skilled charcoal drawer, but with dedication and persistence, you can develop your skills and style. As you continue to practice, you will become more comfortable with the medium and begin to see improvement in your work.

    Exercises for Skill-Building

    Exercising your drawing skills with charcoal can be done through simple gestures, such as quick sketches and still-life drawings, helping you to develop your technique and build confidence in your abilities, allowing you to tackle more complex subjects.

    Overcoming Common Challenges

    Any struggles you encounter while drawing with charcoal can be overcome with patience and practice, as you learn to control the medium and develop your skills, you will become more proficient in creating the effects you desire in your artwork.

    A key aspect of overcoming common challenges is analyzing your mistakes and understanding what went wrong, this will help you to identify areas for improvement and make adjustments to your technique, enabling you to produce high-quality charcoal drawings that reflect your artistic vision, and as you continue to work through challenges, you will develop your unique style and voice as an artist.

    Conclusion

    The basics of charcoal drawing are now at your fingertips, and you can enhance your skills by learning more about How To Draw with Charcoal – Charcoal Drawing Techniques. You will be able to create stunning artwork by mastering these techniques and practicing regularly. As you continue to explore your creativity, your charcoal drawings will become more expressive and detailed, allowing you to bring your unique vision to life.

    FAQ

    Q: What are the basic materials needed to start charcoal drawing?

    A: To start charcoal drawing, you’ll need a few important materials. These include a set of charcoal pencils or sticks, a sharpener, an eraser, and a sketchbook or paper specifically designed for charcoal drawing. It’s also helpful to have a blending stump and a tortillon for smoothing and blending your drawings. Additionally, investing in a fixative spray can help prevent smudging and preserve your work.

    Q: What are the different types of charcoal used in drawing?

    A: There are several types of charcoal used in drawing, each with its own unique characteristics. Vine charcoal is the most commonly used type and is known for its soft, expressive lines. Compressed charcoal is denser and produces darker, more detailed marks. Charcoal pencils offer more control and are often used for detail work and fine lines. Finally, white charcoal is used for highlighting and creating contrasting effects on dark paper.

    Q: How do I achieve different tones and values in charcoal drawing?

    A: Achieving different tones and values in charcoal drawing is done through varying the pressure and technique used when applying the charcoal. Light, gentle strokes can create soft, delicate lines and subtle shifts in tone, while applying more pressure can produce darker, richer values. Blending with a stump or tortillon can also help smooth transitions between different tones, creating a more nuanced and realistic representation of light and shadow.

    Q: Can I use charcoal on any type of paper, or are there specific requirements?

    A: While charcoal can be used on a variety of papers, the best results are typically achieved with papers specifically designed for charcoal or pastel drawing. These papers have a textured surface, often referred to as “tooth,” which helps the charcoal adhere and allows for better blending and layering. Smooth papers can also be used, but they may not hold the charcoal as well, potentially leading to smudging or difficulty in achieving detailed work.

    Q: How do I prevent smudging and protect my charcoal drawings?

    A: Preventing smudging and protecting your charcoal drawings can be achieved through a few simple steps. Working carefully and minimizing the amount of touching or handling of the drawing can reduce smudging. Regularly using a fixative spray can also help set the charcoal in place, preventing it from smearing. For long-term protection, consider framing your drawing behind glass or using a UV-filtering acrylic. Additionally, storing your drawings in a cool, dry place, away from direct sunlight, can help preserve them over time.

How to Make Art Journals

You’re about to launch on a creative journey, crafting a space where your thoughts and imagination come together. As you begin, you’ll gather simple materials like paper, glue, and paint. Your art journal will be a reflection of your unique perspective, a place to express yourself freely. You’ll learn to combine words and images, experimenting with different techniques to make your journal truly yours. With each step, you’ll shape a one-of-a-kind book that showcases your artistic voice.

Key Takeaways:

To create a unique and personalized art journal, consider the following points:

  • Start by selecting a notebook or sketchbook that suits your style and preferences, taking into account the size, paper quality, and binding.
  • Experiment with various materials and techniques, such as painting, drawing, collaging, and writing, to add depth and visual interest to your art journal.
  • Make your art journal a personal and creative space by incorporating photos, ephemera, and other memorabilia that inspire and reflect your thoughts, feelings, and experiences.

Gathering Materials

For the foundation of your art journal, you’ll need to collect a few basic materials. This includes a journal, art supplies, and any personal items you want to incorporate into your journal.

Choosing the Right Journal

Before you start, consider the size and type of journal that suits your needs. You’ll want one that is comfortable to handle and has paper that can withstand various art techniques.

Essential Art Supplies

Against the urge to overspend, start with the basics: a pencil, eraser, and pen. These will be the building blocks of your art journal, allowing you to sketch and write with ease.

Essential to creating a unique and expressive art journal, you’ll want to experiment with different supplies, such as paints, markers, and collage materials, to add depth and texture to your pages. As you become more comfortable with your journal, you can add more supplies to your collection, tailoring it to your personal style and creative vision.

Setting Up Your Journal

Some of the most important decisions you’ll make when creating an art journal are made at the outset. You’ll need to decide on the size, shape, and type of journal you want to use. Think about the kind of art you want to create and the space you have available to work on your journal.

Preparing the Pages

Alongside your journal selection, you’ll need to prepare your pages. You can add a coat of gesso or paint to create a uniform background, or leave them blank for a more minimalist approach. This will give you a foundation to build on as you start creating your art journal.

Creating a Theme

Planning your theme is similar to mapping out a journey. You’ll want to consider what inspires you and what you want to express in your art journal. This could be a personal experience, a place, or an emotion.

Due to the personal nature of an art journal, your theme will evolve as you work on it. You’ll find that your ideas and inspirations will shift and change, and your journal will become a reflection of your unique perspective and creativity. As you work on your journal, you’ll start to see your theme emerge, and you can adjust your approach accordingly, allowing your art journal to become a true expression of yourself.

Creating Art Journal Pages

Now that you have your art journal, it’s time to start creating. You’ll find that your pages can be as simple or as complex as you like, depending on your mood and inspiration.

Mixing Media and Techniques

Among the various ways to create art journal pages, mixing media and techniques is a great approach. You can combine paint, ink, and collage to create unique textures and effects, making your journal truly yours.

Experimenting with Color

The colors you choose will set the tone for your art journal. You can use bright hues to express joy or muted tones to convey contemplation, allowing you to explore your emotions through your art.

For instance, you can experiment with different color combinations to evoke a particular mood or atmosphere, and see how your art journal pages reflect your personality and style as you work through the process of creating and expressing yourself. You can try monochromatic schemes, complementary colors, or analogous colors to add depth and interest to your pages.

Adding Words and Stories

Once again, you’re faced with a blank page, waiting for your thoughts and ideas to fill it. You can add words and stories to your art journal, making it a reflection of your experiences and emotions.

Writing Prompts and Ideas

Words flow easily when you have a starting point. You can use writing prompts, such as descriptive phrases or questions, to spark your creativity and guide your writing.

Incorporating Meaningful Quotes

Behind every quote, there’s a story or message that resonates with you. You can add quotes that inspire or motivate you, making your art journal a source of encouragement.

Further, incorporating meaningful quotes can add depth and context to your art journal. You can use them as a theme or inspiration for your artwork, or as a way to express your thoughts and feelings, making your journal a unique and personal reflection of your inner world.

Organizing and Reflecting

After completing your art journal, take time to organize and reflect on your work. You will find that this step helps you to appreciate your progress and identify areas for improvement.

Creating an Index or Key

Across the pages of your journal, you will have created a unique visual language, and an index or key can help you navigate this world, allowing you to quickly find specific themes, techniques, or inspirations that you have explored.

Reviewing and Reflecting on Progress

Around the time you finish a journal, take a step back and assess your growth, looking at how your style, skills, and themes have evolved over time, and you will see your artistic voice emerge.

Due to the personal nature of art journals, your reflection will be deeply individual, and you will find that looking back on your work gives you new insights into your thoughts, feelings, and experiences, helping you to better understand yourself and your artistic vision.

Overcoming Creative Blocks

Many times, you’ll find yourself staring at a blank page, unsure of what to create. This is normal. Take a break, clear your mind, and come back to your art journal when you feel refreshed.

Staying Inspired and Motivated

Across the pages of your art journal, you’ll discover that inspiration can strike at any moment. You’ll find that your motivation grows with each new entry, as you experiment with different techniques and styles.

Finding New Ideas and Techniques

To get started, you’ll need to explore different mediums and tools, such as paints, markers, and collage materials. You’ll find that your art journal is a great place to try new things and take risks.

At this point, you’ll start to notice that your art journal is becoming a reflection of your thoughts and feelings. You’ll see that your ideas and techniques are evolving, and that you’re developing your own unique style. As you continue to create, you’ll find that your art journal becomes a source of inspiration and motivation, helping you to stay focused and driven to produce your best work.

To wrap up

So, you’ve learned the basics of making art journals. Now, it’s time to put your skills to the test. You can find more tips and inspiration on How To Start An Art Journal: A Complete Beginner’s Guide. You will fill your journal with your unique voice and vision, making it a reflection of your artistic journey. Your art journal is yours to experiment and express yourself freely.————-FAQ

Q: What is an art journal and how do I get started with making one?

A: An art journal is a unique and creative way to express yourself through a combination of art, writing, and reflection. To get started, you’ll need a few basic supplies such as a notebook or journal, pens, pencils, markers, and any other art materials you’d like to incorporate. Begin by setting an intention for your journal, whether it’s to practice mindfulness, explore your creativity, or document your travels. Then, start experimenting with different techniques and mediums, and don’t be afraid to make mistakes – they’re all part of the process.

Q: What type of journal is best for making an art journal?

A: The type of journal you choose will depend on your personal preference and the style of art you want to create. Look for a journal with high-quality, mixed-media paper that can withstand a variety of techniques, such as watercolor, collage, and ink. Consider a journal with a sewn binding, which will allow you to open it flat and work across spreads. You can also choose a journal with prompts or inspirational quotes to help spark your creativity.

Q: How do I develop a consistent style and theme in my art journal?

A: Developing a consistent style and theme in your art journal takes time and experimentation. Start by exploring different techniques and mediums, and see what works best for you. Consider creating a mood board or vision board to help define your aesthetic and inspire your creativity. You can also experiment with different colors, textures, and motifs to develop a cohesive look and feel. As you work in your journal, pay attention to what themes and styles emerge, and see how you can build on those to create a consistent narrative.

Q: Can I use digital tools to create an art journal, or do I need to work traditionally?

A: While traditional art journaling with physical materials can be very rewarding, you can also create a digital art journal using a tablet, smartphone, or computer. There are many digital drawing and painting programs available, such as Procreate or Adobe Illustrator, that can mimic traditional media. You can also use a digital journaling app, such as Day One or Sketchbook Pro, to create and organize your digital art journal. The most important thing is to choose the tools that work best for you and your creative style.

Q: How often should I work in my art journal, and what if I don’t feel inspired?

A: The frequency at which you work in your art journal is up to you – some people like to work in their journal daily, while others prefer to work in it weekly or monthly. The most important thing is to make art journaling a habit, and to schedule time for it in your daily or weekly routine. If you don’t feel inspired, try setting a timer for 10-15 minutes and challenging yourself to create something during that time. You can also try using prompts or exercises, such as freewriting or drawing from observation, to get your creative juices flowing. With consistent practice, you’ll find that inspiration will come more easily, and your art journal will become a source of joy and self-expression.

Skip to content