How to Recycle Paper Creatively

You can breathe new life into old paper by transforming it into unique and useful items. As you explore the world of paper recycling, you’ll discover various techniques to turn your discarded paper into decorative pieces, functional products, and even works of art. Your creativity will shine as you learn to recycle paper in innovative ways, reducing waste and giving old materials a fresh purpose, while also helping the environment with your innovative approach.

Key Takeaways:

To get the most out of recycling paper, consider the following points:

  • Use old newspapers and cardboard to create unique crafts such as paper mache, origami, or decoupage, which can add a personal touch to your home decor or serve as a fun family activity.
  • Transform recycled paper into notebooks or journals by binding the pages together with glue, staples, or a simple sewing technique, making for a thoughtful gift or a personalized writing space.
  • Apply creative techniques like collage or quilling to turn recycled paper into artistic pieces, such as greeting cards, gift tags, or framed wall art, which can add a touch of elegance and personality to any room.

Preparation is Key

While getting started with creative paper recycling, you need to have a clear plan in place. You will need to gather various paper materials, tools, and a dedicated workspace to bring your ideas to life.

Gathering Paper Materials

Against all odds, you can collect a wide variety of paper materials from your daily life, such as old newspapers, cardboard tubes, and magazine cutouts, to use in your creative projects.

Essential Tools for Crafting

Essentially, you will need some basic tools like scissors, glue, and a craft knife to get started with paper recycling. You can find these tools in your home or purchase them at a craft store.

Further exploration of these tools will help you understand their uses and applications in different paper crafting techniques, allowing you to enhance your creativity and produce unique pieces, as you experiment with various textures, colors, and designs, and you will be able to develop your skills and style in paper recycling.

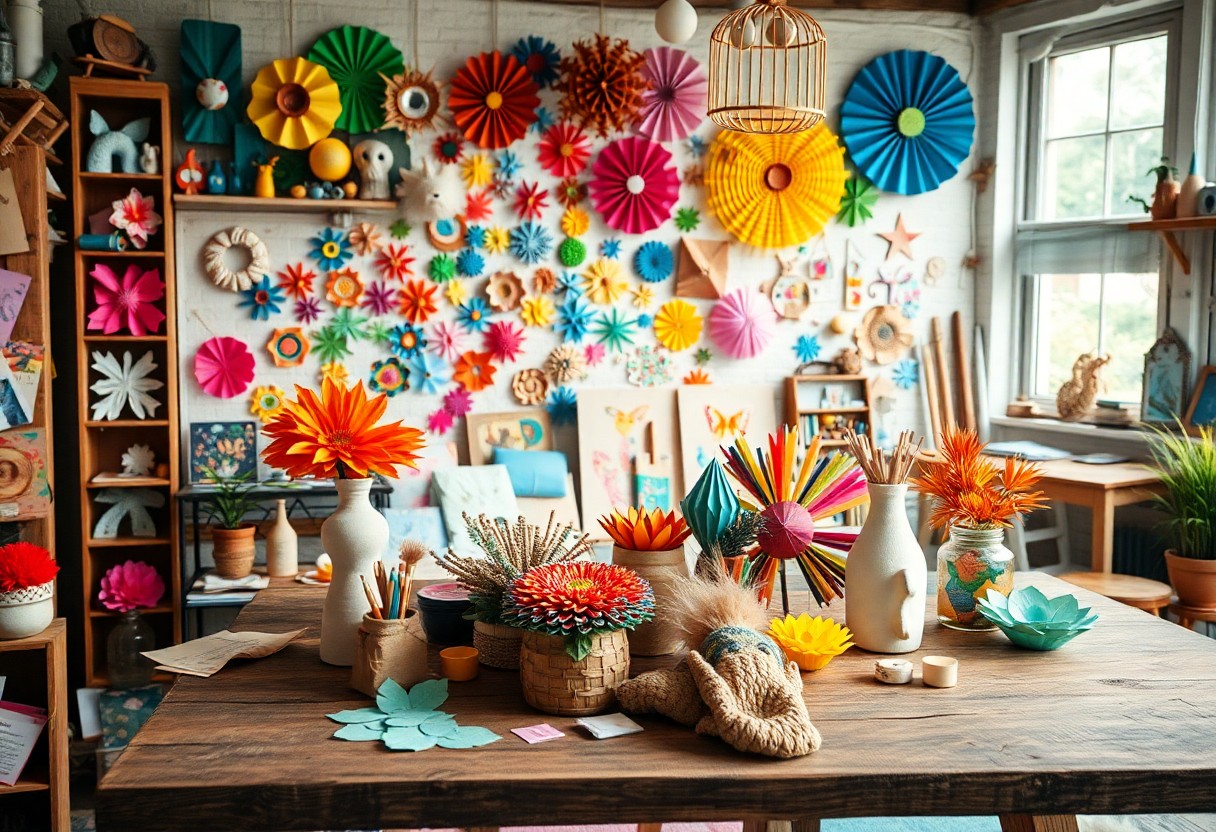
Creative Recycling Ideas

Clearly, recycling paper can be a fun and creative process, allowing you to think outside the box and come up with innovative ideas. You can turn old paper into new products, reducing waste and promoting sustainability in the process. Your creativity is the only limit when it comes to recycling paper.

Paper Mache Masterpieces

Along with other materials, you can use old paper to create unique paper mache masterpieces, such as decorative bowls, vases, or sculptures. Your paper mache creations can add a personal touch to your home decor, making them a great way to showcase your creativity.

Origami Art from Old Notes

After collecting old notes and paper scraps, you can transform them into intricate origami art pieces, such as birds, flowers, or other decorative items. You can use your origami creations to decorate your space or give them as gifts to friends and family.

Considering the variety of origami designs available, you can choose the ones that suit your style and skill level, from simple to complex designs. You can also experiment with different folding techniques and paper types to create unique and personalized origami art pieces that reflect your personality and creativity.

Paper Beads and Jewellery

Unlike other materials, paper can be transformed into beautiful beads and jewellery with a little creativity. You can recycle old papers, magazines, and newspaper to create unique accessories that showcase your style.

Rolling and Shaping Beads

On the path to creating paper beads, you’ll start by rolling and shaping your paper strips into desired forms. You’ll find that with practice, your beads will become more uniform and polished, making them perfect for your jewellery pieces.

Crafting Unique Accessories

Rolling out your imagination, you can turn your paper beads into stunning accessories, such as necklaces, earrings, and bracelets. You can customize your jewellery to fit your personal taste and style, making each piece truly one-of-a-kind.

Beads can be used to create a wide range of accessories, from simple and elegant to bold and statement-making. As you experiment with different paper types, colours, and shapes, you’ll discover the endless possibilities for crafting unique accessories that reflect your personality and add a touch of eco-friendliness to your wardrobe. You can also experiment with combining paper beads with other materials, like fabric, metal, or wood, to create truly innovative pieces that showcase your creativity and skill.

Decorative Items

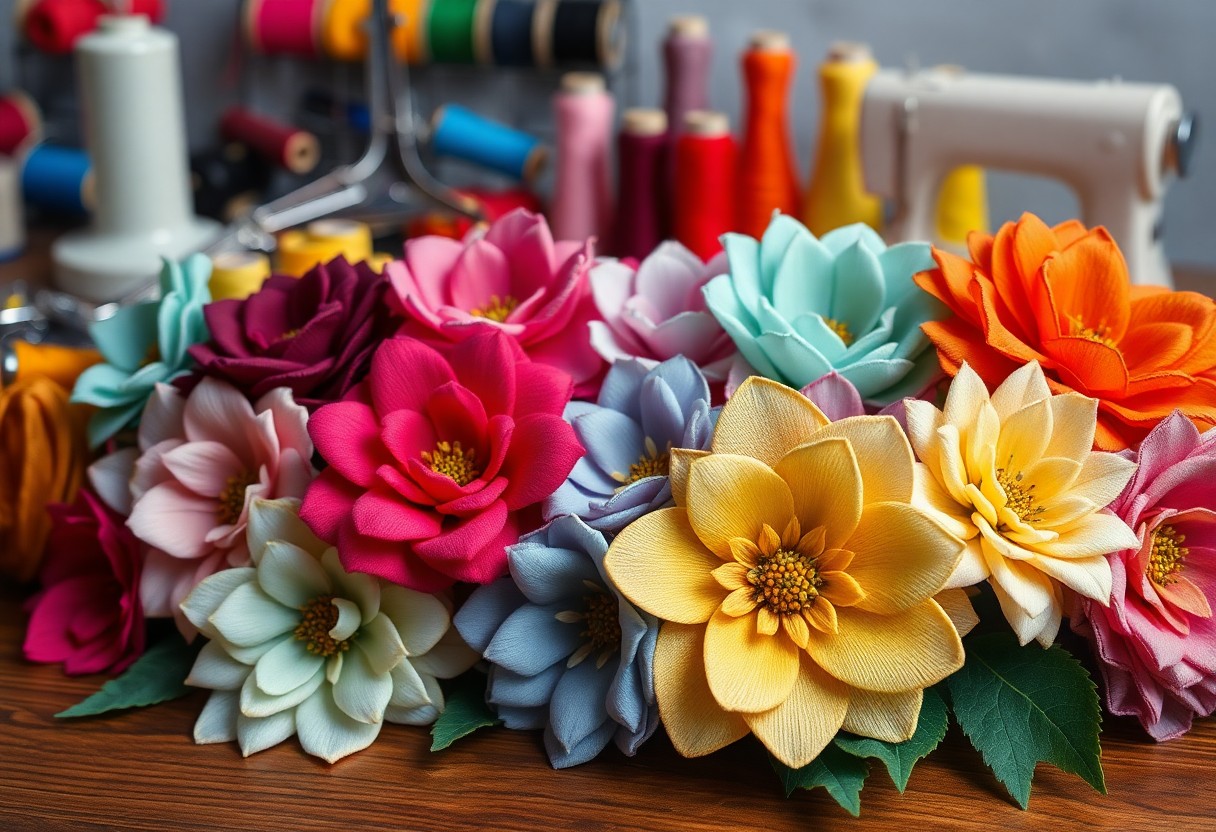
Paper Flower Arrangements

Above all, creating paper flower arrangements is a great way to add a touch of elegance to your home decor. You can use recycled paper to create stunning flowers that can be arranged in a vase or used as a centerpiece.

Decoupage Furniture Makeover

To give your old furniture a new look, you can try decoupage, a technique that involves gluing cut-out images onto a surface. You can use recycled paper to create unique designs and patterns on your furniture, giving it a fresh and updated look.

Understanding the process of decoupage is key to achieving a professional-looking finish. You can start by selecting the paper you want to use, cutting out the images or patterns, and then applying a coat of varnish to protect the design. As you work on your decoupage furniture makeover, you will notice how your old pieces can be transformed into beautiful and functional works of art that reflect your personal style.

Paper Mosaic Art

Once again, you can breathe new life into old paper by transforming it into stunning mosaic art. You can use newspaper clippings, magazine cutouts, or colored paper scraps to create unique designs and patterns.

Designing Patterns

Altogether, you will find that designing patterns is an enjoyable process, allowing you to experiment with different colors and textures. You can create geometric shapes, floral motifs, or abstract designs, depending on your preference and skill level.

Creating Mosaic Masterpieces

Parallel to your creative vision, you can start creating mosaic masterpieces by arranging your paper pieces into the desired pattern. You can use a glue stick or decoupage medium to secure the pieces in place, forming a beautiful and intricate design.

Plus, as you become more comfortable with the technique, you can explore more complex designs and themes, incorporating other materials like fabric, wood, or found objects into your mosaic art. You can also experiment with different scales, creating large-scale murals or tiny, delicate pieces, depending on your interest and available space.

Sustainable Gift Ideas

Despite the abundance of gift wrapping options, you can make a significant impact by choosing eco-friendly alternatives. You can create unique and thoughtful gifts using recycled paper, reducing waste and supporting sustainability.

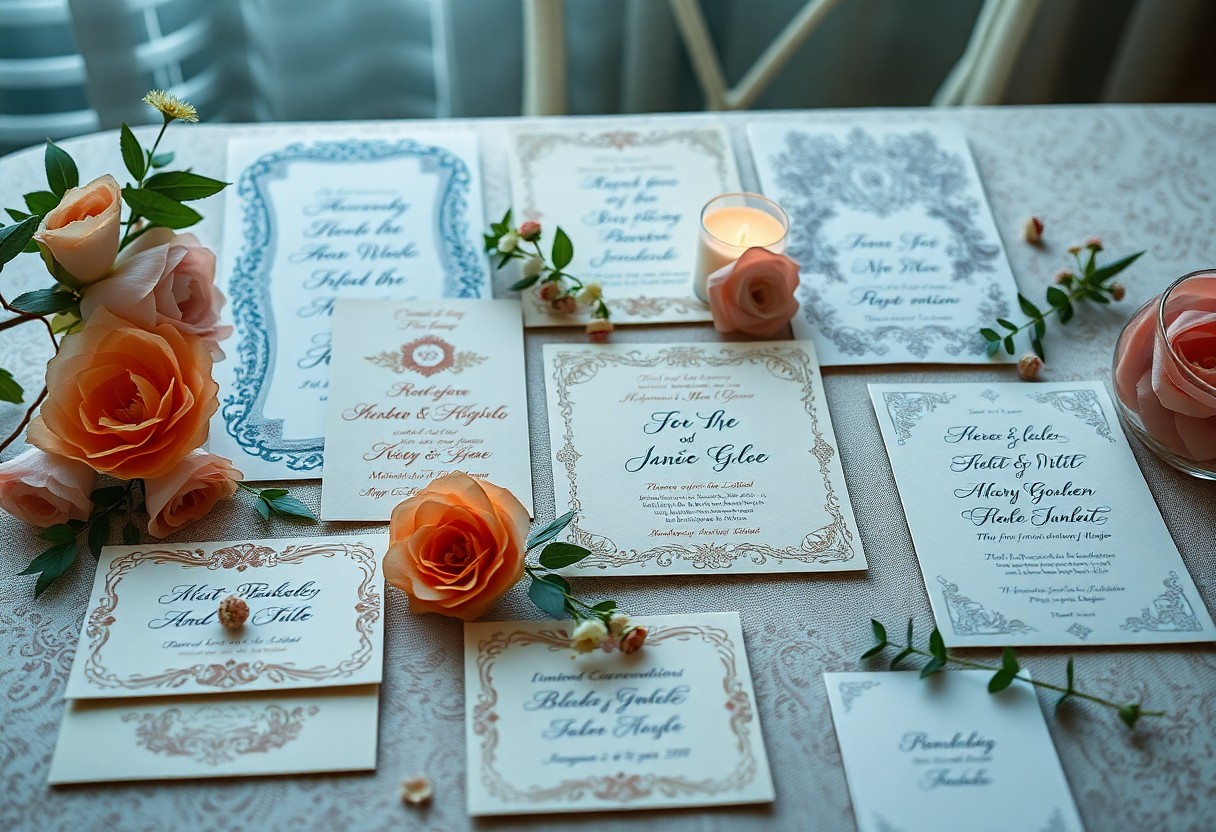
Handmade Cards and Wrapping

Around the holiday season, you can create beautiful handmade cards and wrapping paper using recycled materials, adding a personal touch to your gifts and making them even more special for your loved ones.

Repurposed Paper Gifts

Handcrafting your own gifts from repurposed paper is a great way to show you care about the environment and the person receiving the gift, allowing you to turn old papers into something new and valuable.

Repurposed paper gifts can take many forms, such as decorative boxes, journals, or even pieces of art, and you can get creative with the design and functionality, tailoring your gift to the recipient’s interests and tastes, making it a truly personalized and meaningful present.

Summing up

Now that you have learned about creative ways to recycle paper, you can start exploring your own ideas. You can visit DIY ideas from waste paper to get inspired and turn your waste into unique creations, making your recycling process more enjoyable and beneficial for the environment, and enhancing your skills as you experiment with your projects.

FAQ

Q: What are the different types of paper that can be recycled creatively?

A: Various types of paper can be recycled creatively, including old newspapers, cardboard, paper bags, junk mail, and even paper towel rolls. You can transform these items into unique crafts, such as origami figures, paper mache vases, or decorative gift boxes. The key is to think outside the box and explore the potential of each paper type.

Q: How do I prepare paper for creative recycling?

A: Preparing paper for creative recycling involves cleaning and sorting the materials. Start by removing any plastic or staples from the paper, and then sort the paper by type and color. This will help you visualize the possibilities and make it easier to choose the right materials for your project. You can also cut or shred the paper into smaller pieces to create a more uniform texture and make it easier to work with.

Q: What are some creative ways to reuse old cardboard tubes?

A: Old cardboard tubes can be transformed into a variety of creative projects, such as bird feeders, pencil holders, or even a marble run. You can decorate the tubes with paint, markers, or tape to give them a personalized touch. Another idea is to cut the tubes into smaller sections and use them as plant starters or mini-greenhouses for seedlings. The possibilities are endless, and it’s up to you to experiment and come up with innovative ideas.

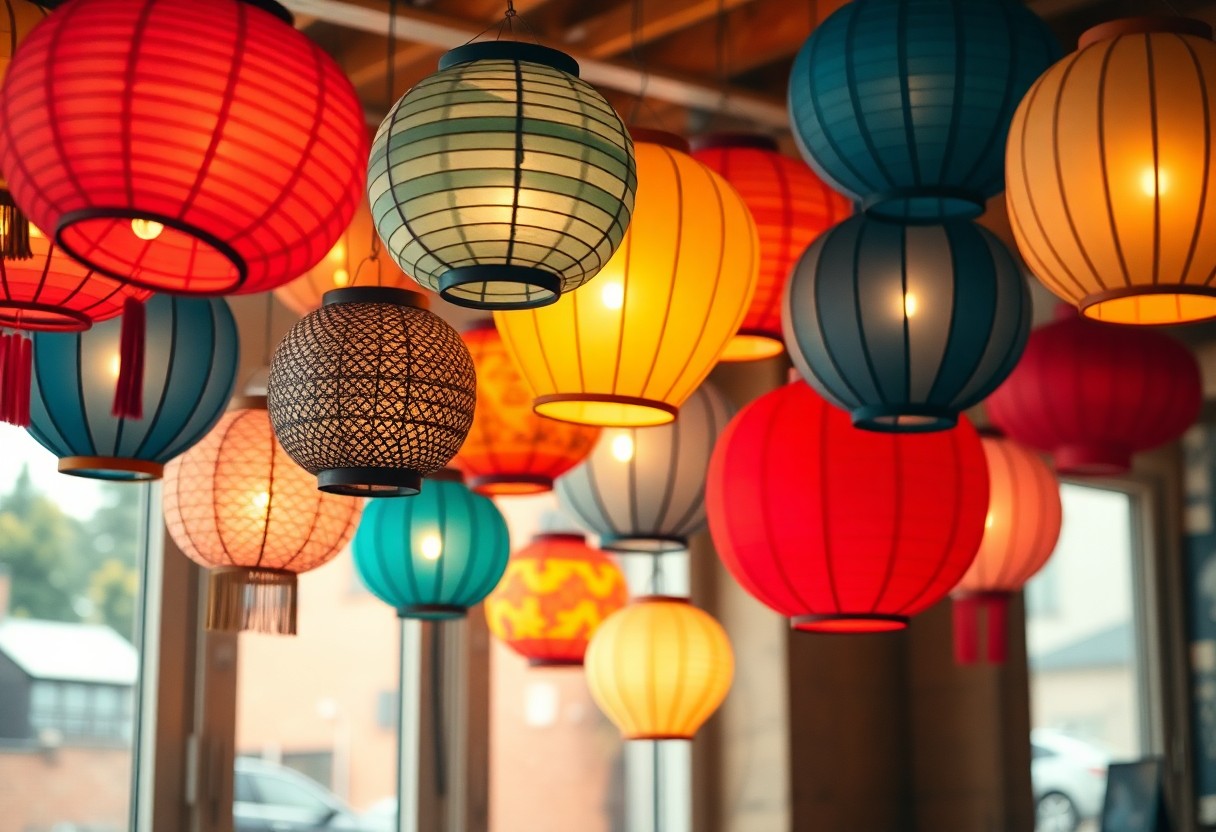
Q: Can I recycle paper to create decorative items for my home?

A: Yes, paper can be recycled to create a wide range of decorative items for your home, such as paper flowers, garlands, or lamp shades. You can use techniques like decoupage, quilling, or paper folding to create intricate designs and patterns. Additionally, you can use recycled paper to create unique gift wraps, gift tags, or cards, adding a personal touch to your presents. With a little creativity, you can turn old paper into stunning decorative pieces that reflect your personal style.

Q: Are there any safety precautions I should take when recycling paper creatively?

A: When recycling paper creatively, it’s important to take a few safety precautions to avoid accidents. Always use scissors or craft knives with caution, and make sure to wear protective gloves and eyewear when necessary. Additionally, be mindful of any allergies or sensitivities you may have to certain materials, such as glue or paint. It’s also a good idea to work in a well-ventilated area and avoid using materials that may be hazardous to your health. By taking these precautions, you can ensure a fun and safe creative experience.

The Beauty of Handmade Invitations

As you plan your special event, you’re considering every detail to make it perfect. Your invitations set the tone for your celebration, and handmade ones offer a unique touch. You can create personalized and meaningful invites that reflect your style and theme. With handmade invitations, you can add a human element that digital invites often lack, making your guests feel valued and excited for your event. This approach allows you to showcase your creativity and make a lasting impression on your guests.

Key Takeaways:

  • The personal touch of handmade invitations makes them stand out from mass-produced ones, allowing the host to convey their unique style and personality to the guests.
  • Handmade invitations offer a creative outlet for hosts to express their artistic side and add a touch of elegance to the overall event experience.
  • The time and effort put into creating handmade invitations demonstrates the host’s attention to detail and commitment to making the event a special and memorable occasion.

The Art of Handmade Invitations

While handmade invitations are a labor of love, you will find that the end result is well worth the effort. You can customize them to fit your personal style and the theme of your event, making them a unique and meaningful way to invite your guests.

The Personal Touch

Around the time you start thinking about your invitations, you consider what will make them special and reflect your personality. You want your guests to feel valued, and a handmade invitation shows you are willing to go the extra mile to make them feel appreciated.

Unique Designs

To create an invitation that stands out, you can experiment with different materials, colors, and designs. You have the freedom to choose the paper, ink, and embellishments that fit your theme, allowing you to create a one-of-a-kind invitation that reflects your style.

The uniqueness of handmade invitations lies in the fact that you can tailor them to your specific needs and preferences. You can add photos, ribbons, or other embellishments that make your invitation truly special, giving your guests a glimpse into the thought and effort you have put into your event, making them feel excited and honored to be a part of it.

Materials and Techniques

Now, when it comes to creating handmade invitations, you have a wide range of materials and techniques to choose from. You can explore various options, including digital resources like DIY Wedding Invitations: How to Create Your Own Invites, to find the perfect fit for your special occasion.

Paper and Ink

Against a backdrop of traditional invitation-making, you’ll find that paper and ink are fundamental components. You can select from various textures, colors, and finishes to create a unique look that reflects your style and theme.

Embellishments and Decorations

Materials like ribbons, stamps, and die-cuts can add a personal touch to your invitations. You can use these elements to create intricate designs and patterns that make your invitations truly special.

Embellishments can elevate your handmade invitations to the next level, allowing you to express your creativity and attention to detail. You can experiment with different combinations of embellishments to find the perfect balance of texture, color, and visual interest, making your invitations a reflection of your personal style and the tone of your event.

The Beauty of Imperfection

Unlike mass-produced invitations, handmade ones have a unique charm that sets them apart. You can see the human touch in every detail, making each invitation a one-of-a-kind piece.

Human Error

Albeit minor flaws can be present, they add to the authenticity of the invitation, giving you a sense of the person behind the craft. You appreciate the effort and dedication that goes into creating something by hand.

Character and Charm

The distinctive quality of handmade invitations lies in their ability to convey your personality and style, making them a reflection of you. You can choose the materials, colors, and design that resonate with your taste and vision.

Understanding what makes handmade invitations special, you can see how the imperfections and unique characteristics come together to create a truly personalized and meaningful invitation. You can feel the love and care that goes into crafting each one, making your invitation a keepsake for your guests to treasure, and a beautiful representation of your special occasion.

DIY Invitation Ideas

Despite the ease of digital invitations, handmade ones offer a personal touch. You can create unique and beautiful invitations that reflect your style and the occasion. This allows you to add personal elements, making your invitations truly special.

Simple Yet Elegant

About the easiest way to create handmade invitations, you can use simple materials like paper, glue, and scissors. You can design your invitation with a minimalist approach, focusing on clean lines and elegant fonts, making it perfect for formal events.

Creative and Playful

On the other hand, you can let your imagination run wild and create invitations that are fun and playful. You can use colorful paper, stamps, and other embellishments to make your invitations stand out and set the tone for a lively celebration.

Plus, with creative and playful invitations, you can experiment with different shapes, sizes, and textures, allowing you to add an extra layer of personality to your invitations. You can also include personalized elements, such as photos or inside jokes, to make your invitations truly one-of-a-kind and memorable for your guests.

The Joy of Receiving

Once again, you get to experience the thrill of receiving a unique and personalized invitation, which sets the tone for the upcoming event. You feel special and valued, knowing that the host took the time to create something just for you.

The Surprise Factor

Upon opening the envelope, you are greeted with a beautiful, handmade design that exceeds your expectations, making the occasion even more exciting and memorable.

A Treasured Keepsake

Along with the invitation, you receive a tangible piece of art that you can hold onto, a memento that symbolizes the thought and effort put into the event, and the consideration given to you as a guest.

In addition, as you treasure the handmade invitation, you begin to appreciate the story behind its creation, the materials used, and the craftsmanship that went into making it, which adds a deeper layer of meaning to the overall experience, making your connection to the event and the host even stronger.

The Craft of Invitation Making

Your invitation is a reflection of your personal style and the tone of your event, making the craft of invitation making an art form that requires attention to detail and creativity.

Traditional Methods

After deciding on a design, you can choose from various traditional methods, such as calligraphy, engraving, or letterpress, to add a touch of elegance to your invitations.

Modern Twists

On the other hand, you can opt for modern twists, such as digital printing, laser cutting, or foil stamping, to give your invitations a contemporary look.

In fact, with modern technology, you can now create intricate designs and customize your invitations to fit your theme, making them truly unique and personalized, allowing you to express your creativity and make a lasting impression on your guests.

To wrap up

Taking this into account, you can see that handmade invitations offer a unique touch to your special events. You will appreciate the personal effort and thoughtfulness that goes into creating each one. By choosing handmade invitations, you add a touch of elegance and sophistication to your celebrations, making your guests feel valued and appreciated. Your events will be truly unforgettable with these beautiful, one-of-a-kind invitations.

FAQ

Q: What makes handmade invitations so special and unique?

A: Handmade invitations are truly one-of-a-kind, as each one is carefully crafted by hand, making every single invitation distinct from the others. The personal touch and attention to detail that goes into creating each invitation makes them stand out from mass-produced, generic invitations. The beauty of handmade invitations lies in their imperfections, which add to their charm and character, making them a treasured keepsake for the recipient.

Q: How do handmade invitations reflect the personality and style of the event or occasion?

A: Handmade invitations can be tailored to perfectly match the theme, tone, and aesthetic of the event or occasion. The choice of materials, colors, fonts, and design elements can all be carefully selected to reflect the personality and style of the event, making the invitation a beautiful representation of what’s to come. Whether it’s a formal wedding, a rustic birthday party, or a whimsical baby shower, handmade invitations can be designed to set the tone and build excitement for the celebration.

Q: What kind of materials and techniques are used to create handmade invitations?

A: The materials and techniques used to create handmade invitations are vast and varied. Some common materials include high-quality papers, cardstocks, and textured fabrics, while techniques such as calligraphy, hand-stamping, and embroidery are often used to add intricate details and embellishments. Other materials like ribbons, lace, and natural elements like leaves and flowers can also be incorporated to add depth and visual interest to the invitation.

Q: Can handmade invitations be customized to fit a specific budget or timeline?

A: Absolutely! While handmade invitations can be more time-consuming and labor-intensive to create, they can be tailored to fit a variety of budgets and timelines. Depending on the complexity of the design and the materials used, handmade invitations can range from simple and affordable to elaborate and luxurious. Additionally, many invitation designers and artists offer rushed production options or priority shipping to accommodate tight deadlines, ensuring that handmade invitations can be created and delivered within a specific timeframe.

Q: How do handmade invitations contribute to the overall experience and impression of an event or occasion?

A: Handmade invitations have the power to set the tone and create a lasting impression for an event or occasion. They convey the host’s attention to detail, creativity, and thoughtfulness, making the recipient feel special and valued. The beauty and uniqueness of handmade invitations can generate excitement and anticipation for the event, creating a sense of wonder and curiosity. Moreover, handmade invitations can become a treasured keepsake, serving as a reminder of the special occasion and the love and care that went into creating it.

DIY Paper Lantern Tutorials

You’re looking to create something with your own hands, something that brings a touch of warmth to your space. You’ve come to the right place. With these DIY paper lantern tutorials, you’ll learn to craft your own lanterns, step by step. You’ll gather simple materials and get to work, your hands moving with purpose as you shape and fold the paper into beautiful forms. Your lanterns will be unique, a reflection of your own style and patience.

Key Takeaways:

To create beautiful and unique DIY paper lanterns, consider the following points:

  • Using colorful and patterned paper can add a personal touch to your lanterns and make them stand out in any setting.
  • Mastering the folding and gluing techniques is important to achieve a professional-looking finish and ensure the lanterns are sturdy.
  • Experimenting with different shapes and sizes can help you create a variety of lanterns to suit different occasions and decor styles, from traditional to modern.

Materials Needed

While making a paper lantern, you will need several materials.

Paper Types

You can use:

  • Rice paper
  • Tissue paper
  • Crepe paper

Any of these papers will work for your lantern.

Material Quantity
Paper 1 sheet
String 1 piece
Glue 1 bottle
Scissors 1 pair

Lighting Options

Options for lighting your lantern include candles, LEDs, or small light bulbs.

Hence, you can choose the one that suits your needs. You will be able to find these at your local store, and they are easy to install in your lantern.

Design and Planning

You start by envisioning the look of your lantern. Consider the occasion and the space where it will be used. This will help you decide on the overall aesthetic you want to achieve.

Choosing Colors

Choosing the right colors for your lantern is key. Consider the mood and atmosphere you want to create, and select hues that fit with your vision.

Selecting Shapes

For a unique lantern, think about the shape you want to create. You can choose from traditional spherical shapes or opt for something more exotic.

Design your lantern with the shape in mind, considering how it will impact the overall visual effect. You will need to think about the size, proportions, and how the shape will affect the lighting inside the lantern.

Construction Techniques

To build a paper lantern, you’ll need to master basic construction techniques. You’ll work with paper, glue, and a few simple tools. Your goal is to create a sturdy, evenly proportioned lantern.

Folding and Cutting

For precise folds and cuts, use a ruler and a sharp knife. You’ll make straight cuts and sharp folds, giving your lantern its shape and structure. Your hands will move with a newfound precision.

Assembly and Decoration

Along with the construction, you’ll start thinking about assembly and decoration. You’ll add your personal touch, with colors and patterns that reflect your style. Your lantern begins to take shape.

Consequently, as you assemble and decorate your lantern, you’ll notice how your creative decisions impact the overall look. You’ll add a light source, and your lantern will glow with a warm, inviting light. You’ll step back, admiring your handiwork, and feel a sense of pride in what you’ve created.

Adding Lighting

Despite the beauty of paper lanterns, you can enhance their appeal by adding a light source. You can find inspiration for DIY paper lanterns decor at DIY Paper Lanterns Decor Ideas to create your unique design.

Candles and LEDs

Lighting your lanterns with candles or LEDs will give your space a warm ambiance. You can choose either option, depending on your preference and the style you’re aiming for.

Safety Precautions

Any time you’re working with light sources, you need to be cautious. You should keep an eye on your lanterns when they’re lit, especially if you’re using candles.

Also, you should place your lanterns away from flammable materials and ensure they’re stable to avoid accidents, allowing you to enjoy your beautiful DIY paper lanterns with peace of mind.

Decorating and Customizing

Not only can you create your own paper lanterns, but you can also customize them to fit your style. You can add your personal touch with various decorating techniques and materials.

Paint and Markers

Around the world of decorating, about the simplest way to add color and design to your lantern is with paint and markers. You can use bright colors and bold designs to make your lantern stand out.

Ribbons and Embellishments

The final touches to your lantern can be added with ribbons and embellishments. You can use them to create a elegant and sophisticated look.

To add ribbons and embellishments, you will need to choose the ones that fit your lantern’s style and color. You can tie a ribbon around the top of the lantern or glue embellishments onto the lantern’s surface. You can experiment with different combinations to find the one that works best for your lantern.

Hanging and Displaying

Many options are available when it comes to hanging and displaying your paper lanterns. You can place them in a corner, from the ceiling, or even on a table. Your creativity is the only limit to how you showcase your lanterns.

Indoors and Outdoors

Along with the right lighting, your paper lanterns will shine in any setting. You can hang them in your living room or take them outside for a garden party. Your lanterns will add a touch of elegance to any event.

Tips and Ideas

Above all, you have the freedom to experiment with your lanterns. You can try:

  • Using different sizes and colors
  • Creating patterns with the lanterns
  • Adding decorations like ribbons or flowers

Any arrangement you choose will be a reflection of your personal style.

Outdoors, you can hang your lanterns from trees or a gazebo. You can try:

  • Hanging lanterns at different heights
  • Using lanterns of varying shapes
  • Creating a theme with your lanterns

Any setting you create will be unique and beautiful, and you will enjoy the process of making it your own.

To wrap up

Summing up, you’ve now got the basics to create your own DIY paper lanterns. You’ve learned the steps, and with a bit of patience, your hands will be crafting these beauties in no time. Your paper lanterns will bring a warm glow to any room, and you can take pride in knowing you made them yourself.

FAQ

Q: What materials do I need to make a DIY paper lantern?

A: To make a DIY paper lantern, you will need a few basic materials, including rice paper or thin colored paper, a balloon, a glue stick, scissors, a pencil, and a string or twine. You may also want to add some decorative elements, such as paint, markers, or stickers, to give your lantern a personalized touch.

Q: How do I inflate the balloon to the right size for my paper lantern?

A: Inflating the balloon to the right size is important for creating a lantern that is both sturdy and visually appealing. Start by blowing up the balloon to a medium size, then test it by wrapping a piece of paper around it to see if it’s the right size. If it’s too small, blow it up a bit more, and if it’s too large, let some air out. You can also use a measuring tape to measure the circumference of the balloon to ensure it’s the size you want.

Q: How do I attach the paper to the balloon to create the lantern shape?

A: Attaching the paper to the balloon is a bit tricky, but with a few simple steps, you can achieve a beautiful lantern shape. Start by applying a thin layer of glue to the balloon, then carefully wrap the paper around it, smoothing out any wrinkles or air pockets as you go. Make sure to apply even pressure to avoid creasing the paper. You can also use a brush to apply the glue for a more even coat.

Q: Can I use different shapes and sizes of paper to create unique lanterns?

A: Yes, you can definitely experiment with different shapes and sizes of paper to create unique and personalized lanterns. Try using square or rectangular paper for a more modern look, or use circular paper for a traditional lantern shape. You can also use paper with different textures, such as tissue paper or crepe paper, to add depth and interest to your lantern. Just be sure to adjust the size of the balloon accordingly to accommodate the shape and size of the paper.

Q: How do I add a light source to my DIY paper lantern?

A: Adding a light source to your DIY paper lantern is easy and safe, as long as you follow a few basic precautions. You can use a small LED candle or a string of fairy lights to illuminate your lantern. Simply place the light source inside the lantern, making sure it’s secure and won’t come into contact with the paper. You can also use a battery-operated tea light for a warm and cozy glow. Just be sure to follow the manufacturer’s instructions for use and safety guidelines.

Top Sewing Projects for Beginners

FAQ

Q: What are some easy sewing projects for beginners to start with?

A: For those new to sewing, starting with simple projects is the best way to build skills and confidence. Some top sewing projects for beginners include making a tote bag, a simple pillowcase, or a drawstring pouch. These projects require minimal pattern pieces and straightforward construction, making them perfect for practicing basic sewing techniques like straight stitching and hemming.

Q: What sewing skills are required for a beginner-friendly project?

A: Beginner-friendly sewing projects typically require basic skills such as understanding how to thread and operate a sewing machine, ability to sew straight lines, and knowledge of how to backstitch to secure seams. Additionally, being able to press fabrics as you sew and understanding the basics of pattern reading can be helpful but are not necessarily required for the simplest projects.

Q: How do I choose the right fabric for my beginner sewing project?

A: Choosing the right fabric for your sewing project can make all the difference in the outcome. For beginners, it’s best to start with fabrics that are easy to work with, such as cotton or linen. These fabrics are forgiving, easy to cut, and simple to sew. Avoid starting with slippery or thick fabrics like silk or leather until you have more experience. Also, consider the season and the intended use of the item when selecting your fabric.

Q: What tools and equipment do I need to get started with sewing?

A: To start sewing, you’ll need a few basic tools and equipment. First, a sewing machine is necessary for most projects, but you can start with a simple, mechanical model. Other necessities include a variety of needles, threads to match your fabrics, scissors dedicated to cutting fabric, pins, and a sewing gauge or seam guide. An iron and ironing board are also must-haves for pressing your fabrics as you sew, helping you achieve professional-looking results.

Q: Where can I find patterns and tutorials for beginner sewing projects?

A: There are numerous resources available for finding patterns and tutorials tailored to beginner sewing projects. Online platforms like YouTube, Pinterest, and sewing blogs offer a wealth of free tutorials and patterns. Additionally, sewing books and magazines can provide detailed instructions and inspiration. Many pattern companies also offer beginner-friendly patterns that include step-by-step instructions and sometimes even video tutorials to help guide you through the sewing process.

How to Make Fabric Flowers

You can create beautiful fabric flowers to embellish your clothing, accessories, or home decor. With basic sewing skills and simple materials, you can make your own unique flowers. Your creativity will shine as you choose fabrics, colors, and styles to suit your projects. In this guide, you will learn the steps to make fabric flowers, from preparing materials to finishing touches, and discover how to add a personal touch to your creations.

Key Takeaways:

To create beautiful fabric flowers, consider the following points:

  • Use high-quality fabric that is suitable for the type of flower you want to make, as it will affect the overall appearance and durability of the flower.
  • Master the petal shaping technique, as it is crucial for creating realistic and delicate-looking flowers that resemble real blooms.
  • Experiment with different assembly methods, such as gluing, sewing, or using floral wire, to find the one that works best for your fabric flower project and skill level.

Gathering Materials

A good starting point for making fabric flowers is to collect all the necessary materials, including fabrics, threads, and tools, to ensure a smooth and enjoyable creative process, as you launch on this project, you will need to have these items readily available.

Essential Tools

Acquiring the right tools is vital, as you will be using them to shape and craft your fabric flowers, you will need scissors, glue, and a hot glue gun to bring your creations to life.

Fabric Selection

Tactfully choosing the right fabric is key to creating beautiful flowers, you will need to select fabrics that are suitable for the type of flower you want to make, considering factors such as texture, color, and weight.

And as you examine deeper into the world of fabric selection, you will discover that different fabrics can evoke varying emotions and atmospheres, allowing you to customize your flowers to fit your desired aesthetic, you can experiment with different patterns, colors, and textures to create unique and personalized flowers that reflect your style and creativity.

Preparing the Fabric

If you want to make beautiful fabric flowers, you need to start with the right fabric. Choose a lightweight fabric that can hold its shape, such as cotton or silk. You will also need scissors, a needle, and thread to prepare your fabric for flower making.

Cutting Out Petals

Among the various steps in making fabric flowers, cutting out petals is the first step. You will need to cut out multiple petal shapes from your fabric, depending on the type of flower you want to make. Use a template or pattern to get the desired shape and size.

Shaping the Petals

Any excess fabric can be trimmed away as you shape your petals. You will need to use a technique such as gathering or curling to create a natural, curved shape. This will help your flowers look more realistic and delicate.

To achieve the perfect petal shape, you will need to experiment with different techniques and tools. You can use a hot tool to curl the edges of the petals or a needle and thread to gather the center. As you shape your petals, you can adjust the amount of gathering or curling to get the desired effect, and you will see your fabric flowers start to take shape under your hands.

Creating the Flower Center

Now that you have your fabric and tools, it’s time to create the center of your flower. This step is vital in giving your flower its shape and dimension. You will have two options to create the center: using a template or the free-hand method.

Using a Template

Around this point, you’ll need to decide on the size and shape of your flower center, and a template can help you achieve uniformity and precision. You can use a pre-made template or create your own using a piece of cardboard or paper.

Free-Hand Method

For a more organic look, you can try creating the flower center without a template. This method allows you to be more creative and flexible with your design, and you can adjust the size and shape as you go along.

Template or not, your goal is to create a circle or a shape that resembles the center of a flower. When using the free-hand method, you can use a needle and thread to help you create a circular shape, or you can simply cut out a circle from your fabric. As you work on your flower center, you’ll start to see your flower take shape, and you can adjust your technique to achieve the look you want.

Assembling the Flower

Unlike other crafting projects, assembling a fabric flower requires patience and attention to detail. You will need to carefully arrange your petals and center to create a beautiful, realistic bloom.

Attaching the Petals

Pertaining to the petals, you will need to attach them to the base of the flower, working your way around the center. You can use a hot glue gun or a needle and thread to secure them in place.

Adding the Center

Behind the beautiful petals, the center of the flower is what gives it depth and dimension. You will need to choose a center that complements your petals and attaches securely to the base.

Adding a center to your fabric flower can be as simple as gluing a small button or bead to the middle, or as complex as creating a intricate design using embroidery floss or yarn. You can choose a center that matches your petals or contrasts with them, depending on the look you want to achieve. As you add the center, you will see your flower come to life, and with a few final touches, you will have a beautiful, handmade bloom.

Finishing Touches

Despite the flowers being almost complete, you can add some final details to make them more realistic and visually appealing. You can use techniques like layering, shaping, and arranging to create a beautiful fabric flower.

Adding Leaves or Stems

Before you start adding any embellishments, you can attach leaves or stems to your fabric flowers to give them a more natural look. You can use wire, glue, or thread to secure them in place, and adjust them to your desired shape and position.

Embellishing the Flowers

Among the many ways to embellish your fabric flowers, you can use beads, sequins, or rhinestones to add a touch of sparkle and elegance. You can also experiment with different textures and colors to create a unique and personalized design.

Finishing the embellishing process, you will notice that your fabric flowers have transformed into beautiful, intricate creations. You can now use them to decorate your clothes, accessories, or home decor items, and enjoy the satisfaction of having created something beautiful with your own hands. You can also experiment with different embellishing techniques and materials to create a wide range of effects and styles.

Tips and Variations

After creating your fabric flowers, you can enhance them with various techniques. Consider the following:

  • Adding embellishments
  • Using different petal shapes

. Thou can customize your flowers to fit your style and project needs.

Experimenting with Colors

By exploring different color combinations, you can create unique fabric flowers that match your desired theme or decor. You can mix and match various hues to create ombre effects or contrasting colors to make your flowers stand out.

Mixing Fabric Textures

On the other hand, combining different fabric textures can add depth and visual interest to your flowers. You can pair smooth fabrics with lace or velvet to create a captivating contrast.

Also, when mixing fabric textures, you can experiment with layering different fabrics to achieve a dimensional look. You can use your fabric flowers to create beautiful brooches, hair clips, or embellishments for your clothing and home decor items, allowing you to express your creativity and personalize your projects.

To wrap up

Hence, you now have the basic knowledge to create your own fabric flowers. You can experiment with different fabrics, colors, and techniques to make your flowers unique. With practice, you will refine your skills and be able to create beautiful flowers to adorn your clothes, accessories, or home decor. Your handmade fabric flowers will add a personal touch to any project, and you will be proud of your creations.

FAQ

Q: What materials do I need to make fabric flowers?

A: To make fabric flowers, you will need a few basic materials, including fabric of your choice (cotton, silk, or satin work well), a pair of scissors, a hot glue gun, a wire stem or floral tape, and any additional embellishments you’d like to add, such as beads or rhinestones. You may also want to use a template or pattern to help you cut out your flower shapes.

Q: What types of fabric are best suited for making fabric flowers?

A: The type of fabric you choose will depend on the look and feel you want to achieve with your fabric flowers. Delicate fabrics like silk and chiffon work well for making realistic, petal-like flowers, while thicker fabrics like cotton and fleece can be used to create more rustic, textured flowers. You can also experiment with different fabric textures, such as velvet or lace, to add depth and interest to your flowers.

Q: How do I cut out the flower shapes from the fabric?

A: To cut out the flower shapes, start by tracing the template or pattern onto the fabric using a pencil or marker. Then, use a pair of sharp scissors to carefully cut out the shapes, making sure to follow the lines of the template. You can also use a craft knife or rotary cutter to cut out the shapes, but be careful not to cut yourself. If you’re using a intricate design, you may want to use a pair of embroidery scissors to get into the small areas.

Q: How do I assemble the fabric flowers?

A: To assemble the fabric flowers, start by gathering the cut-out flower shapes and arranging them in the desired order. Then, use a hot glue gun to attach the shapes together, starting from the center of the flower and working your way outwards. Make sure to apply even pressure to avoid creating wrinkles or creases in the fabric. You can also use a needle and thread to sew the shapes together, but hot glue tends to be faster and more convenient.

Q: How do I add the finishing touches to my fabric flowers?

A: To add the finishing touches to your fabric flowers, start by fluffing out the petals to create a natural, curved shape. Then, use a wire stem or floral tape to attach the flower to a base, such as a hair clip or brooch. You can also add embellishments like beads, rhinestones, or sequins to give your flowers a bit of sparkle and shine. Finally, use a spritz of fabric stiffener or hairspray to help hold the flower’s shape and prevent it from wilting or losing its shape over time.

Skip to content