fabric

How to Make Fabric Flowers

You can create beautiful fabric flowers to embellish your clothing, accessories, or home decor. With basic sewing skills and simple materials, you can make your own unique flowers. Your creativity will shine as you choose fabrics, colors, and styles to suit your projects. In this guide, you will learn the steps to make fabric flowers, from preparing materials to finishing touches, and discover how to add a personal touch to your creations.

Key Takeaways:

To create beautiful fabric flowers, consider the following points:

  • Use high-quality fabric that is suitable for the type of flower you want to make, as it will affect the overall appearance and durability of the flower.
  • Master the petal shaping technique, as it is crucial for creating realistic and delicate-looking flowers that resemble real blooms.
  • Experiment with different assembly methods, such as gluing, sewing, or using floral wire, to find the one that works best for your fabric flower project and skill level.
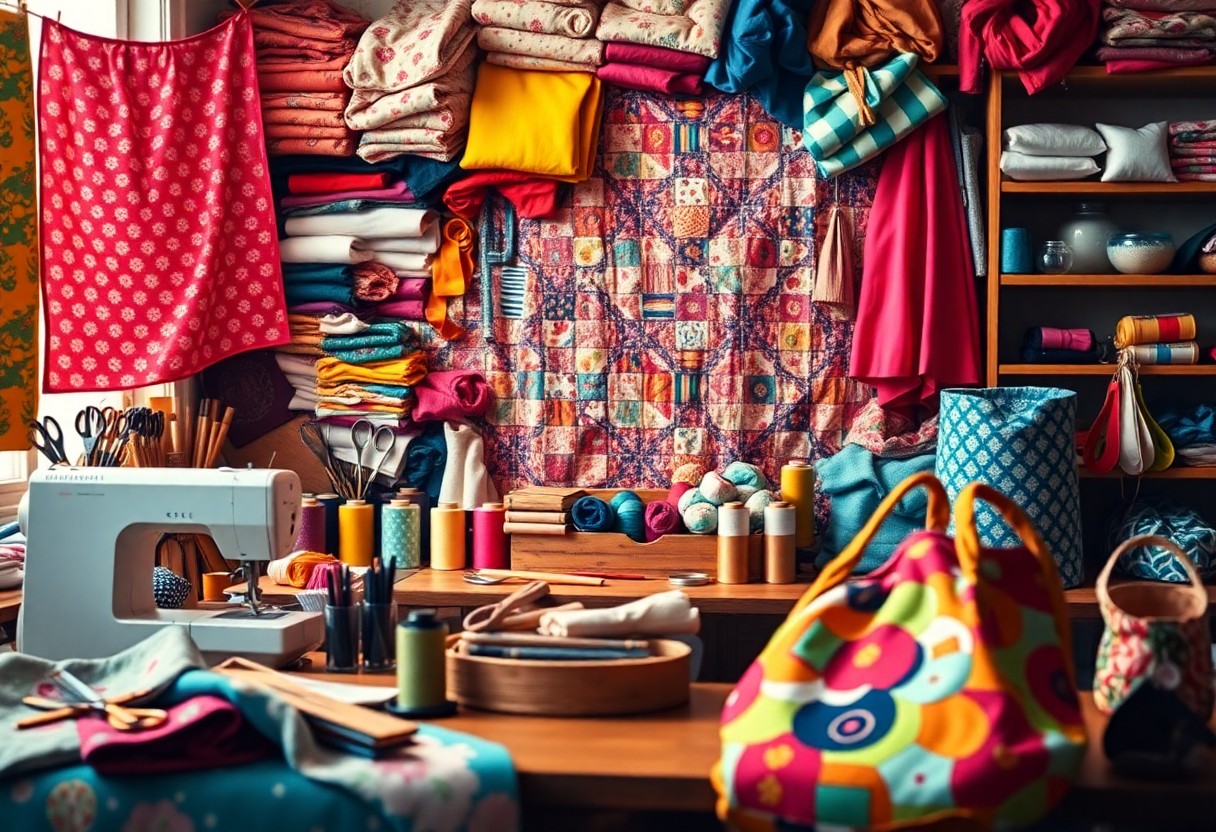
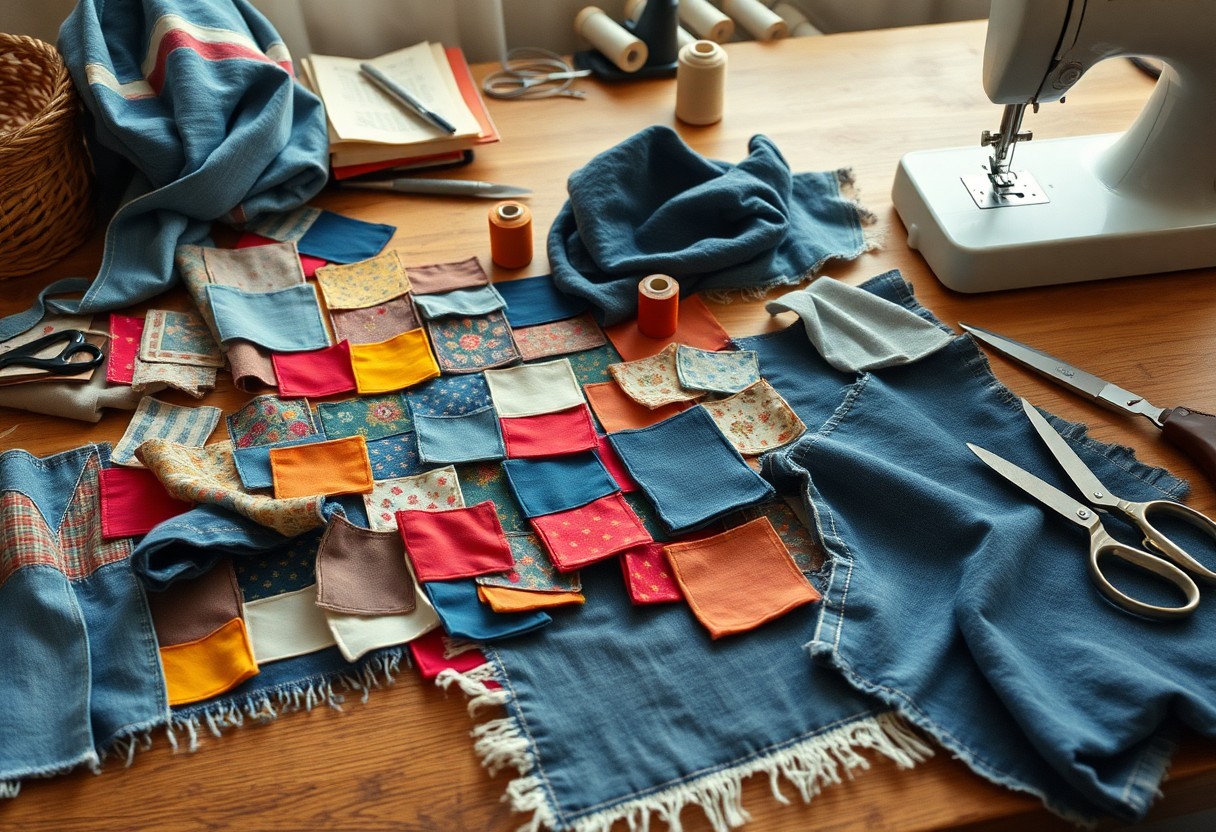
Gathering Materials

A good starting point for making fabric flowers is to collect all the necessary materials, including fabrics, threads, and tools, to ensure a smooth and enjoyable creative process, as you launch on this project, you will need to have these items readily available.
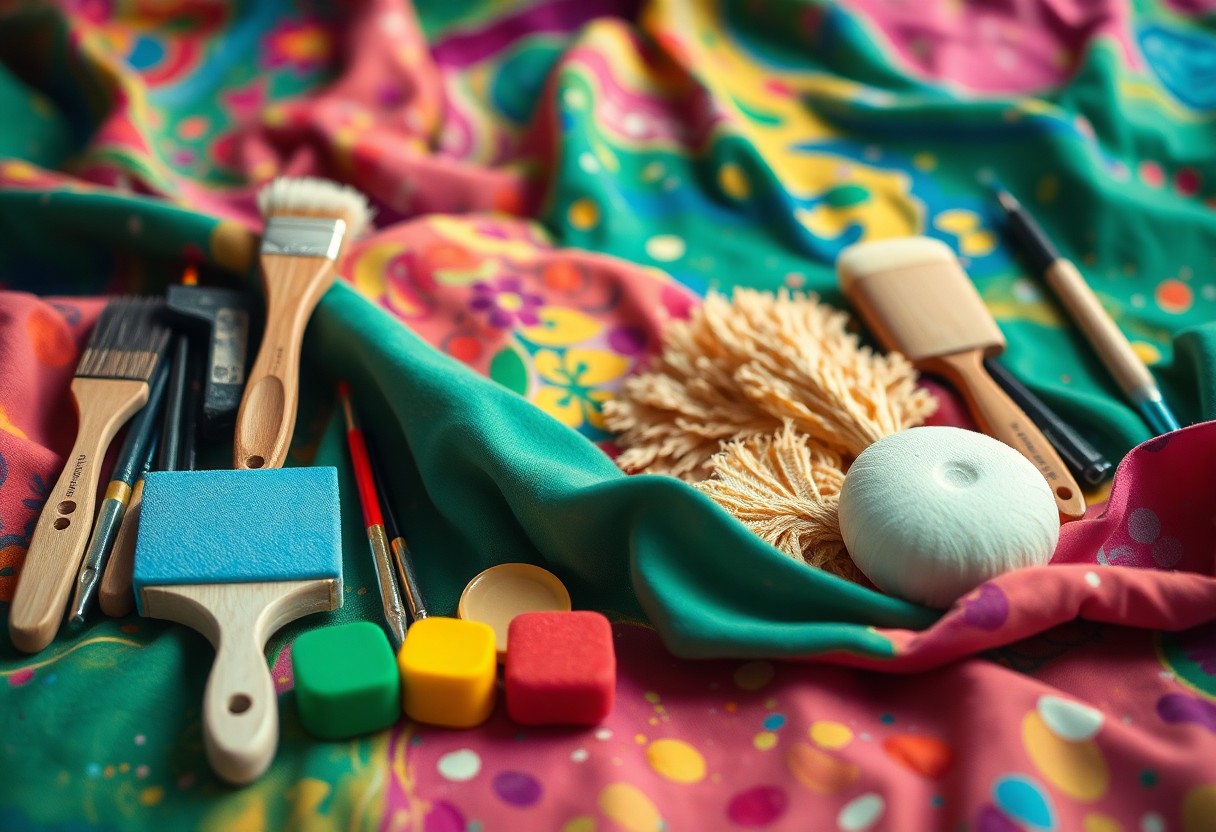
Essential Tools

Acquiring the right tools is vital, as you will be using them to shape and craft your fabric flowers, you will need scissors, glue, and a hot glue gun to bring your creations to life.

Fabric Selection

Tactfully choosing the right fabric is key to creating beautiful flowers, you will need to select fabrics that are suitable for the type of flower you want to make, considering factors such as texture, color, and weight.

And as you examine deeper into the world of fabric selection, you will discover that different fabrics can evoke varying emotions and atmospheres, allowing you to customize your flowers to fit your desired aesthetic, you can experiment with different patterns, colors, and textures to create unique and personalized flowers that reflect your style and creativity.

Preparing the Fabric

If you want to make beautiful fabric flowers, you need to start with the right fabric. Choose a lightweight fabric that can hold its shape, such as cotton or silk. You will also need scissors, a needle, and thread to prepare your fabric for flower making.

Cutting Out Petals

Among the various steps in making fabric flowers, cutting out petals is the first step. You will need to cut out multiple petal shapes from your fabric, depending on the type of flower you want to make. Use a template or pattern to get the desired shape and size.

Shaping the Petals

Any excess fabric can be trimmed away as you shape your petals. You will need to use a technique such as gathering or curling to create a natural, curved shape. This will help your flowers look more realistic and delicate.

To achieve the perfect petal shape, you will need to experiment with different techniques and tools. You can use a hot tool to curl the edges of the petals or a needle and thread to gather the center. As you shape your petals, you can adjust the amount of gathering or curling to get the desired effect, and you will see your fabric flowers start to take shape under your hands.

Creating the Flower Center

Now that you have your fabric and tools, it’s time to create the center of your flower. This step is vital in giving your flower its shape and dimension. You will have two options to create the center: using a template or the free-hand method.

Using a Template

Around this point, you’ll need to decide on the size and shape of your flower center, and a template can help you achieve uniformity and precision. You can use a pre-made template or create your own using a piece of cardboard or paper.

Free-Hand Method

For a more organic look, you can try creating the flower center without a template. This method allows you to be more creative and flexible with your design, and you can adjust the size and shape as you go along.

Template or not, your goal is to create a circle or a shape that resembles the center of a flower. When using the free-hand method, you can use a needle and thread to help you create a circular shape, or you can simply cut out a circle from your fabric. As you work on your flower center, you’ll start to see your flower take shape, and you can adjust your technique to achieve the look you want.

Assembling the Flower

Unlike other crafting projects, assembling a fabric flower requires patience and attention to detail. You will need to carefully arrange your petals and center to create a beautiful, realistic bloom.

Attaching the Petals

Pertaining to the petals, you will need to attach them to the base of the flower, working your way around the center. You can use a hot glue gun or a needle and thread to secure them in place.

Adding the Center

Behind the beautiful petals, the center of the flower is what gives it depth and dimension. You will need to choose a center that complements your petals and attaches securely to the base.

Adding a center to your fabric flower can be as simple as gluing a small button or bead to the middle, or as complex as creating a intricate design using embroidery floss or yarn. You can choose a center that matches your petals or contrasts with them, depending on the look you want to achieve. As you add the center, you will see your flower come to life, and with a few final touches, you will have a beautiful, handmade bloom.

Finishing Touches

Despite the flowers being almost complete, you can add some final details to make them more realistic and visually appealing. You can use techniques like layering, shaping, and arranging to create a beautiful fabric flower.

Adding Leaves or Stems

Before you start adding any embellishments, you can attach leaves or stems to your fabric flowers to give them a more natural look. You can use wire, glue, or thread to secure them in place, and adjust them to your desired shape and position.

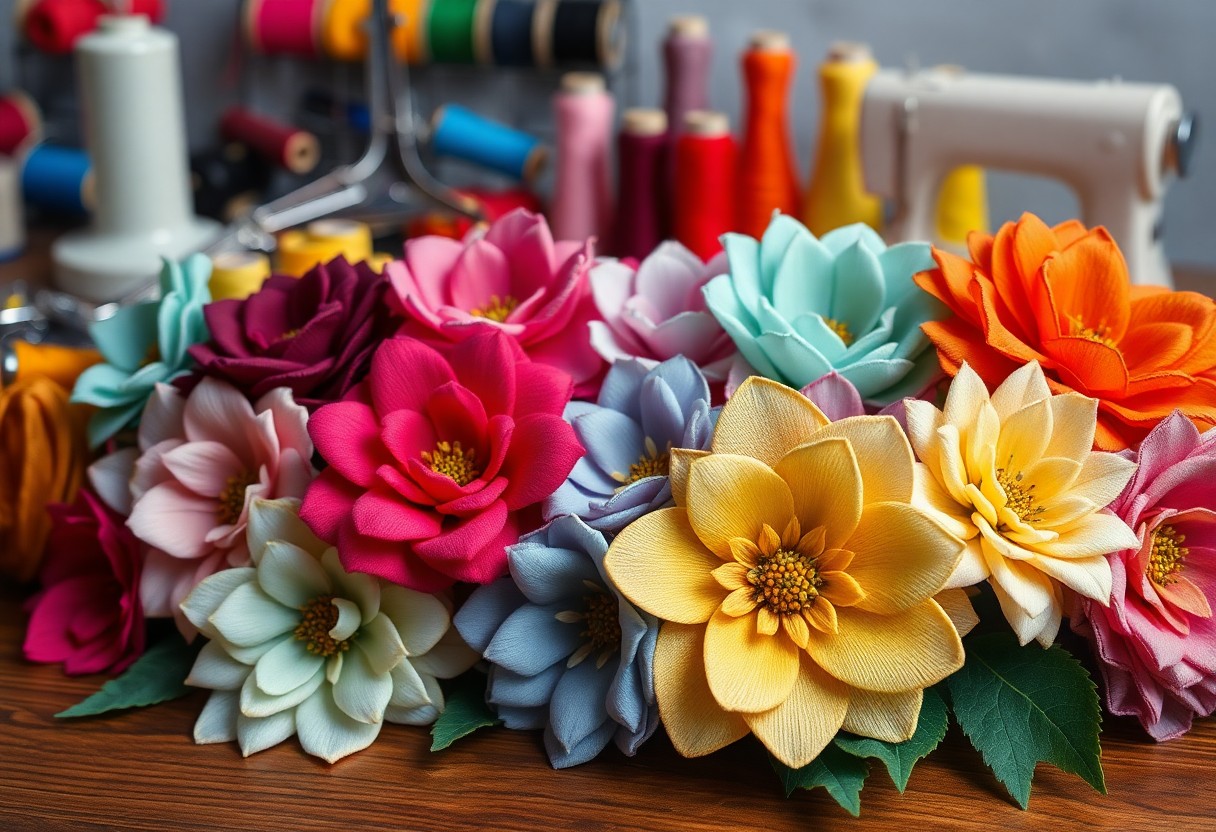
Embellishing the Flowers

Among the many ways to embellish your fabric flowers, you can use beads, sequins, or rhinestones to add a touch of sparkle and elegance. You can also experiment with different textures and colors to create a unique and personalized design.

Finishing the embellishing process, you will notice that your fabric flowers have transformed into beautiful, intricate creations. You can now use them to decorate your clothes, accessories, or home decor items, and enjoy the satisfaction of having created something beautiful with your own hands. You can also experiment with different embellishing techniques and materials to create a wide range of effects and styles.

Tips and Variations

After creating your fabric flowers, you can enhance them with various techniques. Consider the following:

  • Adding embellishments
  • Using different petal shapes

. Thou can customize your flowers to fit your style and project needs.

Experimenting with Colors

By exploring different color combinations, you can create unique fabric flowers that match your desired theme or decor. You can mix and match various hues to create ombre effects or contrasting colors to make your flowers stand out.

Mixing Fabric Textures

On the other hand, combining different fabric textures can add depth and visual interest to your flowers. You can pair smooth fabrics with lace or velvet to create a captivating contrast.

Also, when mixing fabric textures, you can experiment with layering different fabrics to achieve a dimensional look. You can use your fabric flowers to create beautiful brooches, hair clips, or embellishments for your clothing and home decor items, allowing you to express your creativity and personalize your projects.

To wrap up

Hence, you now have the basic knowledge to create your own fabric flowers. You can experiment with different fabrics, colors, and techniques to make your flowers unique. With practice, you will refine your skills and be able to create beautiful flowers to adorn your clothes, accessories, or home decor. Your handmade fabric flowers will add a personal touch to any project, and you will be proud of your creations.

FAQ

Q: What materials do I need to make fabric flowers?

A: To make fabric flowers, you will need a few basic materials, including fabric of your choice (cotton, silk, or satin work well), a pair of scissors, a hot glue gun, a wire stem or floral tape, and any additional embellishments you’d like to add, such as beads or rhinestones. You may also want to use a template or pattern to help you cut out your flower shapes.

Q: What types of fabric are best suited for making fabric flowers?

A: The type of fabric you choose will depend on the look and feel you want to achieve with your fabric flowers. Delicate fabrics like silk and chiffon work well for making realistic, petal-like flowers, while thicker fabrics like cotton and fleece can be used to create more rustic, textured flowers. You can also experiment with different fabric textures, such as velvet or lace, to add depth and interest to your flowers.

Q: How do I cut out the flower shapes from the fabric?

A: To cut out the flower shapes, start by tracing the template or pattern onto the fabric using a pencil or marker. Then, use a pair of sharp scissors to carefully cut out the shapes, making sure to follow the lines of the template. You can also use a craft knife or rotary cutter to cut out the shapes, but be careful not to cut yourself. If you’re using a intricate design, you may want to use a pair of embroidery scissors to get into the small areas.

Q: How do I assemble the fabric flowers?

A: To assemble the fabric flowers, start by gathering the cut-out flower shapes and arranging them in the desired order. Then, use a hot glue gun to attach the shapes together, starting from the center of the flower and working your way outwards. Make sure to apply even pressure to avoid creating wrinkles or creases in the fabric. You can also use a needle and thread to sew the shapes together, but hot glue tends to be faster and more convenient.

Q: How do I add the finishing touches to my fabric flowers?

A: To add the finishing touches to your fabric flowers, start by fluffing out the petals to create a natural, curved shape. Then, use a wire stem or floral tape to attach the flower to a base, such as a hair clip or brooch. You can also add embellishments like beads, rhinestones, or sequins to give your flowers a bit of sparkle and shine. Finally, use a spritz of fabric stiffener or hairspray to help hold the flower’s shape and prevent it from wilting or losing its shape over time.

The Joy of Fabric Crafts

As you explore the world of fabric crafts, you’ll discover a wide range of creative possibilities. You can express your personality and style through various techniques, from sewing and embroidery to quilting and patchwork. With your own two hands, you can transform simple fabrics into unique and functional items, such as clothing, accessories, or home decor. Your imagination and skills will guide you as you explore into this rewarding hobby.

Key Takeaways:

  • The therapeutic benefits of fabric crafts are numerous, as they provide an outlet for creativity and self-expression, allowing individuals to unwind and relax while producing something tangible and meaningful.
  • Fabric crafts offer a wide range of techniques and materials to explore, from sewing and embroidery to quilt-making and upcycling, making it easy to find a project that suits your skills and interests.
  • Engaging in fabric crafts can be a social activity, providing opportunities to connect with like-minded individuals through classes, workshops, and online communities, and to share ideas and inspiration with others who appreciate the art of fabric crafting.

Getting Started

The world of fabric crafts is waiting for you to explore, and it’s easier than you think to get started. You can begin with simple projects like sewing a tote bag or creating a quilt, and as you gain confidence, you can move on to more complex tasks.

Choosing the Right Fabric

By selecting the appropriate fabric for your project, you ensure that your final product turns out as expected. You will want to consider factors such as texture, color, and durability when making your selection, as these elements can greatly impact the overall outcome of your craft.

Essential Tools and Supplies

An investment in basic tools and supplies is necessary to begin your fabric craft journey. You will need items like a sewing machine, scissors, and thread to get started, and as you progress, you can add more specialized tools to your collection.

Plus, having a dedicated workspace with good lighting and storage for your supplies will help you stay organized and focused on your projects. You can set up a sewing station in a corner of your home and keep your fabrics, threads, and tools within easy reach, making it simpler for you to work on your crafts whenever inspiration strikes.

Sewing and Embellishments

One of the most satisfying aspects of fabric crafts is the ability to create unique and personalized items through sewing and embellishments. You can use your skills to make a wide range of items, from clothing and accessories to home decor and gifts. As you explore the world of sewing and embellishments, you’ll discover the many ways to express your creativity and bring your ideas to life.

Basic Stitches and Techniques

Along with the basics of sewing, you’ll learn various stitches and techniques that will help you to create professional-looking projects. You’ll master the straight stitch, backstitch, and running stitch, among others, and learn how to use them to construct a variety of items. Your sewing skills will improve with practice, and you’ll be able to tackle more complex projects as you gain confidence.

Adding Decorative Touches

Around the edges of your projects, you can add decorative touches such as ribbons, buttons, and embroidery floss to give them a personalized look. You can use these embellishments to add color, texture, and interest to your creations, making them truly unique and reflective of your personal style. Your ability to add these decorative touches will elevate your projects and make them stand out.

Also, as you experiment with different embellishments, you’ll find that you can use them to convey meaning and tell stories through your fabric crafts. You can choose embellishments that hold special significance, such as a button from a favorite garment or a piece of fabric from a memorable event, and incorporate them into your projects to make them even more meaningful. This will allow you to infuse your creations with emotional value and make them truly special.

Quilting and Patchwork

Now that you’ve discovered the world of fabric crafts, you can explore the delightful realm of quilting and patchwork, where you can create stunning textiles with your own hands.

Introduction to Quilting

Behind the scenes of every beautiful quilt lies a story of dedication and skill, as you will learn the basics of quilting and how to bring your unique vision to life.

Creating Unique Patchwork Designs

Between the varied fabrics, colors, and patterns, you can find endless inspiration for your patchwork designs, and as you experiment with different combinations, your creativity will flourish.

Creating unique patchwork designs allows you to express your personal style and add a touch of personality to your quilts, and as you become more confident in your skills, you can try more complex patterns and techniques to take your quilting to the next level, making each project a reflection of your artistic vision and your ability to bring it to life with your own hands.

Crafting with Felt and Yarn

Not only are felt and yarn versatile materials, but they also offer a wide range of creative possibilities. You can use them to make decorative items, accessories, and even functional objects, allowing you to express your personality and style.

Making Felt Flowers and Shapes

Filling your space with handmade felt decorations can be a great way to add a personal touch. You can create beautiful flowers, shapes, and designs using felt, and use them to embellish your clothing, accessories, or home decor, giving you a sense of accomplishment and pride in your creations.

Knitting and Crochet Essentials

Aside from felt, you can also explore the world of yarn by learning the basics of knitting and crochet. You will need to familiarize yourself with the necessary tools and materials, such as needles, hooks, and yarn types, to start creating your own projects, and as you progress, you can experiment with different techniques and patterns to create unique items.

Crocheting or knitting can be a fun and rewarding hobby, allowing you to create something with your own hands. As you research deeper into the world of knitting and crochet, you will discover the various types of yarn, needles, and hooks available, and you can choose the ones that suit your projects and preferences, enabling you to bring your ideas to life and enjoy the process of creating something from scratch.

Upcycling and Repurposing

Unlike traditional crafting methods, upcycling and repurposing allow you to breathe new life into old fabrics. You can find inspiration for SCRAP FABRIC SEWING PROJECTS on SCRAP FABRIC SEWING PROJECTS and get creative with your fabric scraps.

Turning Old into New

After collecting your fabric scraps, you can start transforming them into unique items, such as quilts, bags, or home decor.

Creative Ways to Reuse Fabric Scraps

Across various crafting communities, you’ll find numerous ways to reuse fabric scraps, from patchwork to embroidery, and you can experiment with different techniques to find your favorite.

Also, you can explore various textures, colors, and patterns to add depth and visual interest to your upcycled projects, making each item truly one-of-a-kind and reflecting your personal style, as you explore into the world of fabric upcycling and repurposing, you’ll discover the joy of giving old fabrics a new purpose.

Displaying and Sharing

All your hard work on fabric crafts deserves to be showcased, and there are many ways to do so. You can display your creations in your home, share them with friends and family, or even sell them online or at local markets.

Showcasing Your Creations

Exhibiting your fabric crafts can be a great way to add a personal touch to your home decor. You can hang your quilts or embroidery pieces on walls, or use decorative baskets to store and display your smaller items.

Gift-Giving and Selling Your Crafts

About the process of sharing your crafts with others, you’ll find that it’s a wonderful way to connect with like-minded people. You can give your crafts as gifts or sell them to those who appreciate handmade items.

In fact, selling your fabric crafts can be a lucrative hobby, and you can start by setting up an online shop or participating in local craft fairs. You’ll be able to share your passion with others and earn some extra income, which can be a very rewarding experience for you as a crafty person.

Conclusion

As a reminder, you have discovered the joy of fabric crafts and how it can enrich your life. You have learned various techniques to create unique items, from clothing to home decor. Your fabric craft journey can be a rewarding and creative outlet, allowing you to express yourself and produce beautiful pieces. You can continue to explore and develop your skills, enjoying the satisfaction of creating something with your own hands.

FAQ

Q: What is fabric crafting and how do I get started with it?

A: Fabric crafting, also known as textile crafting, is a fun and creative hobby that involves working with fabrics to create unique and personalized items such as clothes, accessories, home decor, and more. To get started, you’ll need some basic supplies like fabric, thread, scissors, and a sewing machine. You can find plenty of tutorials and patterns online or in craft books to help you learn various techniques and projects. Start with simple projects like making a tote bag or a pillowcase, and as you gain confidence and skills, you can move on to more complex projects.

Q: What types of fabric are best suited for beginners?

A: As a beginner, it’s best to start with fabrics that are easy to work with and forgiving, such as cotton, polyester, or blends. These fabrics are versatile, durable, and can be used for a variety of projects. Avoid working with delicate or slippery fabrics like silk or chiffon until you have more experience. You can also experiment with different fabric textures and weights, like fleece, flannel, or canvas, to add variety to your projects.

Q: What are some vital tools and materials needed for fabric crafting?

A: Some vital tools and materials needed for fabric crafting include a sewing machine, scissors, rotary cutter and mat, sewing needles, threads, and fabric glue. You’ll also need a measuring tape, seam ripper, and iron to help you with cutting, sewing, and finishing your projects. Depending on the specific project, you may also need additional materials like zippers, buttons, or ribbons. It’s a good idea to invest in good quality tools and materials to ensure that your projects turn out professional-looking and durable.

Q: Can I use fabric crafting to make gifts for my loved ones?

A: Absolutely! Fabric crafting is a great way to create personalized and thoughtful gifts for your loved ones. You can make items like customized t-shirts, tote bags, pillowcases, or blankets that are tailored to their interests and preferences. You can also add special touches like embroidery, appliques, or quilting to make your gifts truly unique and meaningful. Fabric crafted gifts are not only functional but also show that you care and are willing to put in the time and effort to create something special just for them.

Q: How can I join a community of fabric crafters and stay inspired?

A: There are many ways to join a community of fabric crafters and stay inspired. You can join online forums, social media groups, or local craft clubs to connect with other crafters, share ideas, and learn from their experiences. You can also attend workshops, classes, or conferences to learn new techniques and stay up-to-date with the latest trends. Follow your favorite craft bloggers, YouTube channels, or Instagram accounts to stay inspired and motivated. Additionally, you can participate in craft challenges, swaps, or charity projects to stay engaged and give back to the community.

Top Fabric Painting Techniques

As you explore the world of fabric painting, you’ll discover various methods to enhance your creations. You can achieve unique, professional-looking results by mastering different techniques. Your fabric painting skills will improve with practice and experimentation. You’ll learn to select the right tools, prepare your fabric, and apply paint with precision. With these techniques, you’ll unlock new creative possibilities and take your fabric painting to the next level, producing stunning pieces that reflect your personal style and artistic vision.

Key Takeaways:

To achieve professional-looking results in fabric painting, consider the following techniques:

  • Using resist methods, such as wax or starch, to create unique and intricate designs on fabrics like silk or cotton.
  • Applying layering techniques to build up colors and textures, allowing for greater control over the final appearance of the painted fabric.
  • Experimenting with blending methods, such as wet-on-wet or glazing, to achieve subtle, nuanced color transitions and shading effects in fabric paintings.

Preparing the Fabric

Your fabric painting journey begins with preparing the fabric, and this step is crucial to achieve the desired results. You need to choose the right fabric, prepare it for painting, and treat it to ensure the paint adheres well and lasts long.

Choosing the Right Fabric

Across various types of fabrics, you’ll find that natural fibers like cotton, linen, and silk work best for fabric painting. You can select a fabric that suits your project, considering factors like texture, weight, and color.

Pre-Treatment Methods

On the surface of your fabric, pre-treatment methods can make a significant difference. You can use methods like washing, drying, and ironing to prepare your fabric for painting, which helps to remove finishes and relax fibers.

Considering the type of fabric you’ve chosen, you may need to use specific pre-treatment methods. For example, you can use a fixative to prevent colors from bleeding or a fabric primer to create a smooth surface for painting. By doing so, you’ll ensure that your paint adheres well and your design turns out vibrant and long-lasting.

Basic Painting Techniques

Even if you’re a beginner, you can achieve professional-looking results with fabric painting by mastering the basics. You’ll need to understand color theory, brush strokes, and fabric preparation to get started.

Hand-Painting

Although hand-painting requires skill and patience, you can create unique designs with practice. You’ll be able to express your creativity and add personal touches to your projects.

Stenciling

By using stencils, you can add intricate designs and patterns to your fabric with ease. You’ll find that stenciling is a great way to achieve crisp, sharp lines and detailed designs.

Considering the variety of stencils available, you can choose from simple to complex designs, depending on your project’s requirements. You can use stencils to create repeat patterns, borders, or even entire scenes, making it a versatile technique to add to your fabric painting repertoire. You’ll be able to experiment with different stencil materials, such as plastic or metal, to achieve the desired effect on your fabric.

Advanced Techniques

Not for beginners, these methods take your fabric painting to the next level:

  1. Shibori
  2. Batik
Technique Description
Shibori Resist dyeing
Batik Wax resist

Ombre Effect

Across the fabric, you can achieve a gradual color transition by layering paints, creating a stunning ombre effect that adds depth to your work.

Resist Method

Behind the resist method lies a simple technique: applying a resist agent to your fabric before painting, allowing you to create unique, intricate designs.

Advanced techniques like the resist method require practice, but with patience, you can master the process, experimenting with different resist agents and paint combinations to achieve your desired effects, taking your fabric painting to new heights, and enabling you to create complex, multicolored designs that showcase your skill and artistry.

Design and Pattern Creation

For creating unique designs, you can visit 10 Practical Tips for Fabric Painting to explore various techniques. This will help you to enhance your fabric painting skills and create stunning designs.

Free-Hand Design

Around the time you start painting, you’ll find that free-hand design allows you to express your creativity freely, enabling you to bring your imagination to life on the fabric.

Geometric Patterns

Among the various patterns you can create, geometric patterns are a popular choice, offering a wide range of possibilities for your fabric painting projects.

At the heart of geometric pattern creation lies the use of shapes, such as triangles, squares, and circles, which you can arrange to form complex and beautiful designs, allowing you to add your personal touch to your fabric painting projects, and with practice, you’ll be able to create intricate patterns that elevate your work to the next level.

Color Selection and Mixing

To achieve vibrant and unique designs, you need to understand the fundamentals of color selection and mixing. You will learn how to choose the perfect colors for your fabric painting project and create custom hues that enhance your artwork.

Color Theory Basics

Against a backdrop of color theory, you will discover how to select colors that complement each other, creating a visually appealing palette for your fabric painting. You will understand the color wheel and how to use it to choose harmonious colors.

Mixing Custom Colors

Behind the art of mixing custom colors lies a simple technique that you can master with practice. You will learn how to combine different colors to create unique shades and tints that add depth to your fabric painting.

But as you investigate deeper into mixing custom colors, you will find that the possibilities are endless, and you can experiment with various techniques to achieve the desired effects. You can mix colors to create subtle pastels, rich jewel tones, or bold neons, depending on your artistic vision and the mood you want to convey in your fabric painting.

Special Effects and Finishing Touches

All the techniques you’ve learned so far can be enhanced with special effects and finishing touches, taking your fabric painting to the next level. You can experiment with different methods to achieve unique results, making your artwork truly personalized.

Adding Textures

Above all, adding textures can give your fabric painting depth and dimension, allowing you to create intricate and interesting designs. You can use various materials like fabric paint, glue, or even found objects to achieve the desired texture.

Sealing the Paint

Alongside protecting your artwork, sealing the paint ensures your fabric painting lasts longer and withstands wear and tear. You can use a fabric sealant or varnish to protect your design and make it more durable.

Among the various options available for sealing your paint, you can choose a spray or brush-on sealant, depending on your preference and the type of fabric you’re working with. You can also consider using a fixative to prevent the paint from smudging or fading, giving your artwork a professional finish and making it easier to care for.

Final Words

As a reminder, you now have the knowledge of top fabric painting techniques at your fingertips. You can apply these methods to create unique and personalized items, elevating your artistic skills. With practice, you will master your skills, and your fabric paintings will become truly exceptional, reflecting your style and creativity. You will be able to experiment with different techniques, making your projects stand out, and showcasing your artistic talent.

FAQ

Q: What are the basic supplies needed for fabric painting?

A: To get started with fabric painting, you will need a few basic supplies, including high-quality fabric paint, a paintbrush or sponge, a palette or plate for mixing colors, a cup of water, and a piece of fabric to paint on. It’s also a good idea to have a smock or apron to protect your clothing, as well as a well-ventilated workspace. Additionally, you may want to consider using a stabilizing material, such as interfacing or freezer paper, to help keep your fabric smooth and prevent it from stretching or distorting while you work.

Q: What are some popular fabric painting techniques for creating unique designs?

A: There are several popular fabric painting techniques that can be used to create unique and interesting designs, including tie-dye, shibori, and resist dyeing. Tie-dye involves folding or pleating the fabric to create resistance areas, and then applying dye to the folded fabric. Shibori is a Japanese technique that involves folding or twisting the fabric to create intricate patterns and designs. Resist dyeing involves applying a resist, such as wax or starch, to the fabric before applying dye, to create intricate and detailed designs.

Q: How do I prepare my fabric for painting?

A: Before painting on fabric, it’s a good idea to pre-wash and dry the fabric to remove any finishes or impurities that may affect the paint’s adhesion. You should also iron the fabric to remove any wrinkles, and consider applying a stabilizing material, such as interfacing or freezer paper, to the back of the fabric to help keep it smooth and prevent it from stretching or distorting while you work. Additionally, you may want to consider using a primer or gesso to create a smooth, even surface for painting.

Q: What are some tips for achieving vibrant and long-lasting colors when painting on fabric?

A: To achieve vibrant and long-lasting colors when painting on fabric, it’s a good idea to use high-quality fabric paint that is specifically designed for the type of fabric you are working with. You should also follow the instructions on the paint label carefully, and make sure to apply thin, even coats of paint, allowing each coat to dry completely before applying the next. Additionally, you may want to consider using a fixative or sealant to help set the colors and prevent them from fading or running over time.

Q: How do I care for and maintain my fabric painting after it’s complete?

A: To care for and maintain your fabric painting, you should avoid washing it in hot water or using harsh detergents, as these can cause the colors to fade or run. Instead, wash the fabric in cold water using a mild detergent, and allow it to air dry. You should also avoid exposing the fabric to direct sunlight or high temperatures, as these can cause the colors to fade or degrade over time. Additionally, you may want to consider applying a fabric finisher or textile sealant to help protect the fabric and extend its lifespan.

How to Craft with Recycled Fabric

You can breathe new life into old clothes and textiles by crafting with recycled fabric. As you explore this creative outlet, you’ll discover the potential to transform your old garments into unique pieces. Your imagination and creativity will guide you in turning discarded fabrics into functional items, such as bags, quilts, or home decor. By following simple steps, you can create one-of-a-kind projects that showcase your style and reduce waste.

Key Takeaways:

To get the most out of crafting with recycled fabric, consider the following points:

  • Start by collecting and sorting various types of recycled fabric, such as old clothes, linens, and textile scraps, to determine the best materials for your project.
  • Transform your recycled fabric into unique creations by applying different techniques, like dyeing, cutting, and stitching, to give new life to old materials.
  • Be creative and experiment with various designs and patterns to turn your recycled fabric into functional items, such as bags, quilts, or home decor accessories.

Preparing Recycled Fabric

To start crafting with recycled fabric, you need to prepare your materials. This involves several steps that will help you work efficiently and effectively with your fabric scraps.

Sorting and Cleaning Fabric

With a keen eye for detail, you will separate your fabric scraps into different categories based on their texture, color, and size, and then clean them to remove any dirt or debris.

Cutting and Processing Techniques

Sorting through your fabric scraps, you will identify the best cutting and processing techniques to use for your project, taking into account the type of fabric and the desired outcome.

It is necessary to consider the texture and stability of the fabric when cutting and processing, as some fabrics may fray or stretch more than others, and you will need to adjust your techniques accordingly to achieve the desired results for your craft project.

Choosing the Right Projects

Some of the most important decisions you’ll make when crafting with recycled fabric involve selecting the right projects for your skills and materials.

Considering Fabric Types and Texture

You’ll want to consider the types of fabric you have available and their textures, which can include:

  • Cotton
  • Polyester
  • Linen

. Any project you choose should be suitable for your fabric.

Fabric Type Project Ideas
Cotton Quilts, dresses
Polyester Upholstery, bags
Linen Home decor, accessories
Mixed Collage, patchwork
Silk Scarves, blouses

Selecting Patterns and Designs

Patterns are key to creating visually appealing projects. You can find inspiration in nature, art, or even your favorite clothes.
To get started, look for patterns that match your skill level and the type of fabric you’re using. You can find many free patterns online or create your own using graph paper and pencils. Consider the color palette and theme of your project, and don’t be afraid to experiment with different combinations of fabrics and textures.

Essential Tools and Materials

After gathering your recycled fabric, you’ll need to prepare your workspace with the necessary tools and materials to bring your project to life. You’ll be working with various textures and colors, so it’s crucial to have the right equipment on hand.

Basic Sewing Kit

Adeptly, you will need a basic sewing kit that includes a sewing machine, needles, threads, and scissors to help you cut and sew your recycled fabric into the desired shape and size.

Additional Crafting Supplies

Similarly, materials like fabric glue, buttons, and embroidery floss can add an extra touch to your project, allowing you to get creative with your recycled fabric crafting.

Tools like rotary cutters, cutting mats, and tape measures will also come in handy when working with your additional crafting supplies, enabling you to accurately measure and cut your fabric, and assemble your project with ease, as you work to transform your recycled fabric into a unique and personalized item that reflects your style and creativity.

Tips for Working with Recycled Fabric

For successful crafting with recycled fabric, consider the following:

  • Choose fabrics that are clean and dry
  • Sort fabrics by type and color

This will help you create beautiful and unique projects.

Handling Delicate or Thick Fabrics

Likewise, when working with delicate or thick fabrics, you need to handle them with care to avoid damage or distortion.

Minimizing Waste and Maximizing Usage

There’s always a way to minimize waste when working with recycled fabric, and you can get creative with even the smallest scraps.

With a little planning and strategy, you can maximize your usage of recycled fabric and reduce waste in your crafting projects. You can use small scraps to create patchwork designs, or cut them into strips for quilting or rug-making. By getting creative with your fabric scraps, you can create unique and eco-friendly crafts that showcase your resourcefulness and skill.

Factors to Consider in Crafting

Not all recycled fabrics are created equal, and you should consider several factors when choosing materials for your project. Some key considerations include:

  • Fabric type and weight
  • Color and texture
  • Thou should think about these factors to ensure your project turns out as desired.

    Color and Texture Combinations

    Equally important is selecting color and texture combinations that complement each other, as you want your finished project to be visually appealing, and you can achieve this by choosing fabrics that work well together.

    Durability and Longevity of Projects

    Equally, when working with recycled fabrics, you need to consider the durability and longevity of your projects, and you can do this by choosing fabrics that are sturdy and long-lasting, and will withstand use and washing.

    The durability and longevity of your projects will also depend on the techniques you use to construct them, and you should choose methods that will ensure your project remains intact over time, such as using strong stitches and reinforcing seams, and by doing so, you will create a beautiful and long-lasting piece from your recycled fabrics.

    Advanced Techniques and Ideas

    Now that you have mastered the basics, you can explore more complex projects, such as:

    1. Upcycling old clothes

    Visit 13 Ideas for Textile Recycling DIY and Fabric Scrap Crafts for inspiration.

    Technique Description

    Embellishments and Decorations

    Embellishing your projects with ribbons, buttons, or appliques can add a personal touch, allowing you to customize your creations to fit your style, and with your imagination, you can create unique pieces.

    Creating Complex Patterns and Designs

    Designing intricate patterns and motifs can elevate your crafts, and by experimenting with different colors, textures, and shapes, you can develop your own distinctive aesthetic.

    Ideas for complex patterns include combining disparate fabrics, playing with scale and proportion, and incorporating unexpected materials, which will help you to create visually striking and imaginative pieces, as you continue to experiment and innovate, you will develop your skills and style, enabling you to craft items that reflect your personality and creativity.

    Final Words

    Hence, you have learned the basics of crafting with recycled fabric, and now you can unleash your creativity to repurpose old materials into unique items. You will be reducing waste and creating something truly special with your own hands. As you continue to experiment with your craft, you will discover new ways to breathe new life into your recycled fabric, making your projects even more personalized and meaningful to you and your loved ones.

    FAQ

    Q: What are the best types of recycled fabric to use for crafting?

    A: The best types of recycled fabric to use for crafting include old t-shirts, denim jeans, cotton sheets, and felted wool sweaters. These fabrics are durable, easy to work with, and can be transformed into a variety of unique and creative projects, such as quilts, bags, and home decor items. You can also experiment with other recycled materials like plastic bags, old umbrellas, and fabric scraps to add an extra layer of eco-friendliness to your crafts.

    Q: How do I prepare recycled fabric for crafting?

    A: To prepare recycled fabric for crafting, start by washing and drying the fabric to remove any dirt, stains, or finishes that may affect the fabric’s texture or color. Then, iron the fabric to remove wrinkles and creases, and cut it into the desired shape and size for your project. If the fabric is particularly fragile or prone to fraying, you can stabilize it with a layer of interfacing or fusible web to make it easier to work with. Additionally, consider sorting and categorizing your recycled fabrics by color, texture, and weight to make it easier to find the perfect fabric for your next project.

    Q: What are some creative ways to craft with recycled fabric?

    A: There are many creative ways to craft with recycled fabric, including upcycling old clothing into new garments, such as turning old t-shirts into reusable bags or creating a quilt from vintage denim jeans. You can also use recycled fabric to make home decor items, like pillow covers, table runners, and wall hangings. Other ideas include creating stuffed animals or dolls from recycled fabric scraps, making fabric jewelry or accessories, and even crafting functional items like coasters, potholders, and market bags. The possibilities are endless, and the best part is that you can feel good about reducing waste and giving old fabrics a new life.

Skip to content