DIY

Creative DIY Projects for Beginners

As you commence on your DIY journey, your imagination unfolds like a canvas, waiting for vibrant colors and bold brushstrokes. You’re about to unlock a world where everyday objects transform into unique treasures, and your creativity knows no bounds. With these innovative projects, you’ll discover the thrill of shaping your surroundings, making your space a reflection of your personality, and unleashing the maker within you, step by step, into a world of endless possibilities.

Key Takeaways:

  • Start with simple and affordable DIY projects that require minimal materials and equipment, allowing you to build confidence and develop your skills.
  • Explore various DIY project ideas, such as woodworking, painting, or upcycling, to find what suits your interests and strengths, and to discover new creative outlets.
  • Utilize online resources and tutorials to learn new techniques, get inspiration, and troubleshoot common issues, helping you to complete your DIY projects successfully and safely.

Getting Started

Before plunging into the world of DIY projects, you’ll want to acquaint yourself with the basics. This is where your creative journey begins, and the possibilities are endless. You’ll discover the joy of bringing your ideas to life, and the sense of pride that comes with creating something with your own hands.

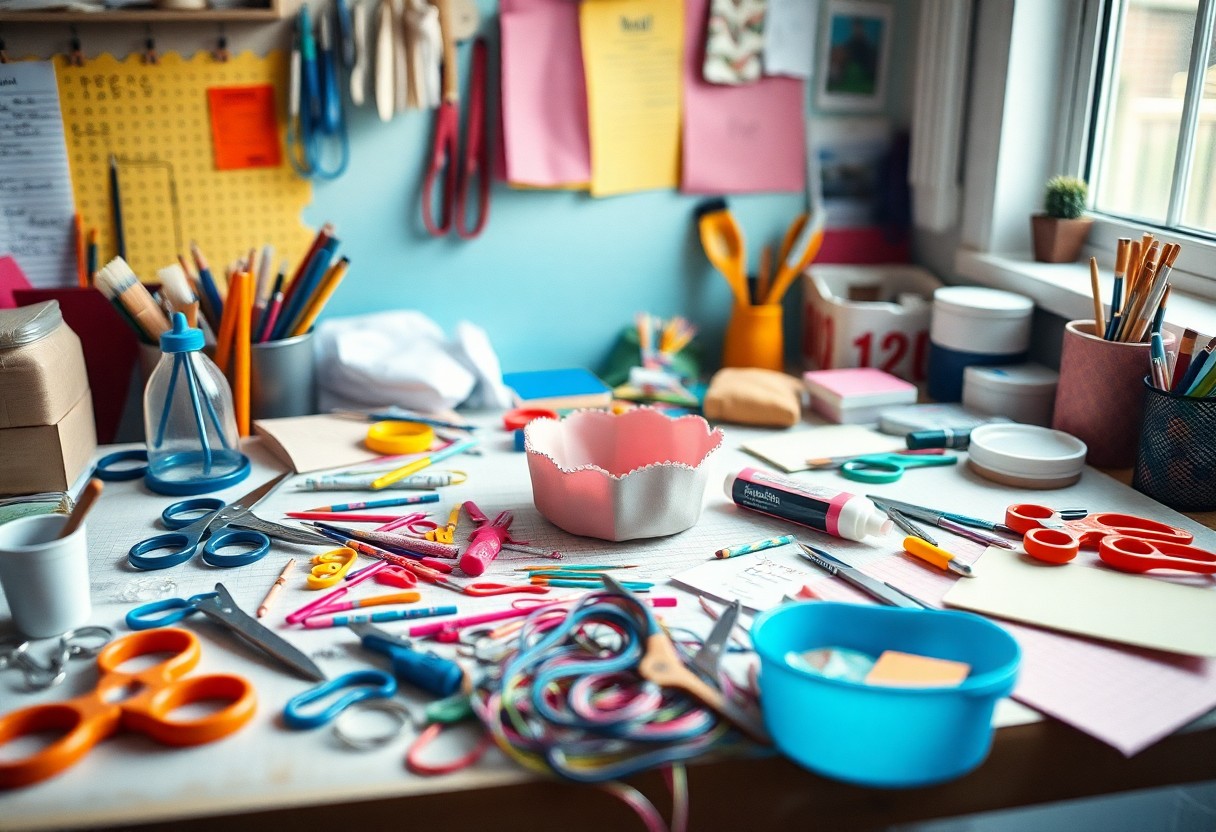
Gathering Materials and Tools

Beneath the surface of every DIY project lies a foundation of imperative materials and tools. Between the various options available, you’ll need to choose the ones that suit your project best, considering factors like quality, price, and availability. You’ll find that having the right tools at your disposal makes all the difference in the world.

Setting Up Your Workspace

After selecting your materials and tools, it’s time to set up your workspace. Amidst the chaos of your daily life, you’ll need to carve out a dedicated area where you can focus on your craft, free from distractions and clutter. You’ll want your workspace to be a sanctuary where your creativity can flourish, and your imagination can run wild.

In addition to a clear and comfortable workspace, you’ll also want to consider factors like lighting, ventilation, and storage. You’ll find that a well-organized workspace not only boosts your productivity but also inspires you to try new things, experiment with different techniques, and push the boundaries of your creativity. As you settle into your workspace, you’ll begin to feel a sense of ownership and belonging, and your DIY projects will start to take shape in exciting and unexpected ways.

Simple DIY Projects

Clearly, the world of DIY is full of endless possibilities, and as a beginner, you’re about to commence on a journey of creativity and self-expression. You’ll find that simple DIY projects are the perfect way to get started, allowing you to explore your imagination and bring your ideas to life.

Decorative Items for Your Home

Amazingly, you can create unique decorative items for your home with just a few simple materials. You can make your own candles, photo frames, or wall art, adding a personal touch to your living space and making it truly yours.

Handmade Gifts for Loved Ones

Simply, making handmade gifts for your loved ones is a thoughtful and meaningful way to show you care. You can create personalized jewelry, knitted scarves, or customized mugs, putting your heart and soul into every detail.

This way, you’ll not only be giving a gift, but also a piece of yourself, making it a truly special and cherished present. As you explore the world of handmade gifts, you’ll discover the joy of creating something with your own hands, and the happiness it brings to both you and the recipient.

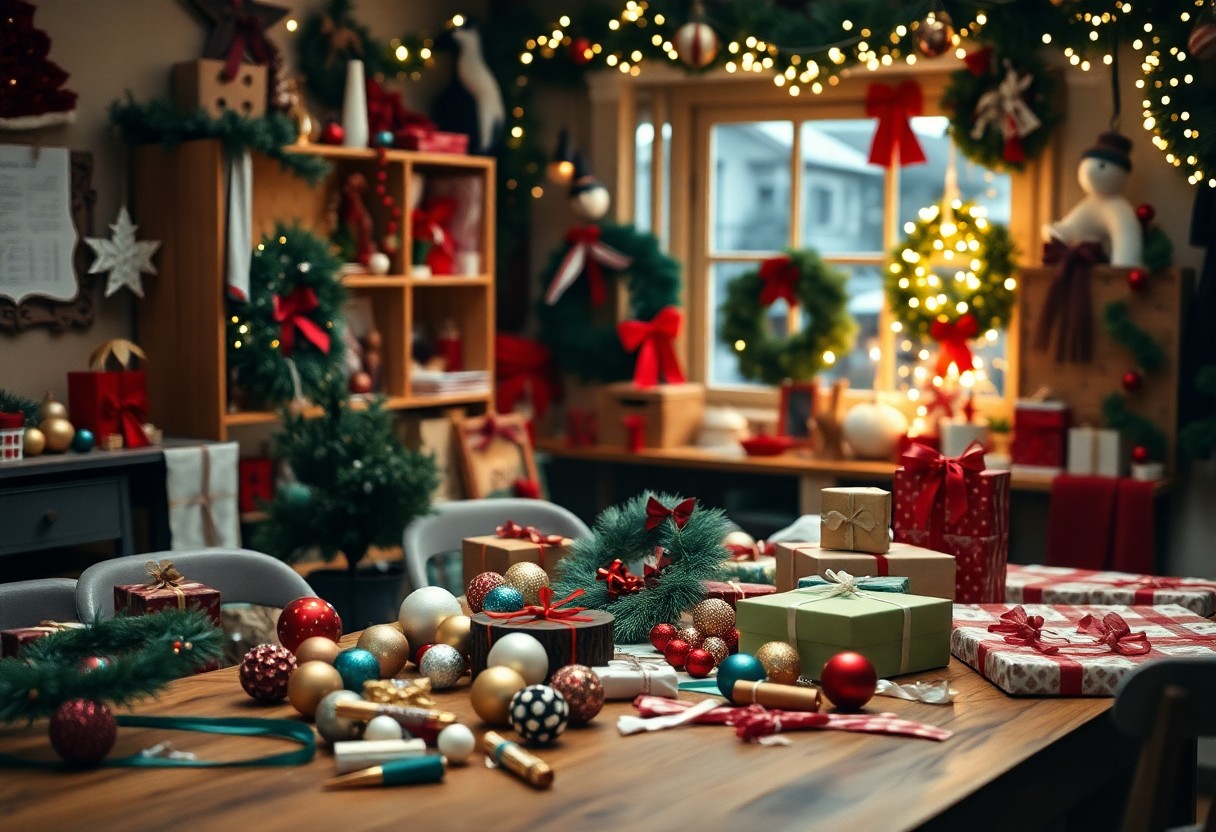
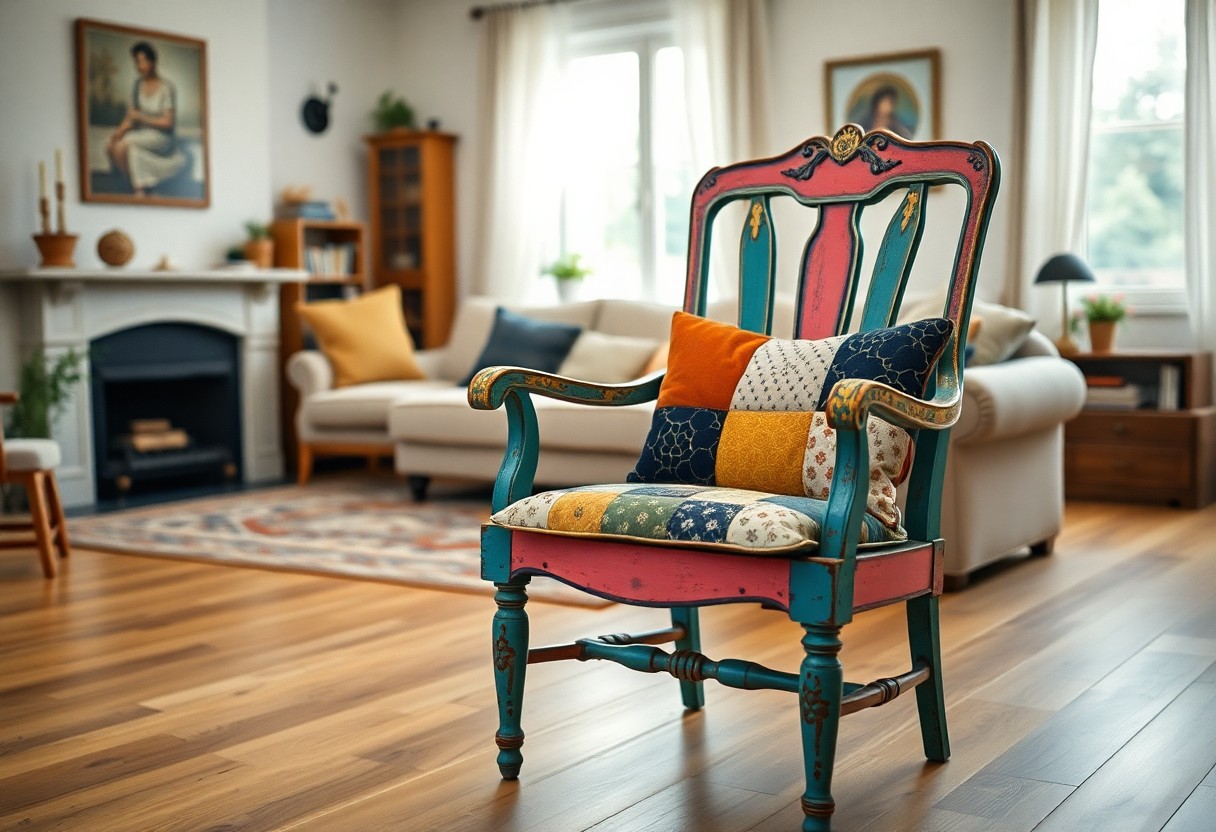
Upcycling and Repurposing

Keep your creativity sparked with upcycling and repurposing projects that breathe new life into old items, inviting you to reimagine your space with unique, handmade treasures.

Turning Old into New

Across DIY, you’ll discover countless ways to transform discarded items into functional pieces that reflect your personality, as you craft and shape your surroundings with imagination and flair.

Creative Ways to Reuse Materials

Towards the heart of upcycling lies the art of reuse, where you’ll find innovative methods to repurpose materials, giving them a fresh purpose and allowing your creativity to flourish.

It is in this process of creative reuse that you’ll uncover the true magic of DIY, as you experiment with various materials and techniques, shaping them into one-of-a-kind creations that tell a story of your ingenuity and craftsmanship, inspiring you to continue exploring the endless possibilities of upcycling and repurposing.

Exploring Different Crafts

Unlike other hobbies, crafting allows you to express your creativity and bring your ideas to life. You can explore various crafts, from painting to sewing, and discover what suits your style and skills.

Painting and Drawing

After getting familiar with the basics, you’ll find that painting and drawing can be a great way to unwind and tap into your imagination. You can start with simple exercises and gradually move on to more complex projects, allowing your creativity to flourish.

Sewing and Embroidery

Above all, sewing and embroidery offer a unique opportunity to create something with your own hands, from clothing to home decor. You can choose from a variety of fabrics, threads, and techniques to create truly personalized items.

With every stitch, you’ll develop your skills and confidence, and soon you’ll be creating beautiful, functional items that reflect your personality and style. You can make clothes, accessories, or home decor items, and even give them as gifts or sell them, sharing your creativity with others.
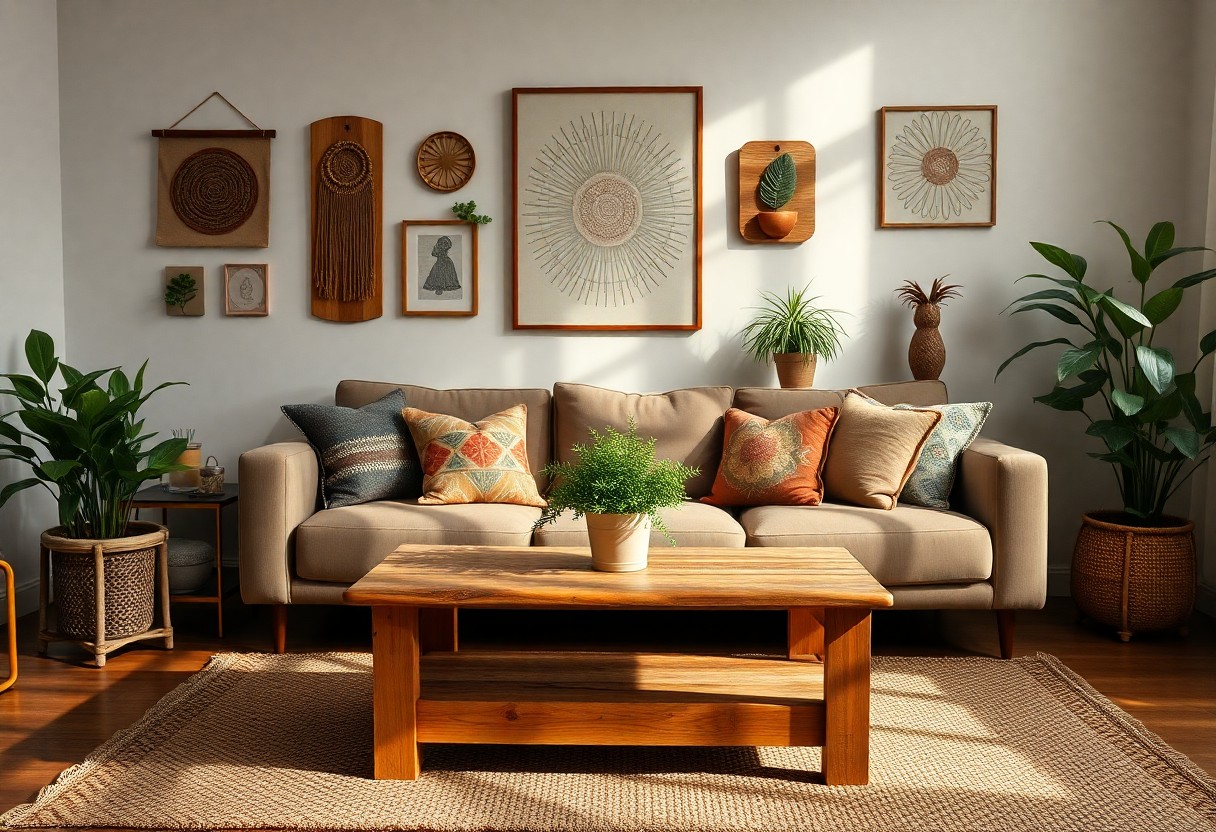
DIY Home Decor

Your home is a reflection of your personality, and with DIY projects, you can turn it into a haven. For inspiration, check out Beginner DIY Projects to get started on your creative journey.

Creating a Cozy Atmosphere

Any effort you put into creating a warm and inviting space will be worth it. You can begin by adding soft lighting, plush throw blankets, and comfortable seating to make your home feel cozy and welcoming.

Personalizing Your Space

An eye for detail can make all the difference in turning your house into a home. You can start by adding personal touches such as family photos, artwork, or collectibles that reflect your personality and style.

Understanding what makes your space unique is key to personalizing it. You can experiment with different colors, textures, and patterns to create a look that is distinctly yours. As you launch on this creative journey, you’ll find that your space becomes a reflection of your personality, values, and experiences, making it a true haven that nourishes your mind, body, and soul.

Overcoming Challenges

Despite the excitement of starting a new DIY project, you will inevitably encounter obstacles. Don’t be discouraged, as these challenges are an opportunity for growth and learning. You will develop problem-solving skills and gain confidence in your abilities as you work through each issue.

Dealing with Mistakes and Failures

Albeit frustrating, mistakes are a natural part of the creative process. You will learn to analyze what went wrong and adjust your approach accordingly, developing your skills and technique with each attempt.

Staying Motivated and Inspired

By surrounding yourself with creative influences and like-minded individuals, you will find the inspiration to push through difficult times and stay motivated to complete your project. Your imagination and enthusiasm will be sparked, driving you to bring your vision to life.

Failures can be daunting, but they also present a chance to reassess and refine your approach. As you navigate the ups and downs of DIY projects, you will discover that your perseverance and determination are key to overcoming challenges and achieving your goals. You will emerge from each experience with newfound knowledge and a deeper understanding of your creative capabilities, empowering you to tackle even more ambitious projects in the future.

Final Words

To wrap up, you’ve now commenceed on a journey of creative discovery, with a plethora of DIY projects at your fingertips. As you probe into your first endeavors, your imagination will soar, and your unique voice will shine through in every craft. You’ll find that the world of DIY is a realm where your dreams and creativity know no bounds, and the joy of making something with your own hands is a treasure to behold, waiting for you to uncover.

FAQ

Q: What are some easy and fun DIY projects for beginners?

A: There are numerous DIY projects perfect for beginners, including painting, drawing, knitting, woodworking, and upcycling old items. These projects are great for those new to DIY as they require minimal investment and can be completed with basic tools and skills. For instance, you can start with simple woodworking projects like building a birdhouse or a picture frame, or try your hand at upcycling old jars into decorative pieces.

Q: What materials and tools do I need to get started with DIY projects?

A: The materials and tools needed for DIY projects vary depending on the specific project. However, some basic tools that every beginner should have include a hammer, screwdriver, pliers, and a tape measure. Additionally, having a well-stocked craft box with items like glue, scissors, and paint can be helpful. It’s also a good idea to invest in a beginner’s toolkit that includes a variety of basic tools. For specific projects, you may need additional materials like fabric, wood, or yarn, which can be found at craft stores or online.

Q: How do I choose the right DIY project for my skill level and interests?

A: Choosing the right DIY project involves considering your skill level, interests, and available time. Start by browsing online tutorials, blogs, or social media platforms to find projects that appeal to you. Look for projects labeled as “beginner-friendly” or “easy” to ensure they’re suitable for your skill level. You can also consider what you enjoy doing in your free time, such as painting, sewing, or woodworking, and find projects that align with those interests. Additionally, read reviews and comments from others who have completed the project to get an idea of the challenges and rewards involved.

Q: What are some common mistakes beginners make when working on DIY projects, and how can I avoid them?

A: Common mistakes beginners make when working on DIY projects include not following instructions carefully, using low-quality materials, and not taking necessary safety precautions. To avoid these mistakes, make sure to read and follow instructions carefully, and take your time when working on a project. Invest in good-quality materials, even if they’re a bit more expensive, as they will last longer and produce better results. Additionally, always wear protective gear like gloves and safety glasses when working with power tools or materials that can cause injury. It’s also a good idea to practice safety habits like keeping your workspace clean and well-lit, and avoiding distractions while working.

Q: How can I display and showcase my finished DIY projects, and what are some tips for sharing them with others?

A: There are many ways to display and showcase your finished DIY projects, depending on the type of project and your personal style. You can display your projects in your home, give them as gifts, or share them online through social media platforms or blogs. To showcase your projects, consider using decorative items like frames, shelves, or shadow boxes. When sharing your projects with others, be sure to include detailed photos and descriptions, and provide tips and advice for those who want to try the project themselves. You can also join online communities or forums to connect with other DIY enthusiasts and share your projects with a wider audience. Additionally, consider entering your projects into local craft fairs or competitions to get feedback and recognition for your work.

DIY Home Decor Ideas

As you commence on the journey to make your house a home, you’re likely looking for ways to add your personal touch without breaking the bank. You want your space to reflect your unique style and personality. With a little creativity and some DIY magic, you can turn your living space into a warm and inviting oasis that showcases your flair. You’ll discover how to transform your home with simple, functional, and beautiful DIY projects that bring your vision to life.

Key Takeaways:

To upgrade your space with affordable and creative solutions, consider the following:

  • Start with repurposing old items, such as turning old jars into vases or transforming pallets into shelves, to add a personal touch to your home decor.
  • Use natural elements like plants, wood, and stone to bring warmth and texture to your space, and combine them with lighting to create a cozy atmosphere.
  • Get inspired by upcycling ideas, such as turning old furniture into planters or creating wall art from fabric, to give your home a unique and eclectic feel.

Planning and Preparation

Before you start your DIY home decor project, take a look at 900+ Best DIY Home Decor ideas for inspiration. This will help you get a sense of what you like and what you want to achieve.

Assessing Your Space

The first step in planning your DIY home decor project is to assess your space. Take stock of the rooms you want to decorate, considering factors like natural light, furniture, and traffic flow.

Setting a Budget

Beside the excitement of starting your project, it’s crucial to think about your budget. You’ll need to consider the cost of materials, tools, and any additional help you might need.

Setting your budget is an important part of the planning process. You’ll want to determine how much you can afford to spend on your DIY home decor project, and then prioritize your spending based on your needs and wants. Consider making a list of the materials and tools you’ll need, and then pricing them out to get a sense of the total cost. This will help you stay on track and avoid overspending as you work on your project.

Painting and Color Schemes

Clearly, a fresh coat of paint can transform your space, and with the right color scheme, you can create a cohesive look that reflects your personal style. You can choose from a wide range of colors and techniques to achieve the desired effect.

Choosing the Right Colors

Prior to selecting your colors, consider the natural light, furniture, and decor in your room to ensure a harmonious palette. You can test samples on your walls to see how the colors look at different times of day.

Painting Techniques

Beneath the surface of a beautiful paint job lies a well-executed technique. You can achieve unique effects with methods like ombre, stripes, or stenciling, adding texture and visual interest to your walls.

In addition, to master various painting techniques, you can practice on a small area first, and don’t be afraid to experiment and try new things – it’s all part of the DIY process, and you might be surprised at how a simple technique can elevate your space.

Furniture Makeover

After giving your old furniture a fresh new look, you’ll be amazed at the transformation. With a little creativity, you can turn outdated pieces into unique and functional decor that reflects your personal style.

Upcycling Old Furniture

Renovating your existing furniture can be a fun and rewarding experience. You can update the look of your old furniture by repainting, reupholstering, or refinishing it to give it a brand new appearance that fits your current decor.

Repurposing Items

Along with updating your furniture, you can also breathe new life into old items. You can turn an old door into a coffee table or use mason jars as vases to add a touch of rustic charm to your space.

Items like old ladders, windows, and pallets can be repurposed into functional and decorative pieces, such as bookshelves, mirrors, or headboards. You can get creative and experiment with different materials to give your space a unique and personalized touch, making your DIY home decor project truly one-of-a-kind.

Lighting and Textiles

Keep your space cozy and inviting with a thoughtful balance of lighting and textiles, as you create a warm atmosphere that reflects your personal style.

Lighting Fixtures and Lamps

By choosing the right lighting, you can set the tone for your entire room, making it feel more welcoming and comfortable, and you can easily find the perfect fixtures and lamps to suit your taste.

Throws, Rugs, and Pillows

Throws can add a pop of color and texture to your space, and you can use them to tie together your furniture and decor, creating a cohesive look that feels uniquely yours.

At the heart of a beautifully decorated room are the textiles that bring it all together, and as you select your throws, rugs, and pillows, consider the colors, patterns, and textures that will complement your furniture and decor, and don’t be afraid to mix and match to create a look that’s all your own.

Wall Decor and Shelves

All you need is a little creativity to turn your walls into a beautiful display of your personal style. With a few simple DIY projects, you can add texture, depth, and visual interest to any room in your home.

Creating a Gallery Wall

Around every corner, you’ll find inspiration for your gallery wall, from family photos to artwork and collectibles. Gather your favorite pieces and start arranging them in a way that feels organic and visually appealing to you.

Installing Shelves and Ledges

Before you start drilling holes, take a moment to plan out your shelf layout and consider the weight and size of the items you’ll be displaying. This will ensure a sturdy and balanced installation that complements your wall decor.

In fact, installing shelves and ledges can be a great way to add storage and display space to your walls, and with the right tools and materials, you can achieve a professional-looking result that enhances the overall aesthetic of your home. As you work on this project, think about the style and functionality you want to achieve, and don’t hesitate to get creative with the design and placement of your shelves and ledges to make them truly your own.

Outdoor and Seasonal Decor

Many homeowners enjoy decorating their outdoor spaces to reflect their personal style and the current season. You can create a beautiful and inviting atmosphere in your yard with a few simple decorations.

Patio and Garden Ideas

With a little creativity, you can turn your patio and garden into a stunning outdoor oasis. You can add decorative planters, string lights, and comfortable seating to create a cozy atmosphere.

Seasonal Decorating Tips

Outdoor decorations can be easily changed with the seasons. You can try:

  • Adding seasonal flowers and plants
  • Using themed decor, such as wreaths and garlands

Perceiving the beauty of nature, you can create a unique and welcoming outdoor space that reflects your personal style.

Indeed, decorating your outdoor space for the seasons can be a fun and creative process. You can try:

  • Creating a winter wonderland with lights and snowflakes
  • Welcoming spring with colorful flowers and pastel colors

Perceiving the possibilities, you can create a beautiful and inviting outdoor space that you’ll enjoy all year round.

Final Words

Presently, you have all the DIY home decor ideas you need to transform your space into a warm and inviting oasis. With these simple and functional projects, you can create a home that reflects your personal style and makes you feel cozy and relaxed. You can now confidently take on your next DIY project, turning your house into a beautiful home that you’ll love spending time in, and making it truly your own.

FAQ

Q: What are some easy and affordable DIY home decor ideas to try?

A: Some easy and affordable DIY home decor ideas include repurposing old items like mason jars, wooden crates, and vintage windows to create unique decorative pieces. You can also try making your own wall art using paint, stencils, or photographs. Additionally, consider upcycling old furniture by refinishing or reupholstering it to give it a fresh new look. Other ideas include creating a gallery wall, making a headboard from reclaimed wood, or using string lights to add ambiance to a room.

Q: What are some popular DIY home decor trends right now?

A: Some popular DIY home decor trends right now include minimalist decor, industrial chic, and bohemian style. Many people are also incorporating natural elements like plants, wood, and stone into their decor. Another trend is using bold colors and patterns to add personality to a room. You can also try incorporating texture and mixed metals to add depth and interest to your space. Finally, consider using eco-friendly and sustainable materials in your DIY projects to reduce waste and create a more environmentally conscious home.

Q: How can I get started with DIY home decor if I have no experience?

A: If you have no experience with DIY home decor, start by brainstorming ideas and looking for inspiration online or in home decor magazines. You can also try watching YouTube tutorials or taking a class to learn new skills like painting, sewing, or woodworking. Begin with small, simple projects like making a throw pillow or creating a decorative vase filler. As you gain confidence and experience, you can move on to more complex projects like refinishing furniture or creating a statement piece of art. Don’t be afraid to experiment and try new things – it’s all part of the DIY process!

Q: What are some DIY home decor ideas for small spaces?

A: For small spaces, consider DIY home decor ideas that maximize storage and minimize clutter. Some ideas include using wall-mounted shelves or storage units, creating a storage ottoman or bench, or using multi-functional furniture pieces like a storage coffee table or desk. You can also try using mirrors to create the illusion of more space, or incorporating light colors and minimal patterns to make a small room feel larger. Another idea is to use vertical elements like floor lamps or tall vases to draw the eye upwards and create a sense of height.

Q: How can I make my DIY home decor projects look professional and polished?

A: To make your DIY home decor projects look professional and polished, pay attention to details like finish and texture. Consider using high-quality materials and finishes like paint, stain, or varnish to give your projects a smooth and professional look. Also, take the time to measure and plan carefully to ensure that your projects are symmetrical and well-proportioned. Finally, don’t be afraid to add decorative elements like trim, molding, or hardware to give your projects a finished and polished look. With a little practice and patience, you can create DIY home decor projects that look like they were made by a pro!

How to Make Wall Art

You can enhance your space with unique wall art that reflects your personality. To get started, you will need to decide on a design and materials that fit your style and budget. If you’re looking for inspiration, you can check out Easy Ways to Create Large Scale Wall Art on a Budget to discover affordable options. Your creativity and imagination will guide you in making beautiful wall art that transforms your room into a stunning space.

Key Takeaways:

To create stunning wall art, consider the following points:

  • Start by selecting a theme that resonates with your personal style or the room’s décor to ensure the art piece blends in seamlessly.
  • Choose a medium that suits your skills and preferences, such as painting, drawing, or mixed media, to bring your creative vision to life.
  • Experiment with different techniques, like layering, texturing, or abstracting, to add depth and visual interest to your wall art and make it a unique conversation piece.

Gathering Materials

Before you start creating your wall art, you need to gather all the necessary materials. This includes a canvas, paints, brushes, and any additional decorative items you want to incorporate into your design. You’ll also need a workspace where you can lay out your materials and work on your project without any distractions or interruptions.

Choosing the Right Canvas

Around the time you’re deciding on the theme of your wall art, you should also consider the type of canvas you want to use. You’ll find that canvases come in various sizes, shapes, and materials, so you need to choose the one that best suits your needs and preferences.

Selecting Colors and Brushes

Around the same time you’re selecting your canvas, you should also think about the colors and brushes you’ll use to bring your design to life. You’ll want to choose colors that complement each other and fit with the theme of your wall art, as well as brushes that are suitable for the type of paint you’re using.

Understanding the color palette and brush styles you’re working with is key to creating a beautiful piece of wall art. As you select your colors and brushes, consider the texture and effect you want to achieve, and don’t be afraid to experiment with different combinations to find the one that works best for your project. You can also test your colors and brushes on a small area of the canvas before starting your main design.

Design and Planning

It is the initial stage of creating wall art, where you brainstorm and visualize your ideas. You will decide on the theme, style, and overall aesthetic of your artwork, setting the foundation for a successful project.

Sketching Ideas

Among the first steps in designing your wall art, you will start sketching out your ideas, considering the space where the artwork will be displayed and the message you want to convey. You will experiment with different shapes, patterns, and compositions to find the perfect fit for your vision.

Considering Color Schemes

Across the various design elements, you will select a color scheme that complements your artwork and the surrounding environment. You will think about the emotions and moods different colors evoke, ensuring your choices align with your artistic goals.

Considering the color scheme of your wall art, you will look at the colors used in the room, as well as your personal preferences, to create a harmonious palette. You will choose colors that enhance your artwork, making it a beautiful addition to the space, and you will also think about the balance between contrasting and complementary colors to create visual interest.

Preparing the Workspace

Keep your workspace clean and organized to ensure a successful wall art project. You will need a clear area to work on your design, and a clutter-free space will help you stay focused and avoid mistakes.

Setting Up the Area

Alongside your creativity, you will need a well-lit and comfortable workspace to bring your wall art idea to life. You can set up a table or easel to hold your materials and design.

Protecting the Floor and Surroundings

Against potential mess and damage, you should take necessary precautions to protect your floor and surroundings. You can use drop cloths or old sheets to cover your work area and prevent paint or other materials from spilling.

In addition to covering your floor, you should also consider protecting your walls and furniture from accidental splatters or spills. You can use tape or plastic sheets to mask off areas you don’t want to get dirty, and make sure to clean up any mess immediately to avoid permanent damage to your surroundings.

Creating the Art

After planning your design, you can start creating your wall art. You will need various materials such as paints, brushes, and a canvas or wood panel. Your creativity and skills will shine as you bring your idea to life.

Starting with a Base Coat

Before you begin adding details, you need to start with a base coat to set the tone for your art. You can choose a single color or a gradient to create a unique effect, and apply it evenly to your surface.

Adding Layers and Details

The next step is to add layers and details to your art, which will give it depth and dimension. You can use different techniques such as layering paint, adding textures, or incorporating other materials to create a unique piece.

Even as you add more layers and details, you can experiment with different styles and techniques to make your art truly yours. You can try mixing media, such as paint and ink, or adding three-dimensional elements to create a mixed-media piece that reflects your personality and creativity.

Adding Final Touches

Unlike other steps in the process, adding final touches to your wall art is where you get to see your vision come together. You can add a few finishing details, such as a frame or a coat of varnish, to enhance the overall look of your piece.

Applying Varnish or Sealant

Before applying a varnish or sealant, ensure your wall art is completely dry and free of dust. You will then apply a thin, even layer to protect your artwork and give it a professional finish.

Hanging and Displaying

Against the wall, your finished piece will look great, but you need to consider a few things when hanging and displaying it. You should choose a spot with good lighting and minimal glare.

At this stage, you can step back and admire your handiwork. You’ve successfully created your own wall art, and now it’s time to show it off. You can experiment with different hanging options, such as a single piece or a gallery wall, to find the perfect display for your unique creation.

Troubleshooting Common Issues

Your wall art project may encounter some issues, but don’t worry, they can be easily resolved. You can fix mistakes, deal with canvas imperfections, and achieve a professional finish.

Fixing Mistakes

Before you proceed, assess the mistake and determine the best course of action. You can paint over small errors or use correction techniques to fix them.

Dealing with Canvas Imperfections

Above all, inspect your canvas carefully for imperfections like wrinkles or bubbles. You can stretch or iron the canvas to remove them.

Plus, if you notice any stubborn imperfections, you can use a primer or gesso to create a smooth surface for your art. You can also use a texture paste to add a unique effect to your wall art, making the imperfections a part of the design.

Summing up

Upon reflecting on the process of creating wall art, you now have the skills to design your own pieces. You can choose your materials, select a theme, and arrange your composition to create a unique piece that reflects your style. With your newfound knowledge, you can confidently create wall art that enhances your space and showcases your personality, making your home truly special with your artistic touch.

FAQ

Q: What materials do I need to make wall art?

A: To make wall art, you will need a variety of materials depending on the type of art you want to create. Some common materials include canvas, paint, brushes, frames, scissors, glue, and any other decorative items you want to incorporate into your design. You can also use recycled materials like old maps, music sheets, or book pages to add a unique touch to your art. Additionally, you may need a staple gun, nails, or a hanging kit to mount your art on the wall.

Q: How do I choose the right frame for my wall art?

A: Choosing the right frame for your wall art can enhance its overall appearance and protect it from damage. Consider the style and theme of your art, as well as the color and texture of the frame. You can choose from a variety of frame styles, including modern, traditional, or rustic. Make sure the frame is the right size for your art and that it is made of high-quality materials that will last. You can also consider factors like the width of the frame, the type of glass or acrylic used, and the hanging hardware.

Q: What are some popular techniques for creating wall art?

A: There are many popular techniques for creating wall art, including painting, drawing, printing, and collage. You can use watercolors, acrylics, or oils to create a unique and original piece of art. You can also use digital tools to create a print, or combine different materials and textures to create a collage. Other techniques include stenciling, stamping, and decoupage. You can also experiment with different mediums like ink, pastels, or charcoal to add depth and dimension to your art.

Q: How do I hang my wall art properly?

A: Hanging your wall art properly can make a big difference in its appearance and longevity. Start by choosing the right spot for your art, taking into account the lighting, traffic, and surrounding decor. Use a level to ensure the art is straight, and a measuring tape to mark the spot where you want to hang it. Use a sturdy nail or screw to hang the art, and consider using a hanging kit or adhesive strips for heavier or larger pieces. Make sure the art is secure and level, and adjust as needed to achieve the perfect display.

Q: Can I make wall art without any artistic experience?

A: Yes, you can make wall art without any artistic experience. There are many simple and fun techniques that don’t require any special skills or training. You can start with a simple project like a photo collage or a quote print, and then experiment with different materials and techniques as you become more confident. You can also use stencils, stickers, or pre-made templates to create a unique and personalized piece of art. Additionally, you can find many tutorials and inspiration online, or take a class or workshop to learn new skills and techniques. The most important thing is to have fun and be creative!

Top DIY Projects for Holidays

As you prepare for the holiday season, you’re likely looking for ways to make your celebrations more personal and meaningful. You can add a touch of warmth and personality to your holidays with your own DIY projects. Your creativity and skills will shine through in these unique and thoughtful projects, making your holidays even more special. You will find inspiration in the following DIY projects to make your holiday season truly unforgettable.

Key Takeaways:

To make your holidays more enjoyable and personalized, consider the following DIY projects:

  • Creating handmade decorations such as wreaths, garlands, and ornaments can add a unique touch to your holiday decorations and make your home feel more festive.
  • Making homemade gifts like cookies, candies, and crafts can be a thoughtful and budget-friendly way to show your loved ones you care, and can also be a fun family activity.
  • Setting up a holiday-themed DIY photo booth with props and backdrops can be a great way to capture memories and create a fun and interactive experience for your guests.

Easy Decorations

Before starting your holiday DIY projects, consider easy decorations that can add a touch of warmth to your home. You can create a welcoming atmosphere with simple and elegant decor, making your space feel cozy and inviting.

Simple Centerpieces

One of the easiest ways to add a personal touch to your holiday table is by creating simple centerpieces using items like pinecones, candles, and evergreen branches. You can arrange these items in a decorative bowl or vase, adding a pop of color and fragrance to your table.

Handmade Ornaments

One way to make your holiday decorations more personal is by creating handmade ornaments. You can use materials like felt, glitter, and ribbons to create unique and beautiful ornaments that reflect your personal style.

A key aspect of handmade ornaments is the ability to customize them to fit your holiday theme and color scheme. You can make ornaments in various shapes, sizes, and colors, allowing you to add a personal touch to your holiday decorations. As you create your handmade ornaments, you can experiment with different materials and techniques, making the process a fun and creative experience.

Gift Ideas

Clearly, creating your own gifts is a thoughtful way to show you care. You can make personalized items that reflect your relationship with the recipient, making the gift even more special.

Personalized Photo Frames

These photos can be placed in beautifully crafted frames, making a lovely gift for your loved ones. You can add your personal touch to make it extra special.

Homemade Cookies

Similarly, framing your baking skills into delicious treats is a great idea. You can bake your favorite cookies and package them in decorative jars or boxes, making a sweet gift for your friends and family.

Another advantage of making homemade cookies as gifts is that you can customize them to your recipient’s tastes. You can choose their favorite flavors and toppings, and even create special shapes using cookie cutters, making your gift truly unique and personalized, showing you put thought into your gift.

Holiday Crafts

Keep your holiday season creative and fun with various DIY projects that you can make with your family and friends. You can create beautiful decorations, gifts, and cards that reflect your personal style and add a touch of warmth to your home.

Paper Snowflakes

Crafting paper snowflakes is a classic holiday activity that you can enjoy with your loved ones. You can create intricate designs and patterns using paper and scissors, and decorate your windows, walls, and trees with your unique creations.

Pinecone Decorations

Before you start decorating your home for the holidays, consider using pinecones to add a natural and rustic touch. You can paint, glue, or decorate pinecones in various ways to create beautiful ornaments, centerpieces, and wreaths that reflect your personal style.

Hence, as you explore the world of pinecone decorations, you will discover numerous ways to incorporate them into your holiday decor. You can use pinecones to create a stunning centerpiece for your dining table, or as a unique ornament for your Christmas tree, giving your home a cozy and inviting atmosphere that you and your guests will cherish.

Outdoor Projects

Despite the cold weather, you can still create a warm and inviting atmosphere in your outdoor space with DIY projects. You can decorate your porch, patio, or yard with festive decorations, lights, and plants to make it a winter wonderland.

Christmas Light Displays

Among the most popular outdoor DIY projects are Christmas light displays. You can create your own unique light display using string lights, net lights, or icicle lights to decorate your house, tree, or yard.

Winter Planters

For a beautiful and festive touch, you can create winter planters using evergreen branches, holly, and pinecones. You can fill your planters with these materials and add some decorative ribbons or bows to give it a personal touch.

And as you create your winter planters, you can experiment with different combinations of plants, branches, and decorations to find the perfect look for your outdoor space. You can place them on your porch, patio, or even along your walkway to add a warm and welcoming ambiance to your home.

Indoor Projects

For a festive and cozy atmosphere, indoor DIY projects are a great way to get your home holiday-ready. You can create beautiful decorations, personalize your space, and make it feel more welcoming to your guests.

Holiday-themed Wall Art

To add a personal touch to your walls, you can create your own holiday-themed wall art using materials like paint, glue, and glitter. You can make a beautiful centerpiece for your living room or a festive decoration for your hallway.

Seasonal Candle Holders

Inside your home, you can create a warm and inviting ambiance with seasonal candle holders. You can use materials like pinecones, twigs, and evergreen branches to create unique and fragrant holders for your candles.

Considering your personal style and the overall aesthetic of your home, you can choose the type of candle holders that fit best with your decor. You can place them on your mantel, coffee table, or dining table to add a warm glow to your holiday gatherings, and with your creativity, you can make your home feel cozier and more festive.

Budget-friendly Ideas

To save money on holiday decorations and gifts, consider DIY projects that are easy on the wallet. You can create beautiful and unique items without breaking the bank.

Repurposing Old Items

Adeptly, you can turn old items into new treasures, giving your holidays a personal touch. You can upcycle old jars, bottles, and other containers to create unique decorations.

DIY Gift Wrapping

Immediately, you’ll notice the impact of beautifully wrapped gifts. You can use items like paper, fabric, and ribbons to create stunning presentations.

Understanding the art of DIY gift wrapping, you can add a personal touch to your gifts. You can choose papers and materials that match your holiday theme, and add embellishments like bows and tags to make your gifts stand out.

Conclusion

Summing up, you now have a plethora of DIY projects to tackle during the holidays. With your creativity and skills, you can create stunning decorations and gifts. For more inspiration, visit 80 Easy Christmas Crafts to Bring on the Holiday Cheer to explore unique ideas, and make your holiday season even more special with your own handmade touches.

FAQ

Q: What are some popular DIY projects for the holidays that can add a personal touch to my celebrations?

A: There are many DIY projects that can add a personal touch to your holiday celebrations. Some popular ideas include handmade ornaments, customized gift wrap, and DIY decorations such as wreaths, garlands, and centerpieces. You can also try making your own holiday-themed crafts, such as snow globes, votive candles, and photo displays. These projects can be made with a variety of materials, including paper, fabric, glue, and natural elements like pinecones and holly.

Q: What DIY projects can I make as gifts for my loved ones during the holidays?

A: There are many DIY projects that make great gifts, such as handmade jewelry, customized mugs, and personalized photo albums. You can also try making homemade treats, such as cookies, fudge, and candies, and package them in decorative jars or tins. Other ideas include handmade soaps, lotions, and candles, as well as knitted or crocheted items like scarves, hats, and blankets. Consider the interests and preferences of the recipient when choosing a DIY gift project.

Q: What are some easy and budget-friendly DIY projects for the holidays that can be completed in a short amount of time?

A: There are many easy and budget-friendly DIY projects that can be completed in a short amount of time, such as making paper snowflakes, creating a handmade holiday card, or decorating a small vase or jar with paint, glue, and glitter. You can also try making a simple wreath using evergreen branches, holly, or mistletoe, or creating a centerpiece using candles, pinecones, and ribbons. These projects can be made with materials you may already have on hand, and can be completed in under an hour.

Q: How can I make my DIY holiday projects more eco-friendly and sustainable?

A: There are several ways to make your DIY holiday projects more eco-friendly and sustainable, such as using recycled or repurposed materials, choosing natural and biodegradable materials, and avoiding single-use plastics. You can also try using energy-efficient crafting methods, such as using a sewing machine instead of glue, and making projects that can be reused or repurposed in future years. Consider using materials like old maps, music sheets, and fabric scraps to create unique and eco-friendly decorations.

Q: What are some safety precautions I should take when working on DIY holiday projects, especially if I’m working with children or pets?

A: When working on DIY holiday projects, it’s always a good idea to take safety precautions to avoid accidents and injuries. If you’re working with children or pets, make sure to supervise them closely and keep hazardous materials out of reach. Use protective gear like gloves and goggles when necessary, and follow instructions carefully. Also, make sure your workspace is well-ventilated and free from clutter and tripping hazards. If you’re using materials like glue, paint, or sharp objects, be sure to follow the manufacturer’s instructions and take regular breaks to avoid fatigue and strain.

How to Upcycle Old Furniture

You have old furniture collecting dust, but you don’t want to throw it away. You can breathe new life into it. Start by assessing your pieces, and think about what you can reuse. For inspiration, check out How to Upcycle Wooden Furniture – Oak Dresser tutorials. With a little creativity, your old furniture can become unique and functional again, saving you money and reducing waste. You can transform your space with your own hands.

Key Takeaways:

To give your old furniture a new life, consider the following points:

  • Start by assessing the condition and structure of the furniture to determine the best approach for upcycling, whether it’s a simple refinish or a complete overhaul.
  • Choose the right materials and tools for the job, such as paint, varnish, or fabric, and invest in quality items that will withstand the test of time.
  • Get creative with your upcycling project by adding unique details and features, such as decorative hardware or upholstery, to give your old furniture a one-of-a-kind look.

Gathering Materials

Your upcycling project starts with gathering the right materials, including the old furniture you want to repurpose, new hardware, and any decorative items you want to add.

Essential Tools

Among the basic tools you’ll need are a hammer, screwdriver, and sandpaper, which will help you disassemble and refinish your old furniture.

Creative Resources

Essentially, your imagination is the limit when it comes to creative resources, but some ideas include paint, fabric, and reclaimed wood.

A key part of upcycling is thinking creatively about how to reuse and repurpose different materials, so take some time to brainstorm and explore different options for your project, and you’ll be surprised at what you can come up with using your old furniture and a little bit of creativity.

Preparing the Furniture

Even the most neglected piece can be revitalized with some elbow grease. You’ll need to assess your furniture’s condition and decide what’s worth saving. Take note of any broken parts, scratches, or stains that need attention.

Cleaning and Stripping

Prior to starting, you’ll need to wipe down your furniture to remove dirt and grime. You’ll be amazed at how a simple cleaning can revive the surface. Remove old finishes, and take out any hardware.

Sanding and Smoothing

Frequently, your furniture will have a rough surface. You’ll need to sand it down to create a smooth base for your new finish. This step is where you’ll start to see your furniture transform.

Sanding is where you put in the work to get your furniture ready for its new life. You’ll use progressively finer grits of sandpaper to smooth out the surface, removing any imperfections or old finish. As you sand, you’ll start to see the wood grain emerge, and your furniture will begin to take on a new character. You’ll be able to feel the difference under your hands, and you’ll know you’re on the right track.

Design and Planning

Not every old piece of furniture is a candidate for upcycling, but with a clear vision, you can turn many items into something new and functional. You’ll need to assess your skills, tools, and materials before starting the project.

Measuring and Sketching

On the path to creating something unique, you take precise measurements of your old furniture and sketch out ideas for its new life. You consider the space where the piece will go and how it will be used.

Choosing Colors and Styles

Along with thinking about the function of your upcycled furniture, you think about the aesthetic you want to achieve. You consider the colors and styles that fit with your home’s decor and your personal taste.

In fact, selecting the right colors and styles can make or break your upcycling project. You look at the natural colors of the materials, the style of the original piece, and how you can enhance or change them to fit your vision. You think about the mood and atmosphere you want to create with your upcycled furniture, and choose colors and styles that evoke that feeling.

Disassembling and Rebuilding

Now that you’ve selected your old furniture, it’s time to give it new life. You’ll need to disassemble and rebuild it to create something unique.

Taking Apart and Reusing

Apart from the initial dismantling, you’ll find opportunities to reuse parts, reducing waste and adding character to your project. You’ll be surprised at what you can salvage and incorporate into your new design.

Reconfiguring and Reinventing

By breaking down the old piece, you’ll see new possibilities. You’ll start to envision a fresh purpose for your furniture, and your creativity will take over, guiding your hands as you work.

The process of reconfiguring and reinventing is where your vision comes to life. You’ll take the old components and reshape them into something that reflects your style, making the piece truly yours. You’ll sand, paint, and reassemble, transforming the outdated into a one-of-a-kind treasure that tells a story of your craftsmanship and ingenuity.

Decorating and Finishing

All your hard work has led to this moment. You’re ready to add the final touches to your upcycled furniture. This stage is where you get to express your creativity and make your piece truly unique.

Adding New Hardware

For a fresh look, you’ll want to add new hardware to your furniture. You can choose from a variety of styles and finishes to match your design.

Applying Final Coats

Above all, you want your finish to be smooth and even. You apply a final coat of paint or varnish to protect your furniture and give it a professional look.

In addition to applying a final coat, you should also consider adding a sealant to protect your furniture from spills and scratches. You can choose from a variety of sealants, including wax, polyurethane, or lacquer, depending on the type of finish you’ve used and the level of protection you need. You’ll want to apply the sealant according to the manufacturer’s instructions and make sure it’s fully dry before using your furniture.

Safety Precautions

Despite the excitement of upcycling old furniture, you must consider safety. You’ll be working with power tools, chemicals, and heavy objects, so it’s important to take precautions to avoid injuries.

Protective Gear

Gearing up with the right equipment is vital. You should wear safety glasses, gloves, and a mask to protect yourself from debris and harmful substances.

Workspace Preparation

Preventing accidents starts with a clean and clear workspace. You should remove any clutter, cover your floor, and ensure good ventilation to prevent accidents and exposure to harmful fumes.

With your workspace prepared, you can focus on the task at hand. You’ll be able to move around safely, avoiding tripping hazards and other obstacles, and your work will be more efficient and enjoyable. Your prepared workspace will also help you stay organized, keeping your tools and materials within easy reach.

To wrap up

As a reminder, you’ve got the skills to breathe new life into your old furniture. You’ve learned to see past its worn surface and give it a fresh start. With your hands and some basic tools, you can turn your old pieces into something new and useful. You’ll save money and create something that’s truly your own, piece by piece, with your own two hands.

FAQ

Q: What is upcycling old furniture and how can I get started?

A: Upcycling old furniture is the process of transforming outdated or discarded furniture into unique, functional, and aesthetically pleasing pieces. To get started, begin by scouting local thrift stores, garage sales, or your own home for pieces with potential. Consider the durability, material, and structural integrity of the item, and envision how it can be repurposed. Gather necessary tools and materials, such as sandpaper, paint, and fabric, and start brainstorming creative ways to breathe new life into your find.

Q: What are some popular techniques for upcycling old furniture?

A: Some popular techniques for upcycling old furniture include refinishing, repainting, reupholstering, and restructuring. Refinishing involves stripping and reapplying a new finish to the original surface, while repainting gives the piece a completely new look. Reupholstering involves replacing the old fabric with new, vibrant materials, and restructuring involves disassembling and reconfiguring the piece into a new form. Additional techniques include decoupage, stenciling, and adding hardware or decorative details.

Q: How do I choose the right materials and tools for upcycling old furniture?

A: The materials and tools needed for upcycling old furniture will depend on the specific project and desired outcome. Common materials include paint, stain, varnish, fabric, foam, and hardware. Essential tools may include sanders, drills, saws, and screwdrivers. Consider the type of material the furniture is made of, such as wood, metal, or plastic, and choose materials and tools accordingly. It’s also important to follow safety guidelines and use protective gear, such as gloves and a mask, when working with power tools and chemicals.

Q: Can I upcycle any type of old furniture, or are some pieces better suited for the process?

A: While many types of old furniture can be upcycled, some pieces are better suited for the process than others. Look for sturdy, well-made pieces with solid wood or metal frames, as these can be easily refinished or repurposed. Avoid pieces with broken or damaged structures, as these may be more difficult to work with. Consider the style and era of the piece, as well, and think about how it can be adapted to fit your desired aesthetic. Some popular pieces for upcycling include vintage dressers, chairs, tables, and desks.

Q: How can I add a personal touch to my upcycled furniture and make it truly unique?

A: Adding a personal touch to your upcycled furniture can make it truly one-of-a-kind. Consider incorporating personal items, such as family photos, heirlooms, or sentimental trinkets, into the design. You can also add unique hardware, such as custom knobs or handles, or incorporate unconventional materials, like vintage maps or book pages. Don’t be afraid to experiment and try new things – the beauty of upcycling lies in its creative freedom. Additionally, consider the overall aesthetic you want to achieve, such as rustic, modern, or bohemian, and choose elements that fit with that style.

Linearyazilim Skip to content