DIY

DIY Lighting Crafts for Homes

You can elevate your home’s ambiance with unique lighting solutions. By creating your own DIY lighting crafts, you can add a personal touch to your space. Your home will reflect your style and personality through these handmade pieces. You will learn how to make beautiful and functional lighting fixtures that enhance your decor, making your home a reflection of your creativity and taste.

Key Takeaways:

To enhance your home decor with a personal touch, consider the following points about DIY lighting crafts:

  • Creating Unique Lamps can add a touch of personality to any room, allowing you to express your Personal Style through the choice of materials, shapes, and colors.
  • Upcycling old or discarded items into lighting fixtures is not only Eco-Friendly but also offers a creative way to reduce waste and give new life to forgotten pieces.
  • Experimenting with String Lights and Candles can introduce a warm and Cozy Ambiance to your home, making it feel more inviting and comfortable for both residents and guests.

Basic Lighting Crafts

Before exploring complex lighting projects, you’ll want to start with simple and easy-to-make crafts that can add a touch of warmth to your home. Basic lighting crafts are a great way to get started, and they can be customized to fit your personal style and decor.

Simple Candle Holders

Between the various types of lighting crafts, simple candle holders are a great place to begin. You can create your own unique holders using materials like glass, metal, or wood, and add a personal touch to your space with your favorite candles.
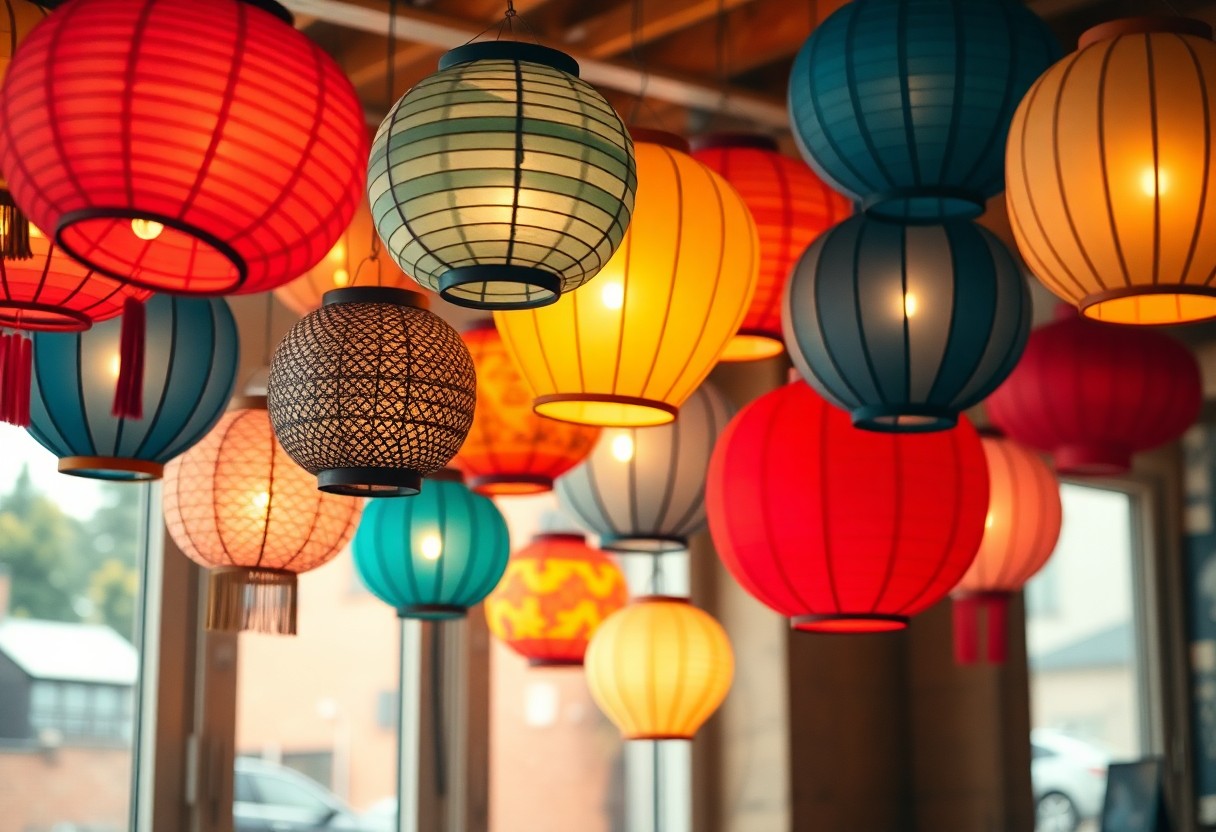
Paper Lanterns

Basically, paper lanterns are a fun and easy DIY project that can add a pop of color and light to your home. You can make your own paper lanterns using paper, glue, and a few basic tools, and hang them in your favorite spots.

Lanterns can be made in various shapes, sizes, and colors, allowing you to customize them to fit your home’s decor and style. You can use your paper lanterns as a centerpiece, hang them from the ceiling, or place them on a table, and they will surely add a warm and cozy ambiance to your space, making it feel more inviting and comfortable for you and your guests.

Advanced Lighting Projects

Even if you have experience with DIY lighting, you can still challenge yourself with more complex projects.

  1. Mason Jar Chandeliers
  2. Recycled Bottle Lamps
Project Difficulty Level
Mason Jar Chandeliers Medium
Recycled Bottle Lamps Hard

Mason Jar Chandeliers

For your next lighting project, consider creating a beautiful Mason Jar Chandelier, you can hang it in your dining room or living room, it will add a touch of elegance to your space.

Recycled Bottle Lamps

Against all odds, you can turn old bottles into stunning lamps, you will need some basic tools and materials, but the result will be worth your effort.

Also, when working on Recycled Bottle Lamps, you should pay attention to the bottle’s shape and size, as it will affect the overall look of the lamp, you can add some decorative elements, such as ribbons or paint, to give it a personal touch, and with a little patience and creativity, you can create a unique and functional piece for your home.

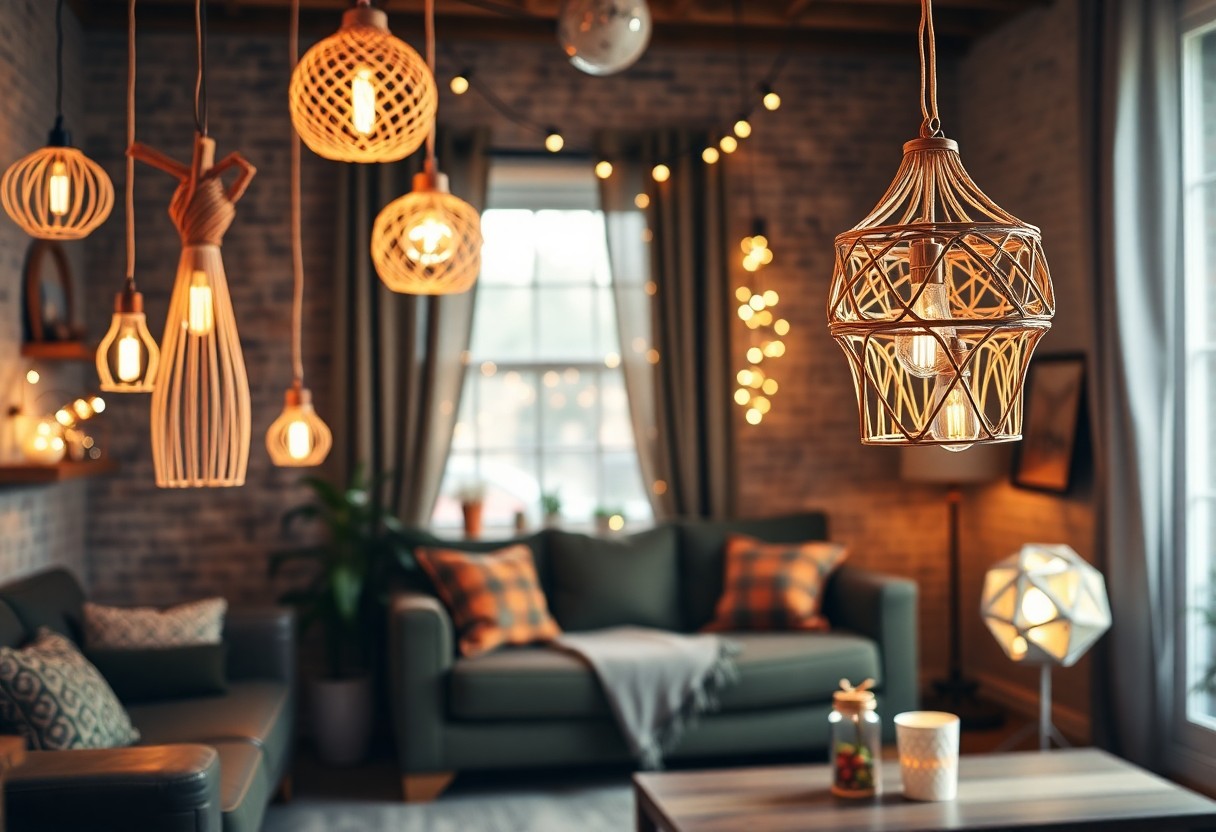
Decorative Lighting Ideas

After exploring various lighting options, you’ll find that decorative lighting can elevate your home’s ambiance. You can choose from a range of ideas to create a unique atmosphere, from subtle to bold statements.

Fairy Lights

Around your home, you can wrap fairy lights around furniture or plants to add a touch of magic. You can place them in a vase or hang them from the ceiling to create a whimsical effect.

String Lights

One of the simplest ways to add warmth to your space is by using string lights. You can hang them in your backyard or indoors to create a cozy atmosphere, and they come in various colors and styles to match your decor.

Even more interesting is the ability to customize string lights to fit your specific needs. You can choose from different lengths, bulb types, and colors to create a unique look that complements your home’s style, allowing you to tailor your lighting to your personal taste and preferences.

Outdoor Lighting Crafts

Now that you’re looking to illuminate your outdoor space, you can create your own unique lighting crafts. You can make your outdoor area more inviting and beautiful with DIY lighting.

Solar-Powered Lights

One of the easiest and most eco-friendly options is to make solar-powered lights. You can use solar panels and LED lights to create a sustainable lighting solution for your outdoor space.

DIY Pathway Lights

With a few simple materials, you can create your own pathway lights to guide you through your garden or yard. You can use glass jars, pebbles, and tea lights to make a beautiful and functional lighting feature.

Due to the versatility of DIY pathway lights, you can customize them to fit your personal style and the theme of your outdoor space. You can experiment with different materials, such as metal lanterns, mason jars, or even seashells, to create a unique and eye-catching lighting display that reflects your personality and adds ambiance to your outdoor area.

Lighting for Specific Rooms

For each room in your home, you can create unique lighting effects that enhance the ambiance and functionality. You can tailor your DIY lighting crafts to fit the specific needs of each space, making your home more inviting and comfortable.

Bedroom Lighting

Specific to the bedroom, you want lighting that promotes relaxation and tranquility. You can create soft, warm glow with table lamps or string lights, making your bedroom a cozy retreat.

Kitchen Lighting

Above all, kitchen lighting should be bright and functional, allowing you to work efficiently. You can install under-cabinet lighting or use pendant lights to illuminate your kitchen counters and island.

At the heart of your kitchen lighting design, consider the tasks you perform in each area, and adjust your lighting accordingly. You can use a combination of overhead lighting, task lighting, and ambient lighting to create a well-lit and functional kitchen that makes cooking and entertaining a pleasure.

Safety Precautions

Once again, as you commence on DIY lighting crafts for your home, it’s vital to consider the safety aspects to avoid any potential hazards. You must take necessary precautions to ensure your safety and the safety of your loved ones.

Electrical Safety

Around the time you start working with electrical components, you should be aware of the risks involved and take steps to mitigate them, such as turning off the power supply and using insulated tools, to prevent electrical shocks, which can be harmful to you.

Fire Safety

Between the various DIY lighting crafts you undertake, you should always be mindful of the fire hazards associated with them, such as using open flames or hot equipment, which can ignite nearby flammable materials and put your safety at risk.

Avoiding fire hazards is a key aspect of DIY lighting crafts, and you should take extra precautions when working with materials that can catch fire easily, such as fabric, paper, or wood, and keep a fire extinguisher nearby, in case of an emergency, to protect yourself and your home.

To wrap up

Drawing together the various DIY lighting crafts for homes, you can now enhance your space with unique and personalized lighting solutions. You have the ability to create your own style, tailored to your taste and budget. By applying these DIY techniques, you can transform your home into a warm and inviting atmosphere, making it a perfect reflection of your personality and aesthetic, and ultimately, making your house truly your home.

FAQ

Q: What are some popular DIY lighting crafts for homes that can add a personal touch to my decor?

A: Some popular DIY lighting crafts for homes include making your own string lights, creating a mason jar chandelier, or assembling a reclaimed wood lamp. You can also try making paper lanterns, glass bottle pendant lights, or a macrame plant hanger with a built-in light source. These projects can add a unique and personal touch to your home decor, and can be customized to fit your style and preferences.

Q: What materials do I need to get started with DIY lighting crafts for my home?

A: The materials needed for DIY lighting crafts can vary depending on the project, but some common supplies include wire, string, fabric, glass or plastic containers, wood, and lighting fixtures such as bulbs, sockets, and switches. You may also need basic crafting tools like scissors, glue, and a hot glue gun. Additionally, you can repurpose or upcycle old or recycled materials like mason jars, bottles, or cardboard tubes to create unique and eco-friendly lighting fixtures.

Q: Are DIY lighting crafts safe and easy to make, or do I need to have prior experience with electrical work?

A: While some DIY lighting crafts may require basic electrical knowledge, many projects are designed to be safe and easy to make, even for beginners. It’s always important to follow safety guidelines and precautions when working with electricity, and to use proper materials and techniques to avoid any risks. If you’re unsure about any aspect of a project, consider consulting with a professional or seeking guidance from a trusted resource. Many DIY lighting crafts also use battery-operated lights or low-voltage systems, which can be a safer and more beginner-friendly option.

Q: Can I use DIY lighting crafts as a way to save energy and reduce my environmental impact?

A: Yes, many DIY lighting crafts can be designed with energy efficiency and sustainability in mind. For example, you can use LED bulbs, which are energy-efficient and long-lasting, or create solar-powered lights that harness natural energy from the sun. You can also use recycled or repurposed materials to reduce waste and minimize your carbon footprint. Additionally, DIY lighting crafts can help reduce the demand for mass-produced, energy-intensive lighting products, making them a great way to add a personal touch to your home while also promoting sustainability.

Q: How can I display and showcase my DIY lighting crafts in my home to maximize their impact and beauty?

A: There are many creative ways to display and showcase your DIY lighting crafts in your home, depending on the type of project and your personal style. You can hang string lights or paper lanterns from the ceiling or a wall, place a mason jar chandelier above a dining table, or set a reclaimed wood lamp on a side table or shelf. You can also use DIY lighting crafts to add ambiance and warmth to outdoor spaces, such as patios or gardens. Consider experimenting with different arrangements and displays to find the perfect way to showcase your unique and handmade lighting creations.

Educational DIY Projects for Children

As you look for ways to engage your child in learning, you’ll find that educational DIY projects are an excellent choice. You can help your child develop new skills and knowledge through hands-on activities that are both fun and informative. Your child will benefit from these projects, which can enhance their creativity, problem-solving skills, and understanding of various subjects. You will be able to support your child’s educational growth and watch them thrive with these engaging projects.

Key Takeaways:

To get the most out of educational DIY projects for children, consider the following points:

  • Engaging children in hands-on activities helps develop their problem-solving skills and encourages creative thinking through experimentation and exploration.
  • STEM-related projects can be particularly beneficial, as they introduce children to science, technology, engineering, and mathematics concepts in a fun and interactive way.
  • Incorporating recycled materials into DIY projects teaches children about sustainability and the importance of environmental conservation, while also fostering resourcefulness and imagination.

Benefits of DIY Projects

The benefits of DIY projects for your children are numerous, and they can have a significant impact on their development and learning. You will notice improvements in their problem-solving skills, hand-eye coordination, and self-confidence as they work on DIY projects.

Developing Fine Motor Skills

For your child’s overall development, DIY projects can be highly beneficial, as they help develop fine motor skills through activities like cutting, drawing, and crafting, which you can easily incorporate into their daily routine.

Fostering Creativity and Imagination

One of the most significant advantages of DIY projects is that they allow your child to express themselves freely, giving you insight into their thoughts and imagination, and helping you guide them in developing their creative side.

In addition, as you encourage your child to engage in DIY projects, you will notice their imagination and creativity blossoming, and their ability to think outside the box and come up with innovative ideas will improve, helping them develop a unique perspective on the world around them.

Science Experiments

It is imperative to engage your children in science experiments that are fun and educational. You can try simple experiments at home using household items, making learning a enjoyable experience for your kids.

Homemade Lava Lamp

Along with creating a colorful and mesmerizing effect, a homemade lava lamp can teach your child about density and buoyancy. You can make one using oil, water, food coloring, and Alka-Seltzer tablets, allowing your child to observe and learn from the colorful mixture.

Building a Volcano

At the heart of every child’s curiosity is a desire to create and explore. You can help your child build a volcano using baking soda, vinegar, and clay, teaching them about chemical reactions and geological processes in a fun and interactive way.

Lava flows and eruptions can be simulated using this experiment, allowing you to explain complex concepts to your child in a simple and easy-to-understand manner. You can adjust the ingredients and design to make the experiment more engaging and challenging for your child, promoting their curiosity and love for science.

Arts and Crafts

Keep your child’s creativity sparkling with arts and crafts projects that foster imagination and skill-building. You can explore various activities, such as painting, drawing, and sculpture, to help your child express themselves.

Paper Mache Animal Making

Crafting unique animal figures using paper mache is an exciting project for you and your child. You will need balloons, paper, glue, and paint to create these adorable creatures, teaching your child about texture and shape.

Recycled Material Collage

Paper-based projects like collages made from recycled materials are an excellent way to teach your child about sustainability. You can collect old magazines, cardboard, and fabric to create a beautiful and eco-friendly artwork, encouraging your child to think creatively.

Also, as you work on the recycled material collage with your child, you will notice their problem-solving skills improving, as they figure out how to arrange and glue the different materials to create a cohesive piece. You can display their artwork proudly, knowing that you have not only encouraged their creativity but also taught them the value of reducing waste.

Environmental Awareness

To raise awareness about the environment, you can engage your children in fun activities. Visit Engaging and Educational Crafts for Kids to explore ideas. This will help you teach your child about the importance of taking care of the planet.

Creating a Mini-Garden

Above all, starting a mini-garden is an excellent way to introduce your child to environmental awareness. You can help your child plant flowers, herbs, or vegetables in a small plot or even in pots.

Making a Bird Feeder

Around your home, you can create a bird feeder using recycled materials like peanut butter, seeds, and pinecones. This activity will help your child understand the importance of providing food for birds and other wildlife.

Due to the simplicity of making a bird feeder, you can easily involve your child in the process, teaching them about the different types of birds that visit your yard and the role they play in the ecosystem. As you work together, you can discuss the importance of conservation and how your actions can impact the environment.

Math and Logic

Not only do math and logic projects enhance your child’s problem-solving skills, but they also foster critical thinking and analytical abilities, preparing them for a wide range of academic and professional pursuits.

DIY Geoboard

With a simple pegboard and rubber bands, you can create a geoboard that allows your child to explore geometric shapes and patterns, developing their spatial awareness and math skills.

Building a Bridge with Popsticks

Among the various math and logic projects, building a bridge with popsticks is an engaging activity that challenges your child to design and construct a sturdy bridge, applying concepts of tension, compression, and geometry.

At this stage, you can encourage your child to experiment with different designs, testing the strength and stability of their bridge, and analyzing the results to improve their creation, thereby developing their mathematical understanding and problem-solving skills.

Language and Literacy

Unlike other subjects, language and literacy can be developed through engaging and interactive DIY projects that foster a love for reading and writing in your child.

Homemade Storybook Creation

For instance, you can help your child create their own storybook using recycled materials, encouraging them to express their creativity and develop their writing skills.

Word Scavenger Hunt

Literacy skills can be improved with activities like a word scavenger hunt, where you hide words around the house or backyard for your child to find and define.

Further exploration of the word scavenger hunt activity can lead to a deeper understanding of vocabulary and spelling, as you encourage your child to use the discovered words in sentences, promoting their language development and comprehension skills.

Conclusion

Considering all points, you can see that educational DIY projects offer your child a unique learning experience. You will find that these projects help your child develop problem-solving skills and hand-eye coordination. As you guide your child through these activities, you will notice their creativity and confidence grow. By incorporating DIY projects into your child’s education, you are providing them with a fun and engaging way to learn and develop new skills.

FAQ

Q: What are the benefits of educational DIY projects for children?

A: Educational DIY projects offer a wide range of benefits for children, including improved problem-solving skills, enhanced creativity, and better understanding of various subjects such as science, technology, engineering, and mathematics (STEM). These projects also promote hands-on learning, encouraging children to think outside the box and develop their critical thinking abilities. By engaging in DIY projects, children can develop a sense of accomplishment and confidence, which can translate to other areas of their lives.

Q: What types of educational DIY projects are suitable for young children?

A: For young children, it’s best to start with simple and safe projects that promote learning and fun. Some examples include making a volcano using baking soda and vinegar, creating a homemade lava lamp using oil and food coloring, or building a bridge using popsicle sticks and glue. These projects are not only easy to follow but also help develop their fine motor skills and hand-eye coordination. As children get older, they can move on to more complex projects that involve electronics, robotics, or coding.

Q: How can parents and educators ensure safety while conducting educational DIY projects with children?

A: Safety should always be the top priority when conducting DIY projects with children. Parents and educators should ensure that children wear protective gear such as goggles, gloves, and lab coats when working with materials that can be hazardous. They should also supervise children at all times and encourage them to follow instructions carefully. Additionally, it’s important to choose projects that are suitable for the child’s age and skill level, and to provide clear guidance and support when needed.

Q: What role do educational DIY projects play in developing children’s problem-solving skills?

A: Educational DIY projects play a significant role in developing children’s problem-solving skills. By working on DIY projects, children are encouraged to think creatively and come up with innovative solutions to problems. They learn to analyze problems, identify patterns, and test hypotheses, which are all important skills for problem-solving. Additionally, DIY projects help children develop resilience and perseverance, as they learn to overcome obstacles and failures, and to try again with a new approach.

Q: How can educational DIY projects be used to promote STEM education in children?

A: Educational DIY projects can be used to promote STEM education in children by providing hands-on experiences that make learning fun and interactive. DIY projects can be designed to teach specific STEM concepts, such as programming, engineering, and physics. For example, children can build a robot using a kit, create a solar system model, or conduct experiments with magnets and electricity. By engaging in these types of projects, children can develop a deeper understanding of STEM subjects and develop important skills such as critical thinking, collaboration, and communication.

Top Kid-Friendly DIY Projects

Get ready for some fun, as you probe the world of DIY delights with your little ones! You’re about to uncover the most fantastic, kid-friendly projects that will spark your child’s imagination and creativity. With your guidance, your tiny tots will become tiny makers, crafting and building their way to a world of wonder. You’ll find projects that are easy to follow, and your kids will adore, making this journey a delightful adventure for the whole family to enjoy together!

Key Takeaways:

To get your kids involved in fun and creative activities, consider the following DIY projects:

  • Engage your kids in arts and crafts projects, such as painting, drawing, or making collages, to encourage their creativity and self-expression.
  • Involve your kids in woodworking projects, such as building a birdhouse or a simple furniture piece, to teach them about problem-solving and handiness.
  • Encourage your kids to participate in gardening projects, such as planting flowers or vegetables, to teach them about nurturing and sustainability.

Easy Crafting

For your little ones, easy crafting is a great way to encourage creativity and self-expression. You can try various projects that are simple, fun, and perfect for kids of all ages.

Finger Painting Fun

Before you begin, gather your materials, including paper, paint, and smocks. You’ll have a blast making art with your tiny tots, creating unique masterpieces that you’ll treasure forever.

Paper Plate Creations

Creations like masks, hats, and flowers can be made with paper plates, glue, and other craft supplies. You’ll be amazed at what you can create with these simple materials.

It is amazing how paper plate creations can spark your child’s imagination, as they transform a simple plate into a work of art. You can help your child cut out shapes, decorate the plate, and add embellishments, making it a fun and interactive experience for the whole family.

Indoor Projects

You can create a world of wonder indoors with your kids, and it’s easier than you think! With a few simple supplies, you can transform your home into a playground of creativity and imagination.

Building a Fort

Before you know it, you’ll be building a cozy fort with your kids, using pillows, blankets, and chairs to create a snug little hideaway. You’ll be amazed at how much fun you can have indoors!

Making a Treasure Hunt

After gathering some clues and prizes, you’ll be making a treasure hunt that will delight your kids and keep them engaged for hours. You’ll hide the treasures, make the clues, and watch your kids have a blast!

Further into the treasure hunt, you can add more complexity and excitement by creating puzzles, riddles, and brain teasers that will challenge and thrill your kids. You can tailor the hunt to your child’s age and interests, making it a truly personalized adventure that you’ll both cherish forever!

Outdoor Adventures

Despite the temptation to stay indoors, you can create amazing outdoor experiences for your kids with DIY projects. You’ll find that with a little creativity, your backyard can become a wonderland of fun and adventure.

Gardening for Kids

On a sunny day, you can start a gardening project with your kids, teaching them about the joys of growing their own flowers and vegetables. You’ll watch your kids’ faces light up as they plant their first seeds and tend to their own little garden.

Nature Scavenger Hunt

Across the yard, you can set up a nature scavenger hunt, hiding items like leaves, rocks, and feathers for your kids to find. You’ll see your kids’ eyes sparkle as they explore and discover the wonders of nature.

And as your kids initiate on their nature scavenger hunt, you can join in on the fun, exploring and learning together. You’ll discover hidden treasures, like a brightly colored bird or a buzzing bee, and make memories that will last a lifetime, all while encouraging your kids to get outside and appreciate the beauty of nature.

Recycling and Repurposing

Not only is recycling good for the planet, but it’s also a fun way to get creative with your kids. You can turn old items into new and exciting things, teaching your kids about sustainability and self-expression.

Turning Old into New

Transforming trash into treasure is a great way to spend time with your kids. You can take old jars, bottles, and cans and turn them into unique planters, pen holders, or decorative pieces.

Creating a Collage

Besides painting and drawing, making a collage is a fantastic way to express yourself. You can gather old magazines, scissors, and glue, and let your kids’ imagination run wild, creating a beautiful and personalized piece of art.

Into the world of art, you and your kids can dive, exploring different textures, colors, and shapes. As you create your collage, you can talk about the different materials you’re using, where they came from, and how they can be reused, teaching your kids about the importance of recycling and taking care of the environment in a fun and interactive way.

Cooking and Baking

Now that you’re ready to get creative in the kitchen, you’ll find that cooking and baking with kids is a delightful adventure, full of sweet treats and tasty delights. You can whip up a storm with your little ones, making memories that will last a lifetime.

Kid-Friendly Recipes

After gathering your ingredients and donning your aprons, you and your tiny chefs can start exploring the world of kid-friendly recipes, where fun and flavor come together in perfect harmony, and you get to enjoy the fruits of your labor.

Decorating Cupcakes

Any time you and your kids decorate cupcakes, you’ll discover a world of colorful possibilities, with frosting, sprinkles, and creativity galore, making each cupcake a unique masterpiece, crafted by your own tiny hands.

The decorating process is where the real magic happens, as you and your kids unleash your imagination, experimenting with different patterns, designs, and decorations, turning each cupcake into a one-of-a-kind treat that’s almost too pretty to eat, but too delicious to resist, and you’ll be amazed at how much joy you can squeeze out of a simple cupcake.

Music and Movement

After getting your kids involved in creative activities, they’ll be eager to express themselves through music and movement. You’ll find that these projects bring out their inner rhythm and get them grooving to the beat.

Homemade Instruments

With a few simple materials, you can create your own instruments, like shakers and drums, to get your kids making music in no time. You’ll be amazed at the sounds they come up with!

Dance Party Fun

Dancing into the world of fun, you’ll find that your kids love to move and groove to their favorite tunes. You can set up a mini dance floor and let them show off their best moves.

Hence, as you plan your dance party fun, consider adding some props like glow sticks, hats, and scarves to make it a memorable experience for your little ones. You’ll be delighted to see them twirling, spinning, and laughing together, creating a joyful atmosphere that’s simply infectious!

Summing up

With these considerations, you’re ready to investigate the wonderful world of kid-friendly DIY projects! You’ll find that with a little creativity, your youngsters will be beaming with pride over their handmade masterpieces. As you initiate on these adventures, your home will become a hub of imagination and delight, filled with the joy and wonder of your little ones’ creations, and you’ll be amazed at the fun you’ll have together!

FAQ

Q: What are some fun and easy DIY projects that I can do with my kids?

A: There are many fun and easy DIY projects that you can do with your kids, such as making homemade playdough, creating a fairy garden, or building a birdhouse. These projects are not only entertaining but also help to develop your child’s creativity and fine motor skills. You can find many tutorials and instructions online to guide you through the process.

Q: What are the benefits of doing DIY projects with my kids?

A: Doing DIY projects with your kids has numerous benefits, including promoting creativity, developing problem-solving skills, and enhancing bonding between parents and children. It also helps to build self-confidence and self-esteem in kids as they see their projects come to life. Additionally, DIY projects can be a great way to teach kids about science, math, and other subjects in a fun and interactive way.

Q: What kind of materials do I need to get started with kid-friendly DIY projects?

A: The materials you need will depend on the specific project you choose, but some common materials used in kid-friendly DIY projects include paper, glue, scissors, paint, markers, and craft sticks. You may also need other materials like fabric, yarn, or building blocks, depending on the project. It’s a good idea to have a dedicated craft space with basic supplies on hand so you can easily start a new project whenever you want.

Q: How can I ensure my kids’ safety while doing DIY projects?

A: To ensure your kids’ safety while doing DIY projects, it’s necessary to supervise them at all times, especially when using materials like scissors, glue, or paint. Make sure they understand the instructions and are wearing any necessary protective gear, such as aprons or gloves. You should also teach them about proper clean-up procedures and encourage them to wash their hands after handling materials. By taking these precautions, you can help prevent accidents and ensure a fun and safe DIY experience.

Q: Can I adapt DIY projects to suit my child’s age and skill level?

A: Yes, most DIY projects can be adapted to suit your child’s age and skill level. For younger kids, you can start with simple projects like finger painting or making collages, while older kids can handle more complex projects like woodworking or sewing. You can also modify projects to make them more challenging or easier, depending on your child’s abilities. The key is to make sure they are having fun and learning something new, regardless of their age or skill level.

DIY Greeting Cards for Any Occasion

As you seek to express your sentiments with elegance and thoughtfulness, consider crafting your own DIY greeting cards. You can find inspiration for your creations by visiting 900+ ALL OCCASION CARDS ideas in 2024, where myriad designs await your discovery. With a little creativity, you can design beautiful, personalized cards that convey your feelings to loved ones on any occasion, making your gestures even more special and meaningful, a true reflection of your unique taste and style.

Key Takeaways:

To create unique and personalized greeting cards, consider the following points:

  • Use colorful and creative materials such as stickers, stamps, and washi tape to add a personal touch to your DIY cards.
  • Experiment with different techniques like layering, embossing, and die-cutting to give your handmade cards a professional look.
  • Choose meaningful and relevant themes, images, and messages that match the occasion and the recipient’s personality to make your greeting cards extra special.

Getting Started

To commence on the delightful journey of creating your own DIY greeting cards, you will first need to gather your thoughts and consider the occasion for which you are crafting the card. This will help guide your decisions throughout the process.

Gathering Materials

Gaining a sense of what materials you will need is the next step in this charming venture. You will want to collect an assortment of papers, adhesives, and embellishments to bring your vision to life.

Choosing Designs

Almost any design can be adapted to fit your needs, and you will find that your own personal style will shine through in the choices you make. You can draw inspiration from various sources, such as nature or architecture.

Due to the vast array of design options available, you may find yourself spoiled for choice. As you ponder the design for your card, consider the personality and preferences of the recipient, as well as the occasion being celebrated, to ensure your creation is a thoughtful and meaningful gesture.

Occasion-Based Ideas

You will find that creating DIY greeting cards can be a most delightful experience, as you tailor them to the specific occasion and recipient, injecting a personal touch that store-bought cards often lack.

Birthday Cards

Above all, birthday cards should reflect the unique personality and style of the celebrant, so consider incorporating their favorite colors, hobbies, or interests into your design to make it truly special.

Holiday Cards

With the numerous holidays throughout the year, you have ample opportunities to express your creativity and thoughtfulness through DIY cards, whether it be for Christmas, Easter, or Thanksgiving, each one offering a chance to connect with loved ones.

Considering the diverse nature of holidays, you may find it helpful to explore various themes, motifs, and sentiments to convey your well-wishes, from the joyful and festive to the sincere and heartfelt, allowing your cards to resonate with your recipients on a deeper level.

Design Techniques

For creating exquisite DIY greeting cards, you will need to explore various design techniques that showcase your artistic flair. As you begin on this creative journey, you will discover the numerous ways to embellish and enhance your cards, making each one a unique masterpiece.

Stamping and Stenciling

Techniques such as stamping and stenciling allow you to add intricate patterns and designs to your cards, lending them a touch of elegance and sophistication. You can experiment with different stamps and stencils to achieve the desired effect, making your cards truly special.

Quilling and Embellishments

Similar to stenciling, quilling and embellishments enable you to add delicate, ornate details to your cards, giving them a beautiful, handmade quality. You can use quilling strips, ribbons, and other adornments to create stunning designs that reflect your personal style.

This quilling and embellishments technique offers you a world of creative possibilities, as you can shape and mold the quilling strips into various forms, from delicate flowers to intricate borders. As you master this technique, you will be able to create cards that are not only visually striking but also deeply personal, making them perfect for any occasion, and a true reflection of your thoughtful and artistic nature.

Adding Personal Touches

Your greeting card is not just a piece of paper with a message, it’s a reflection of your thoughtfulness and creativity, allowing you to express your feelings in a unique way.

Photos and MEMENTOS

Around the edges of your card, you can add cherished memories, such as a photo or a small memento, to make it extra special for the recipient.

Handwritten Messages

Often, the most meaningful part of a greeting card is the handwritten message, as it conveys your sincerity and adds a touch of warmth to the card, making it truly yours.

Indeed, as you take the time to craft a heartfelt message, you will find that your words become a genuine expression of your feelings, allowing you to connect with the recipient on a deeper level, and making the card a treasured keepsake for years to come, a testament to the thought and effort you put into creating something truly special just for them.

Tips and Tricks

Despite the simplicity of creating DIY greeting cards, you may encounter some challenges. Consider the following:

  • Choose the right materials
  • Keep it simple
  • Perceiving the recipient’s style and preferences will help you create a card that is truly special.

    Color Schemes and Patterns

    Above all, selecting a suitable color scheme and pattern is important to create a visually appealing card. You can choose colors that match the occasion or the recipient’s favorite hues, and pair them with complementary patterns to add depth and interest.

    Texture and Dimension

    Deepening the visual appeal of your card, adding texture and dimension can elevate it to a whole new level. You can use various materials such as ribbons, buttons, or embossing to create a unique and eye-catching design.

    Tips for incorporating texture and dimension into your DIY greeting cards include experimenting with different materials and techniques, such as layering or stamping, to add depth and visual interest. As you explore the world of DIY card making, you will find that the possibilities are endless, and your creations will become truly personalized and meaningful expressions of your thoughts and feelings.

    Advanced Techniques

    All aspiring card makers can take their craft to the next level with these methods:

    1. Layering
    2. Dimensionality
    Technique Description
    Layering Combining multiple elements
    Dimensionality Adding depth to your design

    Layering and Dimensionality

    Across various styles, you will find that layering and dimensionality can elevate your cards, as you experiment with different textures and depths to create visually appealing designs.

    Specialty Papers and Materials

    On the subject of materials, you will discover a wide range of options to enhance your cards, from metallic papers to embroidered fabrics, allowing you to add unique touches to your creations.

    Consequently, as you explore the world of specialty papers and materials, you will find that your possibilities for creativity expand, and your cards become even more personalized and thoughtful, reflecting your attention to detail and dedication to your craft, allowing you to make truly one-of-a-kind greetings that will delight your loved ones.

    Summing up

    So, with these simple steps, you have unlocked the secret to creating exquisite DIY greeting cards for any occasion. You can now dazzle your loved ones with your thoughtfulness and creativity, as you put your personal touch on each card. Your handmade masterpieces will undoubtedly be treasured, and the joy of giving them will be yours to savour.

    FAQ

    Q: What materials do I need to make a DIY greeting card?

    A: To make a DIY greeting card, you will need a variety of materials, including cardstock or thick paper, scissors, glue, markers or colored pencils, and any embellishments you like, such as stickers, stamps, or ribbons. You may also want to have a ruler, pencil, and eraser on hand to help you design and layout your card. Depending on the occasion and design, you can also use other materials like photos, fabric, or found objects to add a personal touch.

    Q: What are some tips for designing a DIY greeting card?

    A: When designing a DIY greeting card, consider the occasion and the recipient’s personal style and interests. Choose a color scheme and theme that fits the occasion, and select images and embellishments that will resonate with the recipient. Don’t be afraid to experiment and try out new ideas, and keep your design simple and balanced to ensure the card is visually appealing. You can also look for inspiration online or in card-making books and magazines to get started.

    Q: How can I make a DIY greeting card for a specific occasion, such as a birthday or wedding?

    A: To make a DIY greeting card for a specific occasion, start by brainstorming ideas and themes related to the occasion. For example, for a birthday card, you might use bright colors and playful designs, while for a wedding card, you might use more formal and elegant designs. Consider the recipient’s interests and personality, and incorporate personal touches, such as photos or inside jokes, to make the card extra special. You can also use occasion-specific embellishments, such as birthday candles or wedding bells, to add a festive touch.

    Q: Can I make a DIY greeting card if I’m not crafty or artistic?

    A: Absolutely! Making a DIY greeting card doesn’t require a lot of artistic skill or experience. There are many simple and easy-to-follow tutorials and templates available online, and you can use pre-made cards or card bases to get started. You can also keep your design simple and focus on the message and sentiment, rather than the artistic details. The most important thing is to have fun and be creative, and the recipient will appreciate the thought and effort you put into making a handmade card.

    Q: How can I add a personal touch to a DIY greeting card?

    A: There are many ways to add a personal touch to a DIY greeting card, including using photos, handwritten messages, and personal symbols or icons. You can also incorporate the recipient’s name, initials, or special dates to make the card extra special. Consider adding a personal anecdote or inside joke to the card, or using a favorite quote or song lyrics to make it more meaningful. You can also use handmade elements, such as hand-drawn illustrations or handmade paper, to give the card a unique and personal touch.

DIY Paper Lantern Tutorials

You’re looking to create something with your own hands, something that brings a touch of warmth to your space. You’ve come to the right place. With these DIY paper lantern tutorials, you’ll learn to craft your own lanterns, step by step. You’ll gather simple materials and get to work, your hands moving with purpose as you shape and fold the paper into beautiful forms. Your lanterns will be unique, a reflection of your own style and patience.

Key Takeaways:

To create beautiful and unique DIY paper lanterns, consider the following points:

  • Using colorful and patterned paper can add a personal touch to your lanterns and make them stand out in any setting.
  • Mastering the folding and gluing techniques is important to achieve a professional-looking finish and ensure the lanterns are sturdy.
  • Experimenting with different shapes and sizes can help you create a variety of lanterns to suit different occasions and decor styles, from traditional to modern.

Materials Needed

While making a paper lantern, you will need several materials.

Paper Types

You can use:

  • Rice paper
  • Tissue paper
  • Crepe paper

Any of these papers will work for your lantern.

Material Quantity
Paper 1 sheet
String 1 piece
Glue 1 bottle
Scissors 1 pair

Lighting Options

Options for lighting your lantern include candles, LEDs, or small light bulbs.

Hence, you can choose the one that suits your needs. You will be able to find these at your local store, and they are easy to install in your lantern.

Design and Planning

You start by envisioning the look of your lantern. Consider the occasion and the space where it will be used. This will help you decide on the overall aesthetic you want to achieve.

Choosing Colors

Choosing the right colors for your lantern is key. Consider the mood and atmosphere you want to create, and select hues that fit with your vision.

Selecting Shapes

For a unique lantern, think about the shape you want to create. You can choose from traditional spherical shapes or opt for something more exotic.

Design your lantern with the shape in mind, considering how it will impact the overall visual effect. You will need to think about the size, proportions, and how the shape will affect the lighting inside the lantern.

Construction Techniques

To build a paper lantern, you’ll need to master basic construction techniques. You’ll work with paper, glue, and a few simple tools. Your goal is to create a sturdy, evenly proportioned lantern.

Folding and Cutting

For precise folds and cuts, use a ruler and a sharp knife. You’ll make straight cuts and sharp folds, giving your lantern its shape and structure. Your hands will move with a newfound precision.

Assembly and Decoration

Along with the construction, you’ll start thinking about assembly and decoration. You’ll add your personal touch, with colors and patterns that reflect your style. Your lantern begins to take shape.

Consequently, as you assemble and decorate your lantern, you’ll notice how your creative decisions impact the overall look. You’ll add a light source, and your lantern will glow with a warm, inviting light. You’ll step back, admiring your handiwork, and feel a sense of pride in what you’ve created.

Adding Lighting

Despite the beauty of paper lanterns, you can enhance their appeal by adding a light source. You can find inspiration for DIY paper lanterns decor at DIY Paper Lanterns Decor Ideas to create your unique design.

Candles and LEDs

Lighting your lanterns with candles or LEDs will give your space a warm ambiance. You can choose either option, depending on your preference and the style you’re aiming for.

Safety Precautions

Any time you’re working with light sources, you need to be cautious. You should keep an eye on your lanterns when they’re lit, especially if you’re using candles.

Also, you should place your lanterns away from flammable materials and ensure they’re stable to avoid accidents, allowing you to enjoy your beautiful DIY paper lanterns with peace of mind.

Decorating and Customizing

Not only can you create your own paper lanterns, but you can also customize them to fit your style. You can add your personal touch with various decorating techniques and materials.

Paint and Markers

Around the world of decorating, about the simplest way to add color and design to your lantern is with paint and markers. You can use bright colors and bold designs to make your lantern stand out.

Ribbons and Embellishments

The final touches to your lantern can be added with ribbons and embellishments. You can use them to create a elegant and sophisticated look.

To add ribbons and embellishments, you will need to choose the ones that fit your lantern’s style and color. You can tie a ribbon around the top of the lantern or glue embellishments onto the lantern’s surface. You can experiment with different combinations to find the one that works best for your lantern.

Hanging and Displaying

Many options are available when it comes to hanging and displaying your paper lanterns. You can place them in a corner, from the ceiling, or even on a table. Your creativity is the only limit to how you showcase your lanterns.

Indoors and Outdoors

Along with the right lighting, your paper lanterns will shine in any setting. You can hang them in your living room or take them outside for a garden party. Your lanterns will add a touch of elegance to any event.

Tips and Ideas

Above all, you have the freedom to experiment with your lanterns. You can try:

  • Using different sizes and colors
  • Creating patterns with the lanterns
  • Adding decorations like ribbons or flowers

Any arrangement you choose will be a reflection of your personal style.

Outdoors, you can hang your lanterns from trees or a gazebo. You can try:

  • Hanging lanterns at different heights
  • Using lanterns of varying shapes
  • Creating a theme with your lanterns

Any setting you create will be unique and beautiful, and you will enjoy the process of making it your own.

To wrap up

Summing up, you’ve now got the basics to create your own DIY paper lanterns. You’ve learned the steps, and with a bit of patience, your hands will be crafting these beauties in no time. Your paper lanterns will bring a warm glow to any room, and you can take pride in knowing you made them yourself.

FAQ

Q: What materials do I need to make a DIY paper lantern?

A: To make a DIY paper lantern, you will need a few basic materials, including rice paper or thin colored paper, a balloon, a glue stick, scissors, a pencil, and a string or twine. You may also want to add some decorative elements, such as paint, markers, or stickers, to give your lantern a personalized touch.

Q: How do I inflate the balloon to the right size for my paper lantern?

A: Inflating the balloon to the right size is important for creating a lantern that is both sturdy and visually appealing. Start by blowing up the balloon to a medium size, then test it by wrapping a piece of paper around it to see if it’s the right size. If it’s too small, blow it up a bit more, and if it’s too large, let some air out. You can also use a measuring tape to measure the circumference of the balloon to ensure it’s the size you want.

Q: How do I attach the paper to the balloon to create the lantern shape?

A: Attaching the paper to the balloon is a bit tricky, but with a few simple steps, you can achieve a beautiful lantern shape. Start by applying a thin layer of glue to the balloon, then carefully wrap the paper around it, smoothing out any wrinkles or air pockets as you go. Make sure to apply even pressure to avoid creasing the paper. You can also use a brush to apply the glue for a more even coat.

Q: Can I use different shapes and sizes of paper to create unique lanterns?

A: Yes, you can definitely experiment with different shapes and sizes of paper to create unique and personalized lanterns. Try using square or rectangular paper for a more modern look, or use circular paper for a traditional lantern shape. You can also use paper with different textures, such as tissue paper or crepe paper, to add depth and interest to your lantern. Just be sure to adjust the size of the balloon accordingly to accommodate the shape and size of the paper.

Q: How do I add a light source to my DIY paper lantern?

A: Adding a light source to your DIY paper lantern is easy and safe, as long as you follow a few basic precautions. You can use a small LED candle or a string of fairy lights to illuminate your lantern. Simply place the light source inside the lantern, making sure it’s secure and won’t come into contact with the paper. You can also use a battery-operated tea light for a warm and cozy glow. Just be sure to follow the manufacturer’s instructions for use and safety guidelines.

Skip to content