art

The Art of Hand Embroidery

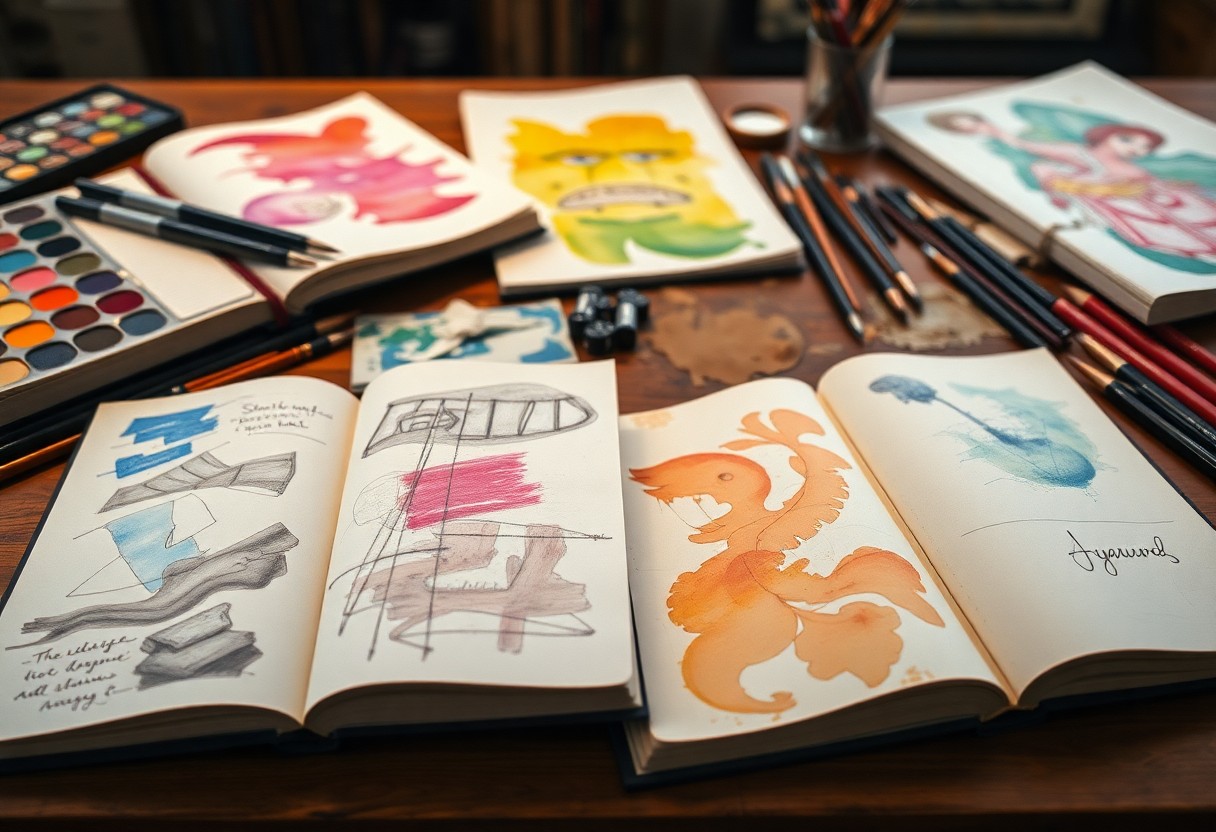
As you investigate into the world of needlework, you will discover the delicate charm of hand embroidery, an art form that requires patience, dedication, and a gentle touch. Your fingers will dance with the needle, weaving intricate patterns and designs that tell a story of elegance and refinement. With each stitch, you will uncover the beauty of this traditional craft, and your appreciation for the meticulous details will grow, much like the delicate threads that intertwine to create a masterpiece of elegance and sophistication.

Key Takeaways:

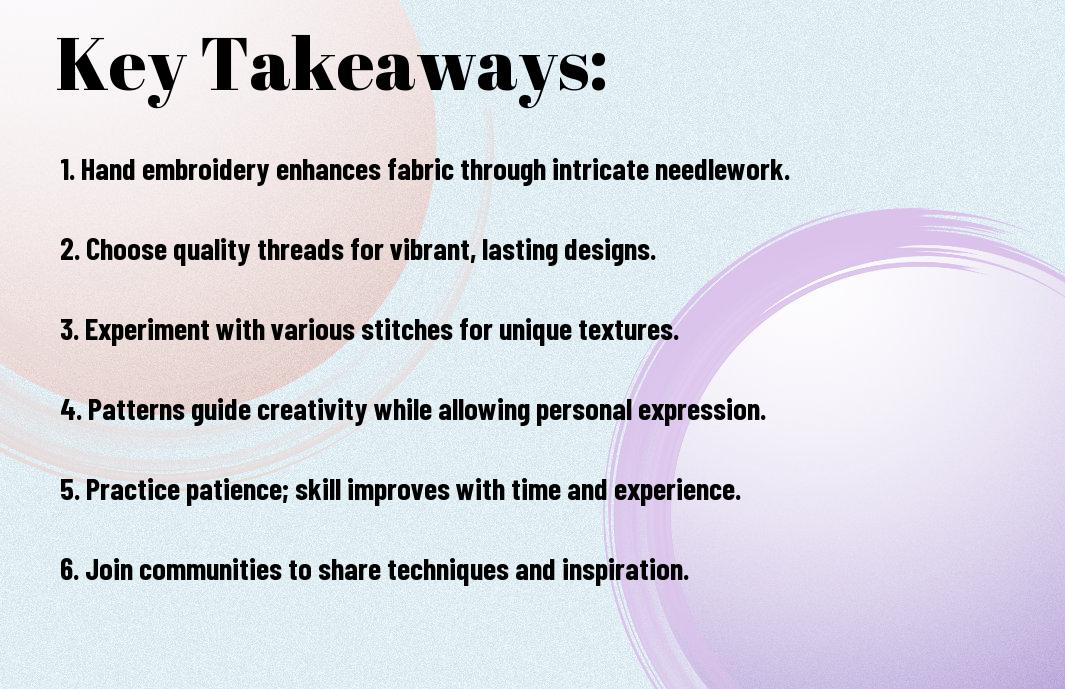
  • The foundation of hand embroidery lies in understanding the various stitches and techniques involved, which can be mastered with practice and patience.
  • Design and pattern selection play a significant role in hand embroidery, as they can greatly impact the overall aesthetic and visual appeal of the final product.
  • The choice of materials, including fabrics, threads, and needles, is vital to achieving the desired texture and color in hand embroidery pieces.

History of Hand Embroidery

To research into the world of hand embroidery, you must first understand its rich history, which spans thousands of years and traverses numerous cultures. As you explore this traditional craft, you will discover the intricate techniques and beautiful designs that have been passed down through generations.

Origins and Evolution

For centuries, hand embroidery has been a beloved craft, with its origins dating back to ancient civilizations in Egypt, China, and Greece. As you learn about its evolution, you will appreciate the skill and artistry that have gone into creating exquisite embroidered pieces, from delicate lace to intricate tapestries.

Influence of Culture and Society

One of the most fascinating aspects of hand embroidery is its reflection of the cultural and social context in which it was created. As you examine the various styles and techniques, you will notice how they reveal the values, traditions, and aesthetics of different societies, inviting you to ponder the significance of this craft in your own life.

It is intriguing to consider how hand embroidery has been shaped by the social and cultural norms of different eras, with various techniques and designs emerging in response to the needs and tastes of specific communities. As you explore this aspect of hand embroidery, you will gain a deeper appreciation for the ways in which this craft has been influenced by the world around it, and how it, in turn, has influenced the world of art, fashion, and culture, allowing you to develop your own unique perspective on this traditional craft.
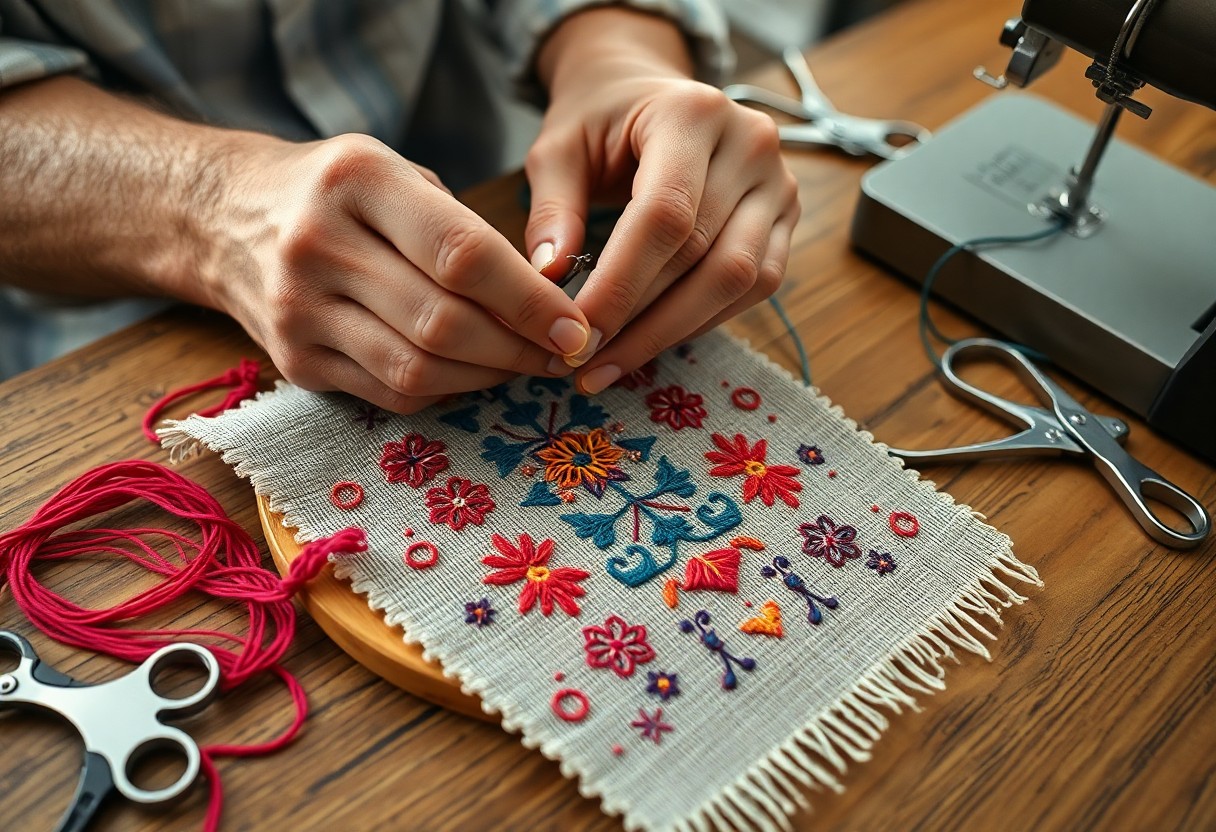
Basic Techniques

Clearly, the foundation of hand embroidery lies in mastering the fundamental techniques that have been passed down through generations. As you begin your journey, you will discover the beauty of creating intricate designs and patterns with your own hands.

Stitches and Patterns

Besides the basic running stitch, you will learn various other stitches, such as the satin stitch and the French knot, which will enable you to create a wide range of patterns and designs, from simple to complex, to adorn your embroidered pieces.

Tools and Materials

Any enthusiast of hand embroidery will tell you that having the right tools and materials is important to producing exquisite work. You will need a few basic supplies, including embroidery hoops, needles, and threads, to start creating your own embroidered masterpieces.

To acquire the necessary tools and materials, you may visit a craft store or search online for specialty suppliers. As you explore deeper into the world of hand embroidery, you will discover the vast array of options available to you, from luxurious silks and linens to delicate cotton threads and intricate needles, all of which will help you to refine your skills and bring your embroidery projects to life, allowing you to create truly unique and beautiful pieces that reflect your personal taste and style.

Design and Composition

Not unlike a beautiful painting, a well-designed hand embroidery piece requires careful consideration of various elements. You will find that a harmonious blend of patterns, shapes, and lines creates a visually appealing composition, drawing your eye to the focal point of your artwork.

Color and Texture

Along with the choice of thread and fabric, you must consider the interplay of colors and textures in your design, as these elements can greatly enhance the overall aesthetic of your embroidery, allowing you to create a rich and intricate piece that invites your gaze.

Balance and Proportion

Beside the careful selection of colors and textures, you should also think about the balance and proportion of your design, ensuring that each element is in harmony with the others, creating a sense of stability and visual equilibrium in your artwork, which will undoubtedly please your eye.

Another aspect to consider when thinking about balance and proportion is the negative space in your design, as you will find that a thoughtful use of empty space can create a sense of lightness and airiness, allowing your embroidery to breathe and your eye to wander through the composition with ease, taking in the intricate details of your handiwork.

Advanced Methods

Keep exploring the world of hand embroidery, and you will discover various techniques to enhance your craft.

  1. Stem stitch
  2. French knot
Stitch Description
Stem stitch Basic outline stitch
French knot Textured, knotted stitch

Specialized Stitches

Albeit simple, these stitches can be combined to create intricate designs, as you will find that your embroidery skills improve with practice, allowing you to tackle more complex projects.

Complex Designs

The art of embroidery offers endless possibilities, and as you progress, you will be able to create stunning, intricate designs that showcase your skill and patience.

Considering the various stitches and techniques you have mastered, you can now attempt to create complex designs, such as floral patterns, landscapes, or even portraits, and you will find that your embroidery hoop becomes a canvas for your imagination, as you weave threads of different colors and textures to bring your vision to life.

Tips and Tricks

Many enthusiasts of hand embroidery have discovered that with a few simple techniques, your stitches can become more even and your project more enjoyable. Consider the following:

  • using good quality threads and needles
  • practicing regularly
  • This will help you to develop your skills and build your confidence in embroidery.

    Common Mistakes to Avoid

    Between the intricate stitches and delicate fabrics, it is easy to make mistakes, yet you can avoid them by being patient and diligent in your work, thus ensuring your embroidery remains beautiful and flawless.

    Improving Skill and Speed

    Behind every skilled embroiderer lies a commitment to consistent practice and a willingness to learn, and as you dedicate yourself to this craft, you will find your skills growing and your speed increasing.

    Due to the nature of hand embroidery, which requires patience, dedication, and attention to detail, you will find that as you continue to practice, your hands will move more deftly, your stitches will become more evenly spaced, and your overall skill will improve, allowing you to complete projects more efficiently and effectively, thereby enhancing your enjoyment of this most delightful and rewarding craft, and enabling you to create truly beautiful and intricate pieces that reflect your growing proficiency.

    Preservation and Display

    Your hand-embroidered pieces are treasures to be cherished, and proper preservation and display techniques will ensure their beauty endures for generations.

    Caring for Embroidered Pieces

    Around the house, you will want to handle your embroidered pieces with utmost care, avoiding exposure to direct sunlight and moisture to prevent fading and damage.

    Showing Off Your Work

    Cautiously, you will want to select a method to showcase your finished embroidery, choosing a frame or display case that complements the piece and protects it from environmental stressors.

    Embroidered pieces can be displayed in a variety of ways, and you may consider creating a beautiful linen-lined box or a decorative hoop to showcase your work, allowing you to admire your handiwork while keeping it safe from harm, and enabling you to proudly share your creations with others, showcasing your skill and artistry.

    Conclusion

    As a reminder, you have discovered the delightful world of hand embroidery, and now your appreciation for this art form has grown. You may wish to explore further, and for that, you can refer to The Art of Embroidery: Inspirational Stitches and Textures to refine your skills and indulge your passion. Your newfound interest will undoubtedly bring you joy and serenity as you create beautiful, intricate designs.

    FAQ

    Q: What is the best way to get started with hand embroidery for a beginner?

    A: To get started with hand embroidery, it’s vital to invest in a few basic tools such as a needle, embroidery hoop, and some embroidery floss. Choosing a simple design or pattern is also advisable, as it will help build confidence and skills. Online tutorials and classes can provide a comprehensive introduction to the various stitches and techniques involved in hand embroidery.

    Q: What are the most common mistakes beginners make when learning hand embroidery?

    A: One common mistake beginners make is not tightening the fabric sufficiently in the embroidery hoop, leading to uneven stitching. Another mistake is not using the correct needle size for the specific type of fabric being worked on. Additionally, failing to follow the pattern or not keeping the tension of the floss consistent can also lead to disappointing results. Practicing regularly and paying close attention to these details can help avoid such mistakes.

    Q: How do I choose the right fabric for my hand embroidery project?

    A: The choice of fabric for hand embroidery depends on the desired effect and the level of difficulty. Cotton and linen are popular choices due to their stability and ease of use. For beginners, Aida cloth or evenweave linen are great options because they have a clear, evenly spaced weave that makes it easy to count stitches. The thread count of the fabric and the type of embroidery floss to be used should also be considered to ensure compatibility and achieve the best results.

    Q: What are some tips for creating intricate and detailed designs in hand embroidery?

    A: To create intricate and detailed designs in hand embroidery, it’s helpful to use a variety of stitches and techniques. Understanding how to blend colors and shading can add depth and dimension to the design. Using high-quality embroidery floss that has good colorfastness is also important to prevent fading. Working in good light and using magnification tools if necessary can help in achieving precise stitches. Lastly, taking breaks to avoid eye strain and maintaining patience are key to producing high-quality, detailed work.

    Q: Can hand embroidery be used to embellish or repair existing clothing and textiles?

    A: Yes, hand embroidery can be a beautiful way to embellish or repair existing clothing and textiles. It can be used to add decorative elements such as monograms, motifs, or patterns to clothing, accessories, or home furnishings. For repair, embroidery can be used to reinforce weakened areas or to cover small tears and holes, extending the life of the item. The technique and type of floss used should be chosen based on the type of fabric and the intended use of the item to ensure durability and aesthetic appeal.

How to Create Abstract Art

You stand in front of a blank canvas, eager to create something unique. Your mind is filled with ideas, but you’re not sure where to start. You’ll begin by experimenting with different materials and techniques, allowing your instincts to guide your brushstrokes. As you work, you’ll uncover your own style, and your abstract art will take shape. With each stroke, you’ll move closer to creating a piece that reflects your vision and emotion.

Key Takeaways:

To create stunning abstract art, consider the following points:

  • Start with a concept or emotion that inspires you, and let it guide your creative process to produce a unique piece of art.
  • Experiment with different techniques, such as layering, texturing, and color blending, to add depth and visual interest to your artwork.
  • Embrace spontaneity and intuition, allowing yourself to make bold and expressive brushstrokes or marks that convey your creative vision.

Preparing the Space

A clean and organized space is crucial for creating abstract art. You can find inspiration on how to start your project by visiting 8 Fun Ways to Start an Abstract Painting to get your creative juices flowing.

Gathering Materials

Materials needed for your abstract art project should be readily available, including paints, brushes, and canvas, so you can focus on the creative process.

Setting up the Environment

Before you begin, set up your workspace to promote productivity and comfort, ensuring good lighting and ventilation to help you stay focused.

And as you arrange your workspace, consider the flow of your creative process, keeping frequently used items within easy reach, allowing you to move freely and concentrate on bringing your abstract art vision to life, with your space now ready for you to express yourself.

Exploring Techniques

Now that you’ve started creating abstract art, it’s time to experiment with different methods to find what works best for you. You’ll discover various techniques to express your unique style.

Experimenting with Colors

With a wide range of colors at your disposal, you can create unique combinations that evoke emotions and convey meaning. You’ll find that certain colors work well together, while others clash, allowing you to refine your palette.

Playing with Textures

Along with color, texture plays a significant role in abstract art, adding depth and visual interest to your work. You can use various materials to create different textures, from smooth to rough, to enhance your art.

Finding Inspiration

After deciding to create abstract art, you need to find inspiration. Your surroundings, experiences, and emotions can spark ideas. Look for things that evoke feelings or stimulate your mind.

Looking at Nature

Above all, nature is a great source of inspiration. You can observe its patterns, colors, and textures to influence your art. Take note of the shapes and forms that appeal to you.

Drawing from Emotions

Around you, emotions are constantly shifting. You can tap into your feelings to create unique and personal art. Your emotions can guide your color choices and brushstrokes.

Finding your emotional state is key to creating authentic abstract art. You can explore your feelings by reflecting on your experiences, thoughts, and sensations. This will help you to express yourself honestly and create art that resonates with others.

Creating the Composition

Balancing Elements

The key to a great composition is balance. You’ll balance your elements, like color and shape, to create a sense of harmony in your artwork. You’ll place each element deliberately, considering how it affects your overall piece.

Considering Negative Space

Around your artwork, negative space plays a significant role. You’ll use it to create a sense of simplicity and focus attention on specific elements. Your negative space will help your artwork breathe, making it more dynamic.

Even when you think you’ve got your composition right, take a step back and look at your negative space. You’ll see how it affects your artwork’s overall feel and flow. You can adjust your elements to use negative space effectively, creating a more engaging piece that draws your viewer in.

Adding Layers and Depth

Once again, you’ll find yourself lost in the process of creating abstract art. You’ll add layers, building up your piece, and watching it evolve. Your colors will blend, your textures will deepen, and your art will take on a life of its own.

Building Up Colors

Among the many techniques you can use, building up colors is one of the most effective. You’ll start with a base coat, then add layers of paint, each one interacting with the last, creating a rich and vibrant palette that draws the viewer in.

Incorporating Patterns

For your art to truly come alive, you’ll need to incorporate patterns. You’ll use shapes, lines, and textures to create a sense of movement and energy, drawing the viewer’s eye through your piece.

This pattern work will add an extra layer of complexity to your art, making it more interesting and engaging. You’ll experiment with different patterns, finding the ones that work best with your colors and textures, and using them to create a sense of tension and balance in your piece.

Refining the Piece

All aspects of your abstract art piece should come together during this stage. You evaluate your work, making adjustments to create a cohesive whole.

Stepping Back and Evaluating

About now, you should take a step back and assess your piece. You are looking for balance, harmony, and a sense of completeness.

Making Final Adjustments

An eye for detail is necessary as you make your final adjustments. You tweak and refine, ensuring every element serves your artistic vision.

Indeed, making final adjustments is where your abstract art piece truly comes alive. You refine colors, textures, and composition, trusting your instincts to guide you. Your goal is to create a piece that resonates with you, and by extension, your audience, drawing them into the world you’ve created.

Final Words

Drawing together the threads of your creativity, you’ve learned to craft unique abstract art. Your brushstrokes now dance with purpose, guided by your intuition. You’ve discovered that abstract art is a journey, not a destination. With each piece, your style evolves, reflecting your inner world. You’ve taken the first steps, now keep creating, experimenting, and pushing your boundaries. Your art will continue to grow, a testament to your imagination and skill.

FAQ

Q: What is abstract art and how do I get started with creating it?

A: Abstract art is a form of art that does not depict recognizable subjects, but instead uses colors, shapes, and textures to create a unique visual language. To get started with creating abstract art, begin by experimenting with different materials and techniques, such as painting, drawing, or mixed media. Play with colors, textures, and patterns to develop your own style and express yourself creatively. You can also draw inspiration from other abstract artists, nature, or emotions to spark your creativity.

Q: What materials do I need to create abstract art?

A: The materials you need to create abstract art can vary depending on the technique and style you want to achieve. Some common materials used in abstract art include paints (acrylic, oil, or watercolor), canvases or papers, brushes, palette knives, and other tools for applying and manipulating the paint. You can also experiment with mixed media, incorporating materials like paper, fabric, or found objects into your artwork. Additionally, you may want to have a variety of surfaces, such as wood panels or boards, to create unique textures and effects.

Q: How do I develop my own unique style in abstract art?

A: Developing your own unique style in abstract art takes time and practice. Start by experimenting with different techniques, colors, and materials to see what works best for you. Look at the work of other abstract artists, but don’t try to copy their style – instead, use their work as inspiration to develop your own voice. Keep creating and pushing yourself to try new things, and you will eventually start to see a unique style emerge. It’s also important to trust your instincts and not overthink your process – abstract art is all about expression and intuition.

Q: Can I create abstract art without any formal training or experience?

A: Absolutely! Abstract art is all about experimentation and creativity, and you don’t need any formal training or experience to get started. In fact, many abstract artists are self-taught and have developed their skills through trial and error. The most important thing is to have a willingness to experiment and take risks – don’t be afraid to try new things and make mistakes. You can also find plenty of tutorials, workshops, and online courses that can provide guidance and inspiration as you develop your skills.

Q: How do I know when my abstract art piece is complete?

A: Knowing when an abstract art piece is complete can be subjective, as it’s often a matter of personal intuition. One way to determine if your piece is complete is to take a step back and look at it with fresh eyes – if it feels balanced and resolved to you, then it’s likely complete. You can also ask yourself if you’ve achieved the emotional or expressive effect you were aiming for. Another approach is to set a deadline or a specific goal for your piece, and when you’ve reached that goal, consider it complete. Ultimately, trust your instincts and don’t overwork your piece – sometimes, less is more in abstract art.

How to Paint with Textures

You stand in front of a blank canvas, brush in hand, ready to create. You’ve got the colors, the vision, but something’s missing – depth. That’s where texture comes in. You’ll learn to add grit, grain, and dimension to your work, making it pop. Your art will take on a life of its own, engaging the viewer on a new level. Now, let’s get started, and you’ll be painting with textures in no time.

Key Takeaways:

  • To achieve unique effects, use thick paints and heavy brushstrokes when painting with textures, allowing for a more expressive and dynamic visual outcome.
  • Experimenting with different materials and tools, such as sponges, palette knives, or even natural elements like leaves, can add depth and interest to your textured paintings.
  • Playing with layering and blending techniques can help to create a sense of dimensionality in your work, drawing the viewer’s eye into the textured world you’ve created.

Preparing the Surface

Your surface is the foundation of your artwork, and it needs to be ready for texture. You’ll need to clean and prepare it before you start painting.

Cleaning the Canvas

Above all, wash your hands, then gently wipe the canvas with a damp cloth to remove dirt and dust.

Applying a Primer

Canvas is your base, and a primer helps it accept texture and paint evenly. Apply a coat, letting it dry completely before proceeding.

Even if you’re using a high-quality canvas, a primer improves the adhesion of your textures and paints, allowing you to achieve the desired effects. You can choose between acrylic or oil-based primers, depending on your project’s requirements, and apply them with a brush or roller, covering the entire surface uniformly.

Choosing the Right Tools

Assuming you’re ready to start painting with textures, you’ll need to gather the right tools. Your choices will depend on the effects you want to achieve. Selecting the right brushes and texturing instruments will make all the difference in your work.

Selecting Brushes

Across various types of brushes, you’ll find ones that suit your needs. You’ll look for brushes with stiff bristles for thick textures and softer ones for smoother effects. Your brush selection will set the tone for your entire piece.

Exploring Texturing Instruments

On the surface of your painting, you’ll apply textures using various instruments. You’ll use these tools to add depth and interest to your work. Your texturing instruments will help you achieve unique effects.

Instruments like palette knives, sponges, and even household items will become your allies in creating textured paintings. You’ll experiment with different tools to find what works best for you, and your unique style will emerge from the textures you create. As you work, you’ll discover new ways to use these instruments to add complexity to your art.

Applying Texture Techniques

Keep your brushstrokes intentional, using heavy strokes to build up texture. You’ll achieve unique effects by layering paint and mediums, creating depth on your canvas.

Thickening Paint

Around the edges, you’ll find thickening agents that help you achieve your desired consistency. You can use these to build up layers of paint and create textured effects.

Using Sponges and Rags

For your next step, grab a sponge or rag and start applying paint in dabbing motions. You’ll be able to create interesting patterns and textures by varying your pressure and technique.

In addition, you can experiment with different types of sponges and rags to achieve unique effects, such as using a natural sponge for organic textures or a lint-free rag for smoother results. You can also try dipping your sponge or rag in paint and then wringing it out to create a more subtle texture.

Creating Dimension and Depth

Despite the challenges, you can achieve dimension and depth in your painting by experimenting with textures. You’ll find that different materials and techniques can add layers of interest to your work.

Layering Colors

Against a plain background, you can build up colors to create a sense of depth. You’ll start to see your painting take shape as you apply each layer, with your colors blending and merging to form a unique texture.

Building Up Texture

The key to texture is applying it in thin layers, allowing each layer to dry before adding the next. You’ll find that your paint starts to take on a life of its own as you build up the texture.

Consequently, you’ll be able to create a raised, almost three-dimensional effect on your canvas. You can use this technique to draw the viewer’s eye to a particular part of the painting, or to add emphasis to a specific element, and your unique texture will be the result of your experimentation and patience.

Experimenting with Different Materials

After mastering basic texture techniques, you’ll want to explore various materials to add depth to your work. You’ll discover new effects by combining paint with different substances, expanding your creative possibilities.

Incorporating Natural Elements

Alongside your paints, you can use natural elements like leaves, twigs, or sand to create unique textures. You can apply these elements directly to your canvas or mix them with paint for added effect.

Using Unconventional Objects

The objects you find in your daily life can become great tools for creating textures. You can use household items like sponges, fabric, or even kitchen utensils to create interesting effects on your canvas.

Understanding how to use unconventional objects in your texture painting takes practice, but it can lead to remarkable results. You can experiment with different objects, observing how they interact with your paint and canvas, and develop your own distinct style by incorporating these unusual tools into your creative process, allowing you to produce truly original work that reflects your unique perspective.

Enhancing with Finishing Touches

Many techniques can elevate your textured painting. You’ll find that adding a few finishing touches can make all the difference in the final product.

Adding a Varnish

Above all, applying varnish will protect your work. You apply it after the paint is dry, and it will give your painting a glossy finish.

Creating a Frame

Behind your painting, a frame can add depth and context. You choose a frame that complements your artwork, and it will enhance the overall effect.

At this stage, you consider the style and material of the frame. You want it to match your painting’s texture and tone, so your artwork looks complete and polished. You can choose from various options, such as wood or metal, and select the one that suits your piece best.

Summing up

With these considerations, you’ve got the basics to paint with textures. You’ve learned to choose your tools and materials, and how to apply them to create depth and dimension. Your brushstrokes, bold or subtle, will bring your artwork to life. Now, get to work and experiment with different textures, see what works for you and what doesn’t. You’ll find your own style, and your paintings will take on a life of their own.

FAQ

Q: What are the different types of textures that can be used in painting?

A: There are several types of textures that can be used in painting, including physical textures such as thick paint, gel medium, and modeling paste, as well as visual textures created through various brushstrokes and techniques. Physical textures can add a tactile element to a piece, while visual textures can create the illusion of texture through color and pattern. Some common textures used in painting include impasto, which involves applying thick layers of paint to the canvas, and sgraffito, which involves scratching through layers of paint to create a textured effect.

Q: What materials can I use to create texture in my paintings?

A: There are many materials that can be used to create texture in paintings, including paint, gel medium, modeling paste, and found objects such as paper, fabric, and natural materials like leaves and twigs. You can also use household items like sponges, cloth, and paper towels to create unique textures and patterns. Additionally, you can experiment with different brushstrokes and techniques, such as dragging, scraping, and dripping, to create a wide range of textures and effects.

Q: How can I prepare my surface for texture painting?

A: To prepare your surface for texture painting, start by priming your canvas or board with a coat of gesso or acrylic paint. This will create a smooth, even surface for you to work on. You can then apply a texture paste or medium to the surface, using a brush, palette knife, or other tool to create the desired texture. Alternatively, you can apply a layer of paint to the surface and then use a texture paste or medium to add texture on top. Make sure to allow each layer to dry completely before adding additional texture or paint.

Q: What are some common techniques for applying texture to a painting?

A: Some common techniques for applying texture to a painting include impasto, which involves applying thick layers of paint to the canvas, and glazing, which involves applying multiple thin layers of transparent paint to achieve a deep, luminous color. You can also use a palette knife to apply thick, heavy strokes of paint, or a sponge or cloth to create soft, mottled textures. Additionally, you can experiment with dragging, scraping, and dripping techniques to create unique, expressive textures and patterns.

Q: How can I balance texture with other elements in my painting?

A: To balance texture with other elements in your painting, consider the overall composition and visual balance of the piece. Texture can be used to create emphasis and draw the viewer’s eye to a particular area of the painting, or to add depth and interest to a background or secondary element. Balance texture with other elements such as color, shape, and line by creating a visual hierarchy, where the most important elements are given prominence and the less important elements are subdued. You can also use texture to create a sense of movement or energy in the painting, by applying it in bold, expressive strokes or patterns.

How to Make Art Journals

You’re about to launch on a creative journey, crafting a space where your thoughts and imagination come together. As you begin, you’ll gather simple materials like paper, glue, and paint. Your art journal will be a reflection of your unique perspective, a place to express yourself freely. You’ll learn to combine words and images, experimenting with different techniques to make your journal truly yours. With each step, you’ll shape a one-of-a-kind book that showcases your artistic voice.

Key Takeaways:

To create a unique and personalized art journal, consider the following points:

  • Start by selecting a notebook or sketchbook that suits your style and preferences, taking into account the size, paper quality, and binding.
  • Experiment with various materials and techniques, such as painting, drawing, collaging, and writing, to add depth and visual interest to your art journal.
  • Make your art journal a personal and creative space by incorporating photos, ephemera, and other memorabilia that inspire and reflect your thoughts, feelings, and experiences.

Gathering Materials

For the foundation of your art journal, you’ll need to collect a few basic materials. This includes a journal, art supplies, and any personal items you want to incorporate into your journal.

Choosing the Right Journal

Before you start, consider the size and type of journal that suits your needs. You’ll want one that is comfortable to handle and has paper that can withstand various art techniques.

Essential Art Supplies

Against the urge to overspend, start with the basics: a pencil, eraser, and pen. These will be the building blocks of your art journal, allowing you to sketch and write with ease.

Essential to creating a unique and expressive art journal, you’ll want to experiment with different supplies, such as paints, markers, and collage materials, to add depth and texture to your pages. As you become more comfortable with your journal, you can add more supplies to your collection, tailoring it to your personal style and creative vision.

Setting Up Your Journal

Some of the most important decisions you’ll make when creating an art journal are made at the outset. You’ll need to decide on the size, shape, and type of journal you want to use. Think about the kind of art you want to create and the space you have available to work on your journal.

Preparing the Pages

Alongside your journal selection, you’ll need to prepare your pages. You can add a coat of gesso or paint to create a uniform background, or leave them blank for a more minimalist approach. This will give you a foundation to build on as you start creating your art journal.

Creating a Theme

Planning your theme is similar to mapping out a journey. You’ll want to consider what inspires you and what you want to express in your art journal. This could be a personal experience, a place, or an emotion.

Due to the personal nature of an art journal, your theme will evolve as you work on it. You’ll find that your ideas and inspirations will shift and change, and your journal will become a reflection of your unique perspective and creativity. As you work on your journal, you’ll start to see your theme emerge, and you can adjust your approach accordingly, allowing your art journal to become a true expression of yourself.

Creating Art Journal Pages

Now that you have your art journal, it’s time to start creating. You’ll find that your pages can be as simple or as complex as you like, depending on your mood and inspiration.

Mixing Media and Techniques

Among the various ways to create art journal pages, mixing media and techniques is a great approach. You can combine paint, ink, and collage to create unique textures and effects, making your journal truly yours.

Experimenting with Color

The colors you choose will set the tone for your art journal. You can use bright hues to express joy or muted tones to convey contemplation, allowing you to explore your emotions through your art.

For instance, you can experiment with different color combinations to evoke a particular mood or atmosphere, and see how your art journal pages reflect your personality and style as you work through the process of creating and expressing yourself. You can try monochromatic schemes, complementary colors, or analogous colors to add depth and interest to your pages.

Adding Words and Stories

Once again, you’re faced with a blank page, waiting for your thoughts and ideas to fill it. You can add words and stories to your art journal, making it a reflection of your experiences and emotions.

Writing Prompts and Ideas

Words flow easily when you have a starting point. You can use writing prompts, such as descriptive phrases or questions, to spark your creativity and guide your writing.

Incorporating Meaningful Quotes

Behind every quote, there’s a story or message that resonates with you. You can add quotes that inspire or motivate you, making your art journal a source of encouragement.

Further, incorporating meaningful quotes can add depth and context to your art journal. You can use them as a theme or inspiration for your artwork, or as a way to express your thoughts and feelings, making your journal a unique and personal reflection of your inner world.

Organizing and Reflecting

After completing your art journal, take time to organize and reflect on your work. You will find that this step helps you to appreciate your progress and identify areas for improvement.

Creating an Index or Key

Across the pages of your journal, you will have created a unique visual language, and an index or key can help you navigate this world, allowing you to quickly find specific themes, techniques, or inspirations that you have explored.

Reviewing and Reflecting on Progress

Around the time you finish a journal, take a step back and assess your growth, looking at how your style, skills, and themes have evolved over time, and you will see your artistic voice emerge.

Due to the personal nature of art journals, your reflection will be deeply individual, and you will find that looking back on your work gives you new insights into your thoughts, feelings, and experiences, helping you to better understand yourself and your artistic vision.

Overcoming Creative Blocks

Many times, you’ll find yourself staring at a blank page, unsure of what to create. This is normal. Take a break, clear your mind, and come back to your art journal when you feel refreshed.

Staying Inspired and Motivated

Across the pages of your art journal, you’ll discover that inspiration can strike at any moment. You’ll find that your motivation grows with each new entry, as you experiment with different techniques and styles.

Finding New Ideas and Techniques

To get started, you’ll need to explore different mediums and tools, such as paints, markers, and collage materials. You’ll find that your art journal is a great place to try new things and take risks.

At this point, you’ll start to notice that your art journal is becoming a reflection of your thoughts and feelings. You’ll see that your ideas and techniques are evolving, and that you’re developing your own unique style. As you continue to create, you’ll find that your art journal becomes a source of inspiration and motivation, helping you to stay focused and driven to produce your best work.

To wrap up

So, you’ve learned the basics of making art journals. Now, it’s time to put your skills to the test. You can find more tips and inspiration on How To Start An Art Journal: A Complete Beginner’s Guide. You will fill your journal with your unique voice and vision, making it a reflection of your artistic journey. Your art journal is yours to experiment and express yourself freely.————-FAQ

Q: What is an art journal and how do I get started with making one?

A: An art journal is a unique and creative way to express yourself through a combination of art, writing, and reflection. To get started, you’ll need a few basic supplies such as a notebook or journal, pens, pencils, markers, and any other art materials you’d like to incorporate. Begin by setting an intention for your journal, whether it’s to practice mindfulness, explore your creativity, or document your travels. Then, start experimenting with different techniques and mediums, and don’t be afraid to make mistakes – they’re all part of the process.

Q: What type of journal is best for making an art journal?

A: The type of journal you choose will depend on your personal preference and the style of art you want to create. Look for a journal with high-quality, mixed-media paper that can withstand a variety of techniques, such as watercolor, collage, and ink. Consider a journal with a sewn binding, which will allow you to open it flat and work across spreads. You can also choose a journal with prompts or inspirational quotes to help spark your creativity.

Q: How do I develop a consistent style and theme in my art journal?

A: Developing a consistent style and theme in your art journal takes time and experimentation. Start by exploring different techniques and mediums, and see what works best for you. Consider creating a mood board or vision board to help define your aesthetic and inspire your creativity. You can also experiment with different colors, textures, and motifs to develop a cohesive look and feel. As you work in your journal, pay attention to what themes and styles emerge, and see how you can build on those to create a consistent narrative.

Q: Can I use digital tools to create an art journal, or do I need to work traditionally?

A: While traditional art journaling with physical materials can be very rewarding, you can also create a digital art journal using a tablet, smartphone, or computer. There are many digital drawing and painting programs available, such as Procreate or Adobe Illustrator, that can mimic traditional media. You can also use a digital journaling app, such as Day One or Sketchbook Pro, to create and organize your digital art journal. The most important thing is to choose the tools that work best for you and your creative style.

Q: How often should I work in my art journal, and what if I don’t feel inspired?

A: The frequency at which you work in your art journal is up to you – some people like to work in their journal daily, while others prefer to work in it weekly or monthly. The most important thing is to make art journaling a habit, and to schedule time for it in your daily or weekly routine. If you don’t feel inspired, try setting a timer for 10-15 minutes and challenging yourself to create something during that time. You can also try using prompts or exercises, such as freewriting or drawing from observation, to get your creative juices flowing. With consistent practice, you’ll find that inspiration will come more easily, and your art journal will become a source of joy and self-expression.

The Art of Wire Wrapping

You’re about to discover a timeless craft that requires patience and skill. As you probe into the world of wire wrapping, you’ll learn to shape and mold metal into intricate designs. Your hands will move deftly, twisting and turning wire into beautiful pieces of art. With each twist, you’ll uncover the simplicity and elegance of this ancient technique, and your creations will reflect your unique touch.

Key Takeaways:

To master wire wrapping, consider the following key points:

  • The technique of shaping and bending wire into various forms is a fundamental aspect of wire wrapping, allowing artists to create intricate designs and patterns.
  • Choosing the right materials, such as wire type and gauge, is crucial to achieving the desired look and durability of the final piece, whether it’s a piece of jewelry or a decorative item.
  • Practice and patience are key to developing the skills and precision needed to create beautiful and intricate wire-wrapped designs, as it requires a great deal of attention to detail and manual dexterity.

Fundamentals

While exploring the art of wire wrapping, you’ll discover the importance of mastering the basics. Your foundation in wire wrapping will set the stage for more complex designs, and it’s crucial to understand the principles that guide this craft.

Materials and Tools

One of the first steps in wire wrapping is gathering the necessary materials and tools. You’ll need wire, pliers, and other basic supplies to get started, and your choice of tools will depend on the type of wire and design you’re working with.

Basic Techniques

Along with mastering materials and tools, you’ll need to learn basic wire wrapping techniques. You’ll start by shaping and forming the wire into various patterns and designs, and your skills will improve with practice and patience.

At the heart of basic techniques is the ability to manipulate the wire into the desired shape. You’ll learn to bend, twist, and shape the wire to create intricate designs, and as you practice, you’ll develop the skills and confidence to take on more complex projects, allowing you to express your creativity and bring your unique vision to life.

Design Principles

It is the foundation of wire wrapping, guiding your creative process. You will explore the elements that make a piece visually appealing.

Balance and Proportion

Blending shapes and sizes, you achieve harmony in your wire-wrapped designs, creating a sense of stability and visual flow.

Color and Texture

Texturing your wire and combining colors, you add depth and interest to your pieces, making them more engaging.

And as you experiment with different colors and textures, you will discover how they interact and enhance your overall design, allowing you to refine your unique style and express your artistic vision through wire wrapping.

Wire Wrapping Styles

Now that you’ve got the basics down, it’s time to explore the various wire wrapping styles that will take your craft to the next level. You’ll find that different styles can completely change the look and feel of your pieces, allowing you to create unique and personalized items.

Traditional Methods

The most common traditional methods involve using simple tools and techniques to shape and mold the wire into intricate designs. You can use these methods to create classic pieces that evoke a sense of timeless elegance.

Modern Approaches

Approaching wire wrapping with a modern mindset allows you to experiment with new materials and techniques. You can incorporate unconventional items into your designs, giving your pieces a fresh and contemporary feel.

Wrapping your mind around modern wire wrapping techniques takes practice, but the results are well worth the effort. You’ll be able to create complex, three-dimensional designs that showcase your skill and creativity, and you’ll have the freedom to push the boundaries of what’s possible with wire wrapping, making each piece truly your own.

Tips and Tricks

For a successful wire wrapping project, consider the following:

  • use the right tools
  • choose suitable wire

. After mastering these basics, your designs will flourish.

Working with Different Wires

Fortunately, you have various wire types to experiment with, including copper, silver, and gold, each offering unique properties to enhance your work.

Troubleshooting Common Issues

With patience and practice, you’ll identify and solve problems, such as tangled wires or imperfect wraps, to achieve professional-looking results.

But as you overcome these challenges, you’ll develop the skills to diagnose and fix issues efficiently, allowing you to focus on the creative aspects of wire wrapping, and your projects will improve significantly as a result of your newfound expertise and attention to detail.

Projects and Inspiration

Not every project requires intricate details, as you can start with simple designs and build your way up to more complex ones, discovering your unique style in the process.

Simple Projects for Beginners

Straightforward techniques can help you get started with wire wrapping, allowing you to create elegant pieces with minimal equipment and experience, and as you progress, you’ll find that your skills will improve, enabling you to take on more challenging projects.

Advanced Designs for Experienced Artists

Beside the basic techniques, you’ll find more complex designs that require patience and practice, including:

  1. Twisted wire pendants
  2. Intricate beadwork
Wire Wrapping Techniques

Technique Description
Coiling Creating coils to form a design

With experience, you’ll be able to create stunning pieces, and as you explore advanced designs, consider the following:

  1. Experimenting with different materials
  2. Pushing the boundaries of traditional wire wrapping
Advanced Wire Wrapping

Design Characteristics
Torched wire Using heat to shape and form wire

You’ll find that your creativity will flourish as you master new techniques and apply them to your work, allowing you to produce unique and captivating pieces that reflect your artistic vision.

Safety and Best Practices

Keep your workspace clean and organized to avoid accidents and ensure your safety while wire wrapping. This will help you stay focused on your craft and produce high-quality work.

Handling Sharp Objects

Against the risk of injury, you must handle sharp objects with care, always cutting away from your body and keeping your fingers clear of the cutting edge.

Working in a Safe Environment

Behind every successful wire wrapping project is a well-planned workspace, where you can work comfortably without distractions or hazards, allowing you to concentrate on your craft.

But as you set up your workspace, you’ll find that a safe environment is not just about the physical space, it’s also about your mental state – you need to be patient, calm, and fully engaged in the process to create something truly beautiful and meaningful, so take your time and let your creativity flow.

Conclusion

Upon reflecting on the art of wire wrapping, you see the skill in your hands. You’ve learned to shape and mold metal into unique pieces. Your creations are a testament to your patience and dedication. As you continue to hone your craft, you’ll find your own style emerging, setting your work apart from others. With each piece, you’ll grow more confident in your ability to create something truly beautiful and lasting.

FAQ

Q: What is the art of wire wrapping and how did it originate?

A: The art of wire wrapping is an ancient technique that involves shaping and molding wire into intricate designs and patterns to create unique pieces of jewelry and decorative items. This art form has its roots in various cultures, including ancient Egypt, Greece, and Rome, where wire was used to create elaborate jewelry and adornments. Over time, wire wrapping has evolved and branched out into various styles and techniques, with modern artists experimenting with different types of wire, tools, and methods to create innovative and stunning pieces.

Q: What types of wire are commonly used in wire wrapping, and what are their characteristics?

A: The most common types of wire used in wire wrapping are copper, silver, and gold-filled or gold-plated wire. Copper wire is a popular choice due to its malleability, affordability, and attractive reddish-orange color. Silver wire is also widely used, offering a bright, white finish and a higher level of durability than copper. Gold-filled or gold-plated wire provides a luxurious, high-end look and is often used for more intricate and complex designs. Each type of wire has its unique properties and requirements, and the choice of wire depends on the desired outcome, skill level, and personal preference of the artist.

Q: What are the basic tools required to start wire wrapping, and how do I choose the right ones?

A: To start wire wrapping, you will need a few basic tools, including round-nose pliers, flat-nose pliers, wire cutters, and a work surface. Round-nose pliers are used to shape and form loops, while flat-nose pliers are used to grip and bend the wire. Wire cutters are necessary for cutting the wire to the desired length. Additionally, a work surface, such as a jewelry-making mat or a wooden board, provides a comfortable and stable area to work on. When choosing tools, consider the quality, comfort, and ergonomics of the tools, as well as your budget and the specific type of wire wrapping you plan to do.

Q: What are some common wire wrapping techniques and patterns, and how do I learn them?

A: Some common wire wrapping techniques include the basic wrap, the spiral, the coil, and the weave. These techniques can be combined and varied to create intricate patterns and designs. To learn these techniques, you can start with online tutorials, classes, or workshops, where experienced instructors can guide you through the process. You can also practice with different types of wire and tools to develop your skills and experiment with new designs. Additionally, there are many wire wrapping books, videos, and online communities available, offering a wealth of information, tips, and inspiration for wire wrappers of all levels.

Q: How do I care for and maintain my wire-wrapped jewelry to ensure its longevity and durability?

A: To care for your wire-wrapped jewelry, avoid exposing it to harsh chemicals, extreme temperatures, or heavy wear and tear. Regularly clean your jewelry with a soft cloth and mild soap, and store it in a cool, dry place. For copper and silver wire, apply a clear coat of wax or sealant to protect against tarnish and corrosion. For gold-filled or gold-plated wire, avoid exposing it to water or moisture, as this can cause the gold layer to wear off. With proper care and maintenance, your wire-wrapped jewelry can last for years to come, retaining its beauty and charm.

Linearyazilim Skip to content