Top DIY Valentine’s Day Gifts

As Valentine’s Day approaches, you’re likely thinking of ways to make it special for your loved one. You want to give a gift that’s thoughtful and personal, and what’s more personal than something you’ve made yourself? With your own hands, you can create a unique and meaningful present that shows you care. You can make your gift-giving experience more intimate and significant by putting your personal touch on it, making your partner feel extra special on this day of love.

Key Takeaways:

To make this Valentine’s Day special, consider the following ideas for unique and thoughtful gifts:

  • Creating a personalized photo album or frame with pictures of special moments can be a romantic gesture, showing your loved one how much you care about your time together.
  • Making a handmade coupon book with customized vouchers for things like massages, home-cooked meals, or movie nights can add a playful touch to your gift-giving.
  • Designing a customized piece of jewelry or a heartfelt letter can be a meaningful way to express your feelings and show your appreciation for your partner.

Handmade Gift Ideas

To create a thoughtful and unique gift, consider making something with your own hands. You can choose from a variety of ideas, such as jewelry, photo albums, and more, to show your love and appreciation.

Personalized Jewelry

Around this time of year, you can find many tutorials and guides to help you make personalized jewelry, allowing you to add a special touch to your gift. You can engrave names, dates, or special messages to make it extra special.

Customized Photo Albums

Handcrafting a customized photo album is a great way to showcase your favorite memories with your loved one. You can fill it with pictures of special moments, making it a one-of-a-kind gift that you can treasure together.

Understanding the process of creating a customized photo album, you will need to gather your favorite photos, choose a theme or design, and assemble the album with care. You can add captions or quotes to make it even more personal, and you will end up with a beautiful and meaningful gift that you can give to your loved one on Valentine’s Day.

DIY Home Decor

There’s no better way to celebrate Valentine’s Day than by transforming your home into a romantic oasis. You can create a warm and inviting atmosphere with your own DIY decorations, making the day even more special and personalized.

Heartfelt Candle Centerpieces

Between soft lighting and sweet scents, you can create a cozy ambiance with candle centerpieces that you design yourself, using your favorite colors and flowers to make them truly unique and meaningful to your loved one.

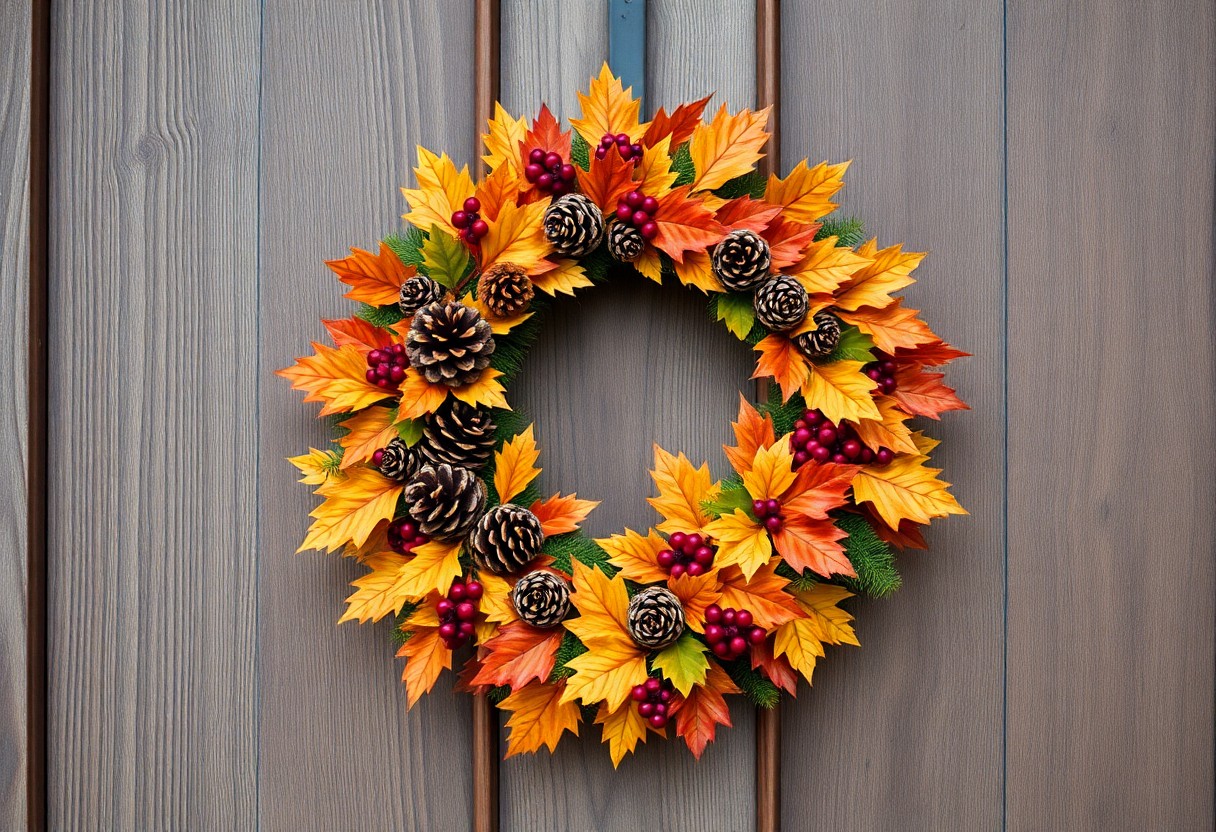
Romantic Flower Arrangements

An beautiful bouquet of flowers is always a great idea, and when you make it yourself, it becomes an even more thoughtful gift, allowing you to choose your partner’s favorite blooms and arrange them in a way that speaks to your love story.

For instance, you can select a mix of red roses, pink carnations, and white lilies to create a stunning arrangement that symbolizes your love, passion, and commitment, and add some greenery like eucalyptus or ferns to give it a fresh and romantic touch, making it a one-of-a-kind gift that you can enjoy together on Valentine’s Day.

Creative Experiences

Not only can DIY gifts be physical objects, but they can also be experiences that you create for your loved one. You can plan a special day or evening that your partner will never forget, making it a unique and thoughtful gift.

Couples’ Spa Day at Home

By transforming your home into a spa, you can create a relaxing and intimate atmosphere for your partner. You can set up a massage table, light some candles, and prepare a soothing playlist to make it a perfect day of pampering.

Personalized Scavenger Hunt

By planning a scavenger hunt with clues and challenges tailored to your partner’s interests, you can create an exciting and adventurous experience. You can hide notes, photos, and small gifts around the house or outside, leading your partner on a fun and romantic journey.

Even more exciting is the fact that you can customize the scavenger hunt to fit your partner’s personality and your relationship. You can include places and objects that hold special meaning to your partner, making the experience even more personal and sentimental. You can also add a final surprise or gift at the end of the hunt, making it a memorable and touching Valentine’s Day gift.

Tech-Savvy Gifts

Your tech-loving partner will appreciate a thoughtful and personalized gift, and there are many DIY options to choose from, such as customized phone cases and digital photo frames, that show you put extra effort into selecting a unique present.

Customized Phone Cases

Following a few simple steps, you can create a one-of-a-kind phone case that reflects your partner’s style and interests, making it a practical and meaningful gift.

Digital Photo Frames

Alternatively, you can fill a digital photo frame with pictures of special moments you’ve shared together, creating a heartfelt and sentimental gift that you can treasure for years to come.

To make it even more special, you can add captions or quotes to the photos, making the digital photo frame a unique and personalized gift that speaks to your relationship and shows you care about your partner’s feelings and memories.

Edible Delights

After considering various gift options, you’ll find that edible delights are a wonderful way to show your love and appreciation on Valentine’s Day. You can create a variety of sweet treats that your partner will adore.

Homemade Chocolates

Eating delicious homemade chocolates is a great way to celebrate Valentine’s Day, and you can make your own using simple ingredients like cocoa powder, sugar, and cream. You can customize them with your partner’s favorite flavors and toppings.

Personalized Cookies

Among the many edible gift options, personalized cookies stand out as a thoughtful and delicious choice. You can bake and decorate cookies with your partner’s name, initials, or a special message to make them extra special.

A thoughtful approach to personalized cookies is to consider your partner’s favorite flavors and decorating styles when creating these sweet treats. You can use various cookie cutters, icing colors, and sprinkles to make them visually appealing and meaningful. As you package your cookies in decorative tins or jars, you’ll see the excitement build for a lovely Valentine’s Day gift.

Budget-Friendly Options

All you need is a little creativity to create a meaningful and budget-friendly Valentine’s Day gift. You can make your own gifts, such as photo albums, coupons, or handmade cards, to show your love and appreciation without breaking the bank.

Repurposed Gift Ideas

Against the idea of buying expensive gifts, you can use items you already have at home to create a unique and thoughtful present. You can turn old jars into candle holders or use your favorite photos to create a personalized collage.

Free Printable Gift Tags

Across the internet, you can find numerous free printable gift tags that you can use to add a personal touch to your DIY gifts. You can customize them to fit your gift’s theme and style, making it an easy and affordable way to make your gift even more special.

In fact, using free printable gift tags can be a great way to add a professional touch to your homemade gifts. You can choose from a variety of designs and templates, and print them out on cardstock or sticker paper to give your gift a polished finish. You can also customize the tags with your own messages or names to make them even more personalized and meaningful to your loved one.

Final Words

With this in mind, you now have a wide range of creative and thoughtful DIY Valentine’s Day gift ideas to impress your loved one. You can choose the one that best fits your skills and your partner’s interests, and put your heart into making it special. By doing so, you will surely make your Valentine’s Day celebration even more meaningful and memorable, showing your love and care through your unique and personalized gift.

FAQ

Q: What are some popular DIY Valentine’s Day gift ideas for my partner?

A: There are many creative and thoughtful DIY Valentine’s Day gift ideas that you can make for your partner. Some popular ones include handmade coupons, personalized photo albums, customized jewelry, homemade chocolates, and romantic candlelit dinner setups. You can also consider making a customized playlist of your partner’s favorite songs, a handmade card, or a special memory box filled with notes and mementos from your time together.

Q: How can I make a DIY Valentine’s Day gift on a budget?

A: Making a DIY Valentine’s Day gift on a budget is easier than you think. Start by using materials you already have at home, such as old photos, scrapbook paper, and leftover craft supplies. You can also get creative with cheap materials like cardboard, glue, and paint. Consider making something simple yet thoughtful, like a handmade coupon book or a batch of homemade cookies. With a little bit of creativity, you can create a beautiful and meaningful gift without breaking the bank.

Q: What are some DIY Valentine’s Day gift ideas for him?

A: If you’re looking for DIY Valentine’s Day gift ideas for your boyfriend or husband, consider making something that shows you pay attention to his interests and hobbies. You could make a customized phone case or wallet, a personalized beer growler, or a handmade gaming controller skin. If he loves food, consider making a batch of his favorite snacks or cooking his favorite meal. You could also make a thoughtful gift like a photo album or a customized map with the places you’ve been together.

Q: How can I make a DIY Valentine’s Day gift more personal and meaningful?

A: To make a DIY Valentine’s Day gift more personal and meaningful, think about what makes your partner special and what they love. Incorporate inside jokes, special memories, and personal anecdotes into your gift. Use photos and mementos from your time together to make the gift more sentimental. You could also include a heartfelt letter or a romantic message to express your feelings. The most important thing is to show your partner that you care and are willing to put thought and effort into the gift.

Q: Can I make a DIY Valentine’s Day gift with my kids?

A: Making a DIY Valentine’s Day gift with your kids can be a fun and thoughtful way to show your partner you care. Consider making a collaborative art project, like a handprint painting or a family photo collage. You could also make a batch of homemade cookies or candies together, or create a special handmade card or coupon book. Not only will this make the gift more personal and meaningful, but it will also create special memories for you and your kids to cherish. Just be sure to involve your kids in the planning and creation process, and have fun with it!

How to Make Handmade Advent Calendars

Key Takeaways:

To create a unique and exciting handmade advent calendar, consider the following points:

  • Start by planning the design and theme of your calendar, taking into account the number of days you want to cover and the type of activities or treats you want to include.
  • Choose a variety of materials and crafting techniques to add depth and visual interest to your calendar, such as paper, fabric, or wood, and consider adding decorations like ribbons or buttons.
  • Make the experience even more special by filling your calendar pockets or compartments with treats and activities that cater to the interests and preferences of the person using it, such as chocolates, stickers, or small toys.

Planning Your Calendar

A well-planned advent calendar will make the holiday season even more special. You’ll want to consider the overall design and functionality of your calendar to ensure it meets your needs.

Choosing a Theme

Besides the traditional Christmas theme, you can choose a variety of themes for your advent calendar, such as winter wonderland, snowflakes, or even a favorite hobby. You can let your imagination run wild and pick a theme that reflects your personality.

Selecting Materials

At this stage, you’ll need to gather materials that fit your theme and design. You’ll want to choose materials that are durable and easy to work with, such as paper, fabric, or wood.

Another important aspect of selecting materials is considering the size and shape of your calendar. You’ll want to ensure that your materials are proportional to the size of your calendar and that you have enough to complete the project. You can visit craft stores or browse online to find the perfect materials for your handmade advent calendar, and don’t hesitate to get creative and mix different textures and colors to make it truly unique.

Designing Your Calendar

Clearly, the design of your handmade advent calendar is where you can let your creativity shine. You’ll want to consider the theme, colors, and overall aesthetic you want to achieve, as well as the number of days you want to include.

Creating a Template

Across the board, a well-planned template is necessary for a beautiful and functional calendar. You can sketch out a rough design on paper or use a digital tool to create a more precise template, taking into account the size and shape of your calendar.

Adding Decorative Elements

Essentially, embellishments can make or break the look of your calendar. You can add ribbons, bows, or other decorative elements to give your calendar a personalized touch, and make it more visually appealing to you and your loved ones.

Hence, as you start adding decorative elements, think about the style and theme you want to convey. You can choose elements that match your home decor or favorite holiday decorations, and have fun experimenting with different combinations to find the perfect look for your handmade advent calendar.

Building Your Calendar

Not every handmade advent calendar is the same, and you can customize yours to fit your style and preferences. You will start by planning the layout and design of your calendar.

Assembling the Calendar Base

Before you begin assembling the base, gather all your materials and tools. You will need a piece of cardboard or wood to serve as the base, as well as any decorative elements you want to include.

Attaching the Doors or Compartments

Calendar construction involves attaching doors or compartments to the base. Here is a breakdown of the steps:

Steps | Description
———|————
1 | Cut out doors or compartments
2 | Attach doors or compartments to base

You can use glue, nails, or another strong adhesive to secure the doors or compartments.

A thorough approach to attaching the doors or compartments is necessary for a polished finish. Here is a more detailed guide:

Techniques | Tools
—————|———-
Measuring | Ruler
Cutting | Scissors or craft knife

As you work on attaching the doors or compartments, you will see your calendar start to take shape, and you can begin to envision the finished product.

Filling Your Calendar

Many of the joys of a handmade advent calendar lie in the surprises that await you each day. As you fill your calendar, consider the treats and activities that will bring delight to your loved ones.

Selecting Treats and Surprises

Beneath the surface of a great advent calendar are thoughtful selections that cater to your family’s interests. You can choose from a variety of small toys, chocolates, and other goodies to fill each day’s compartment.

Adding Personalized Touches

Filling your calendar with personalized touches makes it extra special. You can add notes, drawings, or small mementos that are meaningful to your loved ones, making each day a unique experience.

Another way to make your advent calendar even more personal is to tailor the activities and treats to your family’s traditions and hobbies. You can include coupons for activities like baking cookies, going on a winter walk, or having a movie night, making the countdown to the holiday season a fun and engaging experience for everyone involved.

Decorating Your Calendar

Despite the simplicity of a handmade advent calendar, you can still make it look stunning with the right decorations. You can add ribbons, bows, and other embellishments to give it a personal touch. Your calendar will be a beautiful reflection of your personality and style.

Adding Embellishments

Your creativity will shine when adding embellishments to your calendar. You can use stickers, stamps, or drawings to make each day’s box unique and exciting. You can also add photos or small mementos to make it extra special.

Finishing Touches

Below the surface of your calendar, you’ve added a beautiful design, now it’s time to add the final details. You can add a hanger or a string to hang your calendar, making it easy to display in your home.

Even after you’ve completed the finishing touches, you can still make adjustments to your calendar. You can fill each box with treats or activities, and you can also add a personal message or a fun surprise to make the countdown to the holiday season even more exciting for you and your loved ones.

Tips and Variations

To make your handmade advent calendar even more special, consider the following ideas:

  • add a personal touch with photos or names

. You can customize it to fit your style and interests. Recognizing your creativity will make it a unique and meaningful project.

Making it a Family Affair

Across the holiday season, you’ll find that involving your loved ones in the process can be a fun and rewarding experience. You can assign tasks to each family member, making it a collaborative effort.

Creating a Themed Calendar

Across various styles and designs, you can choose a theme that suits your taste and preference. You can select a winter wonderland, a festive holiday, or a favorite hobby as your theme.

Affair with a themed calendar will add an extra layer of excitement to your countdown. You can decorate your calendar with elements that match your chosen theme, such as snowflakes, holly, or tiny ornaments, making each day’s surprise a delight to discover, and you’ll enjoy the process of creating a one-of-a-kind advent calendar that reflects your personality and style.

Summing up

Summing up, you’ve now learned the basics of creating your own handmade advent calendar. With these simple steps, you can craft a unique and personalized countdown to the holiday season. For more inspiration, visit Inexpensive Way to Make a DIY Advent Calendar to explore new ideas and make your holiday season even more special with your handmade creation. You can now enjoy your beautifully crafted calendar with your loved ones.

FAQ

Q: What materials do I need to make a handmade advent calendar?

A: To make a handmade advent calendar, you will need a variety of materials, including cardboard or cardstock for the base, 24 small boxes or envelopes, decorative paper or fabric, glue, scissors, and any other embellishments you’d like to add, such as ribbons, buttons, or stickers. You’ll also need a pen or pencil to mark the dates and a calendar or planner to plan out your design.

Q: How do I design my handmade advent calendar?

A: Designing your handmade advent calendar is a fun and creative process. Start by deciding on a theme, such as a winter wonderland or a festive holiday scene. Then, sketch out a rough design on paper, considering the size and shape of your calendar, as well as the placement of the 24 small boxes or envelopes. You can also look for inspiration online or in craft books to get ideas for your design. Once you have a plan, you can start cutting out your materials and assembling your calendar.

Q: What can I put inside each day’s compartment of my handmade advent calendar?

A: The possibilities are endless when it comes to filling each day’s compartment of your handmade advent calendar. You can include small toys, candies, or treats, as well as fun activities or challenges, such as puzzles, games, or crafts. You can also include notes or messages of encouragement, or small mementos, such as stickers, stamps, or temporary tattoos. The key is to make each day’s surprise fun and exciting, and to tailor the contents to the interests and personality of the person using the calendar.

Q: How do I assemble my handmade advent calendar?

A: Assembling your handmade advent calendar is a bit like building a puzzle. Start by gluing the small boxes or envelopes to the base, making sure to leave enough space between each one for easy access. Then, decorate the outside of the calendar with your chosen materials, such as paper, fabric, or ribbons. Next, fill each compartment with the treats or activities you’ve chosen, and finally, add any finishing touches, such as a ribbon or bow to hang the calendar. Make sure everything is securely attached and the calendar is sturdy enough to hold all the contents.

Q: Can I make a handmade advent calendar with my family or kids?

A: Making a handmade advent calendar is a great activity to do with your family or kids. You can involve them in the design and planning process, and have them help with tasks such as cutting, gluing, and decorating. This can be a fun and collaborative project that everyone can enjoy, and it’s a great way to spend quality time together during the holiday season. You can also make it a tradition to make a new handmade advent calendar together each year, using different themes and materials to keep it exciting and fresh.

The Best Winter Craft Projects

You step into your workshop, surrounded by snow outside, and your hands itch to create. You’ve got the time, now you need the ideas. Your winter crafting journey starts here. You’ll find projects to repurpose old items, to make your home cozier, and to give as gifts. You’ll get your hands on materials, follow simple steps, and make something with your own hands, feeling the satisfaction of creating something from scratch.

Key Takeaways:

To make the most out of your winter crafting experience, consider the following points:

  • Engage in Knitting or Crochet projects to create warm and cozy items like hats, gloves, and scarves, which make perfect gifts or personal accessories for the cold season.
  • Explore Paper Crafting techniques, such as card making, gift tagging, and scrapbooking, to add a personal touch to your winter gifts and decorations, using materials like glitter, snowflake patterns, and festive colors.
  • Try your hand at Upcycled or Repurposed craft projects, transforming old items like mason jars, twine, and pinecones into unique decorative pieces, such as candle holders, wreaths, and centerpieces, to add a touch of warmth and personality to your home.

Selecting Materials

A good winter craft project starts with the right materials. You’ll need to consider what you want to create and what supplies you’ll need to get started.

Choosing the Right Fabrics

For those who enjoy sewing, picking the right fabrics is key. You’ll want to select materials that are warm and durable, such as wool or fleece, to create a cozy winter project.

Essential Crafting Tools

An assortment of basic tools will get you started on your winter craft project. You’ll need items like scissors, glue, and yarn to bring your idea to life.

For instance, having a good pair of scissors will make cutting through thick fabrics easier, while a reliable glue gun will help you bond materials together quickly. You’ll find that with the right tools, your project will come together smoothly and efficiently, allowing you to enjoy the process of creating something with your own hands.

Winter-themed Crafts

Any craft project that captures the essence of winter can be a great way to get into the holiday spirit. You can make decorations, gifts, and other items that reflect the season’s magic.

Snowflake Decorations

With simple materials like paper and glue, you can create beautiful snowflake decorations to hang in your windows or from your ceiling. You’ll find that the intricate patterns and delicate designs add a touch of winter wonder to your home.

Handmade Ornaments

Ornate or simple, handmade ornaments can be a great way to personalize your holiday tree. You can make them from various materials like wood, metal, or glass, and customize them to fit your style.

Due to their unique nature, handmade ornaments make great gifts for friends and family. You can create a set of ornaments that reflect your loved ones’ interests or hobbies, making them a thoughtful and personalized present. As you work on your ornaments, you’ll find that the process is just as enjoyable as the end result, allowing you to relax and get into the holiday spirit. You’ll be able to treasure your handmade ornaments for years to come, and they will serve as a reminder of the time and effort you put into creating something special.

Cozy Home Decor

After a long day, you want your home to feel warm and inviting. You can achieve this with simple winter craft projects that add a personal touch to your space.

Knitted Blankets

Opposite to store-bought blankets, knitted ones provide a sense of comfort and coziness, and you can make them yourself with some yarn and a few basic stitches.

Winter-inspired Centerpieces

Above all, your coffee table or dining table needs a centerpiece that reflects the season, and you can create one using pinecones, twigs, and candles.

The key to a beautiful winter-inspired centerpiece is to keep it simple and natural, using elements like pine, holly, or frosted glass to create a warm and inviting ambiance, and you can arrange them in a way that suits your style and decor, making your home feel cozy and welcoming during the cold winter months.

Gift Ideas

Not every gift has to be expensive or store-bought. You can create something special with your own hands. Winter is the perfect time to get crafty and make gifts for your loved ones.

Personalized Mugs

With a few simple materials, you can create personalized mugs that show you care. You can paint or decoupage your favorite designs onto the mug, making it a unique gift for friends and family.

Handmade Candles

For a cozy and thoughtful gift, consider making handmade candles. You can customize the color and scent to fit your loved one’s style, making it a truly personal present.

In addition, making handmade candles allows you to control the ingredients and quality, ensuring a high-quality gift that will be appreciated. You can experiment with different waxes, fragrances, and dyes to create a one-of-a-kind candle that reflects your personality and style, making it a special and meaningful gift for your loved ones.

Tips and Tricks

To get the most out of your winter craft projects, consider the following:

  • Use high-quality materials
  • Follow patterns carefully

. You’ll find that your projects turn out better. Recognizing your mistakes is key to improving your craft.

Working with Yarn

Techniques for handling yarn are imperative. You’ll need to know how to knit, purl, and cast on to create something worthwhile. Your weaving will be tighter, your stitches even.

Adding a Personal Touch

Opposed to mass-produced items, your crafts will have character. You can add your own style, making each piece unique. Your touch will make it special.

Further, when adding a personal touch, you’ll want to think about what makes your craft distinct. You can experiment with different colors, textures, and patterns to create something that reflects your personality. Your winter craft project will be a one-of-a-kind item that you can be proud of, and it will make a great gift for someone special.

Seasonal Inspiration

Your winter craft projects start with the season’s inspiration, drawing from its unique landscapes and emotions.

Winter Wonderland Scenes

Any moment you step outside, you’re surrounded by snow-covered trees, frozen lakes, and frosty air, all begging to be captured in your crafts.

Frosty Morning Crafts

Along with the cold comes a stillness, a quiet that sparks creativity, and you can harness this to create beautiful, delicate pieces that evoke the chill of a winter morning.

Crafts like knitting, painting, and pottery can help you express the serene beauty of frosty mornings, and as you work, you’ll find that the calm and tranquility of the season seep into your creations, making them truly special and reflective of your winter experience.

To wrap up

Conclusively, you’ve now got your hands on the best winter craft projects. You can put your skills to the test, and in no time, your home will be filled with your creations. You’ll find that these projects bring a sense of warmth and coziness to your space, and you’ll be proud to showcase your handmade work to your loved ones. Your winter will be filled with joy and creativity, and that’s all that matters.

FAQ

Q: What are some popular winter craft projects that can be made at home?

A: Some popular winter craft projects that can be made at home include knitting or crocheting warm clothing and accessories, such as hats, scarves, and gloves, as well as making decorations like snowflakes, wreaths, and ornaments. You can also try your hand at making candles, soaps, and other home fragrances to create a cozy atmosphere. Additionally, you can make winter-themed crafts like snow globes, pinecone bird feeders, and handmade cards to give as gifts or use to decorate your home.

Q: What materials are needed for a winter craft project?

A: The materials needed for a winter craft project vary depending on the specific project. For knitting or crocheting, you will need yarn, knitting needles or a crochet hook, and scissors. For making decorations, you may need materials like paper, glue, scissors, and string or twine. For making candles and soaps, you will need wax, vital oils, and molds. You may also need additional materials like fabric, felt, or ribbons to add embellishments to your projects. It’s always a good idea to check the specific instructions for the project you want to make to ensure you have all the necessary materials.

Q: How can I make my winter craft projects more environmentally friendly?

A: There are several ways to make your winter craft projects more environmentally friendly. One way is to use recycled or repurposed materials, such as old sweaters or fabric scraps, to make new items like hats, scarves, or bags. You can also use natural materials like pinecones, twigs, and leaves to make decorations. Additionally, you can choose to use eco-friendly materials like soy wax or beeswax to make candles, and opt for vital oils that are sustainably sourced. You can also try to reduce waste by using up leftover materials and avoiding single-use plastics.

Q: Can I make winter craft projects with my kids?

A: Yes, winter craft projects can be a fun and creative activity to do with your kids. Many winter craft projects, such as making snowflakes, decorating ornaments, or making handmade cards, are easy and safe for kids to do with minimal supervision. You can also adapt more complex projects, like knitting or crocheting, to make them kid-friendly by using larger needles or hooks and simpler patterns. Making winter crafts with your kids can be a great way to spend quality time together, teach them new skills, and create lasting memories. Just be sure to supervise your kids when using materials like scissors, glue, or hot wax.

Q: How can I display and store my winter craft projects?

A: There are many ways to display and store your winter craft projects, depending on the type of project and the space you have available. You can display your projects on a mantel, shelf, or side table, or hang them on the wall or in a window. For smaller projects like ornaments or decorations, you can store them in a decorative box or container when not in use. For larger projects like knitted or crocheted items, you can store them in a closet or on a shelf in a cool, dry place. You can also consider giving your projects as gifts or donating them to a local charity or community organization.

DIY Summer Decor Ideas

Welcome to the warmest season of the year! As you prepare to refresh your home for summer, you’re likely looking for ways to add a touch of sunshine to your decor. You can easily create a bright and inviting atmosphere with a few simple DIY projects. Your home will be transformed into a summer oasis with these easy and creative ideas, and you’ll be enjoying the warmth and beauty of the season in no time, right in the comfort of your own space.

Key Takeaways:

To enhance your home’s aesthetic during the warmer months, consider the following DIY Summer Decor Ideas:

  • Using Natural Elements such as seashells, driftwood, and potted plants can add a touch of warmth and coziness to your summer decor, creating an inviting atmosphere for outdoor gatherings and relaxation.
  • Implementing Colorful Accents like vibrant throw pillows, blankets, and wall art can instantly brighten up your space, making it feel more Airy and Refreshing for the summer season.
  • Creating a Summer Oasis with String Lights, lanterns, and candles can transform your outdoor space into a magical and Cozy retreat, perfect for summer evenings and stargazing.

Outdoor Decor

For a beautiful outdoor space, you can find inspiration from various sources, such as 40 DIY Summer Decorating Ideas to Brighten Up Your Home and create a unique ambiance that reflects your style. You can add decorative items, lighting, and furniture to enhance your outdoor area.

Patio Makeover

Around your patio, you can add a few statement pieces, like a statement rug, outdoor furniture, and plants, to give it a fresh new look. This will help you create a cozy and inviting atmosphere where you can relax and enjoy quality time with family and friends.

Garden Decor

Decor your garden with vibrant flowers, herbs, and shrubs to add color and texture. You can also incorporate decorative elements like garden statues, bird baths, and sundials to create a beautiful and serene atmosphere.

Another aspect of garden decor is adding lighting, which can highlight your garden’s best features and create a warm ambiance in the evening. You can use string lights, lanterns, or solar-powered lights to illuminate your garden and make it a perfect spot for outdoor entertaining.

Indoor Decor

Assuming you want to bring the warmth of summer into your home, start by incorporating light and airy elements into your indoor decor. You can achieve this by using sheer curtains, pale woods, and natural textiles to create a cozy atmosphere.

Summer Color Scheme

Around this time of year, you likely think about vibrant hues that evoke the feeling of sunshine and sea breeze. About choosing a summer color scheme, consider palettes that feature soft corals, minty greens, and sunny yellows to add a touch of warmth to your space.

DIY Centerpieces

Central to your table setting, you will want to create beautiful centerpieces that reflect the spirit of summer. Centering your decor around seasonal flowers, fruits, and greenery can add a pop of color and freshness to your indoor space.

Decor that is thoughtful and well-planned can make all the difference in creating a welcoming atmosphere. As you design your DIY centerpieces, think about combining elements like candles, seashells, and pebbles to bring the outdoors in and add texture and depth to your tablescape, making your home feel like a summer oasis that you will enjoy all season long.

Repurposed Decor

Once again, you can breathe new life into old items by repurposing them as decorative pieces. This will not only add a personal touch to your space but also help reduce waste.

Mason Jar Decor

For a charming and rustic touch, fill mason jars with flowers, pebbles, or candles to create a beautiful centerpiece for your dining table or shelf.

Old Furniture Makeover

Decorate your old furniture with a fresh coat of paint or varnish to give it a new look. This is a great way to update your space without breaking the bank.

Plus, you can get creative with the makeover process by adding new hardware, reupholstering, or decoupage to give your old furniture a unique and personalized touch. You can turn an old dresser into a kitchen island, or an old door into a coffee table, the possibilities are endless, and you can have fun experimenting with different designs and styles to fit your summer decor theme.

Seasonal Accents

Despite the simplicity of summer decor, you can add depth with thoughtful accents. You’ll find that a few well-placed items can make your space feel cozy and inviting.

Summer Florals

Prior to selecting your flowers, consider the color palette and style you want to achieve. You can choose bright and bold flowers or soft pastels to match your summer vibe.

Coastal Themes

Beside the ocean-inspired colors, you can incorporate natural textures like woven fibers and driftwood to bring the coastal feel into your home. You can use these elements in your decor to create a cohesive look.

And as you explore the coastal theme further, you’ll discover that it’s all about embracing the carefree spirit of the sea. You can add shells, pebbles, or coral to your decor to give your space a beachy feel, and don’t forget to incorporate airy fabrics like linen and cotton to keep your home feeling light and breezy.

Lighting Ideas

After a long day, you want your outdoor space to shine, and the right lighting can make all the difference. You can create a warm and inviting ambiance with a few simple DIY lighting ideas that will make your summer decor truly special.

String Lights

Beneath the stars, you can hang string lights to add a touch of magic to your outdoor space. You can wrap them around trees, gazebos, or even your porch to create a cozy atmosphere that’s perfect for summer evenings.

Candle Decor

Behind the soft glow of candles, your summer decor will come alive. You can place candles in mercury glass holders or apothecary jars to add a touch of elegance to your outdoor space, creating a warm and inviting ambiance that’s perfect for relaxing summer nights.

Further, to enhance your candle decor, you can experiment with different scents and colors to match your summer theme. You can choose citrusy scents like lemon or orange to create a refreshing atmosphere, or opt for softer scents like vanilla or lavender to promote relaxation. By placing candles strategically around your outdoor space, you can create a warm and inviting ambiance that will make your summer nights truly unforgettable.

Budget-Friendly Tips

Your summer decor doesn’t have to break the bank. Consider the following:

  • Shop during sales
  • Use items you already have

Perceiving the value in budget-friendly options will help you create a beautiful summer space without overspending.

Thrift Store Finds

Almost anything can be transformed into a unique summer decor piece. You can find hidden gems at thrift stores and give them a fresh new look with a little paint or decoration.

DIY Decor on a Budget

Decorating your space on a budget can be easy and fun. You can create beautiful summer decor pieces using simple materials like seashells, twine, and fabric.

Store your leftover materials from previous projects and use them to create new decor pieces. You can also get creative with items you might otherwise throw away, like old mason jars or cardboard tubes, and turn them into one-of-a-kind summer decorations that reflect your personal style.

Final Words

On the whole, with these DIY summer decor ideas, you’ll be able to create a warm and inviting atmosphere in your home. You can now add a personal touch to your space, making it perfect for relaxing and entertaining. As you put your new decor skills to work, your home will feel fresh and vibrant, reflecting your unique style and flair, making your summer even more enjoyable and memorable.

FAQ

Q: What are some easy and affordable DIY summer decor ideas to refresh my home?

A: There are many easy and affordable DIY summer decor ideas to refresh your home. Some popular ideas include creating a summer-themed wreath for your front door, making a floral garland to hang in your living room, or repurposing old mason jars into vases for fresh flowers. You can also update your outdoor space by adding colorful throw pillows and blankets to your patio furniture, or by creating a DIY outdoor planter using wooden crates or terracotta pots.

Q: How can I incorporate natural elements into my DIY summer decor?

A: Incorporating natural elements into your DIY summer decor can add a touch of warmth and coziness to your space. Some ideas include using fresh flowers, branches, or greenery in your arrangements, or collecting seashells, pebbles, or driftwood to create a beautiful coastal-inspired display. You can also bring the outdoors in by displaying potted plants or a vase with fresh herbs, such as basil or rosemary, on your kitchen windowsill or dining table.

Q: What are some creative ways to use string lights in my DIY summer decor?

A: String lights can add a magical touch to your DIY summer decor, and there are many creative ways to use them. You can hang them from trees or gazebos in your backyard, wrap them around your porch or patio, or use them to create a canopy for your outdoor dining area. You can also use string lights to add ambiance to your indoor spaces, such as your living room or bedroom, by draping them over a mantel or across a wall. Additionally, you can customize your string lights by adding flowers, greenery, or other decorative elements to create a unique and personalized look.

Q: How can I make my DIY summer decor more eco-friendly and sustainable?

A: Making your DIY summer decor more eco-friendly and sustainable is easier than you think. Some ideas include using recycled or repurposed materials, such as old jars, bottles, or cardboard tubes, to create your decorations. You can also choose materials that are biodegradable or sustainable, such as bamboo, twine, or natural fibers. Additionally, consider using energy-efficient LED string lights or solar-powered decorations to reduce your carbon footprint. Finally, get creative with items you might otherwise throw away, such as turning old maps or book pages into decorative decoupage or using fabric scraps to create a unique quilt or throw pillow.

Q: What are some DIY summer decor ideas that can be made with kids?

A: Involving kids in your DIY summer decor projects can be a fun and creative way to spend quality time together. Some ideas include making a handprint or footprint wreath, creating a DIY wind chime using recycled materials, or making a colorful paper flower garland. You can also have kids help with simpler tasks, such as painting rocks or seashells, or assembling a DIY terrarium using small plants and decorative stones. Additionally, consider making a DIY photo display using pictures from your summer vacations or special events, and have kids help decorate the frames or arrange the photos in a collage.

How to Craft Seasonal Wreaths

You can create beautiful, unique wreaths that reflect your personal style and the current season. With a few simple materials and some creativity, you can design stunning pieces to adorn your home. As you explore the world of seasonal wreath-making, you will discover the versatility of various materials and techniques. You will learn how to choose the perfect elements to bring your vision to life and make your home feel welcoming and festive throughout the year.

Key Takeaways:

To create beautiful and unique seasonal wreaths, consider the following points:

  • Use fresh materials such as flowers, leaves, and branches that are in season to create a wreath that reflects the current time of year and adds a touch of nature to your home decor.
  • Experiment with different textures and colors to add depth and visual interest to your wreath, such as combining smooth ribbons with rough twigs or pairing bright flowers with muted greens.
  • Don’t be afraid to get creative and think outside the box when it comes to materials and designs, such as using unusual items like pinecones, seashells, or fabric to create a one-of-a-kind seasonal wreath.

    Gathering Materials

    The first step in crafting seasonal wreaths is to gather your materials. You will need a wire or foam wreath frame, as well as an assortment of seasonal elements such as flowers, foliage, and decorative items.

    Selecting Seasonal Blooms

    Beneath the variety of seasonal blooms, you’ll find the perfect flowers and foliage to match your wreath’s theme. You can choose from a range of colors and textures to create a unique and beautiful arrangement.

    Choosing Ribbon and Embellishments

    Almost any type of ribbon or embellishment can be used to add a finishing touch to your wreath. You can select from a wide range of materials, including silk, burlap, and lace, to create a look that suits your style.

    In fact, when it comes to choosing ribbon and embellishments, you have endless options to enhance your wreath. You can add bows, flowers, or other decorative elements to give your wreath a personalized touch, making it a one-of-a-kind creation that reflects your personality and style.

    Designing Your Wreath

    There’s no one-size-fits-all approach to designing a wreath, as the possibilities are endless and depend on your personal style and preferences. You can choose to go for a classic and elegant look or a more modern and eclectic design, depending on the occasion and the season.

    Considering Color Palette and Theme

    Thematic elements will play a significant role in determining the overall aesthetic of your wreath, and you should consider the colors and themes that resonate with the current season and your personal taste. You can draw inspiration from nature, holidays, or your favorite colors to create a unique and cohesive look.

    Balancing Texture and Form

    An abundance of textures and forms can add depth and visual interest to your wreath, and you should aim to strike a balance between different elements to create a harmonious design. You can combine smooth and rough textures, as well as various shapes and sizes, to create a wreath that is visually appealing.

    Even as you experiment with different textures and forms, you should consider how they will work together to create a cohesive look. You can achieve this by selecting elements that complement each other, such as pairing smooth ribbons with rough twigs or combining circular and linear shapes. By doing so, you will create a wreath that is not only beautiful but also unique and reflective of your personal style.

    Preparing the Base

    For a beautiful and long-lasting wreath, you need to start with a solid foundation. You will be creating your seasonal wreath on a base, which can be made of various materials such as wire, foam, or grapevine. Choose a base that fits your desired shape and size, and make sure it is sturdy enough to hold your decorations.

    Selecting the Right Wreath Frame

    Fortunately, you have numerous options when it comes to selecting a wreath frame, ranging from modern to traditional designs. You can opt for a wire frame for a more versatile and flexible base, or choose a foam frame for a fuller and more voluminous look. Consider the theme and style of your wreath when making your selection.

    Adding Filler Greens and Foliage

    Right from the beginning, you want to add some depth and texture to your wreath with filler greens and foliage. You can use a variety of materials such as eucalyptus, ferns, or lemon leaves to create a lush and vibrant base for your decorations. This will help you achieve a more polished and professional look.

    This step is where you can get creative and experiment with different combinations of filler greens and foliage to find the perfect blend for your wreath. You can choose materials that complement your wreath’s theme and color scheme, or opt for a more traditional approach with classic evergreen branches and holly. As you add your filler greens and foliage, make sure to fluff and shape them to achieve a natural and balanced look, and you will be ready to start adding your decorations and embellishments to complete your seasonal wreath.

    Adding Decorative Elements

    Keep your wreath visually interesting by adding decorative elements that reflect the season and your personal style. You can choose from a variety of materials, such as flowers, fruits, ribbons, and garlands, to create a unique and beautiful wreath.

    Incorporating Flowers and Fruits

    Between the base of your wreath and the decorative elements, you’ll find a world of possibilities. You can use fresh or artificial flowers and fruits to add color, texture, and fragrance to your wreath, making it a stunning piece for your home.

    Using Ribbons and Garlands

    Any ribbon or garland can be used to add a pop of color and texture to your wreath. You can choose from a wide range of materials, such as silk, burlap, or velvet, to match your wreath’s theme and style.

    Indeed, using ribbons and garlands is an excellent way to finish your wreath and give it a polished look. You can tie a ribbon around the wreath form, or weave a garland through the base, to create a beautiful and cohesive design that reflects your creativity and style, allowing you to enjoy your seasonal wreath.

    Finishing Touches

    After completing your wreath, add a professional touch by learning more about How to Make a Wreath tutorials. You can find inspiration and tips to enhance your creation.

    Adding a Personalized Accent

    Accent your wreath with a personalized item, such as a monogram or a decorative pick, to give it a unique touch. You can choose an item that reflects your personal style or the season.

    Final Fluffing and Primping

    Finishing your wreath with a slight fluff and primp will make it look complete. You should adjust any stray elements and make sure everything is in place.

    Primping is an crucial step to ensure your wreath looks its best. You will notice the difference when you take a step back and admire your handiwork, and with a few final tweaks, your wreath is ready to be displayed, showcasing your creativity and style.

    Displaying Your Masterpiece

    To showcase your seasonal wreath, consider the overall aesthetic you want to achieve in your home. You can hang it on your front door, wall, or use it as a centerpiece, and adjust the surrounding decor to complement your wreath.

    Choosing the Perfect Location

    Besides the entrance, you can also place your wreath in a living room or dining area to add a pop of color and fragrance, making your space feel cozy and inviting, as you admire your handmade creation.

    Pairing with Other Seasonal Decor

    Across the room, you can combine your wreath with other seasonal decorations, such as candles, pumpkins, or holly, to create a cohesive and festive atmosphere that reflects your personal style, as you enjoy the beauty of your wreath.

    Hence, when pairing your wreath with other seasonal decor, you can experiment with different textures, colors, and themes to find the perfect balance that enhances the beauty of your wreath and showcases your creativity, allowing you to enjoy the fruits of your labor and the admiration of your guests.

    Final Words

    Conclusively, you have learned the basics of crafting seasonal wreaths, and now you can create your own unique designs. You have the skills to choose the right materials and decorate your wreath according to your style. With your newfound knowledge, you can make beautiful wreaths that reflect your personality and add a personal touch to your home decor, making your space feel welcoming and inviting throughout the year, with your stunning creations.

    FAQ

    Q: What materials do I need to craft a seasonal wreath?

    A: To craft a seasonal wreath, you will need a variety of materials depending on the theme and design you choose. Some common materials include evergreen branches, holly, mistletoe, pinecones, ribbons, flowers, and decorative items like bows, berries, and ornaments. You will also need a wire or foam wreath frame to serve as the base of your wreath. Additionally, you may need some floral wire, scissors, and a hot glue gun to assemble and secure your materials.

    Q: How do I choose the right theme for my seasonal wreath?

    A: Choosing the right theme for your seasonal wreath depends on the time of year, your personal style, and the decor of your home. For example, a winter wreath might feature evergreen branches, pinecones, and snowflakes, while a spring wreath might feature flowers, greenery, and pastel colors. Consider the colors, textures, and motifs that are associated with the current season and choose materials that fit with those themes. You can also draw inspiration from nature, holidays, or special events to create a unique and personalized wreath.

    Q: What is the best way to assemble a seasonal wreath?

    A: Assembling a seasonal wreath can be a fun and creative process. Start by preparing your materials, such as cutting and trimming your branches, flowers, and greenery. Then, begin attaching your materials to the wreath frame using floral wire, hot glue, or another strong adhesive. Work your way around the wreath, adding materials in a balanced and visually appealing way. Consider creating a focal point, such as a bow or a cluster of flowers, to draw the eye and add interest to your wreath. Finally, fluff out your materials and adjust your wreath as needed to achieve a full and lush appearance.

    Q: How can I add a personal touch to my seasonal wreath?

    A: There are many ways to add a personal touch to your seasonal wreath, depending on your interests, hobbies, and style. Consider incorporating personal items, such as photos, ribbons, or decorations that reflect your favorite colors or themes. You can also experiment with different textures, such as burlap, lace, or velvet, to add depth and interest to your wreath. Another idea is to use natural materials, such as pinecones, acorns, or shells, that you have collected on a walk or vacation. By adding personal touches, you can make your wreath truly unique and reflective of your personality and style.

    Q: How do I care for and store my seasonal wreath?

    A: To keep your seasonal wreath looking its best, it’s crucial to care for and store it properly. For fresh wreaths, keep them away from direct sunlight, heat, and moisture, which can cause the materials to dry out or become damaged. For artificial wreaths, dust them regularly with a soft brush or cloth to prevent dust buildup. When not in use, store your wreath in a cool, dry place, such as a closet or attic, and consider wrapping it in tissue paper or a breathable cloth to protect it from damage. By following these tips, you can enjoy your seasonal wreath for years to come and make it a cherished part of your holiday decor.

Skip to content