DIY Christmas Ornaments You’ll Love

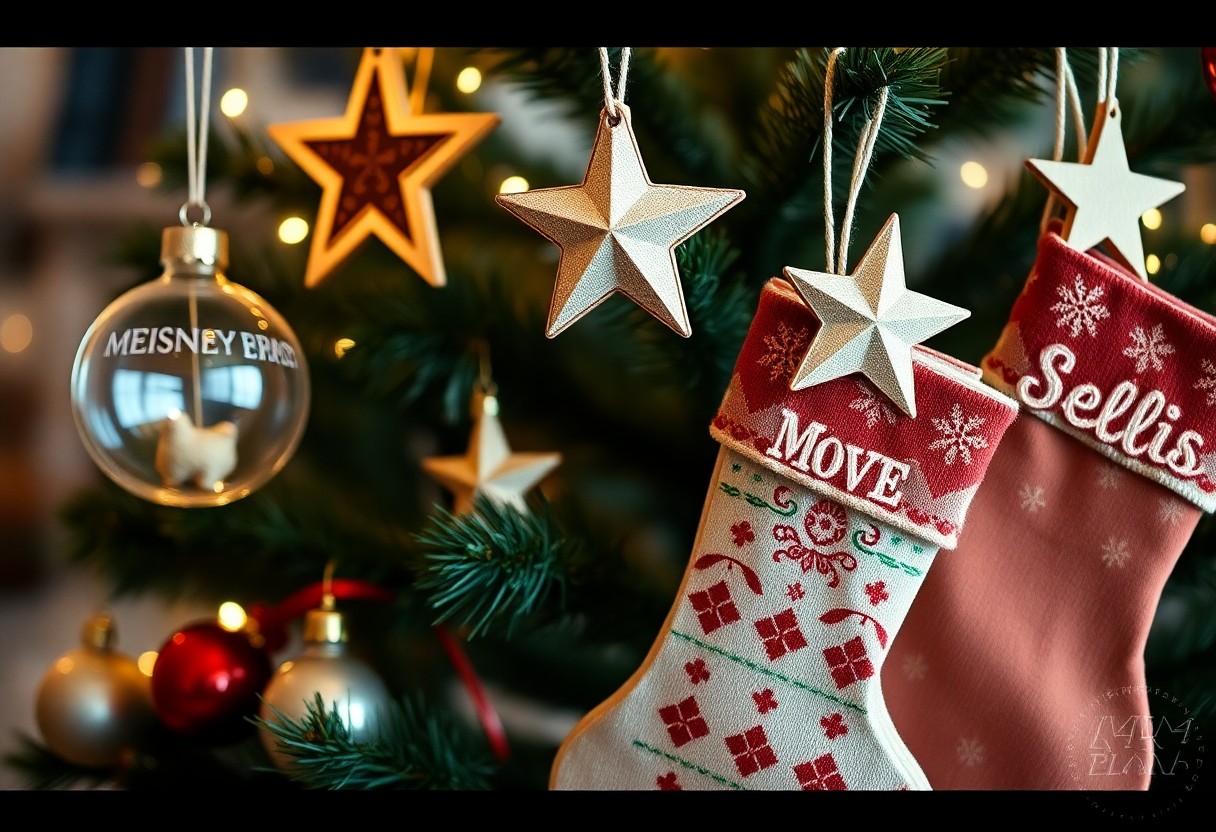
Create a personalized touch to your holiday decor with your own handmade ornaments. You can add a unique flair to your Christmas tree with your favorite materials and designs. For inspiration, you can check out 70 DIY Christmas Ornaments for a More Personal Touch to Your Tree and get started on making your own special ornaments that reflect your style and personality.

Key Takeaways:

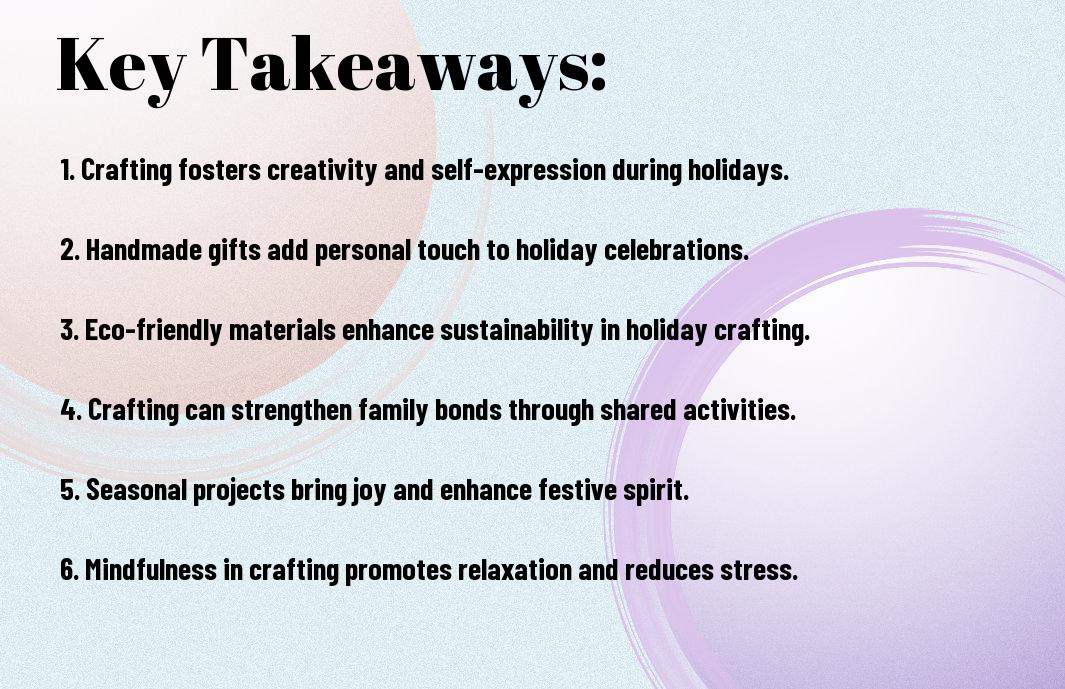
To make your Christmas celebration even more special, consider the following points about DIY Christmas ornaments:

  • Creating Personalized ornaments allows you to add a Unique touch to your Christmas tree, reflecting your personality or commemorating special events and people in your life.
  • Making Handmade ornaments can be a fun and Creative activity for the whole family, teaching children about the value of handmade items and the spirit of giving.
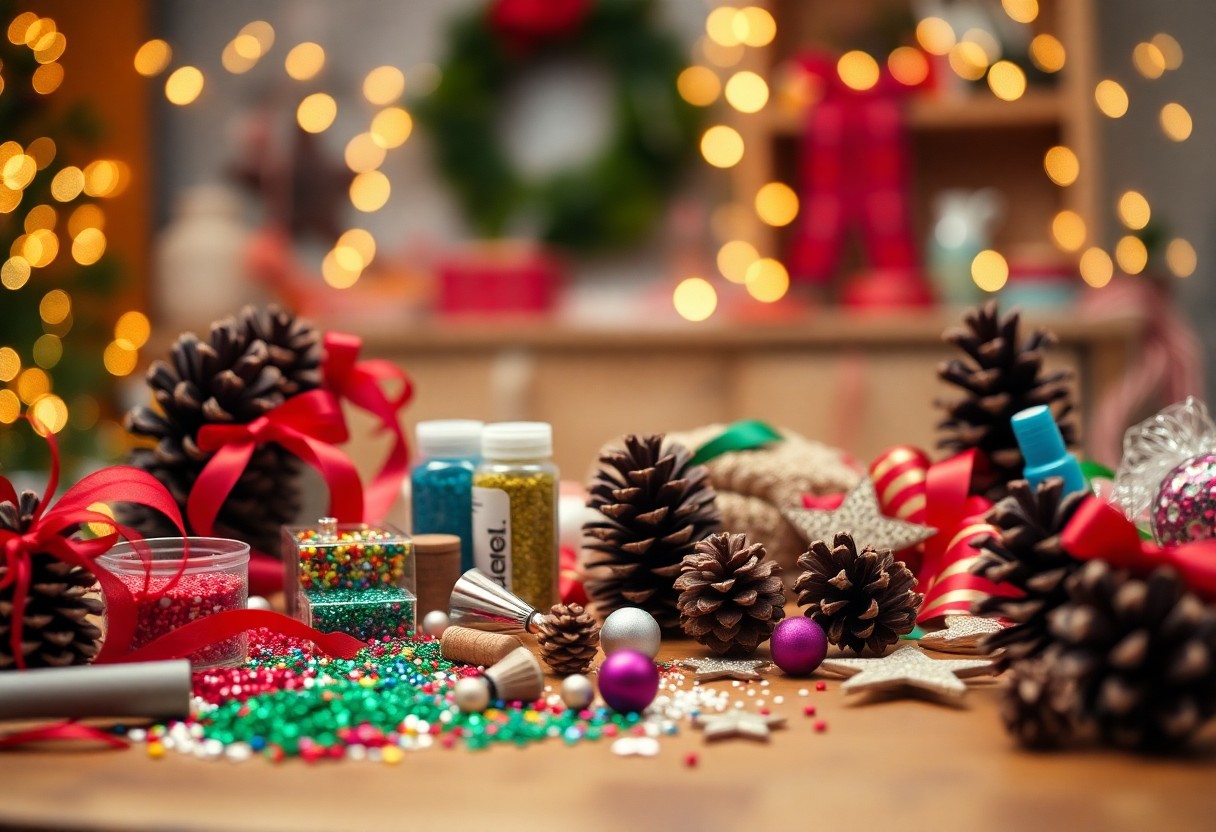
  • Using Natural materials like pinecones, twigs, and dried flowers to make ornaments can add a Rustic and Eco-Friendly element to your Christmas decorations, making your home feel cozy and connected to nature.

Materials and Supplies

A wonderful selection of materials and supplies will help you create unique and beautiful DIY Christmas ornaments. You’ll need basic crafting tools, decorative items, and embellishments to bring your ideas to life.

Essential Crafting Tools

Materials like glue, scissors, and paint will be the foundation of your ornament-making process. You’ll use these tools to shape, cut, and assemble your ornaments, so make sure you have them on hand.

Decorative Items and Embellishments

Above all, the right decorative items and embellishments will add a personal touch to your ornaments. You’ll find a variety of options, such as ribbons, beads, and sequins, to make your ornaments truly special.

Items like glitter, stickers, and stamps will also help you add texture, color, and pattern to your ornaments. You can choose from a wide range of decorative items and embellishments to match your personal style and theme, making your DIY Christmas ornaments truly one-of-a-kind.

Simple Ornament Ideas

Clearly, the simplest ornaments are often the most charming, and you can create your own with just a few basic materials. You’ll be amazed at how easy it is to make beautiful ornaments that will add a personal touch to your Christmas tree.

Paper Snowflakes and Flowers

Beneath the surface of complex designs, you’ll find that paper snowflakes and flowers are a great place to start, and you can customize them to fit your style. You can make intricate designs or keep it simple, whichever you prefer, and hang them on your tree or use them as gift toppers.

Salt Dough Creations

Above all, salt dough ornaments are a fun and easy project that you can make with your family, and you can customize them with paint, glitter, and other embellishments. You can shape them into various forms, from balls to animals, and make them as simple or complex as you like.

Consequently, as you work with salt dough, you’ll find that it’s a very forgiving material, and you can easily fix any mistakes. You can also add a personal touch to your ornaments by using handprints, footprints, or fingerprints to create unique designs, making them a lovely keepsake for years to come.

Advanced Ornament Projects

After mastering the basics, you can move on to more complex designs. Consider the following:

  1. Glass painting
  2. Wooden ornaments
Material Technique
Glass Painting
Wood Carving

Glass Painted Ornaments

Along with your creativity, you can create beautiful glass painted ornaments. You can use specialized paint and brushes to add intricate designs and patterns to your ornaments.

Wooden and Recycled Material Ornaments

Any material can be turned into a unique ornament. You can use wooden slices, twigs, or recycled materials like old CDs or jar lids to create one-of-a-kind decorations.

Ornaments made from wooden and recycled materials add a touch of warmth and personality to your Christmas tree. You can customize them to fit your style and theme, and they make great gifts for friends and family. As you work on your project, you’ll find that the process of creating something with your own hands is just as enjoyable as the end result.

Tips and Tricks

All your DIY Christmas ornaments will turn out beautifully with a few simple tips. Consider the following:

  • use high-quality materials
  • follow the instructions carefully

. Recognizing your limitations and having fun is key to creating unique ornaments.

Preserving and Storing Ornaments

Although your ornaments are delicate, you can preserve them by storing them in a cool, dry place. This will help maintain their beauty and ensure they last for years to come.

Safety Precautions and Advice

Obviously, you want your DIY experience to be safe and enjoyable. You should handle fragile materials with care and avoid using small parts that can be a choking hazard.

But as you work on your DIY Christmas ornaments, you’ll find that safety precautions become second nature. You’ll learn to handle hot glue guns, scissors, and other tools with ease, and your creations will be all the more beautiful for it. With a little practice and patience, you’ll be making gorgeous, one-of-a-kind ornaments that will adorn your tree for years to come.

Decorating Ideas

To create a beautiful and unique Christmas display, you’ll want to think about how you can showcase your DIY ornaments in a way that adds to your holiday decor. You can make your home feel cozy and inviting by hanging your ornaments on the tree, placing them on a mantel, or setting them on a side table.

Themed Christmas Trees

Above all, themed Christmas trees are a great way to add some personality to your holiday decor. You can choose a theme, such as a winter wonderland or a coastal Christmas, and decorate your tree with ornaments that fit your theme, creating a cohesive and stylish look that reflects your personal style.

Ornament Display and Storage

Along with your beautifully decorated tree, you’ll also want to think about how to display and store your ornaments. You can use decorative bowls, vases, or containers to showcase your favorite ornaments, and store the rest in a designated box or bin to keep them safe and organized.

With your ornaments on display, you can enjoy them throughout the holiday season and then easily store them away when the season is over, making it easy to reuse them year after year, and you can also add new ones to your collection, creating a special and meaningful tradition for your family.

Inspiration and Variations

Your DIY Christmas ornaments can be tailored to fit your personal style and preferences, allowing you to create unique and meaningful decorations for your home.

Traditional and Cultural Influences

Across the globe, various cultures have their own special ways of decorating for Christmas, and you can draw inspiration from these traditions to create one-of-a-kind ornaments that reflect your heritage or interests.

Modern and Unique Twists

The options for modern and unique twists on DIY ornaments are endless, and you can experiment with different materials, colors, and designs to create something truly special and personalized to your taste.

Plus, you can take your DIY ornaments to the next level by incorporating personal elements, such as photos, names, or special dates, making them even more meaningful and thoughtful gifts or keepsakes for yourself or loved ones.

Final Words

With this in mind, you now have the skills to create your own unique DIY Christmas ornaments that reflect your personal style. You can proudly display your handmade decorations, knowing you put thought and love into each one. Your tree will shine with your special touches, making this holiday season even more joyful and meaningful to you and your loved ones.

FAQ

Q: What materials do I need to make DIY Christmas ornaments?

A: To make DIY Christmas ornaments, you will need various materials such as glass balls, felt, glue, scissors, paint, glitter, beads, and string or twine. You can also use recycled materials like old CDs, jar lids, and cardboard tubes to create unique and eco-friendly ornaments. Additionally, you can customize your ornaments with personalized items like photos, ribbons, and decorative picks.

Q: How do I get started with making DIY Christmas ornaments?

A: To get started with making DIY Christmas ornaments, begin by browsing online for inspiration and ideas. You can find numerous tutorials and patterns on social media, blogs, and crafting websites. Choose a design that suits your skill level and interests, and gather the necessary materials. Start with a simple project, and as you gain confidence and experience, you can move on to more complex designs. Don’t be afraid to experiment and try new things – it’s all part of the creative process.

Q: Can I make DIY Christmas ornaments with my kids?

A: Absolutely! Making DIY Christmas ornaments is a great activity to do with your kids. It’s a fun and interactive way to spend quality time together, and it can help develop their creativity and fine motor skills. Choose a project that’s suitable for their age and skill level, and provide guidance and supervision as needed. You can also make it a fun and collaborative process by letting them help with the design and decoration of the ornaments.

Q: How do I store and preserve my DIY Christmas ornaments?

A: To store and preserve your DIY Christmas ornaments, make sure to handle them with care and avoid exposing them to extreme temperatures or humidity. You can store them in a cool, dry place, such as a cardboard box or a plastic container, and wrap each ornament individually in tissue paper or bubble wrap to prevent breakage. You can also use acid-free paper or cloth to store delicate or sensitive ornaments. Additionally, consider making a few extra ornaments each year to replace any that may get damaged or lost.

Q: Can I give DIY Christmas ornaments as gifts?

A: Yes, DIY Christmas ornaments make wonderful and thoughtful gifts for friends and family. They are a unique and personalized way to show you care, and they can be customized to fit the recipient’s interests and preferences. You can package them in decorative boxes or bags, and add a personalized note or card to make it an extra-special gift. DIY Christmas ornaments are also a great way to share your creativity and talents with others, and they can become a cherished keepsake for years to come.

How to Make Halloween Decorations

As you investigate into the spirit of Halloween, your creativity awakens, and your home beckons to be transformed into a haunted haven. You’ll weave a spell of spooky delight, and with every step, your abode will become a realm of ghostly charm. In this guide, you’ll uncover the secrets to crafting your own Halloween decorations, summoning the essence of the dark and mysterious night, with a touch of playful wickedness that will leave your guests shivering with delight. Get ready to unleash your inner ghoul and decorate with glee!

Key Takeaways:

To create effective and engaging Halloween decorations, consider the following points:

  • Use lighting to set the mood and create a spooky atmosphere, with options including string lights, lanterns, and projection lights to highlight your decorations.
  • Incorporate themes and colors that reflect the Halloween spirit, such as orange, black, and purple, to create a cohesive and immersive experience.
  • Get creative with DIY decorations, like making your own ghosts, spiders, and other decorations using materials like paper, fabric, and recycled items to add a personal touch to your Halloween decor.

Spinning a Web of Decorations

Before you look into the world of Halloween decorations, consider the overall atmosphere you want to create. You’ll want to craft a sense of eeriness and mystery that will leave your guests spellbound.

Crafting Spider Webs and Ghostly Figures

Along with the cobwebs and spiders, you’ll want to create ghostly figures that seem to float in mid-air, adding an air of ethereal mystery to your decor. You can use white sheets, fabric, or even paper to craft these ghostly apparitions.

Creating a Haunted Mansion Atmosphere

Figures of bats, rats, and other creatures will add to the haunted mansion atmosphere you’re trying to create. You can place them in dark corners, on walls, or even hanging from the ceiling to create an eerie sense of movement.

Spinning your web of decorations, you’ll want to pay attention to lighting, using dim, flickering lights to create an eerie glow. As you work, you’ll start to see your haunted mansion come to life, with your decorations working together to create a sense of foreboding and unease, drawing your guests into the heart of your spooky spectacle, and you’ll be the master of your own haunted domain.

Carving Pumpkins and Other Fruits

It is the season of spooky delights, and nothing sets the tone like a well-carved pumpkin or fruit, casting an eerie glow in the darkness, as you prepare to unleash your creativity and bring your Halloween decorations to life.

Designing Spooky Faces and Patterns

Cutting into the flesh of a pumpkin, you’ll uncover the artistic possibilities that lie within, as you sculpt spooky faces and patterns that will make your Halloween decorations a sight to behold, with you as the master of the macabre.

Adding a Glow to Your Creations

Any pumpkin or fruit can be transformed into a haunting lantern, as you add a glow to your creations, breathing life into the darkness, and you’ll find that the right lighting can make all the difference in setting the mood for a howling good time.

Your glowing creations will be the crowning jewel of your Halloween decorations, casting an ethereal spell over all who lay eyes on them, and you’ll delight in the process of experimenting with different lighting effects, from candles to LED lights, to achieve the perfect ambiance, as the shadows dance upon the walls, inviting all to partake in the spooky festivities.

Conjuring a Graveyard of Delights

Despite the spooky atmosphere, you’ll find that creating a Halloween graveyard is a delightfully fun task. You’ll get to unleash your creativity and bring your darkest imagination to life. With a few simple steps, you’ll be conjuring up a graveyard that will leave your friends and family shivering with delight.

Making Tombstones and Ghostly Silhouettes

Ordinarily, you might think that making tombstones and ghostly silhouettes would be a daunting task, but fear not, for it’s quite easy. You can use cardboard, foam, or even paper to create your tombstones, and add some spooky sayings or names to give them a personal touch.

Creating a Spooky Ambiance with Lighting

Beside the tombstones, lighting will play a huge role in setting the mood for your graveyard. You can use lanterns, candles, or string lights to create an eerie glow that will make your graveyard come alive.

Lighting is where you can get really creative and add some personality to your graveyard. You can use colored lights to create an otherworldly atmosphere, or projection lights to cast spooky shadows on the walls. As you experiment with different lighting effects, you’ll find that your graveyard is transformed into a truly haunting experience, and you’ll be thrilled to see your friends and family react to your handiwork.

Brews and Potions: DIY Decorations

Once again, you’ll find yourself conjuring up a spellbinding atmosphere with these DIY decorations, perfect for a haunting Halloween display. You’ll be experimenting with an array of eerie accessories, from glowing potions to bubbling brews, to create an enchanting setting that will leave your guests under your spell.

Mixing and Matching Colors and Textures

With an assortment of dark hues and mysterious textures at your disposal, you’ll be weaving a web of intrigue, as you mix and match to create a unique and haunting aesthetic that will set the tone for a spooktacular celebration.

Adding a Touch of Magic to Your Decor

Beside the cauldrons and cobwebs, you’ll be adding a pinch of magic to your decor, as you incorporate twinkling lights, mystical symbols, and other whimsical elements that will transport your guests to a world of wonder and awe.

Matching your decorations to the mood and theme of your Halloween celebration, you’ll be able to create an immersive experience that will leave a lasting impression on your guests, as they wander through the shadows and discover the secrets and surprises that you’ve concocted for them, all while maintaining an air ofplayful mystery that will keep them enchanted and delighted.

The Monsters Come Alive: Animatronics and Props

For a spellbinding Halloween display, you’ll want to bring your decorations to life with animatronics and props that will mesmerize your guests and leave them shivering with delight.

Creating Movement and Motion

Among the most enchanting effects you can create are animated creatures that seem to stir and twitch, as if possessed by mischievous spirits, drawing your eye with an otherworldly allure.

Adding Sound Effects for a Frightful Experience

Motion picture-like sound effects can elevate your Halloween display, making it a truly immersive experience, as you weave a sonic tapestry of creaks, groans, and wails that will send shivers down your spine.

It is in sound that you can truly unleash your creativity, crafting an aural landscape that complements your visual displays, with you carefully selecting each sound effect to maximize the frightful experience, ensuring that your guests are fully enthralled by the haunting atmosphere you’ve created, with your decorations coming alive in a symphony of sound and motion.

Weaving a Spell of Halloween Magic

Unlike any other time of the year, Halloween allows you to unleash your creativity and bring your darkest fantasies to life. As you examine into the world of Halloween decorations, you’ll find yourself entwined in a web of spooky delights and eerie charms.

Bringing All the Elements Together

With witching hour approaching, you’ll want to combine your decorations to create a haunting atmosphere that will leave your guests spellbound. You’ll need to balance your lighting, colors, and textures to craft an immersive experience that will transport your visitors to a realm of horror and delight.

Adding a Personal Touch to Your Decorations

Halloween enthusiasts like yourself will love adding unique flourishes to their decorations, making them truly one-of-a-kind. You can incorporate personal items, such as family heirlooms or mementos, to give your decorations a touch of darkness and whimsy.

The art of adding a personal touch to your decorations is where the true magic happens, as you get to infuse your creations with your own brand of darkness and humor. You can experiment with different themes, colors, and textures to reflect your personality, making your Halloween decorations a true reflection of your twisted and playful side, and ensuring that your guests will be talking about your haunted abode for years to come.

Final Words

Conclusively, as you weave your dark magic, your Halloween decorations will cast a spell of delight on all who dare to enter. With each creaking door and flickering candle, you’ll conjure an atmosphere of spooky whimsy, making your lair a haunted haven. Now, go forth and unleash your creativity, dear decorator, and may your Halloween be a howling success, filled with thrills, chills, and mesmerizing decor that’s all your own.

FAQ

Q: What are some popular materials to use for making Halloween decorations?

A: Some popular materials to use for making Halloween decorations include black and orange tissue paper, glow-in-the-dark paint, foam board, cardboard, fake spider webs, and plastic spiders. You can also repurpose old items like cardboard boxes, jars, and bottles to create unique and spooky decorations. Additionally, you can use natural materials like pumpkins, leaves, and twigs to create a more rustic and autumnal look.

Q: How can I make my own DIY Halloween decorations on a budget?

A: Making your own DIY Halloween decorations on a budget can be easy and fun. Start by gathering materials you already have at home, like cardboard, paper, and glue. You can also visit your local thrift store or dollar store to find affordable materials. Consider making decorations like paper bag lanterns, popsicle stick skeletons, or yarn cobwebs. You can also get creative with paint, markers, and other craft supplies to add a spooky touch to your decorations.

Q: What are some tips for creating a spooky ambiance with lighting for Halloween decorations?

A: To create a spooky ambiance with lighting for Halloween decorations, consider using dim red or purple lights to create a eerie glow. You can also use string lights or fairy lights to create a warm and cozy atmosphere. Additionally, you can use flashlights or lanterns to create spooky shadows on the walls. Another tip is to use black lights to make your decorations glow in the dark, adding an extra layer of spookiness to your decor.

Q: How can I make my Halloween decorations more durable and long-lasting?

A: To make your Halloween decorations more durable and long-lasting, consider using durable materials like plastic or foam board instead of paper or cardboard. You can also use a waterproof sealant to protect your decorations from the elements. Additionally, you can use a hot glue gun to attach decorations to a sturdy base or to each other, making them less likely to fall apart. Finally, consider storing your decorations in a dry and cool place to prevent damage or deterioration.

Q: What are some creative ideas for outdoor Halloween decorations?

A: Some creative ideas for outdoor Halloween decorations include creating a graveyard with cardboard tombstones and fake skeletons, setting up a spooky porch with cobwebs and spiders, or creating a monster mash with giant inflatable decorations. You can also use projection lights to project spooky images onto your house or garage, or use a fog machine to create a spooky mist. Additionally, you can set up a haunted house or haunted trail in your front yard, complete with spooky sounds and special effects.

Top Thanksgiving Craft Ideas

110 Best Thanksgiving Art Projects ideas to discover unique and exciting ideas. Your Thanksgiving decorations and activities will be enhanced by these creative projects, making your holiday even more special and enjoyable for your family and friends.

Key Takeaways:

To get the most out of your Thanksgiving celebration, consider the following ideas:

  • Focus on DIY Decorations such as paper turkeys, leaf garlands, and pumpkin centerpieces to create a warm and inviting atmosphere for your guests.
  • Engage your kids with Fun Activities like making handprint turkeys, Thanksgiving-themed coloring pages, and gratitude journals to help them appreciate the holiday.
  • Incorporate Creative Crafts like beaded Indian corn, handmade pilgrim hats, and fall-themed wreaths to add a personal touch to your Thanksgiving celebration and make it a memorable event.

Traditional Crafts

Your Thanksgiving celebration can be made more special with traditional crafts that have been passed down through generations. You can try making handprint turkeys, construction paper chains, and other classic crafts that are easy to make and fun for the whole family.

Handprint Turkeys

Construction Paper Chains

At the heart of many Thanksgiving crafts are construction paper chains that add a pop of color to your holiday decor. You can make these chains in various colors and patterns to match your Thanksgiving theme, and hang them up in your home or use them as a centerpiece.

Even if you’re not a crafty person, construction paper chains are easy to make and require minimal materials. You can use scissors, glue, and construction paper to create the chains, and customize them with your favorite colors and patterns. You can also involve your kids in the process, making it a fun and engaging activity for the whole family.

Modern Twists

Some of the most exciting Thanksgiving craft ideas involve putting a fresh spin on traditional concepts, allowing you to create unique and personalized decorations for your home. You can update classic themes with modern materials and styles, giving your Thanksgiving celebration a distinctive flair.

Pumpkin Decorations

Among the many creative ways to decorate pumpkins, you can try painting, carving, or decoupage to give them a personalized touch, making your Thanksgiving decor truly special and reflective of your style.

Fall-themed Centerpieces

For a beautiful and inviting table setting, you can create stunning fall-themed centerpieces using seasonal elements like leaves, twigs, and pinecones, which will add warmth and coziness to your Thanksgiving gathering.

The fall-themed centerpieces you create can be tailored to fit your personal taste and the overall aesthetic of your home, allowing you to experiment with different textures, colors, and shapes to find the perfect combination that reflects your unique style and complements your Thanksgiving celebration. You can use candles, flowers, or other decorative items to enhance the ambiance and make your centerpieces truly memorable.

Kid-Friendly Ideas

To make Thanksgiving more engaging for your kids, consider involving them in the preparation process with fun and easy crafts. You can find a variety of ideas that are suitable for their age and skill level.

Paper Plate Crafts

The simplest and most affordable materials can be used to create amazing crafts, such as paper plate turkeys or Pilgrim hats. You can decorate these with paint, markers, or feathers to make them more interesting and personalized to your child’s style.

Thanksgiving Card Making

Thankfully, making cards is a great way to get your kids involved in showing their appreciation for family and friends. You can help them create handmade cards with stamps, stickers, or drawings to express their gratitude.

Making your own Thanksgiving cards can be a fun and creative activity for your kids, allowing them to think about what they are thankful for and express it in their own unique way. You can provide them with various materials and let their imagination run wild, and they will have a blast making something special for their loved ones.

Adult-Oriented Projects

Now that you’re looking for sophisticated Thanksgiving craft ideas, you’ll find plenty of options to explore. From wine glass painting to gratitude journals, these projects are perfect for adults seeking a creative outlet.

Wine Glass Painting

Winning over your guests with beautifully painted wine glasses is easy. You can create your own designs, from simple to intricate, using specialized paint and techniques.

Gratitude Journals

Alongside your Thanksgiving preparations, you can start a gratitude journal to reflect on the things you’re thankful for. You can customize your journal with inspiring quotes, photos, and personal anecdotes.

Hence, as you investigate into the world of gratitude journals, you’ll discover the therapeutic benefits of writing down your thoughts and feelings. You can make your journal a keepsake by adding decorative elements, such as stickers, washi tape, or colorful pens, making it a unique and meaningful part of your Thanksgiving tradition.

Seasonal Decor

Many Thanksgiving crafts can be used to create a warm and inviting atmosphere in your home, and one of the most effective ways to do this is through seasonal decor. You can make your own decorations, such as wreaths, centerpieces, and table runners, to add a personal touch to your holiday celebrations.

DIY Fall Wreaths

Around this time of year, you can find plenty of materials to create beautiful fall wreaths, such as leaves, twigs, and pinecones, to adorn your front door or wall, adding a touch of warmth and coziness to your home.

Thanksgiving Table Runners

By adding a handmade table runner to your Thanksgiving table, you can create a unique and personalized setting for your holiday meal, reflecting your personal style and adding to the festive atmosphere.

Due to the variety of materials and designs available, you can choose the perfect table runner to match your Thanksgiving theme, from traditional fall colors to more modern and eclectic designs, allowing you to express your creativity and make your holiday celebration even more special.

Creative Expressions

Once again, you’ll find that Thanksgiving crafts offer a wide range of creative outlets, allowing you to express your gratitude and festive spirit in unique and personalized ways, making your celebrations even more special and meaningful to you and your loved ones.

Turkey-themed Cookies

Beneath the surface of traditional Thanksgiving crafts, you’ll discover delightful ideas like turkey-themed cookies, which you can decorate with your family and friends, creating a fun and tasty activity that you’ll all enjoy and cherish.

Fall-inspired Poetry

After exploring various craft ideas, you’ll likely stumble upon fall-inspired poetry, which allows you to reflect on the season’s beauty and express your thoughts and feelings through creative writing, giving you a chance to slow down and appreciate the world around you.

And as you examine deeper into fall-inspired poetry, you’ll find that it’s a great way to unwind and tap into your creativity, enabling you to produce thoughtful and heartfelt pieces that you can share with others or treasure personally, making your Thanksgiving celebration even more fulfilling and memorable for you.

Final Words

Summing up, you now have a plethora of top Thanksgiving craft ideas to make your holiday more enjoyable. You can choose from various projects to create a personalized and festive atmosphere, making your celebration truly special. With these ideas, you will be able to add a unique touch to your Thanksgiving decoration, making it a memorable experience for your family and friends.

FAQ

Q: What are some popular Thanksgiving craft ideas for kids?

A: There are many fun and creative Thanksgiving craft ideas for kids, such as making handprint turkeys, paper plate pilgrim hats, and construction paper leaves. You can also try making a Thanksgiving tree, where kids can write things they are thankful for on leaves and hang them on a branch. Additionally, kids can make their own Thanksgiving placemats, decorations, and cards for family members.

Q: How can I make a beautiful Thanksgiving centerpiece for my dinner table?

A: To make a beautiful Thanksgiving centerpiece, you can start by gathering some fall-themed materials such as pinecones, acorns, and artificial leaves. You can arrange these items in a decorative bowl or vase, and add some candles, flowers, or other embellishments to give it a warm and inviting glow. You can also make a centerpiece using a pumpkin or a cornucopia, and fill it with fruits, vegetables, and other seasonal items. Another idea is to create a DIY floral arrangement using fall flowers such as sunflowers, dahlias, and alstroemeria.

Q: What are some easy and inexpensive Thanksgiving craft ideas for adults?

A: There are many easy and inexpensive Thanksgiving craft ideas for adults, such as making a gratitude jar, where you write down things you are thankful for and put them in a jar. You can also make a Thanksgiving wreath using materials such as twigs, leaves, and pinecones, or create a handmade card or gift tag for your loved ones. Additionally, you can make a DIY candle or soap using fall-themed scents such as pumpkin spice, apple cinnamon, or maple walnut. You can also upcycle old items such as mason jars, twine, and burlap to create unique and rustic decorations.

Q: How can I make my Thanksgiving decorations more seasonal and festive?

A: To make your Thanksgiving decorations more seasonal and festive, you can incorporate fall colors such as orange, yellow, red, and brown into your decor. You can use these colors in your tablecloth, napkins, and placemats, and add some fall-themed decorations such as pumpkins, gourds, and leaves. You can also hang fall-themed banners or garlands, and set up a festive vignette using seasonal items such as pinecones, acorns, and twigs. Additionally, you can make your decorations more inviting by adding warm lighting, such as candles or string lights, and using seasonal scents such as pumpkin spice or apple cinnamon.

Q: Can I make Thanksgiving crafts with recycled materials?

A: Yes, you can make many Thanksgiving crafts using recycled materials, such as old jars, bottles, and containers. You can turn old jars into vases or candle holders, and decorate them with paint, glitter, or other embellishments. You can also use old cardboard tubes to make turkey decorations, or create a unique wreath using old fabric scraps, twine, or burlap. Additionally, you can make a thankful tree using an old branch or a paper towel roll, and have family members write things they are thankful for on leaves made from recycled paper. This is a great way to get creative and reduce waste at the same time.

How to Create Easter Centerpieces

Key Takeaways:

To create beautiful and festive Easter centerpieces, consider the following points:

  • Use pastel colors and spring flowers to create a bright and cheerful atmosphere, symbolizing new life and renewal.
  • Incorporate Easter-themed decorations, such as bunnies, eggs, and candy, to add a playful touch to your centerpiece.
  • Combine natural elements, like branches and greenery, with decorative items, such as vases and ribbons, to create a unique and eye-catching Easter centerpiece that showcases your personal style and creativity.

Gather Materials

For a beautiful and memorable Easter centerpiece, you will need to collect a variety of items. Your choices will depend on the theme and style you have chosen for your decor. You can start by gathering basic items like vases, candles, and decorative accents.

Essential Items

Around this time, you’ll want to consider the necessary items that will form the foundation of your centerpiece, such as a base or container, floral foam, and any necessary tools like scissors or a hot glue gun.

Decorative Elements

Once you have your necessarys, you can think about the decorative elements that will add personality to your centerpiece, such as fresh flowers, greenery, or decorative eggs.

Plus, you can also consider adding other decorative elements like ribbons, bows, or small Easter-themed decorations to give your centerpiece a more polished and finished look. You can choose items that match your theme and style, and have fun experimenting with different combinations to find the perfect look for your Easter celebration.

Choose a Theme

It is important to select a theme for your Easter centerpiece to ensure a cohesive and beautiful arrangement. You can choose from various themes, such as traditional, modern, or vintage, to match your personal style and home decor. This will help you decide on the colors, flowers, and decorations to use in your centerpiece.

Traditional Easter

Against a backdrop of pastel colors and classic decorations, you can create a timeless Easter centerpiece. You will likely feature flowers, such as tulips or daffodils, and traditional Easter symbols, like bunnies or eggs, in your arrangement.

Modern Twist

Behind the scenes of a modern Easter centerpiece, you’ll find unique and innovative ideas. You can experiment with unconventional materials, like glass vases or metallic decorations, to add a touch of sophistication to your arrangement.

Understanding the modern twist theme, you can now think outside the box and incorporate unexpected elements, such as pebbles, branches, or candles, into your Easter centerpiece. You can also play with different textures and colors to create a visually appealing and modern arrangement that reflects your personal style.

Design Your Centerpiece

After selecting a theme, you can begin designing your Easter centerpiece. You will want to choose elements that complement your table setting and reflect the holiday’s vibrant colors and symbols.

Floral Arrangements

Beneath the Easter theme, beautiful flowers such as tulips and daffodils can add a pop of color to your centerpiece. You can arrange them in a vase or container that fits your theme and adds to the overall aesthetic of your table.

Candle and Decor Combinations

Decorating your centerpiece with candles, eggs, and other Easter decorations can create a warm and inviting ambiance. You can place candles in mercury glass holders or apothecary jars and surround them with small eggs, greenery, or other decorative elements.

Considering the combination of candles and decor, you can experiment with different heights and textures to add depth to your centerpiece. You can pair tall candlesticks with smaller decorative elements, such as tiny vases or wooden decorations, to create a visually appealing arrangement that showcases your personal style and sets the tone for a beautiful Easter celebration.

Add Easter-themed Decor

Unlike other holidays, Easter decor often features soft, pastel colors and whimsical characters, making it easy to create a beautiful centerpiece. You can incorporate your favorite Easter-themed items, such as bunnies, chicks, and eggs, to add a personal touch to your decor.

Bunnies and Chicks

Any addition of adorable bunnies and chicks will instantly evoke the spirit of Easter in your centerpiece. You can use figurines, pictures, or even stuffed animals to bring these beloved characters to life in your decor.

Easter Eggs and Baskets

One of the most iconic Easter symbols is the egg, and you can use decorated eggs or egg-shaped decorations to add a pop of color to your centerpiece. You can also incorporate Easter baskets, filled with flowers, grass, or other decorations, to create a beautiful and festive arrangement.

Also, consider using eggs and baskets in creative ways, such as hanging eggs from a branch or using a basket as a base for your centerpiece. You can fill the basket with flowers, greenery, or other decorations, and add a few strategically placed eggs to create a beautiful and eye-catching arrangement that reflects your personal style and adds a touch of elegance to your Easter celebration.

Consider the Color Scheme

Despite the numerous options available, selecting a color scheme for your Easter centerpiece can be a daunting task. You want to ensure that your arrangement complements the overall aesthetic of your dining table and reflects the festive spirit of the holiday.

Pastel Colors

Colors such as soft pink, baby blue, and pale yellow can create a beautiful and delicate ambiance for your Easter celebration. You can incorporate these hues through flowers, ribbons, or decorative eggs to add a touch of warmth and elegance to your centerpiece.

Bright and Bold Colors

Scheme your Easter centerpiece around vibrant colors like hot pink, turquoise, or sunshine yellow to make a statement. You can use these bold hues in your flowers, vases, or decorative accents to create a lively and energetic atmosphere.

Consequently, as you experiment with bright and bold colors, you’ll find that they can add a level of sophistication and whimsy to your Easter decor. You can balance these vibrant hues with neutral elements, such as white or clear glass, to prevent the arrangement from feeling overwhelming, and create a beautiful and eye-catching centerpiece that reflects your personal style.

Final Tips and Variations

Once again, consider your personal style when creating Easter centerpieces. You can:

  • Experiment with different colors
  • Try unique vases

Visit 850 Best Easter Centerpieces & Florals ideas for inspiration. Any creativity you bring to your centerpiece will make it special.

Mixing Textures and Heights

Textural elements can add depth to your Easter centerpiece. You can combine smooth, shiny objects with rough, natural ones to create visual interest, making your arrangement more dynamic and engaging.

Adding Personal Touches

Against a backdrop of elegant flowers, you can add personal touches that reflect your style and preferences, making your Easter centerpiece truly unique and meaningful to you and your family.

Mixing traditional and modern elements, you can create a one-of-a-kind Easter centerpiece that showcases your personality and adds a warm, inviting ambiance to your holiday table, making it a beautiful reflection of your taste and hospitality.

To wrap up

Hence, with these simple steps, you can create exquisite Easter centerpieces that will elevate your holiday decor. You will have transformed your space into a beautiful and inviting atmosphere, perfect for your family gathering. Your Easter celebration will be filled with joy, love, and stunning decorations that you have crafted with your own hands, making the holiday even more special and meaningful to you and your loved ones.

FAQ

Q: What materials do I need to create a beautiful Easter centerpiece?

A: To create a stunning Easter centerpiece, you will need a variety of materials such as fresh flowers like tulips, daffodils, or hyacinths, decorative vases or containers, Easter-themed decorations like eggs, bunnies, or chicks, greenery like eucalyptus or ferns, and some decorative items like ribbons, bows, or candles. You can also use recycled or natural materials like twigs, pinecones, or moss to add some texture and interest to your centerpiece.

Q: How do I choose the right flowers for my Easter centerpiece?

A: When choosing flowers for your Easter centerpiece, consider the color scheme and theme you want to achieve. Pastel colors like pink, blue, and yellow are traditional Easter colors, while white and cream-colored flowers can add a touch of elegance. You can also choose flowers that are in season, like tulips and daffodils, which are popular Easter flowers. Consider the shape and texture of the flowers as well, and mix different types to create a visually appealing arrangement.

Q: What are some creative ways to decorate my Easter centerpiece?

A: There are many creative ways to decorate your Easter centerpiece, such as adding decorative eggs, bunnies, or chicks to create a whimsical and playful look. You can also use ribbons and bows in pastel colors to add a pop of color and texture. Consider using natural elements like pinecones, twigs, or moss to add some earthy charm to your centerpiece. Additionally, you can use candles, pebbles, or marbles to create a beautiful and unique centerpiece.

Q: How do I arrange my Easter centerpiece to make it look visually appealing?

A: To arrange your Easter centerpiece, start by adding a base layer of greenery like eucalyptus or ferns to the vase or container. Then, add the main flowers or decorative items, working your way around the arrangement to create a balanced and symmetrical look. Consider creating a focal point, like a large decorative egg or a cluster of flowers, and then balance it with other elements. Finally, add some finishing touches like ribbons, bows, or candles to complete the look.

Q: Can I create an Easter centerpiece on a budget, and what are some affordable alternatives?

A: Yes, you can create a beautiful Easter centerpiece on a budget. Consider using affordable flowers like carnations or baby’s breath, or using silk flowers instead of fresh ones. You can also use items you already have at home, like vases, jars, or containers, and decorate them with ribbons, bows, or paint. Additionally, look for affordable decorative items like eggs, bunnies, or chicks at dollar stores or thrift shops. With a little creativity, you can create a stunning Easter centerpiece without breaking the bank.

The Joy of Holiday Crafting

As you approach the holiday season, you may find yourself seeking ways to add a personal touch to your celebrations. You can explore your creative side and make the most of this special time with holiday crafting. Your handmade decorations and gifts will not only reflect your personality, but also bring a sense of warmth and joy to your loved ones. You will discover the satisfaction of creating something unique and meaningful, making your holidays even more special.

Key Takeaways:

  • The happiness gained from holiday crafting can be a significant contributor to a person’s overall wellbeing, as it allows individuals to express their creativity and connect with loved ones.
  • Handmade gifts and decorations can add a personal touch to the holiday season, making it feel more meaningful and special.
  • Engaging in holiday crafting activities can be a great way to relax and unwind, providing a healthy distraction from the stress and pressure that can come with the holiday season.

Preparing for the Holiday Season

Before you investigate the world of holiday crafting, it’s important to get organized and plan ahead. You’ll want to make a list of the projects you want to tackle and the materials you’ll need to complete them. This will help you stay focused and ensure that you have everything you need to bring your creative vision to life.

Gathering Materials and Supplies

Above all, you’ll need to gather the necessary materials and supplies for your holiday crafts. You can start by checking what you already have at home and making a list of what you need to buy. Consider the type of crafts you want to make and the materials that will be required, such as paper, glue, scissors, and decorations.

Setting Up a Crafting Space

Similarly, supplies are just the beginning, and you’ll also need a dedicated space to work on your crafts. You’ll want to set up a comfortable and well-lit area where you can spread out your materials and focus on your projects. This could be a desk, table, or even a corner of your living room.

Hence, as you set up your crafting space, think about the tools and equipment you’ll need to have within easy reach. You may want to invest in a craft mat, a paper trimmer, or a storage bin to keep your supplies organized. By having a dedicated space and the right tools, you’ll be able to work efficiently and enjoy the process of creating your holiday crafts.

Decorations and Ornaments

While creating your holiday decorations, you can express your personal style and add a touch of warmth to your home. You can make your own decorations, such as wreaths, garlands, and ornaments, using various materials like paper, fabric, and natural elements.

Making Handmade Ornaments

Behind the joy of holiday crafting lies the pleasure of making handmade ornaments, which allows you to add a personal touch to your decorations. You can create unique and beautiful ornaments using materials like glass, metal, and ceramic, and customize them to fit your holiday theme.

Decorating the Christmas Tree

Around the holiday season, decorating the Christmas tree is a beloved tradition that brings you and your family together. You can decorating your tree with ornaments, lights, and garlands, and make it a reflection of your personal style and holiday spirit.

Also, as you decorate your Christmas tree, you can experiment with different themes, colors, and textures to create a unique and beautiful display. You can use your handmade ornaments, along with store-bought ones, to add depth and interest to your tree, and make it a stunning centerpiece for your holiday celebrations.

Gift Ideas and Presents

Not only can holiday crafting bring you joy, but it can also help you create unique and thoughtful gifts for your loved ones. You can make personalized items, such as ornaments, decorations, and gift tags, to add a special touch to your presents.

Crafting Personalized Gift Tags

Personalizing your gift tags can make your presents even more special. You can add the recipient’s name, a special message, or a festive design to make your tags stand out. This small touch can show your loved ones that you put extra thought and effort into your gifts.

Making Homemade Gifts

Gifts made with love and care, such as handmade jewelry, knitted items, or baked goods, can be truly meaningful to your loved ones. You can choose a project that fits your skills and interests, and customize it to the recipient’s tastes and preferences.

In fact, making homemade gifts can be a fun and rewarding experience for you, as you get to be creative and see the joy on the recipient’s face when they open their present. You can also involve your family and friends in the process, making it a fun and collaborative activity that brings you all closer together.

Holiday Cards and Invitations

Keep the spirit of the holiday season alive by creating your own unique cards and invitations. You can add a personal touch to your holiday greetings, making them extra special for your loved ones. With a few simple materials and some creativity, you can design and craft beautiful cards and invitations that reflect your personality and style.

Designing and Crafting Cards

Besides traditional store-bought cards, you can create your own unique designs using various materials like paper, glue, and glitter. You can choose from a wide range of themes, colors, and patterns to match your holiday decor and personality.

Creating Custom Invitations

On the other hand, custom invitations can set the tone for your holiday party or gathering. You can design your invitations to match your theme, and include all the important details, such as date, time, and location.

Understanding the importance of customization, you can take your invitations to the next level by adding photos, ribbons, or other embellishments. You can also choose from various shapes, sizes, and folds to create a unique and eye-catching design that will make your guests feel special and excited about your holiday celebration.

Cooking and Baking

Many of your favorite holiday traditions likely involve cooking and baking, and for good reason – the aromas and flavors of the season are a big part of what makes this time of year so special. You can create delicious treats that will impress your friends and family, and make your home feel cozy and inviting.

Holiday Recipes and Treats

Beneath the surface of every successful holiday gathering lies a collection of tried-and-true recipes that you’ve perfected over the years. You can try out new recipes, experiment with different flavors and ingredients, and find the perfect dishes to serve at your holiday gatherings.

Decorating Holiday Cookies

Foregrounding your creativity, you can turn ordinary cookies into stunning holiday treats with a few simple decorating techniques. You can use frosting, sprinkles, and other toppings to create beautiful and delicious cookies that will be the perfect addition to your holiday celebrations.

Holiday cookie decorating is a fun and creative activity that you can enjoy with your family and friends. You can make it a special event, complete with hot cocoa and holiday music, and create memories that will last a lifetime. As you decorate your cookies, you can experiment with different techniques and designs, and find the styles and methods that work best for you.

Preserving Memories

Your holiday crafting can be a great way to preserve memories of special times with family and friends, allowing you to cherish them for years to come.

Creating a Holiday Scrapbook

Around this time, you can start gathering materials to create a beautiful holiday scrapbook, filled with tickets, postcards, and other mementos from your holiday adventures, which you can then use to create a unique and personalized keepsake.

Taking Holiday Photos

After capturing the essence of your holiday, you can use your photos to create a stunning visual narrative of your experiences, which will help you to relive the magic of the season whenever you look at them.

Apart from being a great way to document your holiday, taking photos also allows you to slow down and appreciate the little moments, focusing on the details that make your holiday special, and you can use these photos to create beautiful holiday crafts, such as photo ornaments, gift tags, or even a holiday card.

Conclusion

Hence, as you engage in holiday crafting, you will discover the joy of creating something unique and meaningful. You will find that your efforts bring a personal touch to your celebrations, making them more special and memorable. Your handmade crafts will become treasured possessions, symbolizing your love and thoughtfulness, and you will cherish the process of creating them.

FAQ

Q: What is the main idea behind “The Joy of Holiday Crafting”?

A: The main idea behind “The Joy of Holiday Crafting” is to inspire and guide individuals in exploring their creativity during the holiday season. It’s about embracing the joy and warmth of crafting unique items that can be used to decorate homes, given as gifts, or used to create lasting memories with family and friends.

Q: What kind of crafts can I expect to learn from “The Joy of Holiday Crafting”?

A: “The Joy of Holiday Crafting” covers a wide variety of crafts tailored for the holiday season. This includes, but is not limited to, handmade ornaments, decorative wreaths, personalized gift tags, festive candles, and intricate gingerbread house designs. Each craft is designed to be fun, easy to make, and adaptable to suit different skill levels and interests.

Q: Do I need to have prior crafting experience to enjoy “The Joy of Holiday Crafting”?

A: Absolutely not! “The Joy of Holiday Crafting” is designed to be inclusive and accessible to everyone, regardless of their crafting background. Each project comes with detailed instructions and tips to help beginners get started. For those with more experience, there are also challenging projects that can help hone their skills and encourage creativity.

Q: Can I involve my family in holiday crafting, or is it more suited for individual activities?

A: “The Joy of Holiday Crafting” is perfect for family activities! Many of the projects are designed to be collaborative, making them ideal for spending quality time with your loved ones. From kids to adults, everyone can participate and enjoy the process of creating something together. It’s a great way to create lasting memories and start new family traditions.

Q: How can I make my holiday crafts more personalized and unique?

A: Personalizing your holiday crafts is what makes them truly special. “The Joy of Holiday Crafting” suggests various ways to add a personal touch to your creations, such as using family photos, personal symbols, or handmade elements. You can also experiment with different materials, colors, and themes that reflect your personality or match your home decor. The key is to let your imagination run wild and have fun with the process!

Linearyazilim Skip to content