How to Make Stained Glass Art

You’re about to commence on a creative journey, and with the right guidance, you’ll be able to craft stunning stained glass art pieces. As you begin, you’ll learn the fundamentals of working with glass, from cutting and grinding to assembling and soldering. Your skills will develop, and you’ll be able to bring your unique designs to life, creating beautiful and intricate artworks that showcase your talent and attention to detail.
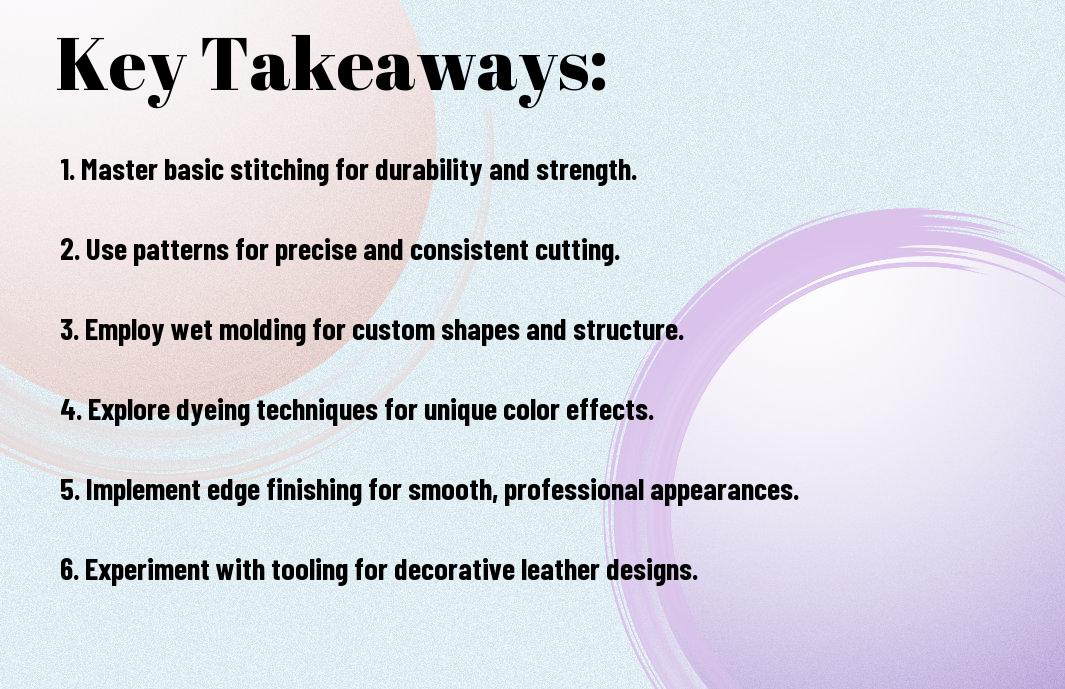
Key Takeaways:

To create beautiful stained glass pieces, consider the following points:

  • Choose the right materials, including glass types, coppers foil, and solders, to ensure a durable and long-lasting piece of art.
  • Develop your cutting and grinding skills to achieve precise glass cuts and smooth edges, which are vital for a professional-looking stained glass piece.
  • Pay attention to safety precautions, such as wearing protective gear and working in a well-ventilated area, to prevent injuries and ensure a successful stained glass project.

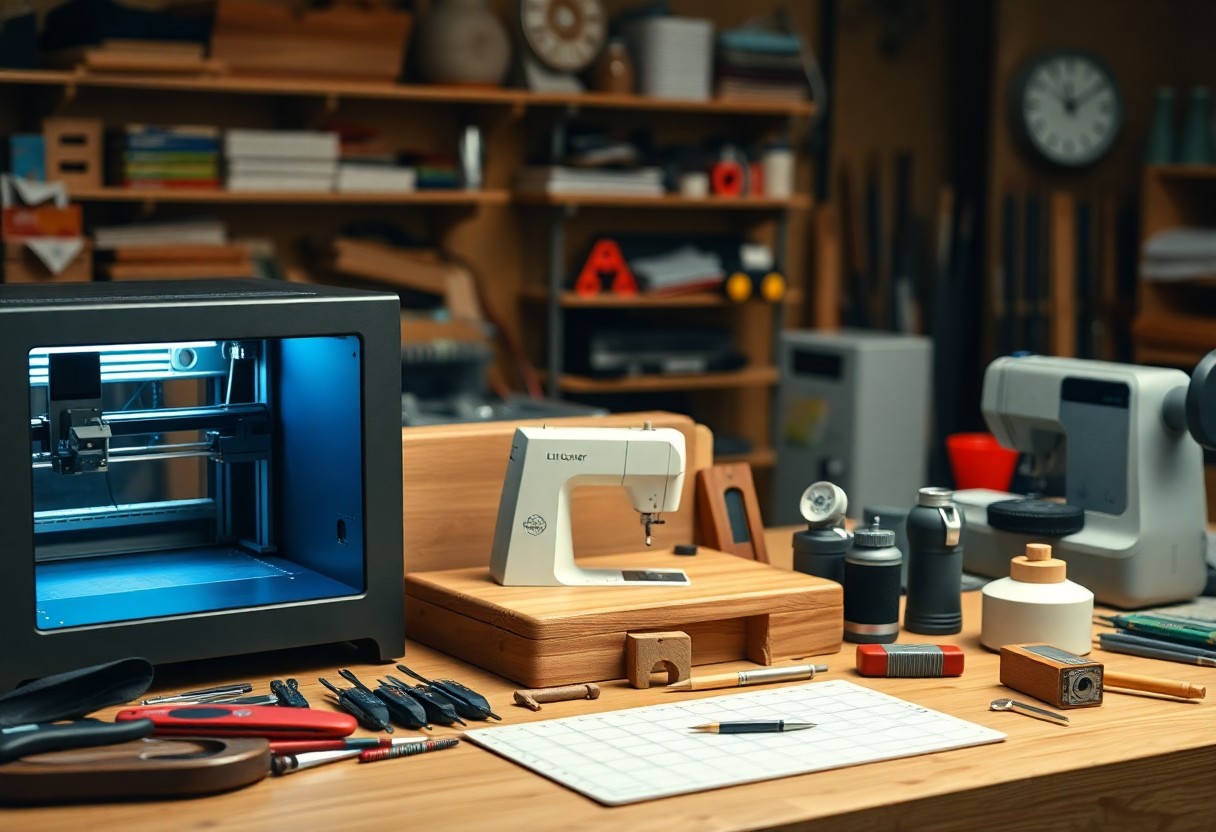
Gathering Materials and Tools

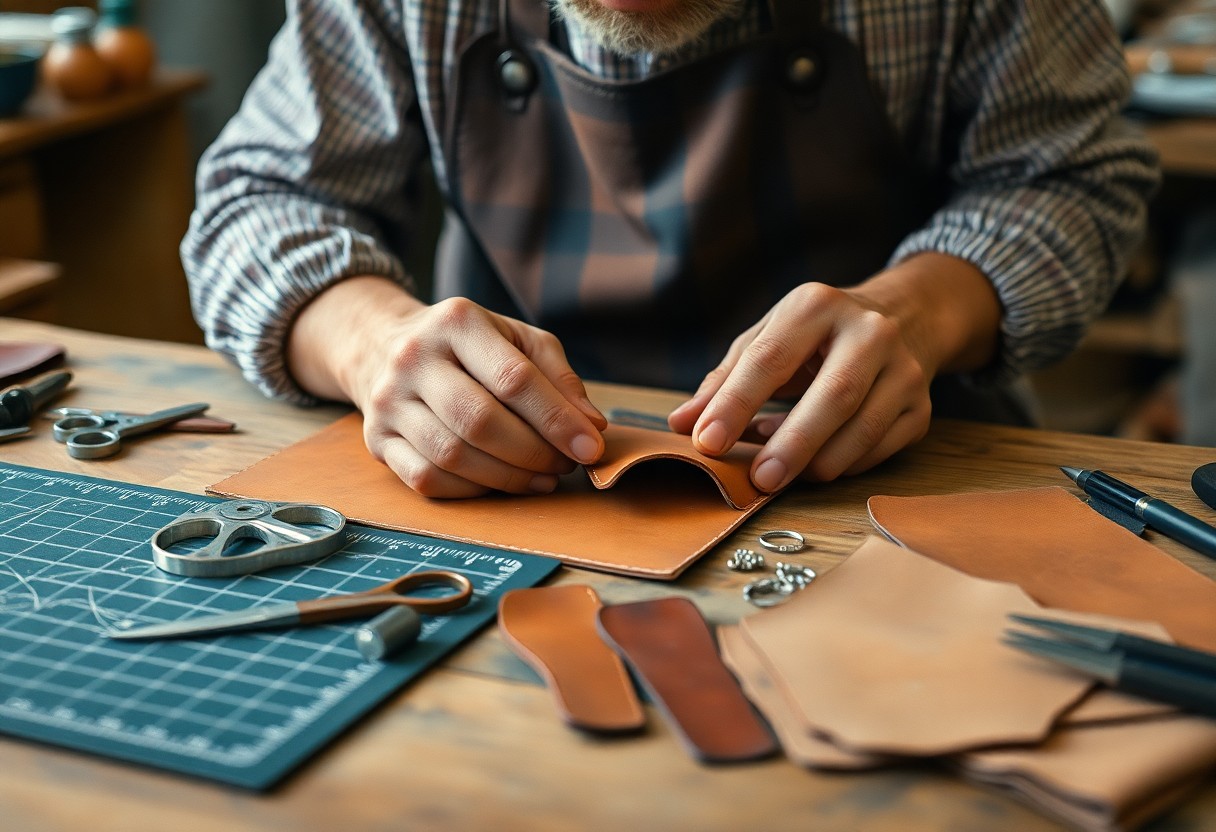
While creating stained glass art, you will need various materials and tools to bring your design to life. You will require a work surface, pattern, glass cutters, and other equipment to shape and assemble your piece.

Essential Tools for Stained Glass Art

Materials like glass cutters, breakers, and runners are necessary for cutting and shaping your glass. You will also need a workboard, solder, and flux to assemble your piece.

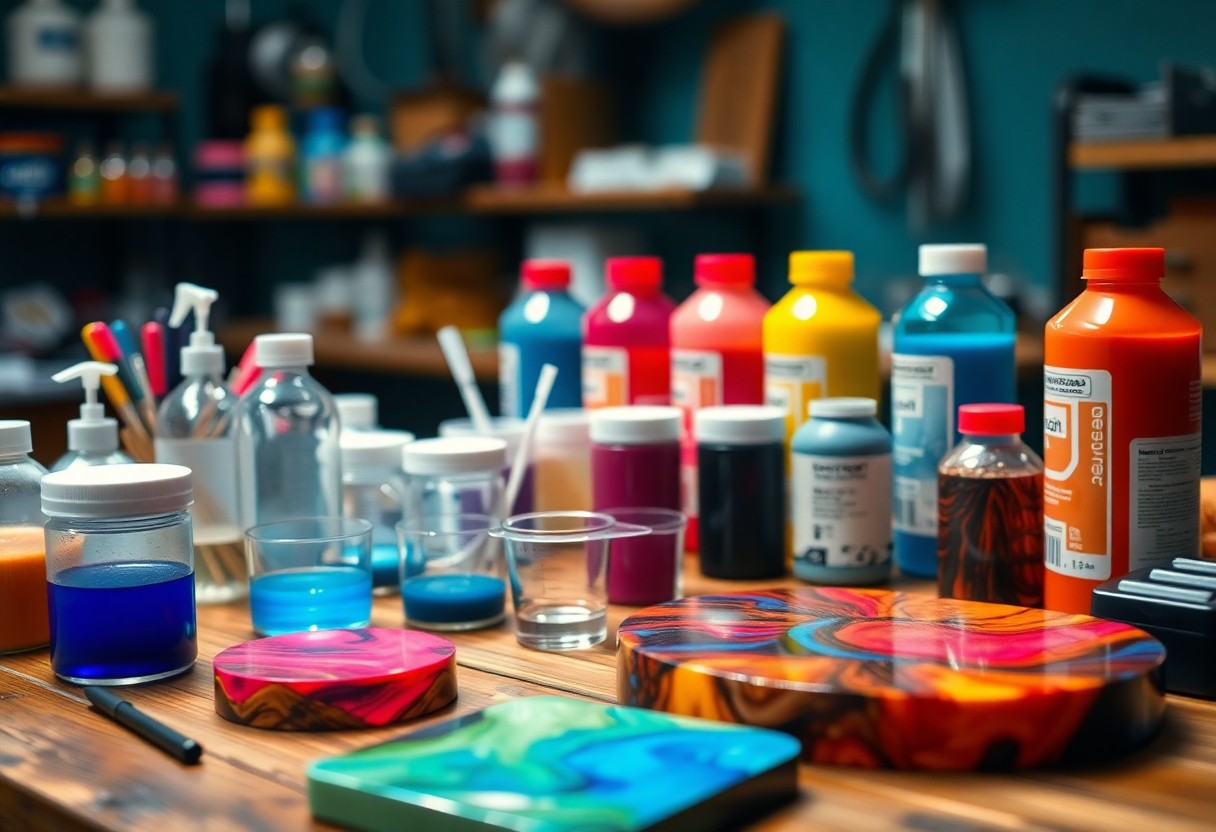
Selecting the Right Glass and Supplies

Tools such as patterns, cutters, and grinders will help you select the right glass and supplies for your project. You can choose from a variety of glass colors, textures, and styles to create a unique piece.

Gathering the right glass and supplies is an important step in creating your stained glass art. You can visit a craft store or online supplier to browse through different types of glass, including opalescent, iridescent, and textured glass, to find the ones that fit your design and skill level. As you select your glass, consider the color, texture, and transparency to ensure they work well together to bring your vision to life.

Designing Your Stained Glass Piece

There’s a lot to consider when designing your stained glass piece, and it begins with creating a pattern.

Tips for Creating a pattern

To develop a pattern, you should consider the following:

  • Keep it simple
  • Use bold lines

. Any design you choose will be the foundation of your stained glass piece.

Factors to Consider in Design

If you’re new to stained glass art, you’ll want to think about the following factors:

  • Color
  • Texture

. Perceiving your design as a whole will help you create a beautiful piece.

Designing your stained glass piece requires careful consideration of several factors, including:

  • Size
  • Shape
  • Theme

. Perceiving the way these elements interact will help you create a stunning stained glass piece that you’ll be proud to display.

Cutting and Shaping the Glass

Keep in mind that cutting and shaping the glass is a delicate process that requires patience and attention to detail. You will need to use specialized tools, such as glass cutters and running pliers, to score and break the glass into the desired shape.

How-to Cut Glass Safely and Effectively

One of the most important aspects of cutting glass is doing it safely and effectively. You should always wear protective gear, such as gloves and safety glasses, and make sure your work surface is clean and clear of debris.

Techniques for Smoothing Glass Edges

Some techniques for smoothing glass edges include using a glass grinder or sandpaper to remove any sharp edges or burrs. You can also use a cork or felt wheel to polish the edges and give them a smooth finish.

This technique is especially useful when working with intricate designs or delicate pieces, as it allows you to achieve a high level of precision and control. As you practice and refine your skills, you will develop your own techniques for smoothing glass edges and achieving the desired finish for your stained glass art pieces, and you will be able to create beautiful and intricate designs with confidence and precision.

Assembling the Stained Glass Piece

Once again, attention to detail is key when assembling your stained glass piece, as it requires patience and precision to ensure a beautiful and durable result.

Copper Foil Method

Glass pieces are carefully wrapped in copper foil, allowing you to shape and assemble your design with ease and flexibility, enabling you to create intricate and delicate patterns.

Lead Came Construction

You will need to cut and assemble the lead came pieces to fit your stained glass design, requiring you to carefully plan and execute each step to achieve a sturdy and visually appealing result.

Assembling the lead came construction requires you to solder the joints, making sure they are strong and watertight, and then you will need to clean and finish your stained glass piece, applying a patina to protect the lead and enhance the colors of your artwork, allowing you to enjoy your finished piece for years to come.

Soldering and Finishing

Many stained glass artists consider soldering and finishing to be the most challenging part of the process. You will need to carefully solder your pieces together, making sure to create a strong and durable bond. This step requires patience and attention to detail to achieve a professional-looking finish.

How-to Solder Stained Glass Joints

To achieve a strong bond, you will need to apply flux to the joint and heat the solder until it melts and flows evenly. You can use a soldering iron or a torch to heat the solder, depending on your preference and the size of your project.

Tips for Achieving a Professional Finish

Joints are what hold your stained glass piece together, and a professional finish depends on them. To get a smooth finish, you can try:

  • using a high-quality solder
  • applying the right amount of flux
  • heating the solder evenly

. Knowing these tips will help you achieve a beautiful and long-lasting stained glass piece.

Howto take your stained glass piece to the next level is by paying attention to the details. You can try:

  • using a soldering iron with a fine tip
  • applying a patina to protect the solder
  • sealing the piece with a waterproof coating

. Knowing these techniques will help you create a stunning stained glass piece that will last for years to come.

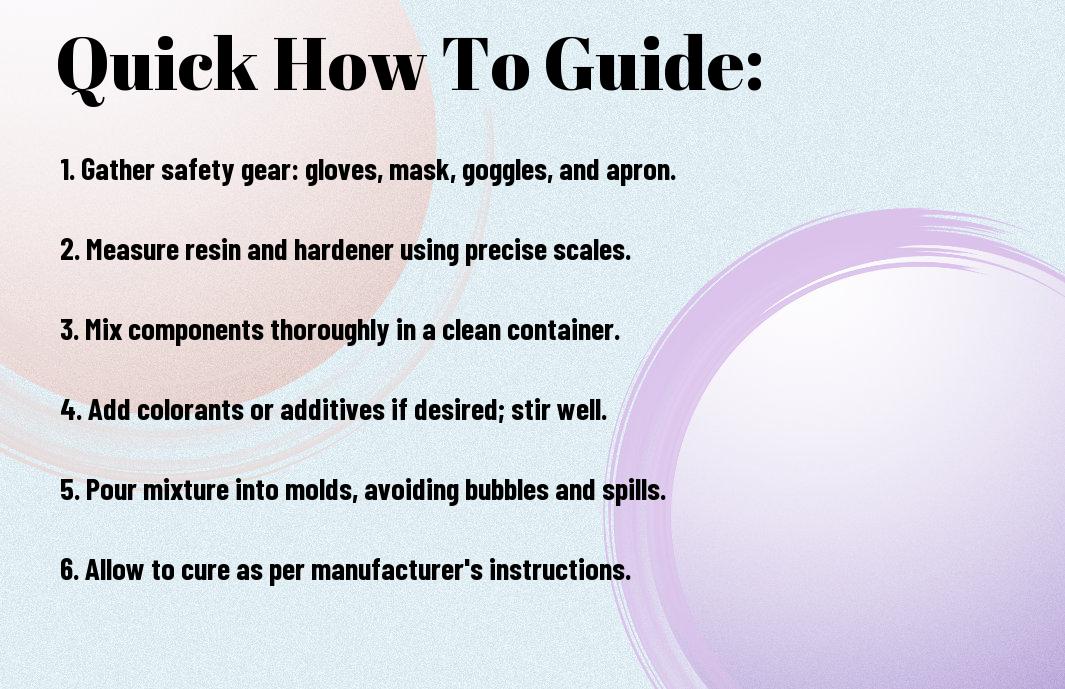
Safety Precautions and Best Practices

After starting your stained glass art project, you should familiarize yourself with safety guidelines, as seen in this Easy Stained Glass Tutorial | Here’s a step by step tutorial on stained glass art, to ensure a smooth process.

Factors to Consider for a Safe Workspace

There’s a need to consider your workspace, you should have:

  • Adequate ventilation
  • Proper lighting
  • The safety of your workspace is important for your well-being.

    How-to Avoid Common Mistakes

    Consider the common mistakes that can occur during the stained glass art process, such as incorrect cutting or grinding techniques, to avoid injuries and damages.

    Best practices for avoiding mistakes include carefully planning your design, using the right tools, and taking your time to ensure accuracy and precision in your work, helping you to create a beautiful stained glass art piece that you can be proud of, and that will last for years to come, as you continue to work on your project, you will develop your skills and techniques.

    Final Words

    So, as you conclude your stained glass art project, you should feel proud of your achievement. You have successfully transformed raw materials into a beautiful piece of art. Your patience and attention to detail have paid off, and you now have a unique masterpiece to showcase. You can apply your newfound skills to create more stunning stained glass art, experimenting with different techniques and designs to make each piece truly your own.

    FAQ

    Q: What materials do I need to get started with making stained glass art?

    A: To begin creating stained glass art, you’ll need a variety of materials, including stained glass sheets in your desired colors, a glass cutter, a breaking plier, copper foil, solder, and a soldering iron. Additionally, a workboard, cutting oil, and a grinder can be helpful for more intricate projects. It’s also a good idea to have a well-ventilated workspace and safety equipment such as gloves and goggles to protect yourself from sharp edges and solder fumes.

    Q: How do I cut and shape the stained glass pieces for my art?

    A: Cutting and shaping stained glass involves several steps. First, use a glass cutter to score the glass along the line where you want to make the cut. Next, use running pliers to snap the glass along the score line, or for more curved cuts, use a breaking plier. For more intricate shapes, you may need to use a grinder to smooth out the edges. Always wear protective gear, including gloves and safety glasses, and work on a stable surface to prevent accidents.

    Q: What is the process for assembling and soldering the stained glass pieces into a complete art piece?

    A: Assembling and soldering your stained glass art involves several steps. First, wrap each piece of cut glass in copper foil, making sure to cover all edges evenly. Then, place the pieces together according to your design, ensuring they fit snugly. Apply a small amount of flux to the copper foil seams. Next, heat the solder with a soldering iron, allowing it to flow smoothly over the seams, joining the glass pieces together. After the solder has cooled, clean the piece to remove any oxidation or residue, and finally, apply a patina if desired to enhance the color and protect the solder. This process requires patience and practice to achieve professional-looking results.

Top Leather Crafting Techniques

You’re about to look into the world of leather crafting, where precision and patience are key. Your hands will shape and mold the leather, bringing your ideas to life. With the right techniques, you’ll be able to create items that are both functional and beautiful. You’ll learn to cut, stitch, and finish your leather projects like a pro, giving you the skills to take your crafting to the next level and create something truly unique.

Key Takeaways:

To master the art of leather crafting, here are the main points to consider:

  • Understanding Leather Selection is key to a successful project, as different types of leather have unique characteristics and uses, such as Full-Grain Leather for durability and Suede Leather for a soft, luxurious finish.
  • Developing Tooling Skills is crucial for creating intricate designs and patterns on leather, including Stitching, Stamping, and Carving, which require practice and patience to master.
  • Mastery of Finishing Techniques is vital to achieve a professional-looking result, including Dyeing, Conditioning, and Sealing, which help to enhance the appearance and Water Resistance of the leather.

Basic Leather Crafting Tools

While working with leather, you’ll need the right tools to achieve professional results. Your toolkit will depend on the project and your level of expertise.

Essential Tools for Beginners

For starters, you’ll need basic tools like a leather cutter, edge beveler, and Awl. These will help you cut, shape, and puncture holes in your leather.

Advanced Tools for Experienced Crafters

Above all, your advanced toolkit will include:

  1. Leather stitcher
  2. Edge creaser
Leather Crafting Tools
Tool Description
Leather cutter Cuts leather accurately

You’ll use these tools to refine your leather work and add intricate details.

Considering your advanced skills, you’ll want to invest in:

  1. Leather skiver
  2. lekz increasesr
Advanced Leather Tools
Tool Purpose
Leather stitcher Creates consistent stitches

You’ll appreciate the precision and control these tools offer, allowing you to take your leather crafting to the next level.

Leather Preparation Techniques

If you’re looking to create high-quality leather goods, you need to start with the right preparation techniques. You’ll be working with a durable material, but it still requires attention to detail to get the best results.

Cutting and Shaping Leather

Behind every well-made leather item is a careful cutting and shaping process. You’ll need to use sharp tools and precise measurements to get the desired shape and size for your project.

Conditioning and Finishing Leather

Finishing touches are what set your leather goods apart. You’ll need to condition and finish your leather to bring out its natural beauty and durability, using techniques that enhance its texture and appearance.

Consequently, as you work on conditioning and finishing your leather, you’ll find that it becomes more supple and develops a rich patina. You can use various techniques, such as applying oils or waxes, to protect the leather and give it a unique character that reflects your craftsmanship.

Stitching and Embellishments

Keep in mind that stitching and embellishments can make or break your leather craft. You need to balance your design with the right stitching patterns and embellishments to create a cohesive look.

Simple Stitching Patterns

For beginners, simple stitching patterns like the running stitch or backstitch are a good starting point. You can use these patterns to create a classic look for your leather craft.

Advanced Embellishments and Designs

Beside the basic stitching patterns, you can add advanced embellishments like:

  1. Beading
  2. Tooling

Embellishments Table

Technique Description
Beading Adding beads to your design
Tooling Using tools to create designs on leather

You can experiment with different techniques to create unique designs.

A key aspect of advanced embellishments and designs is experimentation. You can try out different techniques like:

  1. Stenciling
  2. Pyrography

Advanced Table

Technique Description
Stenciling Using stencils to create designs
Pyrography Using heat to create designs on leather

As you practice, you will develop your own style and techniques for advanced embellishments and designs.

Leather Working Methods

After exploring the basics, you’ll find various techniques to enhance your craft. Check out Techniques : r/Leathercraft for more ideas.

Molding and Shaping Leather

By applying heat and pressure, you can mold leather into desired shapes, creating unique pieces that fit your needs.

Joining and Attaching Leather Pieces

After cutting out your leather pieces, you’ll need to join them together, using methods like stitching or adhesive to create a strong bond.

Molding your leather working skills takes time, and joining pieces is a fundamental part of it. You’ll learn to choose the right thread, needle, and technique to securely attach your leather pieces, ensuring your project is both functional and visually appealing, as you progress in your craft, your skills will become more refined.

Troubleshooting Common Issues

Your leather crafting project can be plagued by various issues, but with the right techniques, you can overcome them and achieve professional-looking results.

Fixing Tears and Holes

Behind every successful leather craft lies a good understanding of how to fix mistakes, and you can repair tears and holes by using a leather patch or stitches to reinforce the area.

Solving Adhesion Problems

With the right adhesive and techniques, you can ensure a strong bond between leather pieces, and you should experiment with different adhesives to find the one that works best for your project.

Hence, solving adhesion problems requires patience and practice, and as you work with different leathers and adhesives, you will develop the skills to identify and solve adhesion issues, allowing you to complete your projects with confidence and precision, and you will be able to achieve a level of craftsmanship that you can be proud of.

Advanced Leather Crafting Projects

All advanced leather crafting projects require patience and skill.

  1. You will work with complex designs
  2. and patterns
Project Difficulty
Bag High
Wallet Medium
Shoes High
Low
Watch strap Medium

Creating Complex Designs and Patterns

The key to creating complex designs is to break them down into simpler components. You will use your skills to craft unique items.

Working with Different Types of Leather

Against the grain, you will work with various leathers.

  • Full-grain leather
  • Top-grain leather
  • Suede
Leather Type Characteristics
Full-grain Durable
Top-grain Strong
Suede Soft
Aniline Supple
Pigmented Water-resistant

Recognizing your leather type is key to your project’s success.

Plus, as you work with different types of leather, you will develop your skills.

  • Full-grain leather is durable
  • Top-grain leather is strong
  • Suede is soft
Leather Type Use
Full-grain Bag
Top-grain Shoes
Suede Jacket
Aniline Wallet
Pigmented Belt

Recognizing the characteristics of each leather type will help you choose the right one for your project.

Final Words

Conclusively, you’ve learned the top leather crafting techniques. You can now apply your skills to create quality leather products. Your hands will shape and mold the leather into something unique. With practice, your craftsmanship will improve, and you’ll develop your own style. You’ll be able to make leather goods that are both functional and beautiful, a testament to your dedication to the craft.

FAQ

Q: What are the basic tools required for leather crafting?

A: To start leather crafting, you will need a few necessary tools, including a leather cutter or leather shears, a leather mallet, an edge beveler, and a stitching awl. Additionally, having a work surface, such as a leather crafting mat or a cutting mat, can help protect your workspace and prevent damage to your tools and leather. You may also want to invest in a set of leather stamps or embossing tools to add decorative elements to your projects.

Q: How do I choose the right type of leather for my project?

A: Choosing the right type of leather for your project depends on the desired look, feel, and durability of the finished product. Full-grain leather is a popular choice for many projects, as it is strong and develops a beautiful patina over time. Top-grain leather is another option, which is sanded and finished to create a smooth, uniform surface. Suede and nubuck leathers are great for projects that require a soft, velvety texture, while leather scraps and reclaimed leather can be used for unique, eco-friendly projects. Consider the intended use of the item, as well as your personal preference and skill level, when selecting the type of leather for your project.

Q: What are some common leather crafting techniques for beginners?

A: For beginners, some common leather crafting techniques include cutting, stitching, and shaping. Cutting involves using a leather cutter or shears to cut out patterns and shapes from the leather, while stitching involves using a needle and thread to sew the leather pieces together. Shaping involves using a leather mallet and edge beveler to shape and finish the edges of the leather. Other techniques, such as stamping, embossing, and burnishing, can be used to add decorative elements and texture to your projects. It’s a good idea to practice these techniques on scrap leather before starting a project, to get a feel for the tools and materials, and to build your skills and confidence as a leather crafter.

How to Work with Resin

You’re about to begin on a creative journey with resin, and with the right guidance, you’ll unlock its full potential. As you start working with resin, you’ll discover its versatility and the unique possibilities it offers. Your projects will flourish as you learn to mix, pour, and finish resin like a pro. In this guide, you’ll find step-by-step instructions to help you master the techniques and achieve stunning results with your resin projects.

Key Takeaways:

  • When working with resin, it is necessary to prepare a clean and dust-free work environment to avoid any contamination that could affect the final result.
  • Understanding the curing process and the mixing ratios of the resin and hardener is vital to achieve the desired consistency and finish.
  • Safety precautions such as wearing protective gear, including gloves and goggles, and ensuring good ventilation are necessary to prevent skin irritation and inhalation of harmful fumes.

    Understanding Resin Basics

    A key aspect of working with resin is grasping its fundamental properties. You will encounter various types of resin, each with unique characteristics.

    Types of Resin

    Among the types of resin you will work with are:

    • Epoxy resin
    • Polyurethane resin
    • Acrylate resin
    • Urethane resin
    • Silicone resin

    The variety of resin types will help you choose the best fit for your project.

    Resin Type Characteristics
    Epoxy resin Strong, durable
    Polyurethane resin Flexible, resistant
    Acrylate resin Clear, fast-curing
    Urethane resin Tough, abrasion-resistant
    Silicone resin Flexible, heat-resistant

    Safety Precautions

    Clearly, your safety is paramount when working with resin. You should take necessary precautions to avoid exposure and potential health hazards.

    This involves wearing protective gear, ensuring good ventilation, and following the manufacturer’s instructions for handling and mixing resin. As you work with resin, you will need to take steps to prevent skin and eye irritation, as well as inhalation of fumes. You should also keep your workspace clean and organized to minimize the risk of accidents and spills.

    Preparing for Resin Work

    Some preparation is necessary before you start working with resin. You can find a wealth of information on resin art, including a helpful Resin Art – Beginner’s Guide to get you started.

    Essential Tools and Materials

    Similar to other crafts, some basic tools and materials are required for resin work, including a well-ventilated workspace, gloves, and a scale to measure your resin and hardener accurately.

    Workspace Setup

    Setting up your workspace is vital for a successful resin project, you will need a clean, dry, and dust-free area to work in, with all your tools and materials within easy reach.

    The workspace setup you create will directly impact the quality of your finished project, as a cluttered or dirty workspace can lead to mistakes and a poor finish, so take your time to set it up correctly, and you will be well on your way to creating beautiful resin pieces.

    Mixing and Applying Resin

    Many variables can affect the outcome of your resin project, and proper mixing and application techniques are important to achieve the desired results. You will need to prepare your workspace, mix the resin according to the instructions, and apply it to your project using the right tools.

    Measuring and Mixing Techniques

    Resin-like materials require precise measurements to ensure the correct ratio of hardener to resin. You should follow the manufacturer’s instructions for mixing and be careful not to introduce air into the mixture, as this can cause bubbles to form.

    Application Methods and Tips

    Techniques for applying resin vary depending on the project, but you can use a brush, pouring, or spreading method. Consider the following:

    • Using a clean and dry surface
    • Applying thin layers to avoid drips
    • Working in a well-ventilated area

    Assume that your workspace is well-prepared before starting the application process.

    Another aspect of applying resin is considering the environmental conditions, such as temperature and humidity, which can affect the curing process. You can use a variety of tools, including:

    • A heat gun to speed up the curing process
    • A UV lamp to cure the resin
    • A mixing stick to remove air bubbles

    Assume that you have the necessary tools and equipment to achieve the desired finish for your project.

    Factors Affecting Resin Quality

    Keep in mind the factors that affect resin quality, including:

    • Materials used
    • Mixing technique

    Recognizing these factors will help you achieve better results.

    Temperature and Humidity Control

    Factors such as temperature and humidity can impact your resin’s quality.

    Factor Impact
    Temperature Affects curing time
    Humidity Affects resin viscosity

    Environmental Factors to Consider

    With your workspace in mind, consider:

    • Air circulation
    • Light exposure

    Recognizing these factors will help you optimize your workspace.

    It is necessary to consider the environmental factors that may affect your resin’s quality. You should consider:

    • Dust and particles
    • Chemical exposure

    Recognizing these factors will help you take necessary precautions to protect your resin and ensure the best possible outcome for your project.

    Troubleshooting Common Issues

    After working with resin, you may encounter some common issues that can be frustrating, but with the right techniques, you can easily resolve them and achieve the desired results.

    Identifying and Fixing Bubbles and Cracks

    Little imperfections can ruin your resin project, but you can identify and fix bubbles and cracks by inspecting your work carefully and using the right tools to remove or fill them.

    Dealing with Color and Finish Problems

    Now that you have mastered the basics of resin, you can deal with color and finish problems by experimenting with different pigments and techniques to achieve the desired effect, and you will find that your projects turn out beautifully.

    Bubbles in your resin can affect the color and finish, but you can minimize them by mixing your resin thoroughly and applying it in a controlled environment, and you will be able to achieve a smooth, even finish that showcases your colors perfectly, allowing you to take your resin projects to the next level and create stunning pieces that you will be proud to display.

    Advanced Resin Techniques

    Once again, you’ll find that working with resin requires patience and practice. Consider the following techniques:

    1. Layering
    2. Mixing with other materials
    Technique Description
    Layering Creating multiple layers of resin

    Coloring and Pigmenting Resin

    Apparently, you can achieve unique effects by adding pigments to your resin. You can use various coloring agents to create the desired hue.

    Adding Textures and Patterns

    To achieve complex designs, you can add textures and patterns to your resin. You can use materials like fabric or paper to create unique effects.

    Pigmenting your resin with textures and patterns opens up a world of creative possibilities. You can experiment with different materials and techniques to create one-of-a-kind pieces that reflect your style and personality.

    To wrap up

    Conclusively, you have learned the basics of working with resin, and now you can apply your knowledge to create unique projects. You will find that practicing with resin helps you develop your skills, and your experience will grow with each new piece you create. As you experiment with different techniques, you will become more confident in your ability to work with resin and achieve the desired results, allowing you to bring your ideas to life.

    FAQ

    Q: What safety precautions should I take when working with resin?

    A: When working with resin, it is vital to take necessary safety precautions to avoid any potential health risks. This includes wearing protective gear such as gloves, goggles, and a mask to prevent skin and eye irritation, as well as inhalation of fumes. Additionally, ensure you are working in a well-ventilated area, away from direct sunlight and heat sources. It’s also a good idea to have a fire extinguisher nearby in case of emergencies. By taking these precautions, you can minimize the risks associated with working with resin and create a safe working environment.

    Q: How do I mix and prepare resin for a project?

    A: To mix and prepare resin for a project, start by carefully reading the instructions provided with your specific resin product, as different types of resin may have unique mixing requirements. Generally, you will need to mix the resin with a hardener or catalyst in a specific ratio. Use a digital scale to ensure accurate measurements, and mix the components in a well-ventilated area. Use a stir stick or mixing cup to thoroughly combine the resin and hardener, making sure to scrape the sides and bottom of the mixing cup. It’s also important to work in a dust-free environment and minimize air bubbles to achieve a smooth, even finish.

    Q: How do I achieve a bubble-free and smooth finish when working with resin?

    A: Achieving a bubble-free and smooth finish when working with resin requires some technique and patience. To minimize air bubbles, make sure to mix the resin slowly and thoroughly, and use a stir stick or mixing cup to remove any air pockets. You can also use a torch or heat gun to gently heat the resin, which will help to dissolve any bubbles that form. To achieve a smooth finish, use a flat, even surface to pour the resin onto, and use a credit card or similar tool to spread it out evenly. Allow the resin to cure slowly and naturally, avoiding direct sunlight or heat sources, which can cause it to cure too quickly and unevenly. By following these tips, you can achieve a beautiful, bubble-free finish with your resin project.

The Joy of Metalworking Crafts

As you explore the world of metalworking, you’ll discover a unique combination of art and technique. You can create intricate pieces that showcase your skill and creativity. To get started, you can find inspiration in Awesome Beginners Metal Working Projects, which will guide you through the process. Your journey into metalworking crafts will be rewarding, allowing you to produce remarkable items that reflect your personal style.

Key Takeaways:

  • The creative process involved in metalworking crafts allows individuals to express themselves and bring their ideas to life, providing a sense of accomplishment and pride in their work.
  • Engaging in metalworking crafts can be a great way to develop problem-solving skills and hand-eye coordination, as it requires patience, attention to detail, and practice to master various techniques.
  • The therapeutic benefits of metalworking crafts should not be overlooked, as the focused and methodical nature of the work can be meditative and help reduce stress, promoting an overall sense of well-being.

History of Metalworking

To understand the evolution of metalworking crafts, you need to probe into its rich history. You’ll discover that metalworking has been a vital part of human civilization for thousands of years, shaping your world in profound ways.

Ancient Civilizations

Across various cultures, you’ll find evidence of metalworking dating back to ancient times, with early civilizations such as Egypt, Greece, and Rome leaving behind a legacy of intricately crafted metal artifacts that showcase your ancestors’ skill and ingenuity.

Modern Techniques

Before you can appreciate the modern metalworking techniques, you should know that they have revolutionized the craft, enabling you to create complex designs and shapes with precision and ease, opening up new possibilities for your creative expression.

Indeed, as you explore modern metalworking techniques, you’ll find that they offer a wide range of tools and methods to help you achieve your desired results, from computer-aided design to 3D printing, allowing you to push the boundaries of what is possible and bring your unique vision to life.

Tools of the Trade

Some of the most common tools you’ll encounter in metalworking include hammers, pliers, and wrenches, which are used to shape and manipulate metal into various forms, allowing you to bring your creative vision to life as you work with different materials and techniques.

Safety Equipment

Above all, your safety should be your top priority, and you’ll need to invest in proper safety equipment, such as gloves, goggles, and a face mask, to protect yourself from potential hazards like sharp edges, flying debris, and toxic fumes, ensuring you can work safely and confidently.

Essential Machinery

Above and beyond basic hand tools, you’ll also need access to important machinery like lathes, drills, and grinders, which will enable you to cut, shape, and finish your metalwork with precision and accuracy, allowing you to achieve professional-grade results and take your craft to the next level.

The important machinery you choose will depend on the specific type of metalworking you’re doing, but as you become more familiar with the craft, you’ll find that having the right equipment at your disposal will make all the difference in the quality of your work, and you’ll be able to tackle more complex projects with confidence, exploring new techniques and pushing the boundaries of what’s possible with metal.

Metalworking Processes

Unlike other crafts, metalworking involves shaping and molding metals to create unique pieces, allowing you to explore your creativity and bring your ideas to life, as you discover the various techniques and tools involved in this craft.

Forging and Casting

Across various metalworking techniques, you will find that forging and casting are fundamental processes, enabling you to shape and mold metals into desired forms, and as you probe deeper, you will learn how to apply these techniques to achieve your desired outcomes.

Welding and Shaping

Welding together different metal pieces, you will be able to create complex structures and designs, and as you master the art of shaping, you will be able to refine your creations, allowing you to add finer details and textures to your work.

With your newfound knowledge of welding and shaping, you can experiment with various metals and techniques, pushing the boundaries of what is possible, and as you practice, you will develop the skills and confidence to tackle more intricate projects, allowing you to take your metalworking to the next level, and create truly unique and impressive pieces that reflect your skill and artistry.

Creative Expression

Keep in mind that metalworking crafts offer a unique outlet for your creativity, allowing you to bring your ideas to life in a tangible way, and as you explore this craft, you’ll discover the joy of shaping and molding metal into beautiful and functional pieces.

Designing and Planning

The initial stages of metalworking involve designing and planning your project, where you’ll consider factors like material selection, technique, and safety protocols, and as you develop your skills, you’ll become more confident in your ability to design and plan successful projects.

Bringing Ideas to Life

Like a master craftsman, you’ll take pride in transforming raw metal into a work of art, and as you work, you’ll experience the satisfaction of seeing your vision take shape, and with each new project, your skills and confidence will grow, allowing you to tackle more complex and ambitious endeavors.

To fully realize your creative vision, you’ll need to develop a range of skills, from cutting and shaping to joining and finishing, and as you master these techniques, you’ll be able to bring your most ambitious ideas to life, creating beautiful and functional pieces that reflect your unique perspective and style, and you’ll find that the process of bringing your ideas to life is both challenging and rewarding, pushing you to grow as a craftsman and an artist.

Safety and Best Practices

For your safety, it’s vital to follow best practices when working with metal. You need to wear protective gear, such as gloves and goggles, to prevent injuries.

Workshop Setup

Any well-organized workspace starts with a clean and clutter-free area. You should arrange your tools and equipment in a way that allows you to work efficiently and safely.

Emergency Procedures

Workshop accidents can happen, and you should be prepared. You need to have a plan in place, including a fire extinguisher and a first aid kit, in case of an emergency.

Due to the potential risks involved in metalworking, you should take extra precautions when dealing with emergencies. You should know how to respond to common accidents, such as cuts or burns, and have the necessary supplies to treat them. By being prepared, you can minimize the risk of injury and ensure a safe working environment.

Community and Inspiration

Many metalworking enthusiasts find that being part of a community enhances their experience, providing opportunities to learn from others and share your own knowledge, which can help you improve your skills and stay motivated.

Metalworking Events

Alongside these gatherings, attending metalworking events allows you to network with like-minded individuals, learn about new techniques, and get hands-on experience with various tools and materials, which can help you expand your skills and knowledge in the field.

Online Resources

Before plunging into a new project, you can explore online forums, tutorials, and social media groups dedicated to metalworking, where you can find inspiration, ask questions, and showcase your work to a global community of metalworkers.

Due to the vast amount of information available online, you can easily find detailed guides, videos, and blogs that cater to your specific interests and skill level, allowing you to learn at your own pace and stay updated on the latest trends and techniques in metalworking, which can help you take your craft to the next level and achieve your goals.

Final Words

The world of metalworking crafts offers you a unique opportunity to explore your creativity and skill. As you explore into this craft, you’ll discover the joy of shaping and molding metal into intricate pieces. To learn more about the craft and its applications, visit About Us – metalcraftusa to explore your potential and take your metalworking skills to the next level, enhancing your projects with your newfound knowledge.

FAQ

Q: What is metalworking and how can I get started with it as a craft?

A: Metalworking is a craft that involves shaping and molding metal into various forms and designs. To get started, you will need some basic tools such as a workshop, safety gear, and metalworking equipment like a welder or a lathe. You can begin by taking online classes or workshops, joining metalworking communities, or reading books on the subject to learn the fundamentals. Start with simple projects like making small decorative items or repairing metal objects to gain hands-on experience and build your confidence.

Q: What safety precautions should I take when engaging in metalworking crafts?

A: Safety is a top priority when working with metal. Always wear protective gear such as safety glasses, gloves, and a face mask to prevent injury from flying sparks, sharp edges, and harmful fumes. Ensure your workspace is well-ventilated and clear of flammable materials. Keep a fire extinguisher nearby and know how to use it. It’s also important to follow proper procedures for handling electrical equipment and to keep loose clothing tied back to avoid accidents. Regularly inspect your tools and equipment to ensure they are in good working condition.

Q: How can I improve my skills and creativity in metalworking crafts?

A: Improving your skills and creativity in metalworking involves practice, patience, and experimentation. Try new techniques and projects to challenge yourself and learn from your mistakes. Joining online forums or local metalworking clubs can provide valuable opportunities to learn from experienced craftsmen, share ideas, and get feedback on your work. Watching tutorials, attending workshops, and reading specialty books can also help you stay updated on the latest methods and tools. Setting aside time to brainstorm and sketch out new ideas can help foster creativity, and don’t be afraid to try unconventional materials or approaches to create unique pieces.

Top Advanced Crafting Tools

As you explore into the world of crafting, you’ll find that having the right tools can elevate your projects to the next level. Your creativity and precision are enhanced with advanced tools, allowing you to achieve professional-grade results. You’ll be able to tackle complex designs and techniques with ease, exploring new possibilities and taking your crafting skills to new heights. With the right tools, your crafting experience will become more efficient and enjoyable, enabling you to produce high-quality items that reflect your skill and attention to detail.

Key Takeaways:

  • The latest software and design programs are crucial for creating complex designs and precision cuts, making them a must-have for any serious crafter or DIY enthusiast.
  • Advanced materials such as 3D printing filament and CNC machining tools enable crafters to create intricate and detailed projects with ease, pushing the boundaries of what is possible in the world of crafting.
  • Specialized tools like laser cutters and embroidery machines allow for high-precision cutting and stitching, making them ideal for crafters who want to add a professional touch to their projects.

Essential Tools

For any crafting project, having the right tools is vital to achieving professional-looking results. You need a set of basic tools to get started, and from there, you can expand your collection as your skills and projects become more complex.

Handheld Devices

Devices such as scissors, cutters, and pliers are must-haves in your toolkit, allowing you to cut, shape, and manipulate various materials with ease, giving you more control over your craft.

Power Equipment

Tools like drills, saws, and sanders are imperative for more heavy-duty crafting tasks, enabling you to work with thicker materials and achieve smoother finishes, taking your projects to the next level.

With power equipment, you can tackle more complex projects, such as woodwork, metalwork, or advanced sewing, and you will find that your workflow becomes more efficient, allowing you to focus on the creative aspects of your craft, giving you the ability to produce high-quality results that you can be proud of.

Advanced Materials

The development of advanced materials has led to significant advancements in crafting. You can consider the following:

  1. Carbon fiber
  2. Nanomaterials
Material Properties
Carbon fiber Lightweight and strong

Rare Resources

Beneath the surface of advanced crafting lies the use of rare resources, which you will need to acquire to create top-notch items, allowing you to enhance your crafting experience.

High-Tech Composites

Combining different materials, you can create high-tech composites that offer unique properties, enabling you to craft innovative items that suit your needs.

Another aspect of high-tech composites is their potential to be customized, as you can mix and match various materials to achieve the desired characteristics, giving you the flexibility to craft items that meet your specific requirements.

Crafting Techniques

Once again, as you research into the world of advanced crafting, you’ll encounter various techniques to enhance your skills. Your proficiency in these methods will elevate your craft, making it more precise and refined.

Precision Cutting

One of the key aspects of advanced crafting is mastering precision cutting tools, which enable you to make exact cuts with ease, allowing you to work with intricate designs and patterns with confidence.

Intricate Shaping

Cutting through complex shapes and designs requires patience and skill, but with the right tools, you can achieve professional-looking results, and your projects will reflect your attention to detail and expertise.

Due to the complexity of intricate shaping, you’ll need to choose the right tools for your specific project, considering factors such as material, design, and desired outcome, to ensure that your final product meets your high standards.

Safety Precautions

Not taking the necessary precautions can lead to accidents, so ensure you have the right tools, such as those found in Essential Paper Crafting Tools That Every Crafter Must Have, to stay safe while crafting.

Personal Protective Gear

The most basic safety measure you can take is wearing protective gear, such as gloves and goggles, to prevent injury from sharp objects and chemicals.

Workspace Safety

One of the most important aspects of safety precautions is ensuring your workspace is clear of clutter and tripping hazards, allowing you to work safely and efficiently.

This workspace safety measure is especially important as it will help you avoid accidents and ensure that you can focus on your craft without distractions, you should also consider securing any toxic materials and keeping them out of reach of children and pets, by doing so you will be able to enjoy your hobby while maintaining a safe environment.

Troubleshooting

Now that you are familiar with advanced crafting tools, it’s time to discuss troubleshooting. You will likely encounter issues with your tools, and being able to identify and fix problems is vital for efficient crafting.

Common Issues

By analyzing your crafting process, you can identify common issues that may arise, such as worn-out parts or misaligned components, and take steps to prevent or address them.

Repair Techniques

Beside regular maintenance, you can use various repair techniques to fix damaged tools, such as replacing broken parts or re-calibrating your equipment, to get your crafting back on track.

But as you examine deeper into repair techniques, you’ll find that your ability to diagnose and fix issues will improve, allowing you to extend the life of your tools and minimize downtime, which is especially important when working on complex projects that require precision and attention to detail, and you’ll be able to tackle even the most demanding crafting tasks with confidence.

Final Words

Considering all points, you now have a comprehensive understanding of the top advanced crafting tools. You can confidently choose the right tools to enhance your crafting experience. With your newfound knowledge, you will be able to optimize your workflow and create exceptional projects. Your crafting skills will improve significantly, and you will be able to tackle complex projects with ease, taking your crafting to the next level.

FAQ

Q: What are the Top Advanced Crafting Tools available in the market?

A: The Top Advanced Crafting Tools include a 3D Printer, a Laser Cutter, and a CNC Milling Machine. These tools offer advanced features such as high precision, speed, and versatility, allowing crafters to create complex designs and projects with ease. The 3D Printer can create three-dimensional objects from digital designs, while the Laser Cutter can cut and engrave various materials with precision. The CNC Milling Machine, on the other hand, can carve and shape materials with high accuracy, making it ideal for creating intricate designs and patterns.

Q: How do I choose the right Advanced Crafting Tool for my needs?

A: To choose the right Advanced Crafting Tool, consider the type of projects you want to work on, the materials you will be using, and your budget. If you are working with plastics, metals, or woods, a CNC Milling Machine or a Laser Cutter may be the best choice. For creating three-dimensional objects, a 3D Printer is the way to go. Additionally, consider the size and complexity of your projects, as well as the level of precision and detail required. It is also crucial to consider the cost of the tool, including the initial investment, maintenance, and operating costs, to ensure it fits within your budget.

Q: What safety precautions should I take when using Advanced Crafting Tools?

A: When using Advanced Crafting Tools, it is crucial to take necessary safety precautions to avoid injuries and damages. Always wear protective gear, such as safety glasses, gloves, and a dust mask, when operating the tools. Ensure the workspace is well-ventilated, and the tools are properly grounded to prevent electrical shocks. Follow the manufacturer’s instructions and guidelines for operating and maintaining the tools, and keep loose clothing and long hair tied back to avoid entanglements. Regularly inspect the tools for damage or wear, and perform routine maintenance to ensure they are in good working condition. By taking these safety precautions, you can minimize the risks associated with using Advanced Crafting Tools and ensure a safe and enjoyable crafting experience.

Skip to content