Painting and Drawing

How to Paint with Textures

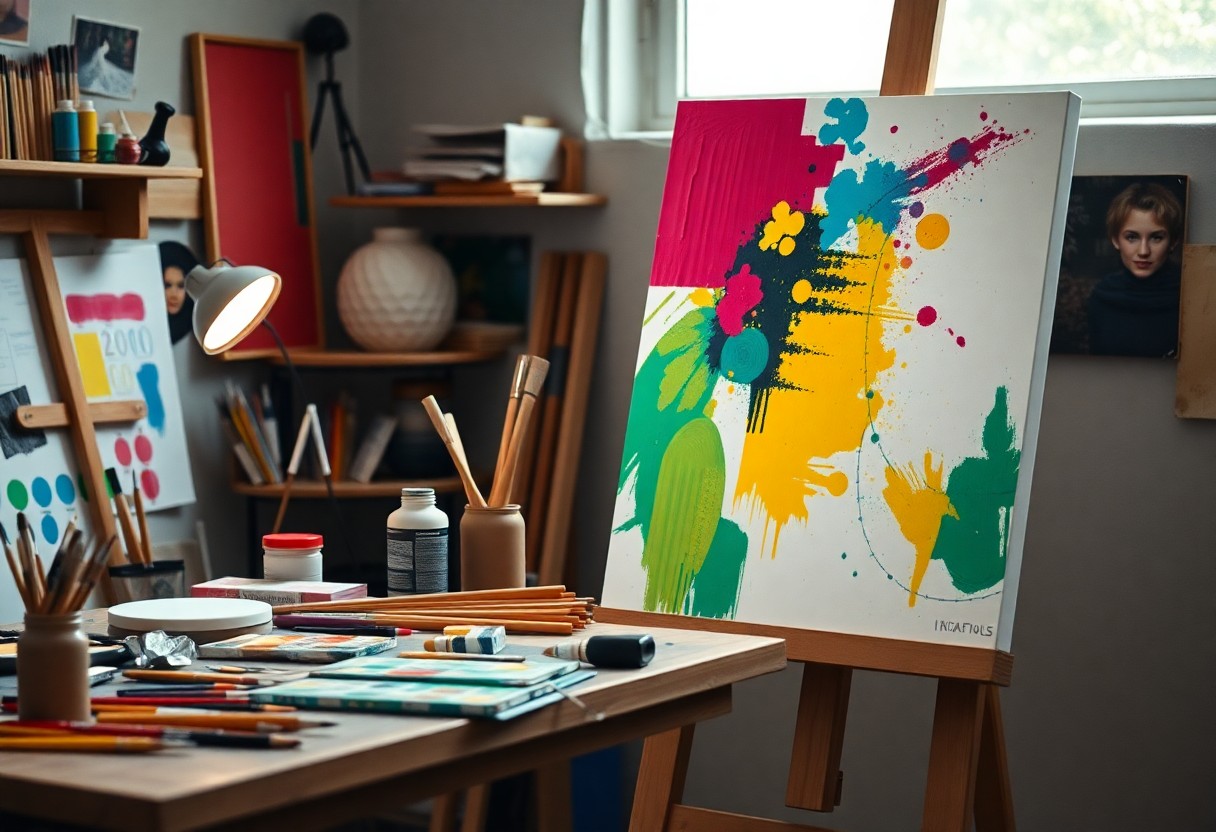
You stand in front of a blank canvas, brush in hand, ready to create. You’ve got the colors, the vision, but something’s missing – depth. That’s where texture comes in. You’ll learn to add grit, grain, and dimension to your work, making it pop. Your art will take on a life of its own, engaging the viewer on a new level. Now, let’s get started, and you’ll be painting with textures in no time.

Key Takeaways:

  • To achieve unique effects, use thick paints and heavy brushstrokes when painting with textures, allowing for a more expressive and dynamic visual outcome.
  • Experimenting with different materials and tools, such as sponges, palette knives, or even natural elements like leaves, can add depth and interest to your textured paintings.
  • Playing with layering and blending techniques can help to create a sense of dimensionality in your work, drawing the viewer’s eye into the textured world you’ve created.

Preparing the Surface

Your surface is the foundation of your artwork, and it needs to be ready for texture. You’ll need to clean and prepare it before you start painting.

Cleaning the Canvas

Above all, wash your hands, then gently wipe the canvas with a damp cloth to remove dirt and dust.

Applying a Primer

Canvas is your base, and a primer helps it accept texture and paint evenly. Apply a coat, letting it dry completely before proceeding.

Even if you’re using a high-quality canvas, a primer improves the adhesion of your textures and paints, allowing you to achieve the desired effects. You can choose between acrylic or oil-based primers, depending on your project’s requirements, and apply them with a brush or roller, covering the entire surface uniformly.

Choosing the Right Tools

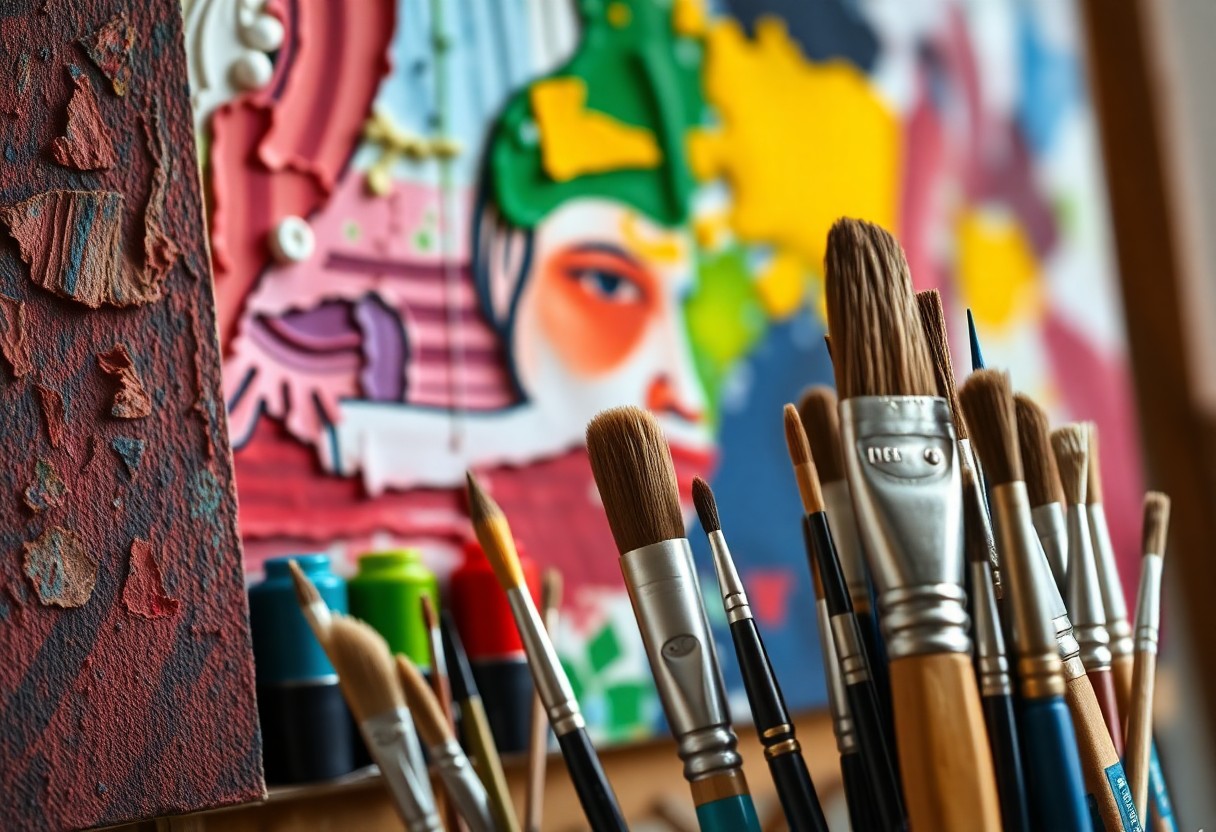
Assuming you’re ready to start painting with textures, you’ll need to gather the right tools. Your choices will depend on the effects you want to achieve. Selecting the right brushes and texturing instruments will make all the difference in your work.

Selecting Brushes

Across various types of brushes, you’ll find ones that suit your needs. You’ll look for brushes with stiff bristles for thick textures and softer ones for smoother effects. Your brush selection will set the tone for your entire piece.

Exploring Texturing Instruments

On the surface of your painting, you’ll apply textures using various instruments. You’ll use these tools to add depth and interest to your work. Your texturing instruments will help you achieve unique effects.

Instruments like palette knives, sponges, and even household items will become your allies in creating textured paintings. You’ll experiment with different tools to find what works best for you, and your unique style will emerge from the textures you create. As you work, you’ll discover new ways to use these instruments to add complexity to your art.

Applying Texture Techniques

Keep your brushstrokes intentional, using heavy strokes to build up texture. You’ll achieve unique effects by layering paint and mediums, creating depth on your canvas.

Thickening Paint

Around the edges, you’ll find thickening agents that help you achieve your desired consistency. You can use these to build up layers of paint and create textured effects.

Using Sponges and Rags

For your next step, grab a sponge or rag and start applying paint in dabbing motions. You’ll be able to create interesting patterns and textures by varying your pressure and technique.

In addition, you can experiment with different types of sponges and rags to achieve unique effects, such as using a natural sponge for organic textures or a lint-free rag for smoother results. You can also try dipping your sponge or rag in paint and then wringing it out to create a more subtle texture.

Creating Dimension and Depth

Despite the challenges, you can achieve dimension and depth in your painting by experimenting with textures. You’ll find that different materials and techniques can add layers of interest to your work.

Layering Colors

Against a plain background, you can build up colors to create a sense of depth. You’ll start to see your painting take shape as you apply each layer, with your colors blending and merging to form a unique texture.

Building Up Texture

The key to texture is applying it in thin layers, allowing each layer to dry before adding the next. You’ll find that your paint starts to take on a life of its own as you build up the texture.

Consequently, you’ll be able to create a raised, almost three-dimensional effect on your canvas. You can use this technique to draw the viewer’s eye to a particular part of the painting, or to add emphasis to a specific element, and your unique texture will be the result of your experimentation and patience.

Experimenting with Different Materials

After mastering basic texture techniques, you’ll want to explore various materials to add depth to your work. You’ll discover new effects by combining paint with different substances, expanding your creative possibilities.

Incorporating Natural Elements

Alongside your paints, you can use natural elements like leaves, twigs, or sand to create unique textures. You can apply these elements directly to your canvas or mix them with paint for added effect.

Using Unconventional Objects

The objects you find in your daily life can become great tools for creating textures. You can use household items like sponges, fabric, or even kitchen utensils to create interesting effects on your canvas.

Understanding how to use unconventional objects in your texture painting takes practice, but it can lead to remarkable results. You can experiment with different objects, observing how they interact with your paint and canvas, and develop your own distinct style by incorporating these unusual tools into your creative process, allowing you to produce truly original work that reflects your unique perspective.

Enhancing with Finishing Touches

Many techniques can elevate your textured painting. You’ll find that adding a few finishing touches can make all the difference in the final product.

Adding a Varnish

Above all, applying varnish will protect your work. You apply it after the paint is dry, and it will give your painting a glossy finish.
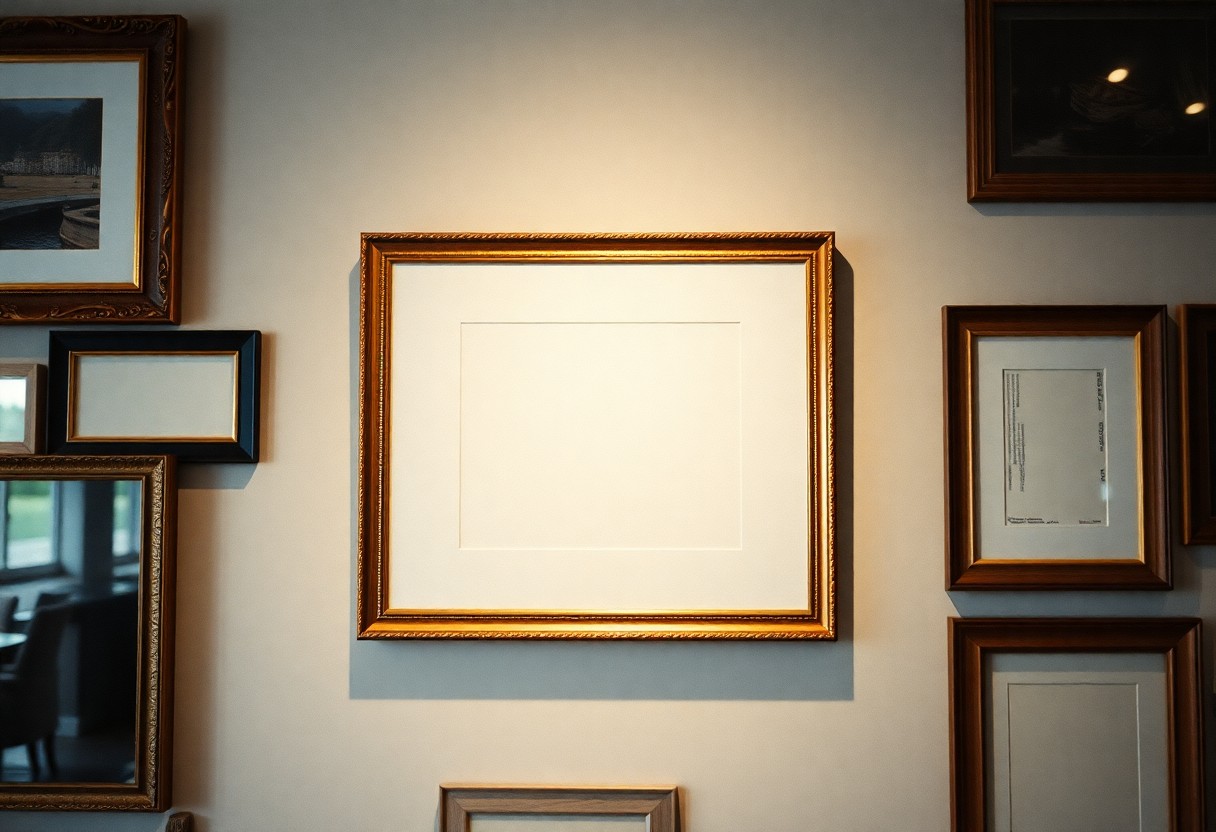
Creating a Frame

Behind your painting, a frame can add depth and context. You choose a frame that complements your artwork, and it will enhance the overall effect.

At this stage, you consider the style and material of the frame. You want it to match your painting’s texture and tone, so your artwork looks complete and polished. You can choose from various options, such as wood or metal, and select the one that suits your piece best.

Summing up

With these considerations, you’ve got the basics to paint with textures. You’ve learned to choose your tools and materials, and how to apply them to create depth and dimension. Your brushstrokes, bold or subtle, will bring your artwork to life. Now, get to work and experiment with different textures, see what works for you and what doesn’t. You’ll find your own style, and your paintings will take on a life of their own.

FAQ

Q: What are the different types of textures that can be used in painting?

A: There are several types of textures that can be used in painting, including physical textures such as thick paint, gel medium, and modeling paste, as well as visual textures created through various brushstrokes and techniques. Physical textures can add a tactile element to a piece, while visual textures can create the illusion of texture through color and pattern. Some common textures used in painting include impasto, which involves applying thick layers of paint to the canvas, and sgraffito, which involves scratching through layers of paint to create a textured effect.

Q: What materials can I use to create texture in my paintings?

A: There are many materials that can be used to create texture in paintings, including paint, gel medium, modeling paste, and found objects such as paper, fabric, and natural materials like leaves and twigs. You can also use household items like sponges, cloth, and paper towels to create unique textures and patterns. Additionally, you can experiment with different brushstrokes and techniques, such as dragging, scraping, and dripping, to create a wide range of textures and effects.

Q: How can I prepare my surface for texture painting?

A: To prepare your surface for texture painting, start by priming your canvas or board with a coat of gesso or acrylic paint. This will create a smooth, even surface for you to work on. You can then apply a texture paste or medium to the surface, using a brush, palette knife, or other tool to create the desired texture. Alternatively, you can apply a layer of paint to the surface and then use a texture paste or medium to add texture on top. Make sure to allow each layer to dry completely before adding additional texture or paint.

Q: What are some common techniques for applying texture to a painting?

A: Some common techniques for applying texture to a painting include impasto, which involves applying thick layers of paint to the canvas, and glazing, which involves applying multiple thin layers of transparent paint to achieve a deep, luminous color. You can also use a palette knife to apply thick, heavy strokes of paint, or a sponge or cloth to create soft, mottled textures. Additionally, you can experiment with dragging, scraping, and dripping techniques to create unique, expressive textures and patterns.

Q: How can I balance texture with other elements in my painting?

A: To balance texture with other elements in your painting, consider the overall composition and visual balance of the piece. Texture can be used to create emphasis and draw the viewer’s eye to a particular area of the painting, or to add depth and interest to a background or secondary element. Balance texture with other elements such as color, shape, and line by creating a visual hierarchy, where the most important elements are given prominence and the less important elements are subdued. You can also use texture to create a sense of movement or energy in the painting, by applying it in bold, expressive strokes or patterns.

Top Canvas Painting Ideas

You stand before a blank canvas, your mind filled with possibilities. You want to create something that speaks to you, something that reflects your style and emotion. Your brush is poised, ready to bring your vision to life. As you contemplate your next move, consider the ideas that will guide your strokes, the themes that will emerge on your canvas, and the story you want to tell through your art.

Key Takeaways:

To get the most out of your canvas painting experience, consider the following points:

  • Start with a theme in mind, whether it’s abstract, landscape, or portrait, to help guide your creative process and give your painting a clear direction.
  • Experiment with different techniques, such as layering, blending, or texturing, to add depth and visual interest to your canvas painting.
  • Choose a color palette that evokes the mood and atmosphere you want to convey, and consider the emotional impact of different colors on the overall effect of your painting.

Simple Landscape Painting Ideas

A simple landscape painting can be a great way to start your artistic journey. You can begin with basic elements like skies, trees, and hills, and gradually add more details to create a captivating scene.

Seascapes

Among the many landscape options, seascapes are a popular choice, allowing you to explore the play of light on water and the emotions it evokes. You can paint a serene beach or a dramatic wave, depending on your mood and style.

Cityscapes

After selecting your cityscape subject, you can focus on capturing the urban atmosphere, with its vibrant colors and dynamic energy. You can depict a bustling street or a quiet alley, using your brushstrokes to convey the feeling of the scene.

Another aspect of cityscapes is the interplay of light and shadow, which you can use to add depth and interest to your painting. You can experiment with different techniques, such as layering or glazing, to achieve the desired effect and bring your cityscape to life.

Abstract Expressionism

Some of the most compelling canvas paintings emerge from abstract expressionism, where you can unleash your creativity without adhering to traditional forms. You’ll find that your emotions and thoughts are translated into vibrant colors and dynamic brush strokes, creating a unique piece of art.

Color Choices

About the colors you select, consider what emotions you want to evoke in your audience. You can opt for bold and bright hues to convey energy or softer pastels for a more subdued tone, allowing you to express your inner world.

Brush Stroke Techniques

Around the canvas, you can experiment with different brush strokes, from gentle sweeps to intense dabbing, which will add texture and depth to your painting. You’ll discover that your brush becomes an extension of your hand, moving freely to create a piece that’s truly yours.

But as you examine deeper into brush stroke techniques, you’ll notice that the way you apply paint can significantly impact the overall mood of your artwork. You can practice varying the speed, pressure, and direction of your strokes to achieve the desired effect, making your painting a reflection of your unique perspective and style.

Still Life Painting Ideas

Keep your creativity flowing with still life compositions, and learn from tutorials like Canvas Painting Step by Step (Easy Painting Ideas) to improve your skills.

Fruit and Flowers

Inspiring ideas can come from arranging a bowl of fruit or a vase of flowers, allowing you to practice color and texture in your painting.

Household Objects

By collecting vintage items, you can create unique compositions that reflect your personal style and tell a story through your art.

To capture the essence of household objects, you’ll want to pay attention to the play of light on their surfaces, and use your brushstrokes to convey the textures and emotions they evoke, making your still life painting a reflection of your inner world, as you bring these ordinary objects to life on your canvas.

Pop Culture Inspired Paintings

For a unique canvas painting idea, consider drawing inspiration from pop culture, allowing you to pay homage to your favorite movies, books, and music.

Movie and Book Characters

Similarly, you can bring your favorite characters to life on canvas, from superheroes to fictional heroes, making for a compelling piece of art that showcases your personality.

Music Icons

For instance, you can capture the essence of your favorite musicians, recreating their iconic styles and poses on your canvas, making for a memorable artwork.

But as you investigate deeper into painting music icons, you’ll find that it’s not just about capturing their likeness, it’s about conveying the emotion and energy of their music, allowing you to create a truly immersive piece that resonates with you and your audience.

Seasonal and Holiday Themes

Once again, you can draw inspiration from the world around you, using seasonal and holiday themes to guide your canvas painting ideas. You can create pieces that reflect your favorite time of year, from winter snowflakes to summer sunshine.

Winter Wonderland

One of the most magical times of year is winter, and you can capture its essence on canvas with snowy landscapes, frozen lakes, and cozy cabins. You can use soft blues and whites to create a serene atmosphere in your winter wonderland painting.

Summer Vibes

Above all, summer is a time of warmth and vitality, and you can convey this feeling in your artwork with bright colors and bold brushstrokes. You can paint sun-kissed beaches, vibrant flowers, and lush green forests to evoke the carefree spirit of summer.

For instance, you can start by brainstorming your favorite summer memories, and then use those as inspiration for your painting. You can think about the colors, textures, and emotions that come to mind when you think of summer, and use those to guide your creative process. As you work, you can experiment with different techniques and styles to capture the feeling of warmth and freedom that defines the season.

Mixed Media and Textures

After experimenting with traditional canvas painting, you can try combining different mediums to add depth and visual interest to your work. This involves incorporating various materials and techniques to create unique textures and effects.

Incorporating Fabric and Paper

On the surface of your canvas, you can attach fabric, paper, or other materials to create intricate layers and dimensions. You can use glue, stitches, or other adhesives to secure these elements, adding an extra layer of meaning to your art.

Using Unconventional Materials

After gathering your materials, you can start experimenting with unconventional items like found objects, natural materials, or recycled elements. You can incorporate these items into your canvas to create a one-of-a-kind piece that reflects your personal style.

Textures become your playground when using unconventional materials. You can combine rough and smooth elements, playing with contrasts to create a visually striking piece. As you work, you’ll find that your canvas transforms into a dynamic, tactile experience, inviting your viewer to touch and explore your art.

To wrap up

So, you’ve got a solid foundation for your next canvas painting project. You can now choose your idea, from landscapes to abstracts, and start creating. Your brushstrokes will bring your vision to life. Take your time, and don’t be afraid to experiment. You’ll find your unique style, and your art will be a reflection of your personality. Get started, and make your canvas your own.

FAQ

Q: What are the best canvas painting ideas for beginners?

A: For those new to canvas painting, some popular and easy-to-execute ideas include landscapes such as sunsets or simple skylines, abstract art which allows for a lot of creativity and freedom, and still-life compositions like fruits or flowers. These subjects are great for practicing brush strokes, color mixing, and composition without feeling overwhelmed by complex details.

Q: How do I choose the right colors for my canvas painting?

A: Choosing the right colors for your canvas painting can greatly impact the mood and aesthetic of your artwork. Consider the theme or subject of your painting and select colors that complement or contrast with it. For example, cool colors like blues and greens can create a calming effect, while warm colors like oranges and yellows can add energy. You can also use color wheels or online palettes to find harmonious color combinations.

Q: What are some unique canvas painting ideas for home decoration?

A: If you’re looking for unique canvas painting ideas to decorate your home, consider creating personalized maps with significant locations marked, geometric patterns that add a modern touch, or inspirational quotes in decorative fonts. You can also paint nature scenes like forests, mountains, or sea vistas to bring the outdoors in. Moreover, abstract pieces with bold textures and vibrant colors can add a striking focal point to any room.

Q: How can I achieve a textured effect in my canvas painting?

A: To achieve a textured effect in your canvas painting, you can use various techniques and materials. Applying thick layers of paint with a palette knife can create raised, three-dimensional effects. Incorporating mixed media like sand, gel medium, or modeling paste into your paint can add unique textures. Additionally, using different brush strokes, such as impasto or dragging, can also provide a textured look to your canvas.

Q: Can I use canvas painting as a form of therapy or stress relief?

A: Yes, canvas painting can be a highly therapeutic and stress-relieving activity. The process of creating art allows you to express emotions and thoughts in a non-verbal way, providing an outlet for stress and anxiety. The repetitive motions of painting can be meditative, helping to calm the mind and promote relaxation. Moreover, the sense of accomplishment from completing a painting can boost self-esteem and confidence, further contributing to mental well-being.

The Basics of Charcoal Drawing

As you begin to explore the world of charcoal drawing, you’ll discover a medium that offers expressive and versatile creative possibilities. You’ll learn to harness the unique characteristics of charcoal to bring your artwork to life. Your journey will start with understanding the fundamentals of charcoal, including the different types and tools available. You will learn how to handle the materials and techniques to achieve the desired effects, allowing you to unlock your full artistic potential and create stunning charcoal drawings.

Key Takeaways:

  • The fundamentals of charcoal drawing involve understanding the different types of charcoal, including vine charcoal, compressed charcoal, and white charcoal, and how to use them to achieve various effects.
  • Mastering techniques such as hatching, cross-hatching, and stippling is vital for creating texture, value, and depth in a charcoal drawing.
  • Practicing sketching and shading exercises can help artists develop their skills and learn to control the expressive qualities of charcoal, allowing them to create detailed and realistic drawings.

    Gathering Materials

    Before you begin charcoal drawing, it’s important to gather the necessary materials to ensure a smooth and successful creative process. You will need a range of tools and surfaces to achieve the desired effects and techniques.

    Essential Tools

    Across the spectrum of charcoal drawing, you’ll find various tools that will help you achieve your artistic vision. You’ll need charcoal pencils, sticks, and erasers to create a range of tones and textures in your artwork.

    Surface Preparation

    Tools aside, preparing your drawing surface is vital for a good start. You’ll want to choose a paper that suits your desired outcome, considering factors such as texture and tone to ensure your charcoal drawing turns out as envisioned.

    But as you prepare your surface, consider the specific qualities of the paper you’ve chosen, and how they will affect your charcoal marks. You’ll find that different papers respond uniquely to charcoal, offering varying levels of absorption and smudging, which will impact the overall look and feel of your artwork, allowing you to make informed decisions about your creative process.

    Basic Techniques

    While exploring charcoal drawing, you’ll discover various techniques to achieve desired effects. You’ll learn to manipulate charcoal to create unique textures and tones, enhancing your artwork.

    Hatching and Cross-Hatching

    Harmonizing lines and strokes, you’ll create depth and dimension in your drawings using hatching and cross-hatching techniques, allowing you to add volume and texture to your subjects.

    Blending and Shading

    Often, you’ll find that blending and shading are crucial for creating realistic and detailed drawings, as you learn to merge different tones and values to achieve a natural, three-dimensional appearance in your artwork.

    This technique allows you to soften harsh lines, creating subtle transitions between light and dark areas, and you can use your fingers, stumps, or blending tortillons to smooth out charcoal marks, achieving a more refined and polished look in your drawings.

    Value and Contrast

    All artworks rely on value and contrast to create visually appealing compositions. You will use charcoal to create a range of values, from light to dark, to add depth and interest to your drawings. By controlling the contrast between light and dark, you can guide the viewer’s eye through your artwork.

    Creating Depth and Dimension

    Around the subject, you will use varying degrees of value to create the illusion of depth and dimension. You can achieve this by applying different pressures and techniques to your charcoal, allowing you to convey volume and texture in your drawing.

    Balancing Light and Dark

    Across your composition, you will need to balance light and dark values to create a harmonious and engaging piece. You should consider the placement and proportion of light and dark areas, as this will affect the overall mood and impact of your artwork.

    The balance of light and dark is important to creating a compelling charcoal drawing. As you work, you will need to constantly evaluate your composition, making adjustments to ensure that the contrast between light and dark is effective in conveying your intended message. You can use your charcoal to make subtle adjustments, gradually building up or erasing values to achieve the desired balance, and ultimately, a stunning piece of art that draws the viewer in.

    Texture and Pattern

    For beginners, understanding texture and pattern is important in charcoal drawing, as it allows you to add depth and dimension to your artwork, making it more engaging and realistic.

    Renderings of Different Surfaces

    For instance, you can practice rendering different surfaces, such as wood, stone, or fabric, to develop your skills in capturing various textures and patterns, which will help you to create more realistic and detailed drawings.

    Expressive Mark-Making

    Before you start drawing, consider the type of marks you want to make, as expressive mark-making can add emotion and energy to your artwork, allowing you to convey your message more effectively through your charcoal drawings.

    A key aspect of expressive mark-making is experimentation, as you can try different techniques, such as hatching, cross-hatching, and stippling, to achieve unique textures and effects, and discover what works best for your style and the subject you are drawing, enabling you to refine your skills and develop your own unique voice in charcoal drawing.

    Composition and Placement

    Now that you have a good understanding of the basics of charcoal drawing, it’s time to think about composition and placement. You will learn how to arrange elements in your drawing to create a visually appealing piece of art.

    Rule of Thirds and Symmetry

    The way you divide your paper can greatly affect the overall composition of your drawing. You should consider using the rule of thirds and symmetry to create a balanced and harmonious piece.

    Negative Space and Focal Points

    The effective use of negative space and focal points can make or break your drawing. You need to think about what you want your viewer to focus on and use negative space to guide their eye.

    Even when working with a limited range of values, you can create a compelling drawing by using negative space to create contrast and define your focal points. You can use the white of the paper to create highlights and make your drawing pop, and your charcoal to create deep, rich shadows that add depth and dimension to your work.

    Practice and Development

    Not every artist starts out as a skilled charcoal drawer, but with dedication and persistence, you can develop your skills and style. As you continue to practice, you will become more comfortable with the medium and begin to see improvement in your work.

    Exercises for Skill-Building

    Exercising your drawing skills with charcoal can be done through simple gestures, such as quick sketches and still-life drawings, helping you to develop your technique and build confidence in your abilities, allowing you to tackle more complex subjects.

    Overcoming Common Challenges

    Any struggles you encounter while drawing with charcoal can be overcome with patience and practice, as you learn to control the medium and develop your skills, you will become more proficient in creating the effects you desire in your artwork.

    A key aspect of overcoming common challenges is analyzing your mistakes and understanding what went wrong, this will help you to identify areas for improvement and make adjustments to your technique, enabling you to produce high-quality charcoal drawings that reflect your artistic vision, and as you continue to work through challenges, you will develop your unique style and voice as an artist.

    Conclusion

    The basics of charcoal drawing are now at your fingertips, and you can enhance your skills by learning more about How To Draw with Charcoal – Charcoal Drawing Techniques. You will be able to create stunning artwork by mastering these techniques and practicing regularly. As you continue to explore your creativity, your charcoal drawings will become more expressive and detailed, allowing you to bring your unique vision to life.

    FAQ

    Q: What are the basic materials needed to start charcoal drawing?

    A: To start charcoal drawing, you’ll need a few important materials. These include a set of charcoal pencils or sticks, a sharpener, an eraser, and a sketchbook or paper specifically designed for charcoal drawing. It’s also helpful to have a blending stump and a tortillon for smoothing and blending your drawings. Additionally, investing in a fixative spray can help prevent smudging and preserve your work.

    Q: What are the different types of charcoal used in drawing?

    A: There are several types of charcoal used in drawing, each with its own unique characteristics. Vine charcoal is the most commonly used type and is known for its soft, expressive lines. Compressed charcoal is denser and produces darker, more detailed marks. Charcoal pencils offer more control and are often used for detail work and fine lines. Finally, white charcoal is used for highlighting and creating contrasting effects on dark paper.

    Q: How do I achieve different tones and values in charcoal drawing?

    A: Achieving different tones and values in charcoal drawing is done through varying the pressure and technique used when applying the charcoal. Light, gentle strokes can create soft, delicate lines and subtle shifts in tone, while applying more pressure can produce darker, richer values. Blending with a stump or tortillon can also help smooth transitions between different tones, creating a more nuanced and realistic representation of light and shadow.

    Q: Can I use charcoal on any type of paper, or are there specific requirements?

    A: While charcoal can be used on a variety of papers, the best results are typically achieved with papers specifically designed for charcoal or pastel drawing. These papers have a textured surface, often referred to as “tooth,” which helps the charcoal adhere and allows for better blending and layering. Smooth papers can also be used, but they may not hold the charcoal as well, potentially leading to smudging or difficulty in achieving detailed work.

    Q: How do I prevent smudging and protect my charcoal drawings?

    A: Preventing smudging and protecting your charcoal drawings can be achieved through a few simple steps. Working carefully and minimizing the amount of touching or handling of the drawing can reduce smudging. Regularly using a fixative spray can also help set the charcoal in place, preventing it from smearing. For long-term protection, consider framing your drawing behind glass or using a UV-filtering acrylic. Additionally, storing your drawings in a cool, dry place, away from direct sunlight, can help preserve them over time.

DIY Painting Techniques for Beginners

As you launch on your painting journey, you’ll discover the joy of creating something beautiful with your own hands. You’ll find that with a few simple techniques, your brushstrokes will come alive, and your canvas will transform into a stunning work of art. Your creativity will flourish as you experiment with different styles and methods, and you’ll be amazed at how easy it is to get started. You’ll learn to unlock your full potential and bring your unique vision to life, one brushstroke at a time, in a fun and relaxing way.

Key Takeaways:

To get started with DIY painting, consider the following points:

  • Start by preparing the surface with primer and sanding to ensure a smooth finish and even paint application.
  • Choose the right brushes and rollers for your project, as they can greatly affect the final result and make the painting process easier.
  • Experiment with different techniques, such as layering and blending, to achieve unique effects and add depth to your painting.

Preparation

While getting started with DIY painting, you’ll want to set yourself up for success. Start by gathering your materials and clearing a workspace, allowing you to focus on the creative process.

Choosing the Right Tools

One of the most important steps is selecting the tools that feel right for you, such as comfortable brushes and a suitable canvas, to help you achieve your desired outcome.

Selecting Colors and Brushes

Tools like brushes and paints will be your foundation, so take your time to explore different types and brands, considering your personal preferences and the effect you want to achieve in your artwork.

Understanding your color palette and brush selection is key to bringing your vision to life. You’ll want to consider the mood and atmosphere you’re trying to create, and choose colors and brushes that will help you get there, allowing your unique style to shine through in your painting.

Basic Techniques

Some basic painting techniques are imperative to get you started on your artistic journey. You’ll be amazed at how quickly you can pick up these skills and start creating beautiful works of art. With a little practice, you’ll be well on your way to becoming a confident painter.

Applying a Base Coat

Before you begin painting, make sure to apply a base coat to your surface. You’ll want to choose a color that complements the hues you plan to use in your design, and apply it evenly to create a smooth foundation for your art.

Creating Texture and Patterns

Any artistic element can be enhanced with texture and patterns. You can use various tools and materials to add depth and visual interest to your painting, such as sponges, brushes, or even household items.

Considering the many ways you can create texture and patterns, you can experiment with different techniques to find what works best for your style. You can use layering, scraping, or stamping to achieve unique effects, and don’t be afraid to try new things – it’s all part of the creative process, and you might be surprised at the amazing results you can achieve.

Advanced Techniques

Your painting skills are now ready to take on more complex methods. Consider the following:

  1. Color mixing
  2. Layering
Technique Description
Wash Transparent layer of paint

Blending and Shading

To achieve a smooth transition between colors, you will need to practice blending and shading. Start by layering thin coats of paint, gradually building up to your desired shade.

Adding Details and Finishing Touches

After you have completed your painting, you can add details such as textures or patterns to give it a personal touch. This is where you can get creative and make your painting truly unique.

Further, when adding details and finishing touches, you will find that it’s all about experimentation and having fun. You can try out different tools, like sponges or brushes, to create interesting effects and add depth to your painting. As you work, you’ll discover what works best for you and your style, and that’s the beauty of the process.

Common Mistakes

Unlike experienced painters, you may encounter some mistakes as a beginner. You can learn from others by checking out 14 Acrylic Painting Techniques That Beginners Should Know to improve your skills.

Avoiding Bleeding and Streaks

Across the canvas, you’ll want to maintain even strokes to prevent bleeding and streaks, ensuring your painting looks smooth and professional.

Fixing Errors and Imperfections

About the time you notice mistakes, don’t worry, you can fix them. You’ll learn to touch up errors and imperfections with ease.

Common mistakes can be frustrating, but you can easily fix them. As you practice, you’ll develop techniques to correct errors, such as using layers to cover up bleedings or streaks, and your paintings will become more polished and beautiful, just like you envisioned them to be, and with patience and practice, you’ll master the art of fixing errors and imperfections in your paintings.

Safety Precautions

All painting projects require some basic safety precautions to ensure your well-being. You’ll want to take a few simple steps to protect yourself from potential hazards.

Working with Chemicals and Fumes

Among the most important considerations is ventilation, as you’ll be working with chemicals and fumes that can be harmful if inhaled. You should always paint in a well-ventilated area.

Protecting Skin and Eyes

The key to protecting your skin and eyes is to cover up and wear protective gear, such as gloves and goggles, to prevent exposure to paint and chemicals. You’ll feel more confident and secure as you work.

Further protection for your skin and eyes can be achieved by wearing long sleeves and pants, and keeping your hair tied back. You can also apply a barrier cream to your skin to prevent paint from adhering to it, and keep a first aid kit nearby, just in case.

Project Ideas

After mastering the basics of DIY painting, you’ll be eager to start working on your own projects. You can explore various ideas, from refreshing old furniture to creating unique artwork, to add a personal touch to your space.

Painting Furniture and Decor

Before you begin, consider the pieces you want to revamp, and think about the style and color scheme you want to achieve. You can upcycle old furniture, add a fresh coat of paint to your walls, or decorate small accessories to give your space a cohesive look.

Creating Art and Masterpieces

Along with practicing your painting skills, you can start creating your own art pieces, from landscapes to abstract designs. You can experiment with different techniques, colors, and materials to produce unique masterpieces that reflect your personality.

Consequently, as you continue to explore your creativity, you’ll find that your art evolves, and you’ll develop your own style. You’ll be able to express yourself through your paintings, and your masterpieces will become a reflection of your journey as an artist, allowing you to showcase your growth and talent in a beautiful and meaningful way.

Final Words

On the whole, you’ve now got a solid foundation in DIY painting techniques to get your creative journey started. As you continue to practice, your skills will grow, and so will your confidence. You’ll find that with each new project, your unique style will begin to shine through, and that’s something to be proud of. Keep experimenting, and most importantly, have fun with the process, and you’ll be creating beautiful works of art in no time.

FAQ

Q: What are the basic materials needed to get started with DIY painting for beginners?

A: To start with DIY painting, you will need a few basic materials, including a paintbrush, roller, paint tray, paint, drop cloths, and a palette or plate for mixing colors. It’s also a good idea to have a variety of paintbrushes in different sizes and shapes, as well as a paint scraper or putty knife for smoothing out surfaces. Additionally, make sure you have a well-ventilated workspace and a source of water for cleaning your tools.

Q: How do I prepare a surface for painting, and what are the steps involved in the process?

A: Preparing a surface for painting involves several steps, including cleaning the surface to remove dirt, grime, and grease, fixing any holes or cracks with spackling compound, and sanding the surface to smooth out any rough edges. After sanding, you should wipe away any dust or debris with a damp cloth, and then apply a primer if necessary. Finally, allow the primer to dry completely before applying your first coat of paint. This will ensure a smooth, even finish and help your paint job last longer.

Q: What are some common DIY painting techniques for beginners, and how can I achieve them?

A: Some common DIY painting techniques for beginners include stippling, which involves applying small dots of color to create a textured effect, and dragging, which involves using a almost-dry brush to create a soft, blended look. You can also try sponging, which involves applying paint to a sponge and then dabbing it onto the surface to create a mottled effect. To achieve these techniques, experiment with different brushstrokes and tools, and don’t be afraid to practice on a small, inconspicuous area first.

Q: How can I choose the right color palette for my DIY painting project, and what are some popular color combinations?

A: Choosing the right color palette for your DIY painting project involves considering the mood and atmosphere you want to create, as well as the natural lighting and existing decor of the space. You can find inspiration in nature, art, or design blogs, or use online color picker tools to help you select a palette. Some popular color combinations include monochromatic, which involves using different shades of the same color, and complementary, which involves pairing colors that are opposite each other on the color wheel. You can also try analogous, which involves using colors that are next to each other on the color wheel, for a harmonious and soothing effect.

Q: What are some common mistakes to avoid when it comes to DIY painting, and how can I fix them if they happen?

A: Some common mistakes to avoid when it comes to DIY painting include applying too much paint at once, which can result in drips and uneven coverage, and not allowing the paint to dry completely between coats, which can cause the paint to peel or blister. To fix these mistakes, try using a paint scraper or putty knife to remove excess paint, and then sand the surface to smooth out any rough edges. You can also try applying a touch-up coat of paint to cover any imperfections, or using a paint pen to fix small mistakes. To avoid mistakes in the first place, make sure to follow the instructions on the paint can, and take your time when painting to ensure a smooth, even finish.

How to Frame Your Artwork

Preparation

The process of framing your artwork begins with a thorough preparation stage, where you lay the groundwork for a successful project. You will need to consider several factors, including the type of frame, matting, and glazing, to ensure that your artwork is properly showcased.

Gathering Materials

Along the lines of getting started, you will need to collect all the necessary materials, including the frame, mat board, glass or acrylic, and any other relevant tools, to ensure that you have everything you need to complete the framing process efficiently.

Choosing the Right Frame

Above all, selecting the right frame for your artwork is imperative, as it will greatly impact the overall appearance of the piece. You should consider factors such as the style, color, and size of the frame, as well as the type of artwork you are framing, to ensure that you make an informed decision.

But as you explore deeper into the process of choosing the right frame, you will need to consider your personal style and the overall aesthetic you want to achieve. You should think about the color palette and theme of your artwork, as well as the decor of the room where the piece will be displayed, to ensure that the frame complements and enhances your artwork, rather than overpowering it, and that you are completely satisfied with the final result, which is your beautifully framed artwork.

Key Takeaways:

  • When framing your artwork, consider the style and period of the piece to choose a frame that complements its aesthetic, ensuring a cohesive and visually appealing presentation.
  • The material and color of the frame should be selected to enhance the artwork’s colors and textures, creating a harmonious balance between the frame and the art.
  • The size and proportions of the frame should be carefully chosen to fit the artwork, taking into account the scale and orientation of the piece to create a balanced and polished final product.

Measuring and Planning

Some artwork requires more planning than others, but measuring is an necessary step in framing your artwork. You need to determine the size and shape of your artwork to choose the right frame.

Taking Accurate Measurements

Against the backdrop of your artwork’s unique dimensions, you will need to take precise measurements to ensure a perfect fit. You should measure the width, height, and any irregular shapes or borders.

Considering Frame Styles

Measuring the style of your artwork will help you choose a frame that complements it. You should consider the color, material, and design of the frame to ensure it enhances your artwork.

Consequently, as you explore different frame styles, you will find that certain designs suit your artwork better than others. You can choose from modern, traditional, or minimalist frames, depending on your personal taste and the style of your artwork, to create a harmonious and visually appealing combination that showcases your piece to its fullest potential.

Frame Options

Now that you have decided to frame your artwork, you can choose from a variety of frame options to enhance its beauty and protect it from damage. You can select frames that match your artwork’s style, color, and theme to create a stunning visual effect.

Wooden Frames

Beside the traditional look, wooden frames offer a warm and cozy feel to your artwork. You can choose from various types of wood, such as oak, maple, or cherry, to complement your artwork’s color and style.

Metal Frames

Along with their modern and sleek look, metal frames provide a durable and low-maintenance option for your artwork. You can select from different metal types, such as aluminum or steel, to create a contemporary and sophisticated look.

Even if you prefer a more traditional style, metal frames can be a great option, as they can be designed to resemble wooden frames or other materials. You can also choose from various finishes, such as silver, gold, or bronze, to add a touch of elegance to your artwork.

Matting and Mounting

Once again, the quality of your artwork’s presentation relies on your attention to detail, and matting and mounting are imperative steps in the framing process, as they enhance the overall appearance and protect your artwork from damage.

Selecting the Right Mat

Across various styles and materials, you can choose a mat that complements your artwork, considering factors such as color, texture, and width to create a visually appealing combination that accents your art.

Attaching the Artwork

Attaching your artwork to the mat or mounting board requires careful consideration to avoid damaging the piece, and you should use acid-free materials and techniques to ensure your artwork’s longevity and preservation.

Also, when attaching your artwork, you will want to consider using a variety of methods such as hinging, dry mounting, or spray adhesive, depending on the type of artwork and the desired level of permanence, allowing you to achieve a secure and professional-looking attachment that will protect your artwork for years to come.

Glazing and Finishing

For the final touches on your framed artwork, you will need to consider glazing and finishing options. This stage can enhance the appearance and protection of your piece. You will decide on the type of glaze and finish that suits your artwork best.

Choosing Glass or Acrylic

Besides the frame itself, the glazing material you choose will significantly impact the overall look of your artwork. You can opt for either glass or acrylic, each offering unique benefits such as UV protection, clarity, and durability.

Adding a Finish

Across the various finishing techniques available, you can select one that complements your artwork’s style and theme. You might consider a matte, glossy, or textured finish, each altering the visual effect of your piece.

In addition to the aesthetic appeal, the finish you choose will also affect the longevity of your artwork. You should consider factors like moisture protection, UV resistance, and ease of cleaning when making your decision, ensuring your artwork remains vibrant and well-preserved over time.

Hanging and Display

Not only does the frame enhance the beauty of your artwork, but the way you hang it can also make or break the overall aesthetic. You want to ensure that your framed piece is displayed in a way that showcases its unique qualities.

Selecting the Perfect Location

Along with considering the lighting and wall space, you should think about the surrounding decor and how your artwork will interact with it. You will want to choose a location that complements your piece and allows it to be the focal point.

Hanging Techniques

By using the right hanging hardware and techniques, you can ensure that your artwork is secure and level. You will want to invest in a sturdy hanging system that can support the weight of your framed piece.

Further to this, you should consider the type of wall you are hanging on, as well as the weight and size of your artwork, to determine the best hanging method for your specific situation. You may need to use anchor points or special fasteners to ensure that your piece is securely attached to the wall.

You’ve created a stunning piece of art, and now you want to showcase it in the best possible way. As you consider framing your artwork, you’ll want to think about the style, material, and overall aesthetic you’re aiming for. Your goal is to enhance the piece without overpowering it, and with the right techniques, you can achieve a professional-looking result that showcases your art to its fullest potential, protecting it for years to come while making it a beautiful addition to any room.

To wrap up

To wrap up, you have now gained valuable insights into framing your artwork. You can confidently select the perfect frame to enhance your piece. For more expert advice, visit The working artist: how to frame your artwork to take your skills to the next level and make your artwork stand out. You will be able to make informed decisions about your artwork’s presentation, ensuring your pieces look their best.

FAQ

Q: What is the first step in framing my artwork?

A: The first step in framing your artwork is to choose a frame style that complements the piece. Consider the color, size, and style of the artwork, as well as the decor of the room where it will be displayed. You can choose from a variety of frame styles, including modern, traditional, and ornate, to find the one that best enhances your artwork.

Q: What types of materials can I use to frame my artwork?

A: There are several types of materials you can use to frame your artwork, including wood, metal, and plastic. Wood frames are a popular choice because they are durable and can be stained or painted to match any decor. Metal frames are also popular, especially for modern and contemporary artwork, and come in a variety of finishes such as silver, gold, and bronze. Plastic frames are a budget-friendly option and come in a range of colors and styles.

Q: How do I measure my artwork for framing?

A: To measure your artwork for framing, start by measuring the width and height of the piece. Make sure to measure from the edges of the artwork, not including any margins or borders. You should also consider the thickness of the frame and any mats or glazing you plan to use, as these can add to the overall size of the framed piece. It’s also a good idea to use a level to ensure your measurements are accurate and the frame will hang straight.

Q: What is the purpose of matting in framing, and do I need it?

A: Matting is a thin, acid-free material that is placed between the artwork and the frame to add depth and protection. It helps to separate the artwork from the frame, preventing it from coming into contact with the glass or acrylic glazing, and can also help to enhance the appearance of the piece by adding a border of color. While matting is not necessary, it can be beneficial in preserving the artwork and adding a professional touch to the framing.

Q: How do I hang my framed artwork once it’s complete?

A: To hang your framed artwork, start by choosing a wall with good lighting and a sturdy structure. Use a level to ensure the frame is straight, and a pencil to mark the spot where you want to hang it. Use a sturdy nail or screw to hang the frame, and consider using a hanging kit or D-rings to distribute the weight of the frame evenly. Make sure to hang the frame at a comfortable viewing height, and adjust as needed to achieve the desired display.

Skip to content