Painting and Drawing

Painting and Drawing

Top Fabric Painting Techniques

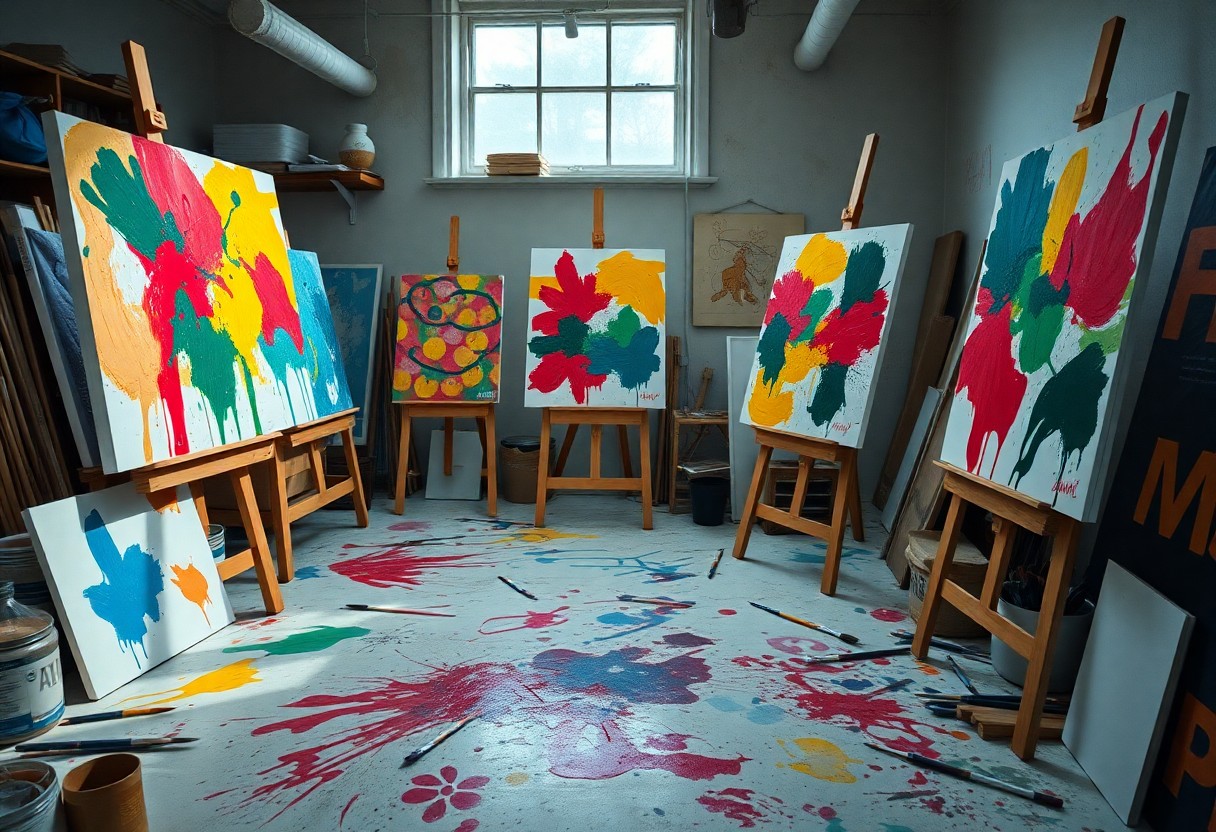
As you explore the world of fabric painting, you’ll discover various methods to enhance your creations. You can achieve unique, professional-looking results by mastering different techniques. Your fabric painting skills will improve with practice and experimentation. You’ll learn to select the right tools, prepare your fabric, and apply paint with precision. With these techniques, you’ll unlock new creative possibilities and take your fabric painting to the next level, producing stunning pieces that reflect your personal style and artistic vision.

Key Takeaways:

To achieve professional-looking results in fabric painting, consider the following techniques:

  • Using resist methods, such as wax or starch, to create unique and intricate designs on fabrics like silk or cotton.
  • Applying layering techniques to build up colors and textures, allowing for greater control over the final appearance of the painted fabric.
  • Experimenting with blending methods, such as wet-on-wet or glazing, to achieve subtle, nuanced color transitions and shading effects in fabric paintings.

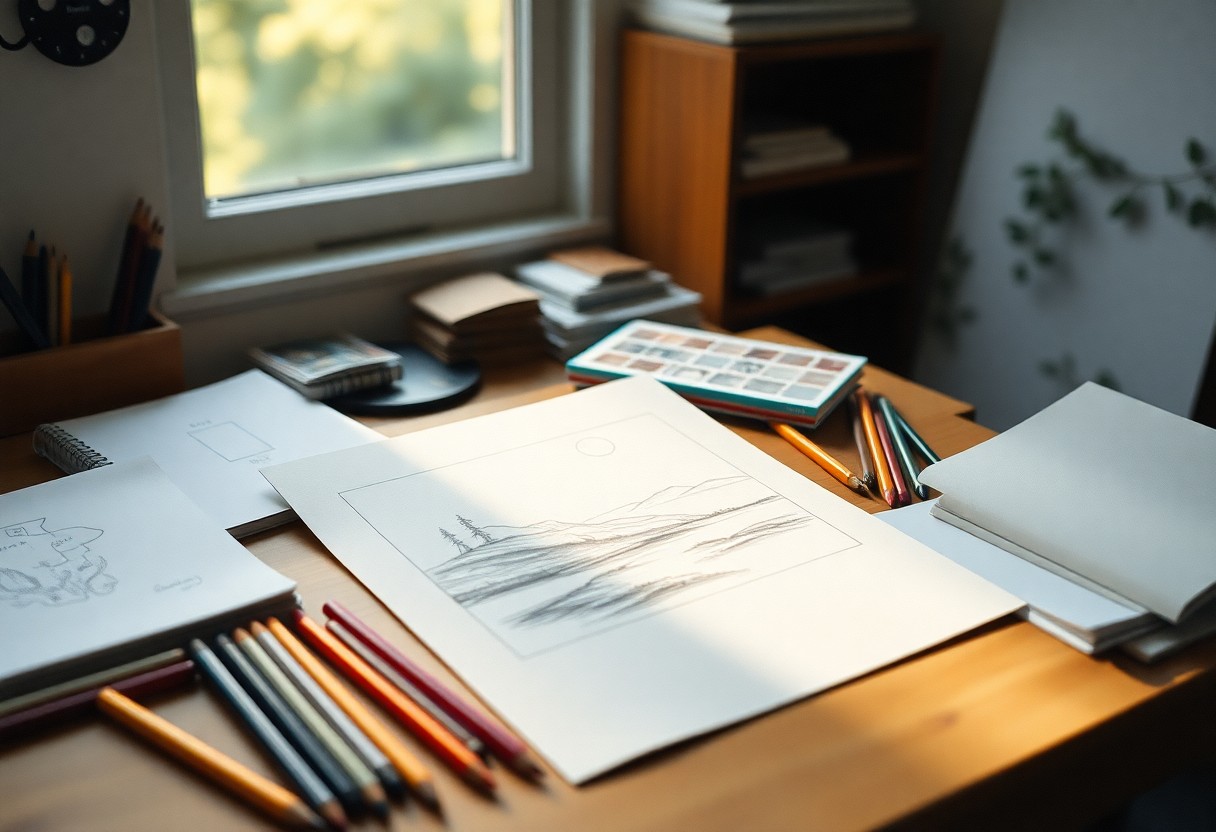
Preparing the Fabric

Your fabric painting journey begins with preparing the fabric, and this step is crucial to achieve the desired results. You need to choose the right fabric, prepare it for painting, and treat it to ensure the paint adheres well and lasts long.

Choosing the Right Fabric

Across various types of fabrics, you’ll find that natural fibers like cotton, linen, and silk work best for fabric painting. You can select a fabric that suits your project, considering factors like texture, weight, and color.

Pre-Treatment Methods

On the surface of your fabric, pre-treatment methods can make a significant difference. You can use methods like washing, drying, and ironing to prepare your fabric for painting, which helps to remove finishes and relax fibers.

Considering the type of fabric you’ve chosen, you may need to use specific pre-treatment methods. For example, you can use a fixative to prevent colors from bleeding or a fabric primer to create a smooth surface for painting. By doing so, you’ll ensure that your paint adheres well and your design turns out vibrant and long-lasting.

Basic Painting Techniques

Even if you’re a beginner, you can achieve professional-looking results with fabric painting by mastering the basics. You’ll need to understand color theory, brush strokes, and fabric preparation to get started.

Hand-Painting

Although hand-painting requires skill and patience, you can create unique designs with practice. You’ll be able to express your creativity and add personal touches to your projects.

Stenciling

By using stencils, you can add intricate designs and patterns to your fabric with ease. You’ll find that stenciling is a great way to achieve crisp, sharp lines and detailed designs.

Considering the variety of stencils available, you can choose from simple to complex designs, depending on your project’s requirements. You can use stencils to create repeat patterns, borders, or even entire scenes, making it a versatile technique to add to your fabric painting repertoire. You’ll be able to experiment with different stencil materials, such as plastic or metal, to achieve the desired effect on your fabric.

Advanced Techniques

Not for beginners, these methods take your fabric painting to the next level:

  1. Shibori
  2. Batik
Technique Description
Shibori Resist dyeing
Batik Wax resist

Ombre Effect

Across the fabric, you can achieve a gradual color transition by layering paints, creating a stunning ombre effect that adds depth to your work.

Resist Method

Behind the resist method lies a simple technique: applying a resist agent to your fabric before painting, allowing you to create unique, intricate designs.

Advanced techniques like the resist method require practice, but with patience, you can master the process, experimenting with different resist agents and paint combinations to achieve your desired effects, taking your fabric painting to new heights, and enabling you to create complex, multicolored designs that showcase your skill and artistry.

Design and Pattern Creation

For creating unique designs, you can visit 10 Practical Tips for Fabric Painting to explore various techniques. This will help you to enhance your fabric painting skills and create stunning designs.

Free-Hand Design

Around the time you start painting, you’ll find that free-hand design allows you to express your creativity freely, enabling you to bring your imagination to life on the fabric.

Geometric Patterns

Among the various patterns you can create, geometric patterns are a popular choice, offering a wide range of possibilities for your fabric painting projects.

At the heart of geometric pattern creation lies the use of shapes, such as triangles, squares, and circles, which you can arrange to form complex and beautiful designs, allowing you to add your personal touch to your fabric painting projects, and with practice, you’ll be able to create intricate patterns that elevate your work to the next level.

Color Selection and Mixing

To achieve vibrant and unique designs, you need to understand the fundamentals of color selection and mixing. You will learn how to choose the perfect colors for your fabric painting project and create custom hues that enhance your artwork.

Color Theory Basics

Against a backdrop of color theory, you will discover how to select colors that complement each other, creating a visually appealing palette for your fabric painting. You will understand the color wheel and how to use it to choose harmonious colors.

Mixing Custom Colors

Behind the art of mixing custom colors lies a simple technique that you can master with practice. You will learn how to combine different colors to create unique shades and tints that add depth to your fabric painting.

But as you investigate deeper into mixing custom colors, you will find that the possibilities are endless, and you can experiment with various techniques to achieve the desired effects. You can mix colors to create subtle pastels, rich jewel tones, or bold neons, depending on your artistic vision and the mood you want to convey in your fabric painting.

Special Effects and Finishing Touches

All the techniques you’ve learned so far can be enhanced with special effects and finishing touches, taking your fabric painting to the next level. You can experiment with different methods to achieve unique results, making your artwork truly personalized.

Adding Textures

Above all, adding textures can give your fabric painting depth and dimension, allowing you to create intricate and interesting designs. You can use various materials like fabric paint, glue, or even found objects to achieve the desired texture.

Sealing the Paint

Alongside protecting your artwork, sealing the paint ensures your fabric painting lasts longer and withstands wear and tear. You can use a fabric sealant or varnish to protect your design and make it more durable.

Among the various options available for sealing your paint, you can choose a spray or brush-on sealant, depending on your preference and the type of fabric you’re working with. You can also consider using a fixative to prevent the paint from smudging or fading, giving your artwork a professional finish and making it easier to care for.

Final Words

As a reminder, you now have the knowledge of top fabric painting techniques at your fingertips. You can apply these methods to create unique and personalized items, elevating your artistic skills. With practice, you will master your skills, and your fabric paintings will become truly exceptional, reflecting your style and creativity. You will be able to experiment with different techniques, making your projects stand out, and showcasing your artistic talent.

FAQ

Q: What are the basic supplies needed for fabric painting?

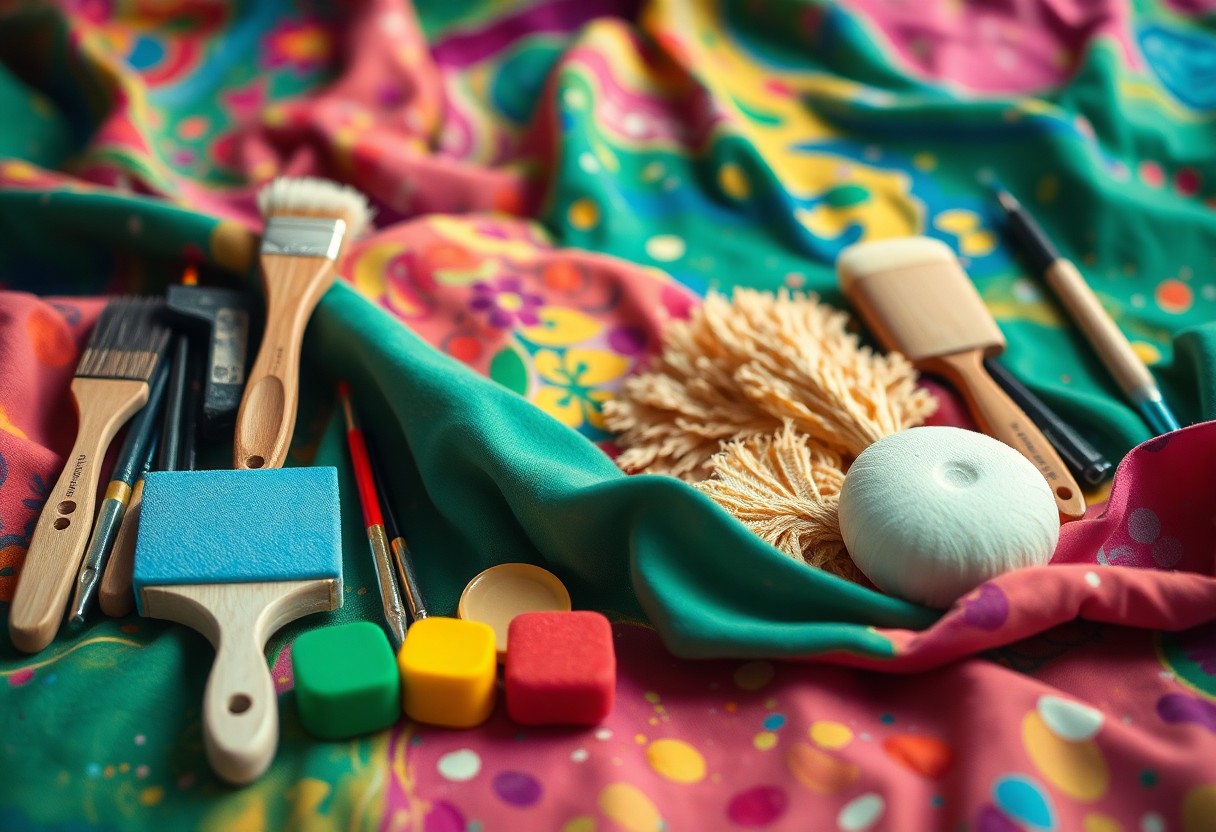
A: To get started with fabric painting, you will need a few basic supplies, including high-quality fabric paint, a paintbrush or sponge, a palette or plate for mixing colors, a cup of water, and a piece of fabric to paint on. It’s also a good idea to have a smock or apron to protect your clothing, as well as a well-ventilated workspace. Additionally, you may want to consider using a stabilizing material, such as interfacing or freezer paper, to help keep your fabric smooth and prevent it from stretching or distorting while you work.

Q: What are some popular fabric painting techniques for creating unique designs?

A: There are several popular fabric painting techniques that can be used to create unique and interesting designs, including tie-dye, shibori, and resist dyeing. Tie-dye involves folding or pleating the fabric to create resistance areas, and then applying dye to the folded fabric. Shibori is a Japanese technique that involves folding or twisting the fabric to create intricate patterns and designs. Resist dyeing involves applying a resist, such as wax or starch, to the fabric before applying dye, to create intricate and detailed designs.

Q: How do I prepare my fabric for painting?

A: Before painting on fabric, it’s a good idea to pre-wash and dry the fabric to remove any finishes or impurities that may affect the paint’s adhesion. You should also iron the fabric to remove any wrinkles, and consider applying a stabilizing material, such as interfacing or freezer paper, to the back of the fabric to help keep it smooth and prevent it from stretching or distorting while you work. Additionally, you may want to consider using a primer or gesso to create a smooth, even surface for painting.

Q: What are some tips for achieving vibrant and long-lasting colors when painting on fabric?

A: To achieve vibrant and long-lasting colors when painting on fabric, it’s a good idea to use high-quality fabric paint that is specifically designed for the type of fabric you are working with. You should also follow the instructions on the paint label carefully, and make sure to apply thin, even coats of paint, allowing each coat to dry completely before applying the next. Additionally, you may want to consider using a fixative or sealant to help set the colors and prevent them from fading or running over time.

Q: How do I care for and maintain my fabric painting after it’s complete?

A: To care for and maintain your fabric painting, you should avoid washing it in hot water or using harsh detergents, as these can cause the colors to fade or run. Instead, wash the fabric in cold water using a mild detergent, and allow it to air dry. You should also avoid exposing the fabric to direct sunlight or high temperatures, as these can cause the colors to fade or degrade over time. Additionally, you may want to consider applying a fabric finisher or textile sealant to help protect the fabric and extend its lifespan.

The Basics of Watercolor Painting

You’re about to explore the world of watercolor painting. Your journey starts with the fundamentals. You’ll learn to mix colors, handle brushes, and apply techniques. Your goal is to create something beautiful with water and pigment. You’ll begin with simple exercises, gradually building your skills. As you progress, your unique style will emerge, and you’ll bring your artistic vision to life.

Key Takeaways:

  • Understanding the fundamentals of watercolor painting is important to creating beautiful and harmonious artworks, including the basics of color theory and brushstrokes.
  • Mastering the techniques of watercolor painting, such as wash, drybrush, and glazing, allows artists to achieve a range of effects and textures in their work.
  • Choosing the right materials, including paper, pigments, and brushes, is vital to producing high-quality watercolor paintings that will last over time and showcase the artist’s skills.

Materials

Before you start watercolor painting, you need to gather the right materials. This includes brushes, paints, and paper. You will also need a palette and a water container.

Brushes

The basics of brush selection are simple: choose brushes that feel right in your hand. You want brushes that move smoothly and evenly, applying the right amount of paint to your paper.

Paints

Beside your brushes, paints are the next vital tool. You can buy them in tubes or pans, and they come in a wide range of colors. You will need to choose a palette that suits your style.

Due to the wide range of watercolor paints available, you can experiment with different types to find what works best for you. You can try transparent, opaque, or mixed-media paints, depending on the effect you want to achieve in your painting. You will find that each type of paint has its own unique characteristics and uses.

Color Theory

If you want to master watercolor painting, understanding color theory is necessary. You need to know how colors interact with each other to create harmonious and balanced artworks.

Primary Colors

Around the core of color theory are primary colors: red, yellow, and blue. You’ll use these colors to create your palette and mix secondary colors.

Mixing Colors

Between the primary colors, you’ll find a world of possibilities. You can mix them to create secondary colors, such as green, orange, and purple, and develop your unique color palette.

At the heart of mixing colors is experimentation. You’ll discover that mixing colors is an art in itself, and the more you practice, the more you’ll understand how to create the colors you want. You can start by mixing equal parts of two primary colors and then adjusting the ratios to achieve the desired hue and shade.

Techniques

Your approach to watercolor painting will depend on the techniques you use. You’ll need to experiment with different methods to achieve the desired effects.

Wet-on-Wet

After applying wet paint to wet paper, you’ll create soft, blended edges. This technique allows you to merge colors and achieve subtle transitions.

Drybrushing

The drybrush technique involves dragging a almost-dry brush across dry paper, creating rough, textured effects. You’ll use this to suggest vegetation, tree bark, or rock surfaces.

Understanding drybrushing is key to adding depth and interest to your paintings. You’ll find that it’s particularly useful for creating detailed, high-contrast scenes, and with practice, you’ll master the subtle dance of brush and paper.

Composition

Unlike other art forms, watercolor painting relies heavily on composition to convey emotion and tell a story. You’ll need to consider the placement of elements, negative space, and visual flow to creating a cohesive piece.

Balance

By paying attention to balance, you can create a sense of stability in your painting. You’ll want to distribute visual weight evenly, using color, shape, and size to guide the viewer’s eye.

Harmony

Behind every great watercolor painting is a sense of harmony, achieved by selecting colors and elements that work together. You’ll want to choose colors that complement each other, creating a visually appealing and cohesive whole.

The key to achieving harmony in your watercolor painting is to experiment with different color combinations and techniques. You can try using analogous colors, complementary colors, or even a limited palette to create a sense of unity and coherence in your work. As you practice, you’ll develop an eye for what works and what doesn’t, and your paintings will become more balanced and harmonious.

Practice

To improve your watercolor skills, you need to practice regularly. Start with simple exercises and gradually move on to more complex ones.

Exercises

About the basics, you will learn various techniques, such as wet-on-wet and wet-on-dry. You will practice mixing colors and creating different hues.

Tips

Tips for better practice include:

  • using high-quality materials
  • watching online tutorials
  • Any practice is better than none, so keep at it.

    Tips like these will help you improve your skills. You can try:

    • practicing regularly
    • experimenting with different techniques
    • Any mistakes you make will be an opportunity to learn and grow.

      Also, as you practice, you will develop your own style and voice. You can try:

      • exploring different subjects
      • using your imagination
      • Any artist will tell you that practice is key to improving your watercolor painting skills.

        Common Mistakes

        For a beginner, watercolor painting can be a challenging medium to master. You’ll encounter mistakes, but learning from them is key to improving your skills.

        Overmixing

        With practice, you’ll find that overmixing your paints can lead to muddy, unappealing colors. You should aim to mix your colors just enough to achieve the desired hue.

        Incorrect Brushstrokes

        With a little patience, you’ll develop the right brushstrokes, but until then, you may struggle with inconsistent results. You need to apply gentle, smooth strokes to achieve the desired effect.

        Even when you’ve mastered the basic brushstrokes, you may still find that your paintings lack a certain finesse. You can improve this by paying attention to the pressure and speed of your brushstrokes, as these can greatly impact the final result of your painting.

        To wrap up

        Drawing together the basics of watercolor painting, you now have a solid foundation to build on. You’ve learned the fundamentals of materials, techniques, and color theory. Your understanding of this medium will continue to grow as you practice and experiment with your skills. With patience and dedication, you’ll master the art of watercolor painting and create beautiful pieces that reflect your unique style and vision.

        FAQ

        Q: What are the basic materials needed to start watercolor painting?

        A: To start watercolor painting, you will need a few basic materials, including watercolor paints, watercolor paper, a brush, a water container, and a palette. The quality of these materials can vary depending on your budget and personal preference. For instance, watercolor paints come in two forms: pan paints and tube paints. Watercolor paper is available in different weights and textures, and brushes come in various shapes and sizes. Understanding the characteristics of each material will help you make informed decisions when selecting your supplies.

        Q: How do I prepare my watercolor paper for painting?

        A: Preparing your watercolor paper is an important step before you begin painting. This typically involves stretching and securing the paper to a board using tape to prevent it from buckling when wet. You can also use watercolor paper that is already glued to a board or choose a heavy weight paper that does not require stretching. If you’re using a block of watercolor paper, it’s already glued on all sides, making it ready to use straight away. Proper preparation ensures your paper remains flat and stable throughout the painting process.

        Q: What is the difference between wet-on-wet and wet-on-dry watercolor techniques?

        A: In watercolor painting, two fundamental techniques are wet-on-wet and wet-on-dry. Wet-on-wet involves adding wet paint to wet paper, allowing for smooth blending and soft edges. This technique is great for creating subtle gradations of color and can be used for backgrounds or suggestive forms. On the other hand, wet-on-dry involves applying wet paint to dry paper, which produces sharper, more defined edges. This technique is ideal for details and creating contrast within a painting. Understanding and mastering these techniques can greatly expand your creative possibilities in watercolor.

        Q: How do I achieve vibrant colors in my watercolor paintings?

        A: Achieving vibrant colors in watercolor painting involves several factors, including the quality of your paints, the use of glazing techniques, and the amount of water used. High-quality watercolor paints will generally produce more vivid results. Glazing, which involves layering transparent washes, can deepen and enrich colors. It’s also important to use the right amount of water; too much can dilute the color, while too little can make it too opaque. Experimenting with different pigments and techniques will help you find the right balance to achieve the vibrant colors you desire.

        Q: Can I correct mistakes in a watercolor painting?

        A: While watercolor is a medium that can be unforgiving, there are several strategies for correcting mistakes. One approach is to lift off the color using a damp brush, which can remove some of the pigment from the paper. Another technique is to use masking fluid to protect areas you want to keep untouched before applying more paint. In some cases, you might need to start over, but this can also be an opportunity to explore new ideas or approaches. Practice and experience will help you navigate the challenges of correcting mistakes in watercolor painting, allowing you to make adjustments with confidence.

Top Acrylic Painting Projects

As you initiate on your artistic journey, you’re likely eager to explore the vibrant world of acrylic painting. Your creativity is waiting to be unleashed, and with the right projects, you’ll be inspired to bring your unique vision to life. You’ll discover a wide range of exciting projects that will nurture your skills and spark imagination, from abstract masterpieces to realistic landscapes, helping you to tap into your full artistic potential and have fun while doing it.

Key Takeaways:

  • One of the primary benefits of Acrylic Painting projects is the ability to create vibrant and colorful pieces that can add a personal touch to any room.
  • Technique and skill level play a significant role in determining the outcome of Acrylic Painting projects, and practice is necessary to achieve desired results.
  • Exploring different themes and subjects in Acrylic Painting projects can help artists develop their unique style and express their creativity in a variety of innovative ways.

    Getting Started

    While exploring the world of acrylic painting, you’ll discover a realm of creative possibilities. As you begin, you’ll find that your journey is filled with excitement and anticipation. Your artistic expression will unfold, and your unique voice will emerge through the vibrant colors and textures of acrylics.

    Essential Materials

    Around every corner, you’ll find the tools you need to bring your vision to life. Your basic supplies will include paints, brushes, canvases, and a palette, which will become your constant companions on this artistic adventure.

    Setting Up Your Space

    To create an ideal setting, you’ll want to consider the lighting, comfort, and flow of your space. You might envision a corner of your home transformed into a vibrant studio, filled with natural light, good ventilation, and all your supplies within easy reach. As you set up your space, you’ll begin to feel a sense of anticipation and excitement, knowing that this is where your artistic journey will unfold.

    Exploring Techniques

    If you’re looking to expand your artistic horizons, you can find plenty of inspiration on YouTube, such as Acrylic Painting Ideas and Tutorials that will help you get started.

    Brushstrokes and Texture

    Along with practicing various brushstrokes, you’ll discover the beauty of texture in your acrylic paintings, adding depth and emotion to your work.

    Color Theory and Mixing

    After understanding the basics of color, you’ll be able to mix and match hues to create stunning effects, taking your paintings to the next level.

    Color is a powerful tool in your artistic journey, and as you experiment with different combinations, you’ll find your unique voice and style emerging, allowing you to express yourself in ways you never thought possible, and guiding you to create truly beautiful and meaningful acrylic paintings that reflect your inner world.

    Project Ideas

    Not limited to traditional techniques, acrylic painting offers a wide range of creative possibilities. You can explore various styles and themes, from realistic to abstract, and express your unique vision. Your imagination is the only boundary, and with acrylics, you can bring your ideas to life.

    Landscapes and Seascapes

    Beneath the surface of acrylic painting lies a world of possibilities, and when it comes to landscapes and seascapes, you can create breathtaking views that transport you to another world. You can paint serene mountains, rolling hills, or dramatic coastlines, and experiment with colors and textures to capture the essence of nature.

    Abstract and Expressionist Art

    Similar to the freedom of acrylic painting, abstract and expressionist art allows you to tap into your emotions and intuition, creating unique and personal pieces that reflect your inner world. You can explore different techniques, such as layering, scraping, or dripping paint, to create intricate and expressive artworks.

    In addition to the freedom of expression, abstract and expressionist art with acrylics offers you the opportunity to experiment with different materials and tools, such as palette knives, sponges, or even household items, to create interesting textures and effects. As you explore this style, you’ll discover that your paintings can become a reflection of your thoughts, feelings, and experiences, making the creative process even more fulfilling and enjoyable.

    Tips and Tricks

    Unlike other painting mediums, acrylics can be unforgiving. To achieve success, consider:

    • using high-quality materials
    • practicing color theory

    . Recognizing your strengths and weaknesses will help you grow as an artist.

    Layering and Glazing

    Layering thin coats of paint allows you to build up colors and textures, creating a unique visual effect in your artwork.

    Adding Depth and Dimension

    Dimensionality is key to making your paintings pop. You can achieve this by playing with light and shadow, and experimenting with different brushstrokes.

    Understanding how to add depth and dimension to your acrylic paintings takes time and practice, but with patience and dedication, you can master these techniques and take your artwork to the next level, allowing you to express yourself in new and exciting ways, and bringing your creative vision to life.

    Common Mistakes to Avoid

    Despite your best efforts, mistakes can happen in acrylic painting. You’ll want to be aware of common pitfalls to ensure your projects turn out as envisioned. By understanding what to avoid, you’ll set yourself up for success and create beautiful, professional-looking pieces.

    Preventing Color Bleeding

    On the surface, color bleeding may seem like an insurmountable issue, but you can prevent it by using the right materials and techniques. You’ll find that using high-quality paints and priming your surface will help your colors stay vibrant and true.

    Avoiding Overmixing

    Overmixing can be a major obstacle in acrylic painting, but you have the power to avoid it. You’ll need to be mindful of your brushstrokes and blend colors carefully to achieve the desired effect.

    Understanding the concept of overmixing is key to avoiding it. You see, when you overmix, you’ll end up with a muddy, unappealing color that lacks depth and dimension. By being gentle with your brushstrokes and blending colors thoughtfully, you’ll create rich, vibrant hues that bring your painting to life. As you work, pay attention to the consistency of your paint and the way your colors interact, and you’ll be well on your way to creating stunning, professional-looking pieces.

    Advanced Projects

    For the more experienced artist, advanced projects offer a chance to explore new techniques. Consider:

    1. Mixed media
    2. Abstract art
    Project Description
    Portraits Use layers and textures

    Painting with Mediums

    Picturing the endless possibilities, you can experiment with different mediums to add depth and interest to your work, allowing you to push your creativity to new heights.

    Creating Complex Compositions

    Tackling complex compositions, you will find that your artistic voice and vision begin to emerge, as you learn to balance elements and create visual flow in your paintings.

    Consequently, as you examine deeper into complex compositions, you will discover that your artistic skills are growing, and your confidence is increasing, allowing you to tackle even more challenging projects and explore new ways to express yourself through art.

    Final Words

    Hence, as you commence on your acrylic painting journey, you’ll discover that your creativity knows no bounds. You’ll find that your unique voice shines through in every brushstroke, and your artwork becomes a reflection of your inner world. As you explore the top acrylic painting projects, you’ll unlock your full potential, and your passion will continue to flourish, guiding you toward new and exciting artistic expressions, and nurturing your soul in the process, allowing your creativity to soar.

    FAQ

    Q: What are the best surfaces for acrylic painting projects?

    A: The best surfaces for acrylic painting projects are those that are primed and have a smooth texture. This can include canvas, paper, or board specifically designed for acrylic paint. Canvas is a popular choice as it provides a flexible and durable surface that can withstand multiple layers of paint. Paper, on the other hand, is a great option for beginners or for creating smaller pieces. Board surfaces, such as wood or panel, offer a rigid and stable surface that is ideal for detailed work.

    Q: What are some popular techniques used in acrylic painting projects?

    A: There are several popular techniques used in acrylic painting projects, including layering, glazing, and impasto. Layering involves applying multiple layers of paint to achieve depth and texture, while glazing involves applying transparent layers of paint to achieve a sense of luminosity. Impasto involves applying thick layers of paint to create a raised, three-dimensional effect. Other techniques, such as drybrushing and sgraffito, can also be used to add texture and interest to acrylic paintings.

    Q: How do I choose the right colors for my acrylic painting project?

    A: Choosing the right colors for your acrylic painting project depends on the mood and atmosphere you want to create. Consider the color wheel and how different colors interact with each other. Cool colors, such as blues and greens, can create a calming effect, while warm colors, such as oranges and yellows, can create a sense of energy. You can also experiment with different color combinations and techniques, such as contrasting colors or analogous colors, to create a unique and interesting palette.

    Q: What are some common mistakes to avoid when working on acrylic painting projects?

    A: Some common mistakes to avoid when working on acrylic painting projects include using too much water, which can cause the paint to become too thin and transparent. Another mistake is not allowing each layer to dry completely before adding additional layers, which can cause the paint to lift or smudge. It’s also important to work in a well-ventilated area and use a palette or surface that is easy to clean, as acrylic paint can be difficult to remove from surfaces. Additionally, not using a primer or gesso on your surface can affect the paint’s adhesion and durability.

    Q: How do I properly care for and store my finished acrylic painting projects?

    A: To properly care for and store your finished acrylic painting projects, make sure they are completely dry and free of dust and debris. Avoid exposing your paintings to direct sunlight or extreme temperatures, as this can cause the colors to fade or the paint to crack. You can varnish your paintings to protect them from dust and UV light. Store your paintings in a cool, dry place, away from direct sunlight and moisture. If you need to transport your paintings, use a sturdy frame or box and handle them with care to avoid damage. Regularly dusting and cleaning your paintings can also help maintain their appearance and longevity.

How to Create Abstract Art

You stand in front of a blank canvas, eager to create something unique. Your mind is filled with ideas, but you’re not sure where to start. You’ll begin by experimenting with different materials and techniques, allowing your instincts to guide your brushstrokes. As you work, you’ll uncover your own style, and your abstract art will take shape. With each stroke, you’ll move closer to creating a piece that reflects your vision and emotion.

Key Takeaways:

To create stunning abstract art, consider the following points:

  • Start with a concept or emotion that inspires you, and let it guide your creative process to produce a unique piece of art.
  • Experiment with different techniques, such as layering, texturing, and color blending, to add depth and visual interest to your artwork.
  • Embrace spontaneity and intuition, allowing yourself to make bold and expressive brushstrokes or marks that convey your creative vision.

Preparing the Space

A clean and organized space is crucial for creating abstract art. You can find inspiration on how to start your project by visiting 8 Fun Ways to Start an Abstract Painting to get your creative juices flowing.

Gathering Materials

Materials needed for your abstract art project should be readily available, including paints, brushes, and canvas, so you can focus on the creative process.

Setting up the Environment

Before you begin, set up your workspace to promote productivity and comfort, ensuring good lighting and ventilation to help you stay focused.

And as you arrange your workspace, consider the flow of your creative process, keeping frequently used items within easy reach, allowing you to move freely and concentrate on bringing your abstract art vision to life, with your space now ready for you to express yourself.

Exploring Techniques

Now that you’ve started creating abstract art, it’s time to experiment with different methods to find what works best for you. You’ll discover various techniques to express your unique style.

Experimenting with Colors

With a wide range of colors at your disposal, you can create unique combinations that evoke emotions and convey meaning. You’ll find that certain colors work well together, while others clash, allowing you to refine your palette.

Playing with Textures

Along with color, texture plays a significant role in abstract art, adding depth and visual interest to your work. You can use various materials to create different textures, from smooth to rough, to enhance your art.

Finding Inspiration

After deciding to create abstract art, you need to find inspiration. Your surroundings, experiences, and emotions can spark ideas. Look for things that evoke feelings or stimulate your mind.

Looking at Nature

Above all, nature is a great source of inspiration. You can observe its patterns, colors, and textures to influence your art. Take note of the shapes and forms that appeal to you.

Drawing from Emotions

Around you, emotions are constantly shifting. You can tap into your feelings to create unique and personal art. Your emotions can guide your color choices and brushstrokes.

Finding your emotional state is key to creating authentic abstract art. You can explore your feelings by reflecting on your experiences, thoughts, and sensations. This will help you to express yourself honestly and create art that resonates with others.

Creating the Composition

Balancing Elements

The key to a great composition is balance. You’ll balance your elements, like color and shape, to create a sense of harmony in your artwork. You’ll place each element deliberately, considering how it affects your overall piece.

Considering Negative Space

Around your artwork, negative space plays a significant role. You’ll use it to create a sense of simplicity and focus attention on specific elements. Your negative space will help your artwork breathe, making it more dynamic.

Even when you think you’ve got your composition right, take a step back and look at your negative space. You’ll see how it affects your artwork’s overall feel and flow. You can adjust your elements to use negative space effectively, creating a more engaging piece that draws your viewer in.

Adding Layers and Depth

Once again, you’ll find yourself lost in the process of creating abstract art. You’ll add layers, building up your piece, and watching it evolve. Your colors will blend, your textures will deepen, and your art will take on a life of its own.

Building Up Colors

Among the many techniques you can use, building up colors is one of the most effective. You’ll start with a base coat, then add layers of paint, each one interacting with the last, creating a rich and vibrant palette that draws the viewer in.

Incorporating Patterns

For your art to truly come alive, you’ll need to incorporate patterns. You’ll use shapes, lines, and textures to create a sense of movement and energy, drawing the viewer’s eye through your piece.

This pattern work will add an extra layer of complexity to your art, making it more interesting and engaging. You’ll experiment with different patterns, finding the ones that work best with your colors and textures, and using them to create a sense of tension and balance in your piece.

Refining the Piece

All aspects of your abstract art piece should come together during this stage. You evaluate your work, making adjustments to create a cohesive whole.

Stepping Back and Evaluating

About now, you should take a step back and assess your piece. You are looking for balance, harmony, and a sense of completeness.

Making Final Adjustments

An eye for detail is necessary as you make your final adjustments. You tweak and refine, ensuring every element serves your artistic vision.

Indeed, making final adjustments is where your abstract art piece truly comes alive. You refine colors, textures, and composition, trusting your instincts to guide you. Your goal is to create a piece that resonates with you, and by extension, your audience, drawing them into the world you’ve created.

Final Words

Drawing together the threads of your creativity, you’ve learned to craft unique abstract art. Your brushstrokes now dance with purpose, guided by your intuition. You’ve discovered that abstract art is a journey, not a destination. With each piece, your style evolves, reflecting your inner world. You’ve taken the first steps, now keep creating, experimenting, and pushing your boundaries. Your art will continue to grow, a testament to your imagination and skill.

FAQ

Q: What is abstract art and how do I get started with creating it?

A: Abstract art is a form of art that does not depict recognizable subjects, but instead uses colors, shapes, and textures to create a unique visual language. To get started with creating abstract art, begin by experimenting with different materials and techniques, such as painting, drawing, or mixed media. Play with colors, textures, and patterns to develop your own style and express yourself creatively. You can also draw inspiration from other abstract artists, nature, or emotions to spark your creativity.

Q: What materials do I need to create abstract art?

A: The materials you need to create abstract art can vary depending on the technique and style you want to achieve. Some common materials used in abstract art include paints (acrylic, oil, or watercolor), canvases or papers, brushes, palette knives, and other tools for applying and manipulating the paint. You can also experiment with mixed media, incorporating materials like paper, fabric, or found objects into your artwork. Additionally, you may want to have a variety of surfaces, such as wood panels or boards, to create unique textures and effects.

Q: How do I develop my own unique style in abstract art?

A: Developing your own unique style in abstract art takes time and practice. Start by experimenting with different techniques, colors, and materials to see what works best for you. Look at the work of other abstract artists, but don’t try to copy their style – instead, use their work as inspiration to develop your own voice. Keep creating and pushing yourself to try new things, and you will eventually start to see a unique style emerge. It’s also important to trust your instincts and not overthink your process – abstract art is all about expression and intuition.

Q: Can I create abstract art without any formal training or experience?

A: Absolutely! Abstract art is all about experimentation and creativity, and you don’t need any formal training or experience to get started. In fact, many abstract artists are self-taught and have developed their skills through trial and error. The most important thing is to have a willingness to experiment and take risks – don’t be afraid to try new things and make mistakes. You can also find plenty of tutorials, workshops, and online courses that can provide guidance and inspiration as you develop your skills.

Q: How do I know when my abstract art piece is complete?

A: Knowing when an abstract art piece is complete can be subjective, as it’s often a matter of personal intuition. One way to determine if your piece is complete is to take a step back and look at it with fresh eyes – if it feels balanced and resolved to you, then it’s likely complete. You can also ask yourself if you’ve achieved the emotional or expressive effect you were aiming for. Another approach is to set a deadline or a specific goal for your piece, and when you’ve reached that goal, consider it complete. Ultimately, trust your instincts and don’t overwork your piece – sometimes, less is more in abstract art.

The Joy of Sketching Daily

As you pick up your pencil and begin to sketch, you’ll discover a sense of freedom and creativity that unfolds with each gentle stroke. Your daily sketching practice becomes a treasured ritual, a moment to breathe, observe, and express yourself. With each new day, your sketches will evolve, reflecting your unique perspective and style, inviting you to explore, experiment, and play, and uncover the joy that awaits in this simple yet profound daily habit.

Key Takeaways:

  • The therapeutic benefits of sketching daily can lead to a significant reduction in stress and anxiety, promoting a sense of wellbeing and relaxation.
  • Developing a daily sketching habit can improve creativity, enhance observation skills, and foster a greater appreciation for art and design.
  • By committing to regular sketching practice, individuals can experience personal growth, develop their unique style, and enjoy the fulfilling process of creating something new every day.

    Benefits of Daily Sketching

    To experience the full range of advantages that sketching has to offer, you’ll want to make it a regular part of your routine. By doing so, you’ll find that your creativity and overall well-being will flourish, leading to a more fulfilling life.

    Relaxation and Stress Relief

    Beneath the surface of daily sketching lies a powerful tool for calming your mind and soothing your spirit. As you sketch, you’ll find that your worries and cares slowly drift away, replaced by a sense of peace and tranquility that will stay with you long after you’ve put down your pencil.

    Improving Observation Skills

    Above all other benefits, daily sketching will help you develop your ability to observe the world around you with greater clarity and precision. As you practice, you’ll become more aware of the intricate details that make each scene unique, and your sketches will begin to reflect this newfound awareness.

    It is through this increased observation that you’ll start to notice the way light falls on a subject, the play of textures and colors, and the subtle nuances of expression and emotion. Your sketches will become more vibrant and alive, filled with the character and personality of the world you’re observing, and you’ll find that your daily sketching practice has become a source of inspiration and joy in your life, allowing you to see the world with fresh eyes and a deeper appreciation for its beauty.

    Getting Started

    While commenceing on your daily sketching journey, you’ll find that it’s easier to begin with the right resources, such as checking out A beginner’s guide to sketching the everyday, Russell Stutler book for tips and inspiration. This will help you set the tone for your creative adventure.

    Choosing the Right Materials

    For your sketching endeavors, you’ll want to gather a few vital tools, such as a sketchbook, pencils, and eraser, to get started on your artistic path, allowing you to express yourself freely.

    Finding Inspiration

    By looking to your surroundings, you’ll discover that inspiration is everywhere, from the beauty of nature to the simplicity of everyday objects, waiting to be sketched and brought to life by your unique perspective.

    Plus, as you continue to sketch daily, you’ll find that your inspiration will grow, and you’ll begin to see the world in a new light, noticing details and textures that you never noticed before, and your sketches will become a reflection of your unique vision and creativity, allowing you to express yourself in a way that’s authentic and fulfilling to you.

    Developing a Daily Habit

    Many people struggle to establish a daily sketching routine, but with persistence and dedication, you can make it a vital part of your daily life. As you start sketching daily, you’ll find your skills improving and your creativity soaring. Your unique style will emerge, and you’ll begin to see the world in a new light.

    Creating a Schedule

    Around the same time each day, set aside a few minutes to sketch, making it a non-negotiable part of your daily routine. You’ll find that having a set time helps you stay committed to your practice, and your mind will begin to anticipate this creative time, helping you to stay focused and inspired.

    Overcoming Procrastination

    Alongside your daily schedule, you’ll need to tackle procrastination, which can be a major obstacle to your sketching practice. You might find that you’re putting off sketching due to fear of not being good enough or lack of inspiration, but don’t let these thoughts hold you back.

    But as you continue to show up to your sketching practice, you’ll start to notice that your fears and doubts begin to fade away, replaced by a sense of excitement and curiosity. You’ll find yourself looking forward to your daily sketching time, and your creative voice will start to shine through, helping you to develop a unique style and perspective that’s all your own, and that’s where the true magic happens, and you’ll be amazed at the progress you’ll make, and the joy you’ll experience.

    Exploring Different Techniques

    Once again, you find yourself immersed in the world of sketching, eager to discover new ways to express your creativity. As you examine deeper, you’ll uncover a plethora of techniques to enhance your art, from line work and shading to color and texture, each one inviting you to experiment and play.

    Line Work and Shading

    Diversely, you can approach line work and shading, using varying strokes and pressures to create unique effects, adding depth and dimension to your sketches, and allowing your pencil to dance across the page with freedom and expression.

    Color and Texture

    Beneath the surface of your sketches, you can add layers of color and texture, bringing your art to life with vibrant hues and tactile elements, as you explore the endless possibilities of mixed media and creative expression.

    In fact, as you continue to experiment with color and texture, you’ll find that your sketches become more nuanced and engaging, reflecting your personality and style, and inviting you to explore new ways of seeing and interpreting the world around you, with your sketchbook as your trusted companion on this creative journey.

    Finding Joy in the Process

    Unlike other creative pursuits, sketching daily allows you to connect with your artistic side and tap into your imagination, bringing you a sense of joy and fulfillment. As you sketch, you’ll find that your worries fade away, and you become fully present in the moment, lost in the flow of creation.

    Embracing Mistakes

    Against all expectations, your mistakes can become a beautiful part of your sketching journey, teaching you to be kinder to yourself and to see the beauty in imperfection. You’ll learn to let go of self-criticism and instead, focus on the process, allowing your unique style to emerge.

    Celebrating Progress

    Anyway, as you continue to sketch daily, you’ll start to notice your progress, and that’s something to celebrate. You’ll see how far you’ve come, and your confidence will grow, encouraging you to keep creating and pushing yourself to new heights.

    But as you celebrate your progress, you’ll also discover that it’s not just about the end result, but about the journey itself. You’ll find that the act of sketching becomes a meditation, a way to calm your mind and soothe your soul, bringing you a sense of peace and clarity that stays with you long after you’ve put down your pencil.

    Staying Motivated

    Your daily sketching practice is a journey, and like any journey, it’s imperative to maintain your enthusiasm and interest to keep moving forward, so you’ll need to find ways to stay motivated and inspired every day.

    Setting Goals and Challenges

    To keep your sketching practice engaging, try setting achievable goals and challenges for yourself, whether it’s to sketch a certain number of days in a row or to focus on a specific technique, this will help you stay focused and motivated.

    Joining a Sketching Community

    For many artists, being part of a community can be a great motivator, so consider joining a local or online sketching group to connect with like-minded individuals and share your work.

    Understanding that you are not alone in your creative journey can be a powerful motivator, and being part of a sketching community can provide you with the support and encouragement you need to keep sketching every day, you’ll find that sharing your experiences and learning from others will help you grow as an artist and stay motivated to continue exploring your creativity.

    Conclusion

    From above, you’ve seen the transformative power of daily sketching. As you commit to this practice, you’ll discover your unique voice and style, unlocking a deeper connection to your creativity. Your sketches will become a reflection of your soul, a testament to the beauty and wonder you encounter each day. You’ll find that sketching daily brings joy, calmness, and clarity to your life, inviting you to see the world with fresh eyes and an open heart.

    FAQ

    Q: What is “The Joy of Sketching Daily” and how does it benefit me?

    A: “The Joy of Sketching Daily” is a practice that involves setting aside time each day to sketch, allowing you to develop your drawing skills, enhance your creativity, and establish a calming daily routine. By incorporating daily sketching into your life, you can improve your observation skills, boost your self-confidence, and enjoy a sense of accomplishment through the creation of something new each day.

    Q: Do I need to have prior drawing experience to start “The Joy of Sketching Daily”?

    A: No, prior drawing experience is not necessary to start “The Joy of Sketching Daily”. This practice is designed for individuals of all skill levels, from beginners to experienced artists. The focus is on the process of creating and expressing yourself daily, rather than on producing perfect drawings. It’s an opportunity to learn, grow, and enjoy the journey of artistic development at your own pace.

    Q: What materials do I need to get started with “The Joy of Sketching Daily”?

    A: To start “The Joy of Sketching Daily”, you’ll need a few basic materials. A sketchbook and a pencil are the crucials. You can also consider adding variety to your sketches with pens, markers, colored pencils, or any other drawing tools that inspire you. The choice of materials largely depends on your personal preference and the style of sketching you wish to pursue. Comfort and portability of your sketching setup can also be important factors, especially if you plan to sketch on the go.

    Q: How much time do I need to dedicate to “The Joy of Sketching Daily”?

    A: The amount of time you dedicate to “The Joy of Sketching Daily” can vary based on your schedule and goals. Even a short period, such as 10-15 minutes a day, can be beneficial and set you on a path of creative habit formation. Ideally, aiming for 30 minutes to an hour allows for a more immersive experience, enabling you to fully engage with your sketching and potentially explore more complex compositions or techniques. The key is to find a duration that fits comfortably into your daily routine and feels sustainable in the long term.

    Q: Can “The Joy of Sketching Daily” help with stress relief and mindfulness?

    A: Yes, “The Joy of Sketching Daily” can be a highly effective tool for stress relief and mindfulness. The act of sketching requires focus on the present moment, allowing you to shift your attention away from daily worries and concerns. This mindful engagement can lead to a sense of calm and relaxation. Additionally, the creative expression and satisfaction derived from sketching can enhance mood and overall sense of well-being, contributing to better emotional and mental health.

Linearyazilim Skip to content