Upcycle

How to Upcycle Everyday Items

You’re surrounded by items you no longer need, but don’t throw them away just yet. You can give your old things a new life. You’ll learn to transform your trash into treasure, making your space more unique and sustainable. Your creativity will turn useless items into functional pieces, reducing waste and saving money. You’ll discover the simplicity of upcycling and how it can benefit your daily life.

Key Takeaways:

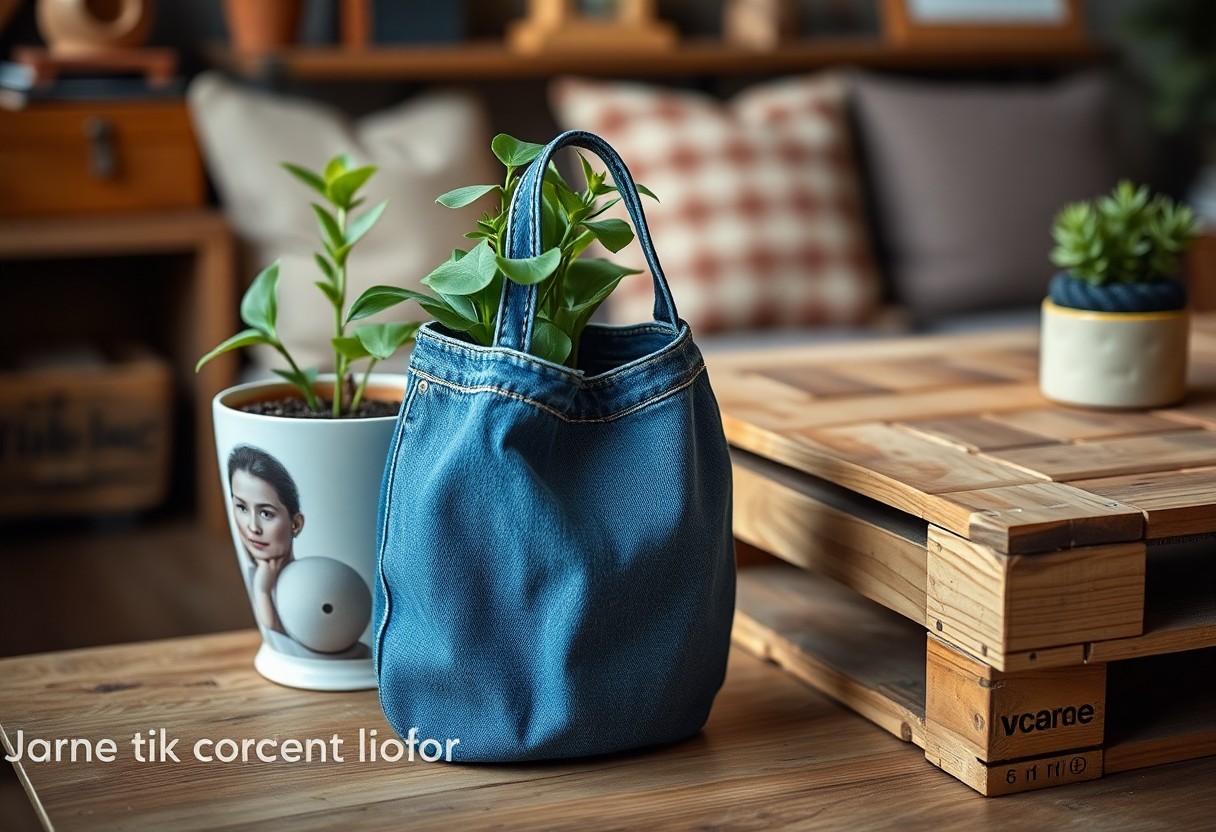
  • To reduce waste, start by repurposing old items that would otherwise be thrown away, such as turning old jars into planters or using old t-shirts to create reusable bags.
  • Get creative with upcycling by thinking outside the box and finding new uses for everyday items, like transforming old pallets into furniture or using old mason jars to make candle holders.
  • Transform your home decor by upcycling items like old bottles into vases, or old wooden crates into shelves, to add a touch of sustainability and personal style to your space.

Gathering Materials

For your upcycling project, you’ll need to gather materials from items you might otherwise discard. Look around your home, yard, or neighborhood for potential treasures.

Identifying Potential Items

At this stage, you’re looking for anything that sparks your creativity. Old furniture, cardboard tubes, or fabric scraps can become the basis for your project.

Collecting Tools and Supplies

Along with your materials, you’ll need basic tools like scissors, glue, and a hammer. Your toolbox and craft supplies will help you shape your creation.

To get started with collecting tools and supplies, you’ll want to assess what you already have on hand. You likely have some basic items like a screwdriver, pliers, or a hot glue gun. Make a list of what you need and head to your local hardware store or craft shop to gather the rest. As you collect your tools and supplies, think about the specific needs of your project and what will help you bring your vision to life. You’ll be able to start creating as soon as you have everything you need.

Creative Ideas

If you’re looking to give your space a fresh look, consider upcycling everyday items. You can turn old things into new, functional pieces that reflect your style. Your creativity is the only limit to what you can achieve.

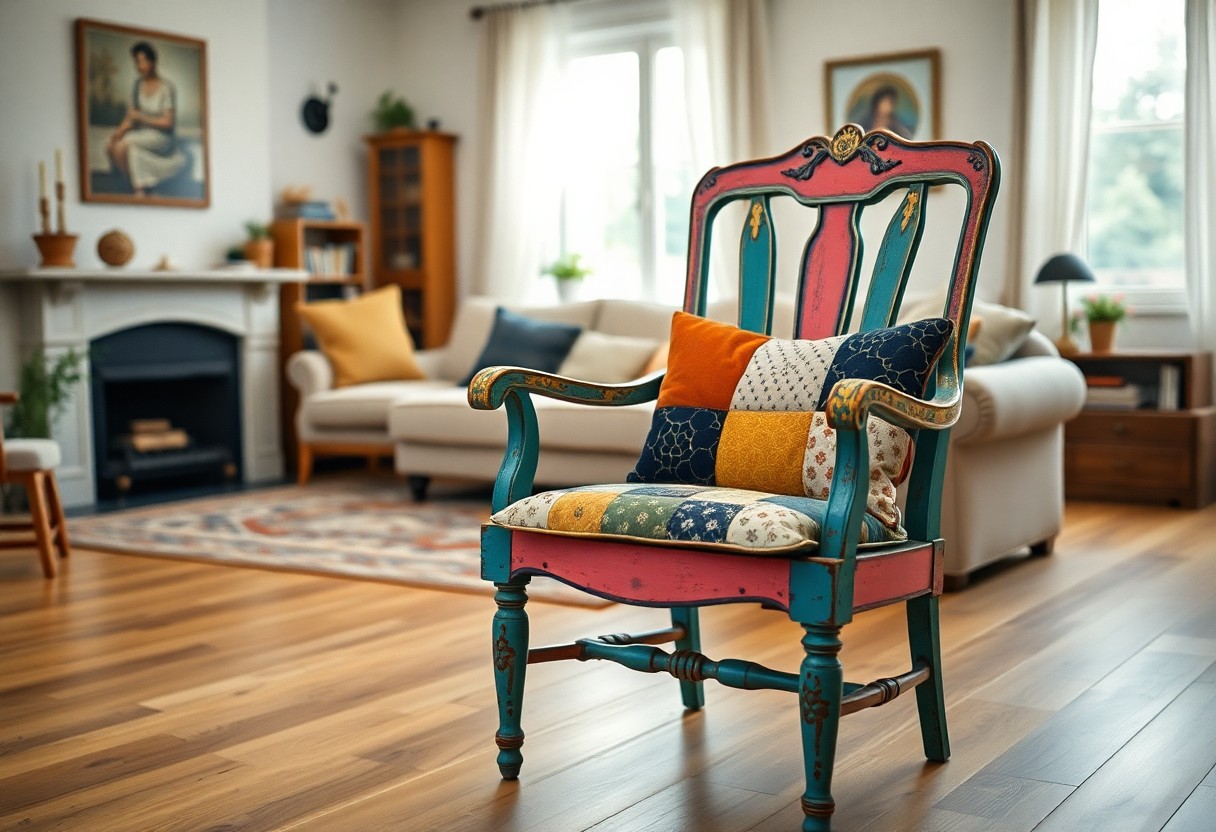
Breathing New Life into Old Furniture

To transform your old furniture, start by assessing its condition and potential. You can repaint, reupholster, or refinish it to give it a new look that fits your needs.

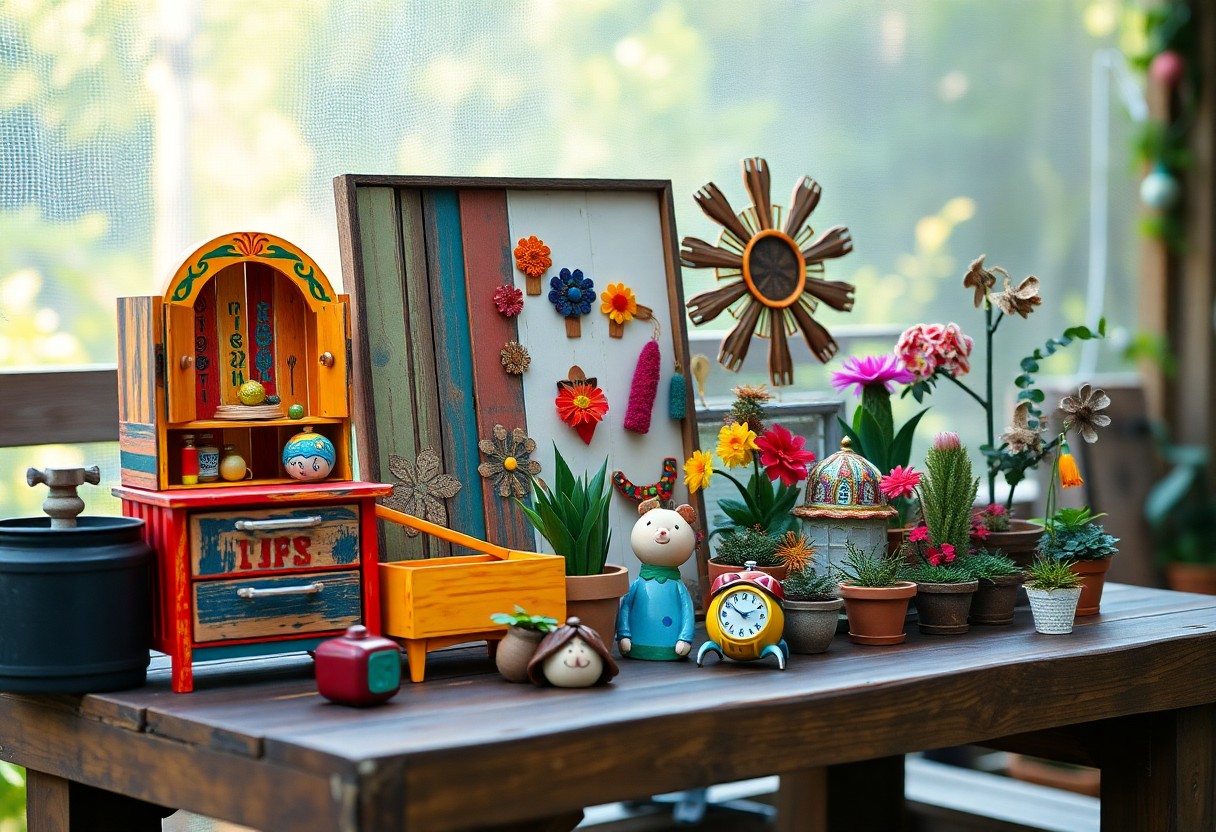
Transforming Household Items into Decor

Into the world of decoration, you can turn household items like jars, bottles, and containers into unique pieces. You can use them as vases, pen holders, or storage containers, adding a personal touch to your space.

The possibilities for transforming household items into decor are endless, and you can experiment with different materials and ideas to create one-of-a-kind pieces that reflect your personality and style. You can fill jars with flowers, pebbles, or candles, or use them as a base for a DIY lamp, giving your space a touch of warmth and character.

Step-by-Step Guides

Once again, you’ll find that upcycling is all about creativity and patience. Here’s a breakdown of the process:

Item Use
Old jars Planters or vases
Cardboard boxes Storage containers

Upcycling Old Jars and Containers

AFTER you’ve collected your old jars and containers, you can start cleaning and preparing them for their new life. You’ll be amazed at how a little paint and glue can turn them into beautiful planters or vases.

Creating Unique Lighting Fixtures

THE possibilities are endless when it comes to creating unique lighting fixtures from everyday items. You can use old mason jars, bottles, or even metal colanders to create stunning lamps and chandeliers.

Indeed, creating unique lighting fixtures is a fun and rewarding project. You can add your personal touch by using different materials, such as twine, ribbons, or beads, to create a one-of-a-kind piece that reflects your style and personality. As you work on your project, you’ll find that the process is just as important as the end result, and you’ll enjoy the satisfaction of turning something old into something new and beautiful.

Safety Precautions

Now that you’re starting your upcycling project, consider your safety. You’ll be working with various materials and tools, so take a moment to prepare your workspace and plan your approach.

Handling Sharp Objects and Chemicals

To avoid accidents, handle sharp objects and chemicals with care. You should wear protective gloves and goggles when working with these items, and make sure your workspace is well-ventilated.

Working with Power Tools and Equipment

Along with manual tools, you may use power tools and equipment for your project. You need to follow the manufacturer’s instructions and take necessary precautions to avoid injury.

And as you work with power tools, keep your workspace organized and clear of clutter. You should also ensure that you have a first aid kit nearby and know what to do in case of an emergency, so you can focus on bringing your upcycling vision to life.

Adding a Personal Touch

Many of your upcycling projects can be elevated by adding a personal touch. You can find inspiration for Easy Items To Upcycle and get started on creating unique pieces that reflect your style. This will make your projects stand out and give them a special feel.

Incorporating Color and Texture

Around this time, you’ll want to think about incorporating color and texture into your project. You can use paint, fabric, or other materials to add depth and visual interest to your upcycled item, making it truly one-of-a-kind.

Adding Functional Details

Any details you add to your project can make it more functional and user-friendly. You can add handles, pockets, or other features that make your upcycled item more practical and useful in your daily life.

Personal touches can make your upcycled items truly special. As you work on adding functional details, you’ll start to see your project come together. You can add a coat of varnish, attach a small decorative item, or include any other element that reflects your personality and style, making your upcycled item a reflection of you.

Displaying Your Creations

After you’ve upcycled your items, it’s time to show them off. You’ll want to find a way to display your creations that showcases your unique style and creativity.

Showcasing Your Upcycled Items

The best way to display your upcycled items is to group similar items together, creating a cohesive look that ties everything together. You can use shelves, tables, or even walls to showcase your creations.

Creating a Themed Display

Your upcycled items can be displayed in a way that tells a story or evokes a certain mood. You can create a themed display by choosing items that fit a particular style or era, and arranging them in a way that feels authentic and inviting.

It is easy to get carried away with your themed display, but you should keep it simple and uncluttered. You can choose a few statement pieces and surround them with smaller, complementary items. This will create a visually appealing display that draws the viewer’s eye to your favorite pieces. You can also experiment with different textures, colors, and shapes to add depth and interest to your display.

Conclusion

As a reminder, you now have the tools to turn your old items into something new. You can breathe life into your discarded things, giving them a fresh purpose. With your imagination and skills, you’ll reduce waste and create unique pieces that reflect your style. You’ll save money and help the environment, too. Your upcycled items will tell a story, and you’ll be the one who gave them a second chance.

FAQ

Q: What is upcycling and how does it benefit the environment?

A: Upcycling is the process of transforming old or discarded items into new, useful, and often unique products. This creative approach helps reduce waste, conserves resources, and decreases the need for new raw materials. By upcycling, you can significantly contribute to environmental sustainability while adding a personal touch to your home decor or daily items.

Q: What kinds of everyday items can be upcycled?

A: A wide variety of everyday items can be upcycled, including glass jars, old furniture, plastic bottles, cardboard tubes, fabric scraps, and much more. The key to successful upcycling is to think outside the box and imagine alternative uses for items that would otherwise be thrown away. For instance, glass jars can become planters, old t-shirts can turn into reusable bags, and wooden crates can be transformed into coffee tables.

Q: Where can I find materials to upcycle?

A: Materials for upcycling can be found in your own home, thrift stores, garage sales, and even online marketplaces. Look for items that are still in good condition but no longer serve their original purpose. Your attic, basement, or backyard might also hold hidden gems waiting to be upcycled. Additionally, consider visiting local recycling centers or joining online communities where people give away items they no longer need, which could be perfect for your next upcycling project.

Q: What skills or tools do I need to start upcycling?

A: The skills and tools required for upcycling can vary greatly depending on the project. Basic DIY skills such as painting, cutting, and gluing are often necessary. For more complex projects, you might need power tools like saws or drills. It’s also beneficial to have some creativity and patience, as upcycling often involves trial and error. Start with simple projects and gradually move on to more complex ones as you gain experience and confidence in your abilities.

Q: How can I get inspired and learn new upcycling techniques?

A: Inspiration for upcycling can come from various sources. Social media platforms like Instagram and Pinterest are filled with creative upcycling ideas and tutorials. You can also find numerous blogs, videos, and books dedicated to upcycling and DIY projects. Participating in workshops or joining a local crafting community can provide hands-on experience and the opportunity to learn from others. Experimenting with different materials and techniques will also help you develop your unique style and approach to upcycling.

How to Upcycle Old Furniture

You have old furniture collecting dust, but you don’t want to throw it away. You can breathe new life into it. Start by assessing your pieces, and think about what you can reuse. For inspiration, check out How to Upcycle Wooden Furniture – Oak Dresser tutorials. With a little creativity, your old furniture can become unique and functional again, saving you money and reducing waste. You can transform your space with your own hands.

Key Takeaways:

To give your old furniture a new life, consider the following points:

  • Start by assessing the condition and structure of the furniture to determine the best approach for upcycling, whether it’s a simple refinish or a complete overhaul.
  • Choose the right materials and tools for the job, such as paint, varnish, or fabric, and invest in quality items that will withstand the test of time.
  • Get creative with your upcycling project by adding unique details and features, such as decorative hardware or upholstery, to give your old furniture a one-of-a-kind look.

Gathering Materials

Your upcycling project starts with gathering the right materials, including the old furniture you want to repurpose, new hardware, and any decorative items you want to add.

Essential Tools

Among the basic tools you’ll need are a hammer, screwdriver, and sandpaper, which will help you disassemble and refinish your old furniture.

Creative Resources

Essentially, your imagination is the limit when it comes to creative resources, but some ideas include paint, fabric, and reclaimed wood.

A key part of upcycling is thinking creatively about how to reuse and repurpose different materials, so take some time to brainstorm and explore different options for your project, and you’ll be surprised at what you can come up with using your old furniture and a little bit of creativity.

Preparing the Furniture

Even the most neglected piece can be revitalized with some elbow grease. You’ll need to assess your furniture’s condition and decide what’s worth saving. Take note of any broken parts, scratches, or stains that need attention.

Cleaning and Stripping

Prior to starting, you’ll need to wipe down your furniture to remove dirt and grime. You’ll be amazed at how a simple cleaning can revive the surface. Remove old finishes, and take out any hardware.

Sanding and Smoothing

Frequently, your furniture will have a rough surface. You’ll need to sand it down to create a smooth base for your new finish. This step is where you’ll start to see your furniture transform.

Sanding is where you put in the work to get your furniture ready for its new life. You’ll use progressively finer grits of sandpaper to smooth out the surface, removing any imperfections or old finish. As you sand, you’ll start to see the wood grain emerge, and your furniture will begin to take on a new character. You’ll be able to feel the difference under your hands, and you’ll know you’re on the right track.

Design and Planning

Not every old piece of furniture is a candidate for upcycling, but with a clear vision, you can turn many items into something new and functional. You’ll need to assess your skills, tools, and materials before starting the project.

Measuring and Sketching

On the path to creating something unique, you take precise measurements of your old furniture and sketch out ideas for its new life. You consider the space where the piece will go and how it will be used.

Choosing Colors and Styles

Along with thinking about the function of your upcycled furniture, you think about the aesthetic you want to achieve. You consider the colors and styles that fit with your home’s decor and your personal taste.

In fact, selecting the right colors and styles can make or break your upcycling project. You look at the natural colors of the materials, the style of the original piece, and how you can enhance or change them to fit your vision. You think about the mood and atmosphere you want to create with your upcycled furniture, and choose colors and styles that evoke that feeling.

Disassembling and Rebuilding

Now that you’ve selected your old furniture, it’s time to give it new life. You’ll need to disassemble and rebuild it to create something unique.

Taking Apart and Reusing

Apart from the initial dismantling, you’ll find opportunities to reuse parts, reducing waste and adding character to your project. You’ll be surprised at what you can salvage and incorporate into your new design.

Reconfiguring and Reinventing

By breaking down the old piece, you’ll see new possibilities. You’ll start to envision a fresh purpose for your furniture, and your creativity will take over, guiding your hands as you work.

The process of reconfiguring and reinventing is where your vision comes to life. You’ll take the old components and reshape them into something that reflects your style, making the piece truly yours. You’ll sand, paint, and reassemble, transforming the outdated into a one-of-a-kind treasure that tells a story of your craftsmanship and ingenuity.

Decorating and Finishing

All your hard work has led to this moment. You’re ready to add the final touches to your upcycled furniture. This stage is where you get to express your creativity and make your piece truly unique.

Adding New Hardware

For a fresh look, you’ll want to add new hardware to your furniture. You can choose from a variety of styles and finishes to match your design.

Applying Final Coats

Above all, you want your finish to be smooth and even. You apply a final coat of paint or varnish to protect your furniture and give it a professional look.

In addition to applying a final coat, you should also consider adding a sealant to protect your furniture from spills and scratches. You can choose from a variety of sealants, including wax, polyurethane, or lacquer, depending on the type of finish you’ve used and the level of protection you need. You’ll want to apply the sealant according to the manufacturer’s instructions and make sure it’s fully dry before using your furniture.

Safety Precautions

Despite the excitement of upcycling old furniture, you must consider safety. You’ll be working with power tools, chemicals, and heavy objects, so it’s important to take precautions to avoid injuries.

Protective Gear

Gearing up with the right equipment is vital. You should wear safety glasses, gloves, and a mask to protect yourself from debris and harmful substances.

Workspace Preparation

Preventing accidents starts with a clean and clear workspace. You should remove any clutter, cover your floor, and ensure good ventilation to prevent accidents and exposure to harmful fumes.

With your workspace prepared, you can focus on the task at hand. You’ll be able to move around safely, avoiding tripping hazards and other obstacles, and your work will be more efficient and enjoyable. Your prepared workspace will also help you stay organized, keeping your tools and materials within easy reach.

To wrap up

As a reminder, you’ve got the skills to breathe new life into your old furniture. You’ve learned to see past its worn surface and give it a fresh start. With your hands and some basic tools, you can turn your old pieces into something new and useful. You’ll save money and create something that’s truly your own, piece by piece, with your own two hands.

FAQ

Q: What is upcycling old furniture and how can I get started?

A: Upcycling old furniture is the process of transforming outdated or discarded furniture into unique, functional, and aesthetically pleasing pieces. To get started, begin by scouting local thrift stores, garage sales, or your own home for pieces with potential. Consider the durability, material, and structural integrity of the item, and envision how it can be repurposed. Gather necessary tools and materials, such as sandpaper, paint, and fabric, and start brainstorming creative ways to breathe new life into your find.

Q: What are some popular techniques for upcycling old furniture?

A: Some popular techniques for upcycling old furniture include refinishing, repainting, reupholstering, and restructuring. Refinishing involves stripping and reapplying a new finish to the original surface, while repainting gives the piece a completely new look. Reupholstering involves replacing the old fabric with new, vibrant materials, and restructuring involves disassembling and reconfiguring the piece into a new form. Additional techniques include decoupage, stenciling, and adding hardware or decorative details.

Q: How do I choose the right materials and tools for upcycling old furniture?

A: The materials and tools needed for upcycling old furniture will depend on the specific project and desired outcome. Common materials include paint, stain, varnish, fabric, foam, and hardware. Essential tools may include sanders, drills, saws, and screwdrivers. Consider the type of material the furniture is made of, such as wood, metal, or plastic, and choose materials and tools accordingly. It’s also important to follow safety guidelines and use protective gear, such as gloves and a mask, when working with power tools and chemicals.

Q: Can I upcycle any type of old furniture, or are some pieces better suited for the process?

A: While many types of old furniture can be upcycled, some pieces are better suited for the process than others. Look for sturdy, well-made pieces with solid wood or metal frames, as these can be easily refinished or repurposed. Avoid pieces with broken or damaged structures, as these may be more difficult to work with. Consider the style and era of the piece, as well, and think about how it can be adapted to fit your desired aesthetic. Some popular pieces for upcycling include vintage dressers, chairs, tables, and desks.

Q: How can I add a personal touch to my upcycled furniture and make it truly unique?

A: Adding a personal touch to your upcycled furniture can make it truly one-of-a-kind. Consider incorporating personal items, such as family photos, heirlooms, or sentimental trinkets, into the design. You can also add unique hardware, such as custom knobs or handles, or incorporate unconventional materials, like vintage maps or book pages. Don’t be afraid to experiment and try new things – the beauty of upcycling lies in its creative freedom. Additionally, consider the overall aesthetic you want to achieve, such as rustic, modern, or bohemian, and choose elements that fit with that style.

The Joy of Trash-to-Treasure Crafts

As you explore the world of crafting, you’ll discover the satisfaction of transforming discarded items into unique treasures. You can breathe new life into old materials, reducing waste and creating something truly special. Your creativity will shine as you repurpose everyday objects, turning them into functional or decorative pieces that reflect your personal style. By embracing trash-to-treasure crafts, you’ll not only produce innovative items, but also contribute to a more sustainable lifestyle.

Key Takeaways:

  • The creative process of transforming discarded items into unique pieces can be a fun and rewarding experience, allowing individuals to express their imagination and creativity.
  • Upcycling and repurposing old items can help reduce waste and promote sustainability, making it an environmentally friendly hobby.
  • Engaging in trash-to-treasure crafts can also be a great way to develop problem-solving skills and resourcefulness, as individuals must think outside the box to turn discarded items into something new and useful.

Benefits of Trash-to-Treasure Crafts

Before venturing into the world of trash-to-treasure crafts, consider the advantages they offer. You’ll not only create unique items, but also contribute to a sustainable lifestyle.

Environmental Benefits

Transforming trash into treasure helps reduce waste, conserving natural resources and decreasing pollution, which benefits your community and the environment.

Cost-Effective and Creative

By embracing trash-to-treasure crafts, you’ll discover innovative ways to reuse materials, fostering your creativity while saving money on art supplies and decorative items.

But as you explore this creative world, you’ll find that the cost-effectiveness of trash-to-treasure crafts extends beyond saving money. You’ll also develop a sense of pride and accomplishment, as you breathe new life into discarded items, making them truly one-of-a-kind treasures that reflect your personal style and creativity.

Popular Trash-to-Treasure Crafts

Any crafty person knows that turning trash into treasure can be a fun and creative activity. You can turn old items into unique pieces that reflect your personality and style. From upcycled jewelry to repurposed home decor, the possibilities are endless.

Upcycled Jewelry

To transform old materials into stunning jewelry, you can use items like bottle caps, fabric scraps, or old keys. You can turn these items into beautiful necklaces, earrings, or bracelets that showcase your creativity.

Repurposed Home Decor

For a unique touch, you can repurpose old items into decorative pieces for your home. You can turn old mason jars into vases, or use old pallets to create a coffee table.

And as you explore the world of repurposed home decor, you’ll find that the possibilities are vast. You can turn old windows into mirrors, or use old maps to create a unique wallpaper. Your creativity and imagination are the only limits to what you can create, and with a little practice, you can turn any old item into a beautiful piece of home decor that reflects your personal style.

Materials and Supplies

Once again, you’ll find that your creative journey is full of possibilities when exploring trash-to-treasure crafts, and for inspiration, you can visit Trash to Treasure tutorials to get started.

Common Household Items

Items such as old jars, cardboard tubes, and fabric scraps can be transformed into unique pieces, allowing you to unleash your creativity and personalize your projects.

Thrift Store Finds

Any trip to a thrift store can yield a plethora of materials, from vintage clothing to old furniture, waiting for you to breathe new life into them.

Thrift stores offer a treasure trove of possibilities for your trash-to-treasure crafts, and as you browse the shelves, you’ll discover that with a little imagination, you can turn someone’s discarded items into your own unique creations, giving you a sense of satisfaction and pride in your work.

Tips and Tricks

Despite the initial chaos, turning trash to treasure can be a breeze with the right approach. Consider the following:

  • Sort and categorize materials
  • Experiment with different techniques
  • Knowing these basics will help you create unique pieces.

    Getting Started

    Once you begin, you’ll find that your creative potential is endless, and you’ll be excited to see your projects take shape as you explore various materials and techniques.

    Overcoming Creative Blocks

    Across the board, you’ll encounter moments where inspiration is scarce, but don’t worry, this is a normal part of the process, and taking a break can help you regain your creative spark.

    Tips for tackling creative blocks include changing your environment, seeking inspiration from others, and giving yourself time to relax and recharge, allowing you to approach your project with fresh eyes and a newfound sense of excitement, helping you to overcome obstacles and bring your unique vision to life, as you continue to develop your skills and explore the world of trash-to-treasure crafts, you’ll find that your confidence and creativity will continue to grow.

    Showcase of Unique Creations

    To take your trash-to-treasure crafts to the next level, consider showcasing your unique creations in a dedicated space. This will allow you to appreciate your finished projects and inspire you to create more.

    Quirky Art Pieces

    Among the most exciting aspects of trash-to-treasure crafts are the quirky art pieces you can create. You can turn old items into stunning works of art that reflect your personality and style.

    Functional Items

    The most practical aspect of trash-to-treasure crafts is creating functional items for your daily life. You can turn old items into useful objects that serve a purpose in your home.

    A key benefit of creating functional items is that you can customize them to fit your specific needs and preferences. As you investigate into the world of functional trash-to-treasure crafts, you’ll find that you can create everything from storage containers to home decor items, all while reducing waste and exercising your creativity. You’ll be amazed at how your unique creations can enhance your daily life and add a personal touch to your living space.

    Community and Inspiration

    After discovering the world of trash-to-treasure crafts, you’ll find that being part of a community can enhance your experience. You’ll get to share your creations, learn from others, and stay updated on the latest trends and techniques.

    Online Forums and Groups

    Besides the wealth of information available online, you can join forums and groups to connect with like-minded individuals who share your passion for trash-to-treasure crafts. You can showcase your projects, ask for feedback, and get inspiration from others.

    Local Workshops and Classes

    About the time you think you’ve learned it all, you can take your skills to the next level by attending local workshops and classes. You’ll have the opportunity to learn from experienced instructors and network with fellow crafters in your area.

    Indeed, local workshops and classes offer a unique chance to explore different techniques and mediums, and you’ll be able to see the transformation of trash into treasure firsthand. You’ll gain hands-on experience, get feedback from instructors, and take home your finished projects, feeling proud of your accomplishments and eager to start your next trash-to-treasure craft.

    Final Words

    So, as you conclude your journey through the world of trash-to-treasure crafts, you’ll find that your creativity has been sparked and your perspective on waste has shifted. You’ll begin to see potential in your discarded items, and your imagination will turn them into unique treasures. With your newfound skills, you’ll be able to breathe new life into old objects, reducing waste and creating something truly special with your own hands.

    FAQ

    Q: What is the main idea behind The Joy of Trash-to-Treasure Crafts?

    A: The main idea behind The Joy of Trash-to-Treasure Crafts is to inspire individuals to transform discarded materials into unique and functional items, promoting creativity, sustainability, and waste reduction. This approach encourages people to think outside the box and explore the potential of everyday objects that would otherwise end up in landfills, giving them a new life and purpose.

    Q: What kinds of materials can be used for Trash-to-Treasure Crafts?

    A: A wide variety of materials can be used for Trash-to-Treasure Crafts, including but not limited to, old jars, cardboard tubes, fabric scraps, plastic containers, wooden pallets, and newspaper. The possibilities are endless, and the choice of material often depends on the desired outcome and the individual’s imagination. Getting creative with materials that are readily available can lead to innovative and personalized crafts.

    Q: Can anyone engage in The Joy of Trash-to-Treasure Crafts, regardless of their crafting experience?

    A: Yes, The Joy of Trash-to-Treasure Crafts is accessible to everyone, regardless of their level of crafting experience. It’s an activity that can be enjoyed by people of all ages and skill levels. Beginners can start with simple projects and gradually move on to more complex ones as they gain confidence and experience. Moreover, the nature of trash-to-treasure crafts often involves experimenting and learning as you go, making it a fun and educational hobby for everyone involved.

Skip to content