You can breathe new life into your old glass jars by transforming them into unique and functional items. Your empty jars can become beautiful vases, pen holders, or storage containers with a little creativity. You will learn how to clean, decorate, and repurpose your old glass jars into useful and decorative pieces for your home, reducing waste and showcasing your resourcefulness.
Key Takeaways:
To give old glass jars a new life, consider the following points:
- Use creative painting techniques to transform the appearance of old glass jars, making them suitable for decorative purposes or as unique gift containers.
- Apply upcycling methods to convert old glass jars into functional items such as planters, candle holders, or storage containers.
- Embed DIY skills to turn old glass jars into beautiful centerpieces or lighting fixtures by adding elements like twine, ribbons, or small decorative items.
Preparing Old Glass Jars
A good starting point for repurposing old glass jars is to prepare them for their new use. You will need to give your jars a thorough cleaning and removal of any labels or residue to ensure they are ready for their new purpose.
Cleaning and Sterilizing
To begin the preparation process, you should wash your jars in warm soapy water to remove any dirt or debris. You can then sterilize them in a pot of boiling water or in the dishwasher to kill any bacteria.
Removing Labels and Residue
Removing the labels from your jars can be a bit tricky, but you can use a variety of methods such as soaking them in water or using a label remover. You will also need to scrape off any remaining residue to leave the jars smooth and clean.
Cleaning the area where the label was can be a bit challenging, but using a mixture of soap and water or a specialized cleaner can help to break down the adhesive, making it easier for you to remove any remaining residue from your jars.
Creative Repurposing Ideas
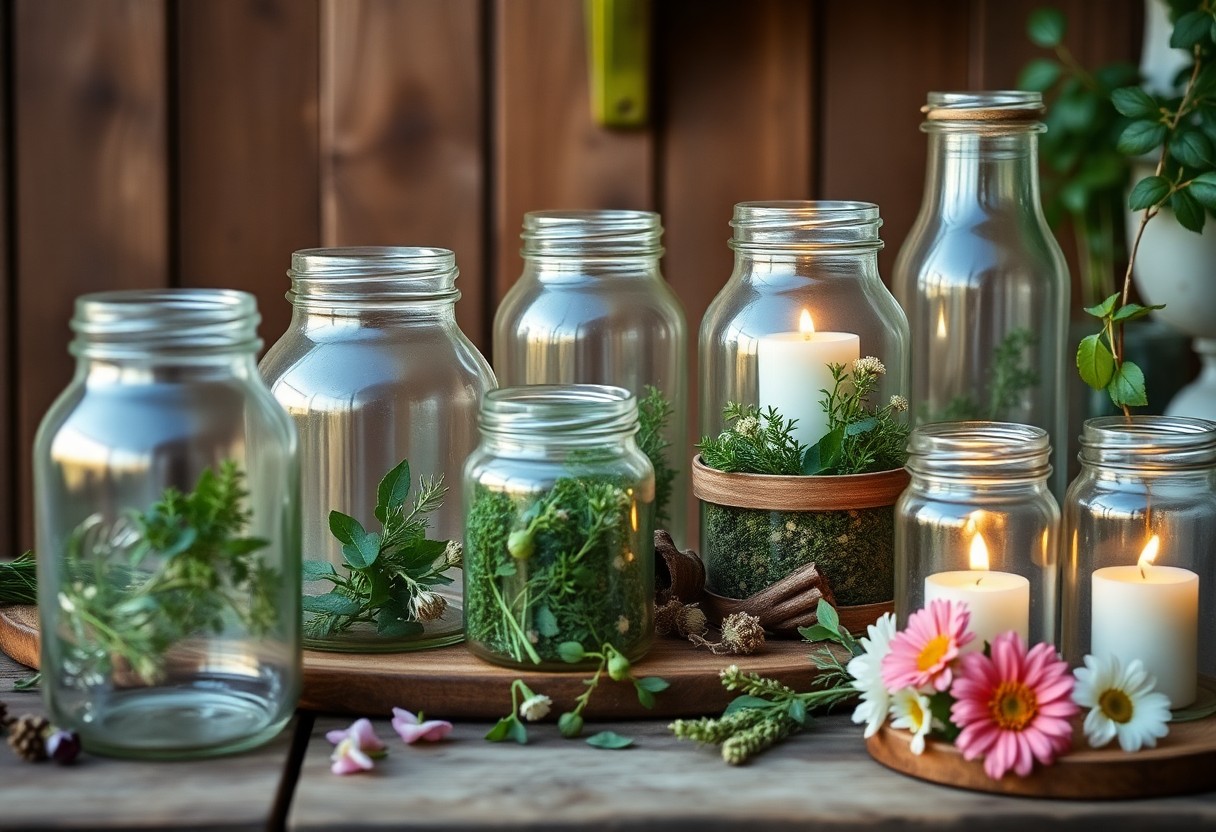
There’s no limit to the creative ways you can repurpose old glass jars, from making beautiful centerpieces to storing kitchen utensils. You can turn them into stunning vases, pen holders, or even a unique wind chime.
Tips for Home Decor
Ideally, you’ll want to consider the style and theme of your home when repurposing old glass jars for decorative purposes. You can:
- Paint them in bold colors
- Add decorative labels or stickers
After selecting the perfect design, you can display your repurposed jars proudly in your home.
Factors to Consider for Kitchen Use
To get the most out of your repurposed glass jars in the kitchen, you should consider a few factors. You can:
- Use them for storing spices or coffee
- Make a DIY kitchen organizer
Perceiving the potential uses for your jars will help you create a more functional kitchen.
Another aspect of repurposing old glass jars for kitchen use is thinking about how you can make them more functional. You can:
- Add airtight lids for storing food
- Label them for easy identification
Perceiving the potential benefits of repurposed glass jars will help you maximize their use in your kitchen, making your cooking and food storage tasks easier and more efficient.
DIY Projects Using Glass Jars
Despite their simple appearance, old glass jars can be transformed into beautiful and functional items for your home. You can use them as vases, candle holders, or even as a unique way to store your kitchen utensils.
How-to Guide for Crafting
To get started with your DIY project, you will need to clean and prepare your glass jars. You can then decorate them using paint, glue, and other craft supplies to give them a personalized touch, making them a reflection of your style and creativity.
Safety Precautions and Materials
Guided by your imagination, you will need a few basic materials to start crafting with glass jars, including a clean workspace, gloves, and safety goggles to protect yourself from any potential hazards.
Glass jars can be sharp and fragile, so you should handle them with care to avoid injuries. As you work on your project, you will need to take necessary precautions to ensure your safety, such as wearing protective gear and working in a well-ventilated area, allowing you to focus on bringing your creative ideas to life.
Organizing and Storage Solutions
For a clutter-free space, repurposed glass jars can be used to store various items, keeping your area tidy and organized. You can use them to store kitchen utensils, cleaning supplies, or office materials, making it easy to find what you need when you need it.
Maximizing Space with Glass Jars
Some of the most effective ways to use glass jars for storage involve placing them in a row on a shelf or in a cabinet, allowing you to make the most of your vertical space and keep your countertops clear. You can also use adhesive hooks to hang them from the ceiling or a wall.
How-to Implement a Jar Organization System
The key to a successful jar organization system is to label each jar clearly, so you can easily identify what’s inside. You can use a marker or stickers to label the jars, and consider grouping similar items together, such as all your baking supplies in one area.
Plus, as you implement your jar organization system, you’ll find that you can customize it to fit your specific needs and preferences. You can choose jars of different sizes and shapes to fit different items, and add decorative touches, such as ribbons or paint, to make your storage system more visually appealing, allowing you to enjoy the benefits of a clutter-free and organized space that reflects your personal style.
Upcycling and Decorating
All sorts of creative possibilities open up when you start thinking about upcycling and decorating old glass jars, from simple storage solutions to beautiful decorative pieces for your home.
Techniques for Painting and Designing
The key to achieving a professional-looking finish is to prepare the surface of the jar properly before painting or designing, and to use the right materials and techniques to bring your vision to life, as you experiment with different methods to find what works best for you.
Tips for Adding Embellishments
If you’re looking to add a personal touch to your upcycled jars, consider adding embellishments such as ribbons, labels, or decoupage, and some popular options include:
- using twine or ribbon to create a rustic look
- adding a handmade label or tag
- applying decoupage cutouts or stickers
Knowing these techniques will help you take your upcycled jars to the next level, as you create unique and personalized pieces for your home.
Understanding the basics of embellishing your jars is important to achieving the desired look, and you can choose from a variety of techniques, including:
- using glue or a hot glue gun to attach decorations
- applying paint or varnish to protect the surface
- adding decorative items like buttons or beads
Knowing the right techniques and materials to use will give you the confidence to experiment and come up with your own unique designs, as you continue to explore the world of upcycling and decorating old glass jars.
Troubleshooting Common Issues
Once again, you’ll encounter problems when repurposing old glass jars, but don’t worry, they can be easily solved. You can fix leaks, cracks, and other issues with simple techniques and materials, ensuring your jars remain functional and safe to use.
How-to Fix Leaks and Cracks
Any attempt to fix a leak or crack in your glass jar requires patience and the right tools. You can use epoxy or silicone sealant to repair small cracks, while larger cracks may need more extensive repair or even replacement, depending on the severity of the damage.
Factors Affecting Jar Longevity
Clearly, your jar’s longevity depends on several factors, including:
- Material quality
- Usage patterns
- Storage conditions
. This understanding will help you take better care of your jars and extend their lifespan.
Common issues that affect the longevity of your glass jars include exposure to extreme temperatures, physical stress, and poor cleaning habits. You can take steps to mitigate these factors by:
- Storing jars in a dry, cool place
- Avoiding sudden temperature changes
- Handling jars with care
. This knowledge will enable you to enjoy your repurposed jars for a longer period.
To wrap up
As a reminder, you can breathe new life into old glass jars by repurposing them. You can explore various ideas, and for more inspiration, visit Everyone tell me how you reuse your glass jars to discover creative ways to reuse your glass jars, making your home more sustainable and beautiful with your own unique touch.
FAQ
Q: What are some creative ways to repurpose old glass jars?
A: There are several creative ways to repurpose old glass jars. You can use them as vases for flowers, pen holders for your desk, or as a unique centerpiece for your dining table. You can also use them to store small items like buttons, safety pins, or beads. Additionally, you can transform them into beautiful candle holders or soap dispensers with a little bit of crafting. The possibilities are endless, and it’s up to your imagination to find new uses for old glass jars.
Q: How do I clean and prepare old glass jars for repurposing?
A: To clean and prepare old glass jars for repurposing, start by washing them thoroughly with soap and warm water. Remove any labels and residue using a mixture of equal parts water and white vinegar or a label remover. Then, rinse the jars with clean water and dry them completely. If there are any stubborn stains or odors, you can soak the jars in a mixture of baking soda and water for a few hours before cleaning. Once the jars are clean and dry, you can start decorating or using them for your chosen purpose.
Q: What are some tips for decorating and customizing repurposed glass jars?
A: There are many ways to decorate and customize repurposed glass jars. You can paint them using glass paint or acrylics, or add decorative stickers or decals. You can also wrap twine, ribbon, or yarn around the jar to give it a rustic or bohemian look. Another idea is to add a layer of glue and glitter to the jar for a sparkly effect. If you want to add a more personal touch, you can write or paint the jar’s new purpose or a special message on it. Regardless of the method you choose, make sure the decorations are safe and durable, especially if you plan to use the jar for storing food or other items.