DIY

How to Make Jewelry Gifts

You can create unique and thoughtful presents by making your own jewelry gifts. With a few simple materials and some basic techniques, you can design beautiful pieces that reflect your personal style and show your loved ones you care. As you explore the world of jewelry making, you will discover the satisfaction of crafting something special with your own hands, and your friends and family will appreciate the thought and effort you put into your handmade gifts.
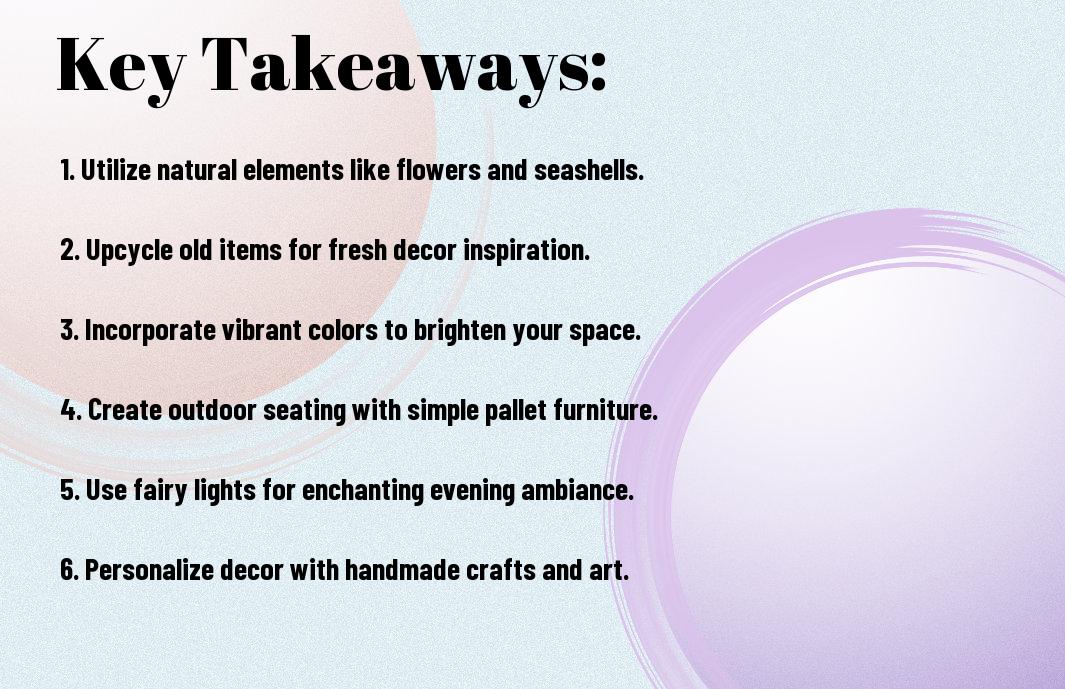
Key Takeaways:

To create meaningful and beautiful jewelry gifts, consider the following points:

  • Choose personalized elements such as birthstones, initials, or special messages to make the gift more sentimental and unique to the recipient.
  • Consider the recipient’s style and preferences when selecting the type of jewelry, such as modern, vintage, or minimalist, to ensure they will appreciate and wear the gift.
  • Pay attention to the quality of the materials and craftsmanship that goes into creating the jewelry, as a well-made piece will be more durable and long-lasting, making it a thoughtful gift.

Choosing the Right Materials

Your jewelry gifts will be as unique as the materials you choose, so select them carefully to reflect the recipient’s style and your craftsmanship.

Selecting Beads and Gemstones

Between the variety of colors, shapes, and sizes, you can find the perfect beads and gemstones to match your gift’s theme, considering the recipient’s preferences and your design.

Working with Metal and Wire

Wiring your jewelry pieces together requires patience and skill, as you shape and mold the metal and wire into beautiful, intricate designs that enhance your gift.

Considering the type of metal and wire you use, you will be able to create durable and long-lasting jewelry gifts, and you can choose from a range of materials, such as copper, silver, or gold, to suit your design and the recipient’s taste, allowing you to add a personal touch to your handmade jewelry gifts.

Designing Your Jewelry

While creating a unique piece of jewelry, you’ll want to consider various factors that reflect your recipient’s personality and style. This stage is important in making a gift that will be cherished. You’ll need to think about the type of jewelry, materials, and design elements that will resonate with the recipient.

Considering the Recipient’s Style

Along with understanding the recipient’s preferences, you should also think about their lifestyle and personal taste. You can look at their current jewelry collection or ask for their input to get a sense of what they like. This will help you create a piece that fits seamlessly into their existing style.

Sketching and Refining Your Design

Beside the initial idea, you’ll need to develop a more detailed design concept. You can start by sketching out different ideas and experimenting with various materials and techniques. This will help you visualize your design and make any necessary adjustments before moving forward.

Refining your design involves making subtle adjustments to the sketch, taking into account the materials, colors, and overall aesthetic you want to achieve. As you refine your design, you’ll start to see your vision come to life, and you can make any final tweaks before starting the creation process. You can also consider seeking feedback from others to ensure your design is well-rounded and appealing.

Essential Tools and Techniques

To create beautiful jewelry gifts, you need to have the right tools and techniques. You will learn about the basic tools and fundamental techniques required to get started.

Basic Jewelry-Making Tools

Along with a workspace, you will need basic tools like wire cutters, pliers, and a workboard to begin making your own jewelry.

Mastering Fundamental Techniques

JewelryMaking requires patience and practice, and you will need to master techniques like stringing, knotting, and wire working to create unique pieces.

At this stage, you will focus on developing your skills in fundamental techniques, and as you progress, you will be able to create more complex designs and patterns, allowing you to personalize your jewelry gifts to suit your loved ones’ styles and preferences.

Creating Unique and Personalized Gifts

All jewelry gifts are special, but making them unique and personalized adds an extra touch. You can create one-of-a-kind pieces that reflect your relationship with the recipient, making the gift even more meaningful.

Adding Sentimental Value to Your Jewelry

Along with thoughtful designs, you can add sentimental value to your jewelry gifts by incorporating special messages or symbols that hold meaning for the recipient, allowing you to create a heartfelt and personalized present.

Incorporating Personal Elements and Symbols

For a truly unique gift, you can incorporate personal elements and symbols that reflect the recipient’s interests, hobbies, or personality, making the jewelry piece a reflection of their individuality.

The process of incorporating personal elements and symbols into your jewelry gifts allows you to customize each piece to your recipient’s style and preferences, ensuring that your gift is not only beautiful but also meaningful and significant to them, and you can achieve this by using various materials, such as birthstones, initials, or special charms that hold personal significance, making your gift truly one-of-a-kind.

Tips for Beginners

Now, as you start making jewelry gifts, consider the following tips:

  • Keep it simple
  • Practice regularly

The most important thing is to have fun and be patient with yourself as you learn and improve your skills.

Common Mistakes to Avoid

Beneath the surface of jewelry making lies a world of potential errors, so below are some common mistakes to watch out for, including poor material selection and inadequate technique, which can affect the quality of your gifts.

Encouragement and Inspiration

Alongside the learning process, you will find that your skills and confidence grow, and at this stage, you can explore more complex designs and techniques to make your jewelry gifts even more special.

It is exciting to think about the endless possibilities that jewelry making offers, and as you continue to create, you will develop your own unique style and voice, allowing you to make truly personalized gifts that your loved ones will cherish, and you can take pride in the fact that you made them yourself, with your own hands and talents.

Presenting Your Jewelry Gift

Once again, your attention to detail will make a big difference in how your jewelry gift is received. You want to present it in a way that showcases its beauty and makes it special.

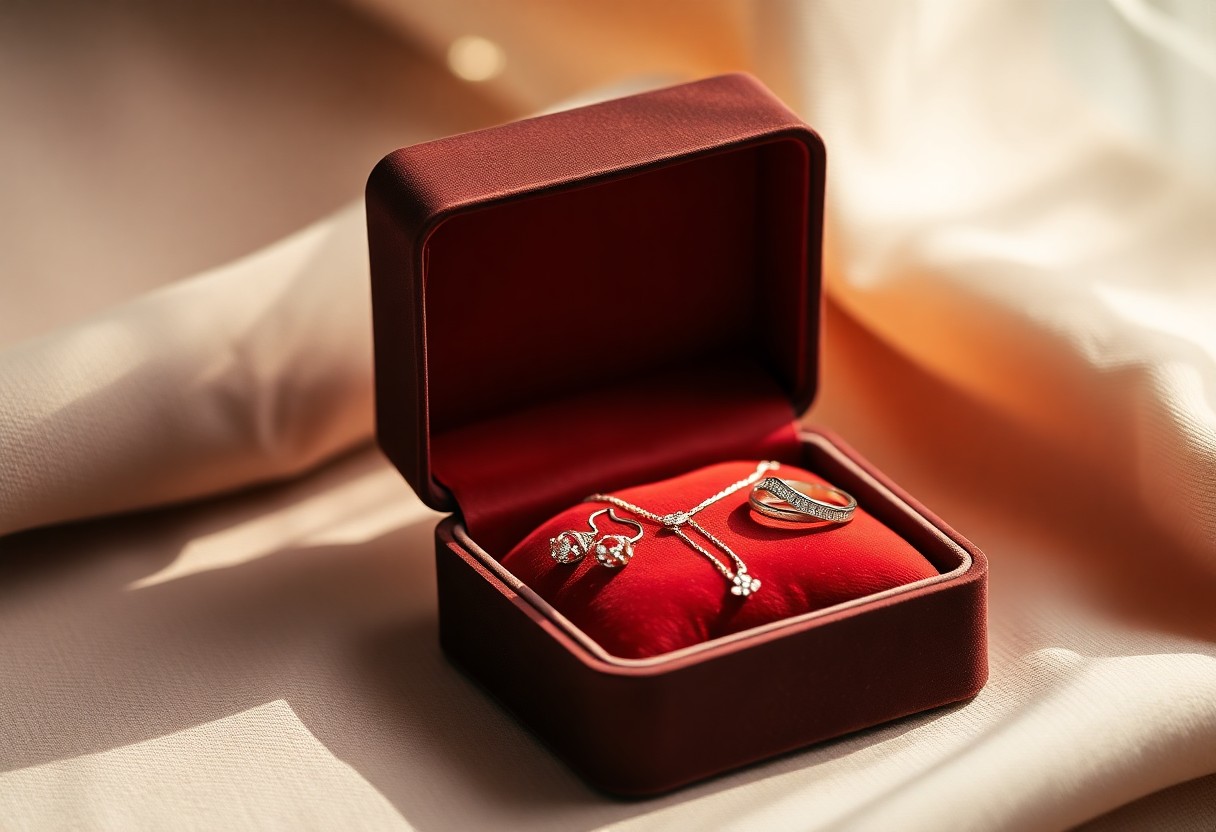
Beautiful Packaging and Display

Any detail you add to the packaging will elevate the gift-giving experience. You can use a decorative box, a velvet pouch, or a satin bag to add a touch of elegance to your gift.

Adding a Thoughtful Touch

Anything that shows you put thought into the gift will be appreciated. You can include a personalized note or a small memento that makes the gift more meaningful to the recipient.

Beautiful gestures like these will make your gift truly unforgettable. You can also consider adding a special message or the story behind the jewelry piece, making it an even more personal and unique gift. This will show that you have put effort and thought into selecting the perfect gift for the recipient.

To wrap up

Considering all points, you now have a solid foundation to create unique jewelry gifts. As you finalize your project, you can find more inspiration at Gift ideas for a jewelry maker? : r/jewelrymaking, to make your gifts even more special and personalized to your loved ones, enhancing your skills and making your jewelry gifts truly unforgettable, reflecting your thought and effort in your creations.

FAQ

Q: What materials do I need to get started with making jewelry gifts?

A: To begin making jewelry gifts, you will need a variety of materials, including beads, wires, strings, clasps, and findings. The specific materials you need will depend on the type of jewelry you want to make. For example, if you want to make a beaded necklace, you will need beads, a beading thread or wire, and a clasp. You can find these materials at craft stores or online. Additionally, you may also need some basic tools such as wire cutters, pliers, and a workstation to help you create your jewelry gifts.

Q: What are some popular types of jewelry gifts that I can make?

A: There are many types of jewelry gifts that you can make, depending on your skills and interests. Some popular options include beaded necklaces and earrings, wire-wrapped pendants, and handmade charms. You can also make custom jewelry gifts, such as personalized monogrammed necklaces or photo pendants. If you are a beginner, you may want to start with simpler projects, such as making a beaded bracelet or a pair of earrings, and then move on to more complex projects as you gain experience.

Q: How do I choose the right beads and materials for my jewelry gifts?

A: Choosing the right beads and materials for your jewelry gifts is an important part of the design process. Consider the occasion, the recipient’s style and preferences, and the overall aesthetic you want to achieve. For example, if you are making a gift for a formal occasion, you may want to choose more elegant and sophisticated beads, such as pearls or crystals. If you are making a gift for a casual occasion, you may want to choose more fun and playful beads, such as brightly colored glass or ceramic beads. You can also experiment with different textures, colors, and shapes to create a unique and personalized look.

Q: How do I properly care for and store my handmade jewelry gifts?

A: To keep your handmade jewelry gifts looking their best, it’s important to properly care for and store them. Avoid exposing your jewelry to harsh chemicals, such as perfume or cleaning products, and store them in a cool, dry place. You can also use a soft cloth to clean your jewelry and prevent tarnishing. For storing, use a jewelry box or pouch to protect your jewelry from dust and damage. You can also consider using acid-free tissue paper or a jewelry cleaning cloth to help maintain the quality of your jewelry gifts.

Q: Can I sell my handmade jewelry gifts, and what are the legal requirements?

A: Yes, you can sell your handmade jewelry gifts, but you will need to comply with local laws and regulations. Check with your local government to see if you need any licenses or permits to sell handmade goods. You will also need to comply with consumer protection laws, such as providing accurate descriptions and disclosing any materials that may cause allergic reactions. Additionally, you may want to consider getting liability insurance to protect yourself in case of any accidents or injuries. You can sell your jewelry gifts online, at local craft fairs, or in local stores, and you can also consider partnering with other artisans or businesses to expand your reach.

DIY Christmas Ornaments You’ll Love

Create a personalized touch to your holiday decor with your own handmade ornaments. You can add a unique flair to your Christmas tree with your favorite materials and designs. For inspiration, you can check out 70 DIY Christmas Ornaments for a More Personal Touch to Your Tree and get started on making your own special ornaments that reflect your style and personality.

Key Takeaways:

To make your Christmas celebration even more special, consider the following points about DIY Christmas ornaments:

  • Creating Personalized ornaments allows you to add a Unique touch to your Christmas tree, reflecting your personality or commemorating special events and people in your life.
  • Making Handmade ornaments can be a fun and Creative activity for the whole family, teaching children about the value of handmade items and the spirit of giving.
  • Using Natural materials like pinecones, twigs, and dried flowers to make ornaments can add a Rustic and Eco-Friendly element to your Christmas decorations, making your home feel cozy and connected to nature.

Materials and Supplies

A wonderful selection of materials and supplies will help you create unique and beautiful DIY Christmas ornaments. You’ll need basic crafting tools, decorative items, and embellishments to bring your ideas to life.

Essential Crafting Tools

Materials like glue, scissors, and paint will be the foundation of your ornament-making process. You’ll use these tools to shape, cut, and assemble your ornaments, so make sure you have them on hand.

Decorative Items and Embellishments

Above all, the right decorative items and embellishments will add a personal touch to your ornaments. You’ll find a variety of options, such as ribbons, beads, and sequins, to make your ornaments truly special.

Items like glitter, stickers, and stamps will also help you add texture, color, and pattern to your ornaments. You can choose from a wide range of decorative items and embellishments to match your personal style and theme, making your DIY Christmas ornaments truly one-of-a-kind.

Simple Ornament Ideas

Clearly, the simplest ornaments are often the most charming, and you can create your own with just a few basic materials. You’ll be amazed at how easy it is to make beautiful ornaments that will add a personal touch to your Christmas tree.

Paper Snowflakes and Flowers

Beneath the surface of complex designs, you’ll find that paper snowflakes and flowers are a great place to start, and you can customize them to fit your style. You can make intricate designs or keep it simple, whichever you prefer, and hang them on your tree or use them as gift toppers.

Salt Dough Creations

Above all, salt dough ornaments are a fun and easy project that you can make with your family, and you can customize them with paint, glitter, and other embellishments. You can shape them into various forms, from balls to animals, and make them as simple or complex as you like.

Consequently, as you work with salt dough, you’ll find that it’s a very forgiving material, and you can easily fix any mistakes. You can also add a personal touch to your ornaments by using handprints, footprints, or fingerprints to create unique designs, making them a lovely keepsake for years to come.

Advanced Ornament Projects

After mastering the basics, you can move on to more complex designs. Consider the following:

  1. Glass painting
  2. Wooden ornaments
Material Technique
Glass Painting
Wood Carving

Glass Painted Ornaments

Along with your creativity, you can create beautiful glass painted ornaments. You can use specialized paint and brushes to add intricate designs and patterns to your ornaments.

Wooden and Recycled Material Ornaments

Any material can be turned into a unique ornament. You can use wooden slices, twigs, or recycled materials like old CDs or jar lids to create one-of-a-kind decorations.

Ornaments made from wooden and recycled materials add a touch of warmth and personality to your Christmas tree. You can customize them to fit your style and theme, and they make great gifts for friends and family. As you work on your project, you’ll find that the process of creating something with your own hands is just as enjoyable as the end result.

Tips and Tricks

All your DIY Christmas ornaments will turn out beautifully with a few simple tips. Consider the following:

  • use high-quality materials
  • follow the instructions carefully

. Recognizing your limitations and having fun is key to creating unique ornaments.

Preserving and Storing Ornaments

Although your ornaments are delicate, you can preserve them by storing them in a cool, dry place. This will help maintain their beauty and ensure they last for years to come.

Safety Precautions and Advice

Obviously, you want your DIY experience to be safe and enjoyable. You should handle fragile materials with care and avoid using small parts that can be a choking hazard.

But as you work on your DIY Christmas ornaments, you’ll find that safety precautions become second nature. You’ll learn to handle hot glue guns, scissors, and other tools with ease, and your creations will be all the more beautiful for it. With a little practice and patience, you’ll be making gorgeous, one-of-a-kind ornaments that will adorn your tree for years to come.

Decorating Ideas

To create a beautiful and unique Christmas display, you’ll want to think about how you can showcase your DIY ornaments in a way that adds to your holiday decor. You can make your home feel cozy and inviting by hanging your ornaments on the tree, placing them on a mantel, or setting them on a side table.

Themed Christmas Trees

Above all, themed Christmas trees are a great way to add some personality to your holiday decor. You can choose a theme, such as a winter wonderland or a coastal Christmas, and decorate your tree with ornaments that fit your theme, creating a cohesive and stylish look that reflects your personal style.

Ornament Display and Storage

Along with your beautifully decorated tree, you’ll also want to think about how to display and store your ornaments. You can use decorative bowls, vases, or containers to showcase your favorite ornaments, and store the rest in a designated box or bin to keep them safe and organized.

With your ornaments on display, you can enjoy them throughout the holiday season and then easily store them away when the season is over, making it easy to reuse them year after year, and you can also add new ones to your collection, creating a special and meaningful tradition for your family.

Inspiration and Variations

Your DIY Christmas ornaments can be tailored to fit your personal style and preferences, allowing you to create unique and meaningful decorations for your home.

Traditional and Cultural Influences

Across the globe, various cultures have their own special ways of decorating for Christmas, and you can draw inspiration from these traditions to create one-of-a-kind ornaments that reflect your heritage or interests.

Modern and Unique Twists

The options for modern and unique twists on DIY ornaments are endless, and you can experiment with different materials, colors, and designs to create something truly special and personalized to your taste.

Plus, you can take your DIY ornaments to the next level by incorporating personal elements, such as photos, names, or special dates, making them even more meaningful and thoughtful gifts or keepsakes for yourself or loved ones.

Final Words

With this in mind, you now have the skills to create your own unique DIY Christmas ornaments that reflect your personal style. You can proudly display your handmade decorations, knowing you put thought and love into each one. Your tree will shine with your special touches, making this holiday season even more joyful and meaningful to you and your loved ones.

FAQ

Q: What materials do I need to make DIY Christmas ornaments?

A: To make DIY Christmas ornaments, you will need various materials such as glass balls, felt, glue, scissors, paint, glitter, beads, and string or twine. You can also use recycled materials like old CDs, jar lids, and cardboard tubes to create unique and eco-friendly ornaments. Additionally, you can customize your ornaments with personalized items like photos, ribbons, and decorative picks.

Q: How do I get started with making DIY Christmas ornaments?

A: To get started with making DIY Christmas ornaments, begin by browsing online for inspiration and ideas. You can find numerous tutorials and patterns on social media, blogs, and crafting websites. Choose a design that suits your skill level and interests, and gather the necessary materials. Start with a simple project, and as you gain confidence and experience, you can move on to more complex designs. Don’t be afraid to experiment and try new things – it’s all part of the creative process.

Q: Can I make DIY Christmas ornaments with my kids?

A: Absolutely! Making DIY Christmas ornaments is a great activity to do with your kids. It’s a fun and interactive way to spend quality time together, and it can help develop their creativity and fine motor skills. Choose a project that’s suitable for their age and skill level, and provide guidance and supervision as needed. You can also make it a fun and collaborative process by letting them help with the design and decoration of the ornaments.

Q: How do I store and preserve my DIY Christmas ornaments?

A: To store and preserve your DIY Christmas ornaments, make sure to handle them with care and avoid exposing them to extreme temperatures or humidity. You can store them in a cool, dry place, such as a cardboard box or a plastic container, and wrap each ornament individually in tissue paper or bubble wrap to prevent breakage. You can also use acid-free paper or cloth to store delicate or sensitive ornaments. Additionally, consider making a few extra ornaments each year to replace any that may get damaged or lost.

Q: Can I give DIY Christmas ornaments as gifts?

A: Yes, DIY Christmas ornaments make wonderful and thoughtful gifts for friends and family. They are a unique and personalized way to show you care, and they can be customized to fit the recipient’s interests and preferences. You can package them in decorative boxes or bags, and add a personalized note or card to make it an extra-special gift. DIY Christmas ornaments are also a great way to share your creativity and talents with others, and they can become a cherished keepsake for years to come.

How to Make Halloween Decorations

As you investigate into the spirit of Halloween, your creativity awakens, and your home beckons to be transformed into a haunted haven. You’ll weave a spell of spooky delight, and with every step, your abode will become a realm of ghostly charm. In this guide, you’ll uncover the secrets to crafting your own Halloween decorations, summoning the essence of the dark and mysterious night, with a touch of playful wickedness that will leave your guests shivering with delight. Get ready to unleash your inner ghoul and decorate with glee!

Key Takeaways:

To create effective and engaging Halloween decorations, consider the following points:

  • Use lighting to set the mood and create a spooky atmosphere, with options including string lights, lanterns, and projection lights to highlight your decorations.
  • Incorporate themes and colors that reflect the Halloween spirit, such as orange, black, and purple, to create a cohesive and immersive experience.
  • Get creative with DIY decorations, like making your own ghosts, spiders, and other decorations using materials like paper, fabric, and recycled items to add a personal touch to your Halloween decor.

Spinning a Web of Decorations

Before you look into the world of Halloween decorations, consider the overall atmosphere you want to create. You’ll want to craft a sense of eeriness and mystery that will leave your guests spellbound.

Crafting Spider Webs and Ghostly Figures

Along with the cobwebs and spiders, you’ll want to create ghostly figures that seem to float in mid-air, adding an air of ethereal mystery to your decor. You can use white sheets, fabric, or even paper to craft these ghostly apparitions.

Creating a Haunted Mansion Atmosphere

Figures of bats, rats, and other creatures will add to the haunted mansion atmosphere you’re trying to create. You can place them in dark corners, on walls, or even hanging from the ceiling to create an eerie sense of movement.

Spinning your web of decorations, you’ll want to pay attention to lighting, using dim, flickering lights to create an eerie glow. As you work, you’ll start to see your haunted mansion come to life, with your decorations working together to create a sense of foreboding and unease, drawing your guests into the heart of your spooky spectacle, and you’ll be the master of your own haunted domain.

Carving Pumpkins and Other Fruits

It is the season of spooky delights, and nothing sets the tone like a well-carved pumpkin or fruit, casting an eerie glow in the darkness, as you prepare to unleash your creativity and bring your Halloween decorations to life.

Designing Spooky Faces and Patterns

Cutting into the flesh of a pumpkin, you’ll uncover the artistic possibilities that lie within, as you sculpt spooky faces and patterns that will make your Halloween decorations a sight to behold, with you as the master of the macabre.

Adding a Glow to Your Creations

Any pumpkin or fruit can be transformed into a haunting lantern, as you add a glow to your creations, breathing life into the darkness, and you’ll find that the right lighting can make all the difference in setting the mood for a howling good time.

Your glowing creations will be the crowning jewel of your Halloween decorations, casting an ethereal spell over all who lay eyes on them, and you’ll delight in the process of experimenting with different lighting effects, from candles to LED lights, to achieve the perfect ambiance, as the shadows dance upon the walls, inviting all to partake in the spooky festivities.

Conjuring a Graveyard of Delights

Despite the spooky atmosphere, you’ll find that creating a Halloween graveyard is a delightfully fun task. You’ll get to unleash your creativity and bring your darkest imagination to life. With a few simple steps, you’ll be conjuring up a graveyard that will leave your friends and family shivering with delight.

Making Tombstones and Ghostly Silhouettes

Ordinarily, you might think that making tombstones and ghostly silhouettes would be a daunting task, but fear not, for it’s quite easy. You can use cardboard, foam, or even paper to create your tombstones, and add some spooky sayings or names to give them a personal touch.

Creating a Spooky Ambiance with Lighting

Beside the tombstones, lighting will play a huge role in setting the mood for your graveyard. You can use lanterns, candles, or string lights to create an eerie glow that will make your graveyard come alive.

Lighting is where you can get really creative and add some personality to your graveyard. You can use colored lights to create an otherworldly atmosphere, or projection lights to cast spooky shadows on the walls. As you experiment with different lighting effects, you’ll find that your graveyard is transformed into a truly haunting experience, and you’ll be thrilled to see your friends and family react to your handiwork.

Brews and Potions: DIY Decorations

Once again, you’ll find yourself conjuring up a spellbinding atmosphere with these DIY decorations, perfect for a haunting Halloween display. You’ll be experimenting with an array of eerie accessories, from glowing potions to bubbling brews, to create an enchanting setting that will leave your guests under your spell.

Mixing and Matching Colors and Textures

With an assortment of dark hues and mysterious textures at your disposal, you’ll be weaving a web of intrigue, as you mix and match to create a unique and haunting aesthetic that will set the tone for a spooktacular celebration.

Adding a Touch of Magic to Your Decor

Beside the cauldrons and cobwebs, you’ll be adding a pinch of magic to your decor, as you incorporate twinkling lights, mystical symbols, and other whimsical elements that will transport your guests to a world of wonder and awe.

Matching your decorations to the mood and theme of your Halloween celebration, you’ll be able to create an immersive experience that will leave a lasting impression on your guests, as they wander through the shadows and discover the secrets and surprises that you’ve concocted for them, all while maintaining an air ofplayful mystery that will keep them enchanted and delighted.

The Monsters Come Alive: Animatronics and Props

For a spellbinding Halloween display, you’ll want to bring your decorations to life with animatronics and props that will mesmerize your guests and leave them shivering with delight.

Creating Movement and Motion

Among the most enchanting effects you can create are animated creatures that seem to stir and twitch, as if possessed by mischievous spirits, drawing your eye with an otherworldly allure.

Adding Sound Effects for a Frightful Experience

Motion picture-like sound effects can elevate your Halloween display, making it a truly immersive experience, as you weave a sonic tapestry of creaks, groans, and wails that will send shivers down your spine.

It is in sound that you can truly unleash your creativity, crafting an aural landscape that complements your visual displays, with you carefully selecting each sound effect to maximize the frightful experience, ensuring that your guests are fully enthralled by the haunting atmosphere you’ve created, with your decorations coming alive in a symphony of sound and motion.

Weaving a Spell of Halloween Magic

Unlike any other time of the year, Halloween allows you to unleash your creativity and bring your darkest fantasies to life. As you examine into the world of Halloween decorations, you’ll find yourself entwined in a web of spooky delights and eerie charms.

Bringing All the Elements Together

With witching hour approaching, you’ll want to combine your decorations to create a haunting atmosphere that will leave your guests spellbound. You’ll need to balance your lighting, colors, and textures to craft an immersive experience that will transport your visitors to a realm of horror and delight.

Adding a Personal Touch to Your Decorations

Halloween enthusiasts like yourself will love adding unique flourishes to their decorations, making them truly one-of-a-kind. You can incorporate personal items, such as family heirlooms or mementos, to give your decorations a touch of darkness and whimsy.

The art of adding a personal touch to your decorations is where the true magic happens, as you get to infuse your creations with your own brand of darkness and humor. You can experiment with different themes, colors, and textures to reflect your personality, making your Halloween decorations a true reflection of your twisted and playful side, and ensuring that your guests will be talking about your haunted abode for years to come.

Final Words

Conclusively, as you weave your dark magic, your Halloween decorations will cast a spell of delight on all who dare to enter. With each creaking door and flickering candle, you’ll conjure an atmosphere of spooky whimsy, making your lair a haunted haven. Now, go forth and unleash your creativity, dear decorator, and may your Halloween be a howling success, filled with thrills, chills, and mesmerizing decor that’s all your own.

FAQ

Q: What are some popular materials to use for making Halloween decorations?

A: Some popular materials to use for making Halloween decorations include black and orange tissue paper, glow-in-the-dark paint, foam board, cardboard, fake spider webs, and plastic spiders. You can also repurpose old items like cardboard boxes, jars, and bottles to create unique and spooky decorations. Additionally, you can use natural materials like pumpkins, leaves, and twigs to create a more rustic and autumnal look.

Q: How can I make my own DIY Halloween decorations on a budget?

A: Making your own DIY Halloween decorations on a budget can be easy and fun. Start by gathering materials you already have at home, like cardboard, paper, and glue. You can also visit your local thrift store or dollar store to find affordable materials. Consider making decorations like paper bag lanterns, popsicle stick skeletons, or yarn cobwebs. You can also get creative with paint, markers, and other craft supplies to add a spooky touch to your decorations.

Q: What are some tips for creating a spooky ambiance with lighting for Halloween decorations?

A: To create a spooky ambiance with lighting for Halloween decorations, consider using dim red or purple lights to create a eerie glow. You can also use string lights or fairy lights to create a warm and cozy atmosphere. Additionally, you can use flashlights or lanterns to create spooky shadows on the walls. Another tip is to use black lights to make your decorations glow in the dark, adding an extra layer of spookiness to your decor.

Q: How can I make my Halloween decorations more durable and long-lasting?

A: To make your Halloween decorations more durable and long-lasting, consider using durable materials like plastic or foam board instead of paper or cardboard. You can also use a waterproof sealant to protect your decorations from the elements. Additionally, you can use a hot glue gun to attach decorations to a sturdy base or to each other, making them less likely to fall apart. Finally, consider storing your decorations in a dry and cool place to prevent damage or deterioration.

Q: What are some creative ideas for outdoor Halloween decorations?

A: Some creative ideas for outdoor Halloween decorations include creating a graveyard with cardboard tombstones and fake skeletons, setting up a spooky porch with cobwebs and spiders, or creating a monster mash with giant inflatable decorations. You can also use projection lights to project spooky images onto your house or garage, or use a fog machine to create a spooky mist. Additionally, you can set up a haunted house or haunted trail in your front yard, complete with spooky sounds and special effects.

Top DIY Valentine’s Day Gifts

As Valentine’s Day approaches, you’re likely thinking of ways to make it special for your loved one. You want to give a gift that’s thoughtful and personal, and what’s more personal than something you’ve made yourself? With your own hands, you can create a unique and meaningful present that shows you care. You can make your gift-giving experience more intimate and significant by putting your personal touch on it, making your partner feel extra special on this day of love.

Key Takeaways:

To make this Valentine’s Day special, consider the following ideas for unique and thoughtful gifts:

  • Creating a personalized photo album or frame with pictures of special moments can be a romantic gesture, showing your loved one how much you care about your time together.
  • Making a handmade coupon book with customized vouchers for things like massages, home-cooked meals, or movie nights can add a playful touch to your gift-giving.
  • Designing a customized piece of jewelry or a heartfelt letter can be a meaningful way to express your feelings and show your appreciation for your partner.

Handmade Gift Ideas

To create a thoughtful and unique gift, consider making something with your own hands. You can choose from a variety of ideas, such as jewelry, photo albums, and more, to show your love and appreciation.

Personalized Jewelry

Around this time of year, you can find many tutorials and guides to help you make personalized jewelry, allowing you to add a special touch to your gift. You can engrave names, dates, or special messages to make it extra special.

Customized Photo Albums

Handcrafting a customized photo album is a great way to showcase your favorite memories with your loved one. You can fill it with pictures of special moments, making it a one-of-a-kind gift that you can treasure together.

Understanding the process of creating a customized photo album, you will need to gather your favorite photos, choose a theme or design, and assemble the album with care. You can add captions or quotes to make it even more personal, and you will end up with a beautiful and meaningful gift that you can give to your loved one on Valentine’s Day.

DIY Home Decor

There’s no better way to celebrate Valentine’s Day than by transforming your home into a romantic oasis. You can create a warm and inviting atmosphere with your own DIY decorations, making the day even more special and personalized.

Heartfelt Candle Centerpieces

Between soft lighting and sweet scents, you can create a cozy ambiance with candle centerpieces that you design yourself, using your favorite colors and flowers to make them truly unique and meaningful to your loved one.

Romantic Flower Arrangements

An beautiful bouquet of flowers is always a great idea, and when you make it yourself, it becomes an even more thoughtful gift, allowing you to choose your partner’s favorite blooms and arrange them in a way that speaks to your love story.

For instance, you can select a mix of red roses, pink carnations, and white lilies to create a stunning arrangement that symbolizes your love, passion, and commitment, and add some greenery like eucalyptus or ferns to give it a fresh and romantic touch, making it a one-of-a-kind gift that you can enjoy together on Valentine’s Day.

Creative Experiences

Not only can DIY gifts be physical objects, but they can also be experiences that you create for your loved one. You can plan a special day or evening that your partner will never forget, making it a unique and thoughtful gift.

Couples’ Spa Day at Home

By transforming your home into a spa, you can create a relaxing and intimate atmosphere for your partner. You can set up a massage table, light some candles, and prepare a soothing playlist to make it a perfect day of pampering.

Personalized Scavenger Hunt

By planning a scavenger hunt with clues and challenges tailored to your partner’s interests, you can create an exciting and adventurous experience. You can hide notes, photos, and small gifts around the house or outside, leading your partner on a fun and romantic journey.

Even more exciting is the fact that you can customize the scavenger hunt to fit your partner’s personality and your relationship. You can include places and objects that hold special meaning to your partner, making the experience even more personal and sentimental. You can also add a final surprise or gift at the end of the hunt, making it a memorable and touching Valentine’s Day gift.

Tech-Savvy Gifts

Your tech-loving partner will appreciate a thoughtful and personalized gift, and there are many DIY options to choose from, such as customized phone cases and digital photo frames, that show you put extra effort into selecting a unique present.

Customized Phone Cases

Following a few simple steps, you can create a one-of-a-kind phone case that reflects your partner’s style and interests, making it a practical and meaningful gift.

Digital Photo Frames

Alternatively, you can fill a digital photo frame with pictures of special moments you’ve shared together, creating a heartfelt and sentimental gift that you can treasure for years to come.

To make it even more special, you can add captions or quotes to the photos, making the digital photo frame a unique and personalized gift that speaks to your relationship and shows you care about your partner’s feelings and memories.

Edible Delights

After considering various gift options, you’ll find that edible delights are a wonderful way to show your love and appreciation on Valentine’s Day. You can create a variety of sweet treats that your partner will adore.

Homemade Chocolates

Eating delicious homemade chocolates is a great way to celebrate Valentine’s Day, and you can make your own using simple ingredients like cocoa powder, sugar, and cream. You can customize them with your partner’s favorite flavors and toppings.

Personalized Cookies

Among the many edible gift options, personalized cookies stand out as a thoughtful and delicious choice. You can bake and decorate cookies with your partner’s name, initials, or a special message to make them extra special.

A thoughtful approach to personalized cookies is to consider your partner’s favorite flavors and decorating styles when creating these sweet treats. You can use various cookie cutters, icing colors, and sprinkles to make them visually appealing and meaningful. As you package your cookies in decorative tins or jars, you’ll see the excitement build for a lovely Valentine’s Day gift.

Budget-Friendly Options

All you need is a little creativity to create a meaningful and budget-friendly Valentine’s Day gift. You can make your own gifts, such as photo albums, coupons, or handmade cards, to show your love and appreciation without breaking the bank.

Repurposed Gift Ideas

Against the idea of buying expensive gifts, you can use items you already have at home to create a unique and thoughtful present. You can turn old jars into candle holders or use your favorite photos to create a personalized collage.

Free Printable Gift Tags

Across the internet, you can find numerous free printable gift tags that you can use to add a personal touch to your DIY gifts. You can customize them to fit your gift’s theme and style, making it an easy and affordable way to make your gift even more special.

In fact, using free printable gift tags can be a great way to add a professional touch to your homemade gifts. You can choose from a variety of designs and templates, and print them out on cardstock or sticker paper to give your gift a polished finish. You can also customize the tags with your own messages or names to make them even more personalized and meaningful to your loved one.

Final Words

With this in mind, you now have a wide range of creative and thoughtful DIY Valentine’s Day gift ideas to impress your loved one. You can choose the one that best fits your skills and your partner’s interests, and put your heart into making it special. By doing so, you will surely make your Valentine’s Day celebration even more meaningful and memorable, showing your love and care through your unique and personalized gift.

FAQ

Q: What are some popular DIY Valentine’s Day gift ideas for my partner?

A: There are many creative and thoughtful DIY Valentine’s Day gift ideas that you can make for your partner. Some popular ones include handmade coupons, personalized photo albums, customized jewelry, homemade chocolates, and romantic candlelit dinner setups. You can also consider making a customized playlist of your partner’s favorite songs, a handmade card, or a special memory box filled with notes and mementos from your time together.

Q: How can I make a DIY Valentine’s Day gift on a budget?

A: Making a DIY Valentine’s Day gift on a budget is easier than you think. Start by using materials you already have at home, such as old photos, scrapbook paper, and leftover craft supplies. You can also get creative with cheap materials like cardboard, glue, and paint. Consider making something simple yet thoughtful, like a handmade coupon book or a batch of homemade cookies. With a little bit of creativity, you can create a beautiful and meaningful gift without breaking the bank.

Q: What are some DIY Valentine’s Day gift ideas for him?

A: If you’re looking for DIY Valentine’s Day gift ideas for your boyfriend or husband, consider making something that shows you pay attention to his interests and hobbies. You could make a customized phone case or wallet, a personalized beer growler, or a handmade gaming controller skin. If he loves food, consider making a batch of his favorite snacks or cooking his favorite meal. You could also make a thoughtful gift like a photo album or a customized map with the places you’ve been together.

Q: How can I make a DIY Valentine’s Day gift more personal and meaningful?

A: To make a DIY Valentine’s Day gift more personal and meaningful, think about what makes your partner special and what they love. Incorporate inside jokes, special memories, and personal anecdotes into your gift. Use photos and mementos from your time together to make the gift more sentimental. You could also include a heartfelt letter or a romantic message to express your feelings. The most important thing is to show your partner that you care and are willing to put thought and effort into the gift.

Q: Can I make a DIY Valentine’s Day gift with my kids?

A: Making a DIY Valentine’s Day gift with your kids can be a fun and thoughtful way to show your partner you care. Consider making a collaborative art project, like a handprint painting or a family photo collage. You could also make a batch of homemade cookies or candies together, or create a special handmade card or coupon book. Not only will this make the gift more personal and meaningful, but it will also create special memories for you and your kids to cherish. Just be sure to involve your kids in the planning and creation process, and have fun with it!

DIY Summer Decor Ideas

Welcome to the warmest season of the year! As you prepare to refresh your home for summer, you’re likely looking for ways to add a touch of sunshine to your decor. You can easily create a bright and inviting atmosphere with a few simple DIY projects. Your home will be transformed into a summer oasis with these easy and creative ideas, and you’ll be enjoying the warmth and beauty of the season in no time, right in the comfort of your own space.

Key Takeaways:

To enhance your home’s aesthetic during the warmer months, consider the following DIY Summer Decor Ideas:

  • Using Natural Elements such as seashells, driftwood, and potted plants can add a touch of warmth and coziness to your summer decor, creating an inviting atmosphere for outdoor gatherings and relaxation.
  • Implementing Colorful Accents like vibrant throw pillows, blankets, and wall art can instantly brighten up your space, making it feel more Airy and Refreshing for the summer season.
  • Creating a Summer Oasis with String Lights, lanterns, and candles can transform your outdoor space into a magical and Cozy retreat, perfect for summer evenings and stargazing.

Outdoor Decor

For a beautiful outdoor space, you can find inspiration from various sources, such as 40 DIY Summer Decorating Ideas to Brighten Up Your Home and create a unique ambiance that reflects your style. You can add decorative items, lighting, and furniture to enhance your outdoor area.

Patio Makeover

Around your patio, you can add a few statement pieces, like a statement rug, outdoor furniture, and plants, to give it a fresh new look. This will help you create a cozy and inviting atmosphere where you can relax and enjoy quality time with family and friends.

Garden Decor

Decor your garden with vibrant flowers, herbs, and shrubs to add color and texture. You can also incorporate decorative elements like garden statues, bird baths, and sundials to create a beautiful and serene atmosphere.

Another aspect of garden decor is adding lighting, which can highlight your garden’s best features and create a warm ambiance in the evening. You can use string lights, lanterns, or solar-powered lights to illuminate your garden and make it a perfect spot for outdoor entertaining.

Indoor Decor

Assuming you want to bring the warmth of summer into your home, start by incorporating light and airy elements into your indoor decor. You can achieve this by using sheer curtains, pale woods, and natural textiles to create a cozy atmosphere.

Summer Color Scheme

Around this time of year, you likely think about vibrant hues that evoke the feeling of sunshine and sea breeze. About choosing a summer color scheme, consider palettes that feature soft corals, minty greens, and sunny yellows to add a touch of warmth to your space.

DIY Centerpieces

Central to your table setting, you will want to create beautiful centerpieces that reflect the spirit of summer. Centering your decor around seasonal flowers, fruits, and greenery can add a pop of color and freshness to your indoor space.

Decor that is thoughtful and well-planned can make all the difference in creating a welcoming atmosphere. As you design your DIY centerpieces, think about combining elements like candles, seashells, and pebbles to bring the outdoors in and add texture and depth to your tablescape, making your home feel like a summer oasis that you will enjoy all season long.

Repurposed Decor

Once again, you can breathe new life into old items by repurposing them as decorative pieces. This will not only add a personal touch to your space but also help reduce waste.

Mason Jar Decor

For a charming and rustic touch, fill mason jars with flowers, pebbles, or candles to create a beautiful centerpiece for your dining table or shelf.

Old Furniture Makeover

Decorate your old furniture with a fresh coat of paint or varnish to give it a new look. This is a great way to update your space without breaking the bank.

Plus, you can get creative with the makeover process by adding new hardware, reupholstering, or decoupage to give your old furniture a unique and personalized touch. You can turn an old dresser into a kitchen island, or an old door into a coffee table, the possibilities are endless, and you can have fun experimenting with different designs and styles to fit your summer decor theme.

Seasonal Accents

Despite the simplicity of summer decor, you can add depth with thoughtful accents. You’ll find that a few well-placed items can make your space feel cozy and inviting.

Summer Florals

Prior to selecting your flowers, consider the color palette and style you want to achieve. You can choose bright and bold flowers or soft pastels to match your summer vibe.

Coastal Themes

Beside the ocean-inspired colors, you can incorporate natural textures like woven fibers and driftwood to bring the coastal feel into your home. You can use these elements in your decor to create a cohesive look.

And as you explore the coastal theme further, you’ll discover that it’s all about embracing the carefree spirit of the sea. You can add shells, pebbles, or coral to your decor to give your space a beachy feel, and don’t forget to incorporate airy fabrics like linen and cotton to keep your home feeling light and breezy.

Lighting Ideas

After a long day, you want your outdoor space to shine, and the right lighting can make all the difference. You can create a warm and inviting ambiance with a few simple DIY lighting ideas that will make your summer decor truly special.

String Lights

Beneath the stars, you can hang string lights to add a touch of magic to your outdoor space. You can wrap them around trees, gazebos, or even your porch to create a cozy atmosphere that’s perfect for summer evenings.

Candle Decor

Behind the soft glow of candles, your summer decor will come alive. You can place candles in mercury glass holders or apothecary jars to add a touch of elegance to your outdoor space, creating a warm and inviting ambiance that’s perfect for relaxing summer nights.

Further, to enhance your candle decor, you can experiment with different scents and colors to match your summer theme. You can choose citrusy scents like lemon or orange to create a refreshing atmosphere, or opt for softer scents like vanilla or lavender to promote relaxation. By placing candles strategically around your outdoor space, you can create a warm and inviting ambiance that will make your summer nights truly unforgettable.

Budget-Friendly Tips

Your summer decor doesn’t have to break the bank. Consider the following:

  • Shop during sales
  • Use items you already have

Perceiving the value in budget-friendly options will help you create a beautiful summer space without overspending.

Thrift Store Finds

Almost anything can be transformed into a unique summer decor piece. You can find hidden gems at thrift stores and give them a fresh new look with a little paint or decoration.

DIY Decor on a Budget

Decorating your space on a budget can be easy and fun. You can create beautiful summer decor pieces using simple materials like seashells, twine, and fabric.

Store your leftover materials from previous projects and use them to create new decor pieces. You can also get creative with items you might otherwise throw away, like old mason jars or cardboard tubes, and turn them into one-of-a-kind summer decorations that reflect your personal style.

Final Words

On the whole, with these DIY summer decor ideas, you’ll be able to create a warm and inviting atmosphere in your home. You can now add a personal touch to your space, making it perfect for relaxing and entertaining. As you put your new decor skills to work, your home will feel fresh and vibrant, reflecting your unique style and flair, making your summer even more enjoyable and memorable.

FAQ

Q: What are some easy and affordable DIY summer decor ideas to refresh my home?

A: There are many easy and affordable DIY summer decor ideas to refresh your home. Some popular ideas include creating a summer-themed wreath for your front door, making a floral garland to hang in your living room, or repurposing old mason jars into vases for fresh flowers. You can also update your outdoor space by adding colorful throw pillows and blankets to your patio furniture, or by creating a DIY outdoor planter using wooden crates or terracotta pots.

Q: How can I incorporate natural elements into my DIY summer decor?

A: Incorporating natural elements into your DIY summer decor can add a touch of warmth and coziness to your space. Some ideas include using fresh flowers, branches, or greenery in your arrangements, or collecting seashells, pebbles, or driftwood to create a beautiful coastal-inspired display. You can also bring the outdoors in by displaying potted plants or a vase with fresh herbs, such as basil or rosemary, on your kitchen windowsill or dining table.

Q: What are some creative ways to use string lights in my DIY summer decor?

A: String lights can add a magical touch to your DIY summer decor, and there are many creative ways to use them. You can hang them from trees or gazebos in your backyard, wrap them around your porch or patio, or use them to create a canopy for your outdoor dining area. You can also use string lights to add ambiance to your indoor spaces, such as your living room or bedroom, by draping them over a mantel or across a wall. Additionally, you can customize your string lights by adding flowers, greenery, or other decorative elements to create a unique and personalized look.

Q: How can I make my DIY summer decor more eco-friendly and sustainable?

A: Making your DIY summer decor more eco-friendly and sustainable is easier than you think. Some ideas include using recycled or repurposed materials, such as old jars, bottles, or cardboard tubes, to create your decorations. You can also choose materials that are biodegradable or sustainable, such as bamboo, twine, or natural fibers. Additionally, consider using energy-efficient LED string lights or solar-powered decorations to reduce your carbon footprint. Finally, get creative with items you might otherwise throw away, such as turning old maps or book pages into decorative decoupage or using fabric scraps to create a unique quilt or throw pillow.

Q: What are some DIY summer decor ideas that can be made with kids?

A: Involving kids in your DIY summer decor projects can be a fun and creative way to spend quality time together. Some ideas include making a handprint or footprint wreath, creating a DIY wind chime using recycled materials, or making a colorful paper flower garland. You can also have kids help with simpler tasks, such as painting rocks or seashells, or assembling a DIY terrarium using small plants and decorative stones. Additionally, consider making a DIY photo display using pictures from your summer vacations or special events, and have kids help decorate the frames or arrange the photos in a collage.

Linearyazilim Skip to content