crafting

The Best Supplies for Jewelry Making

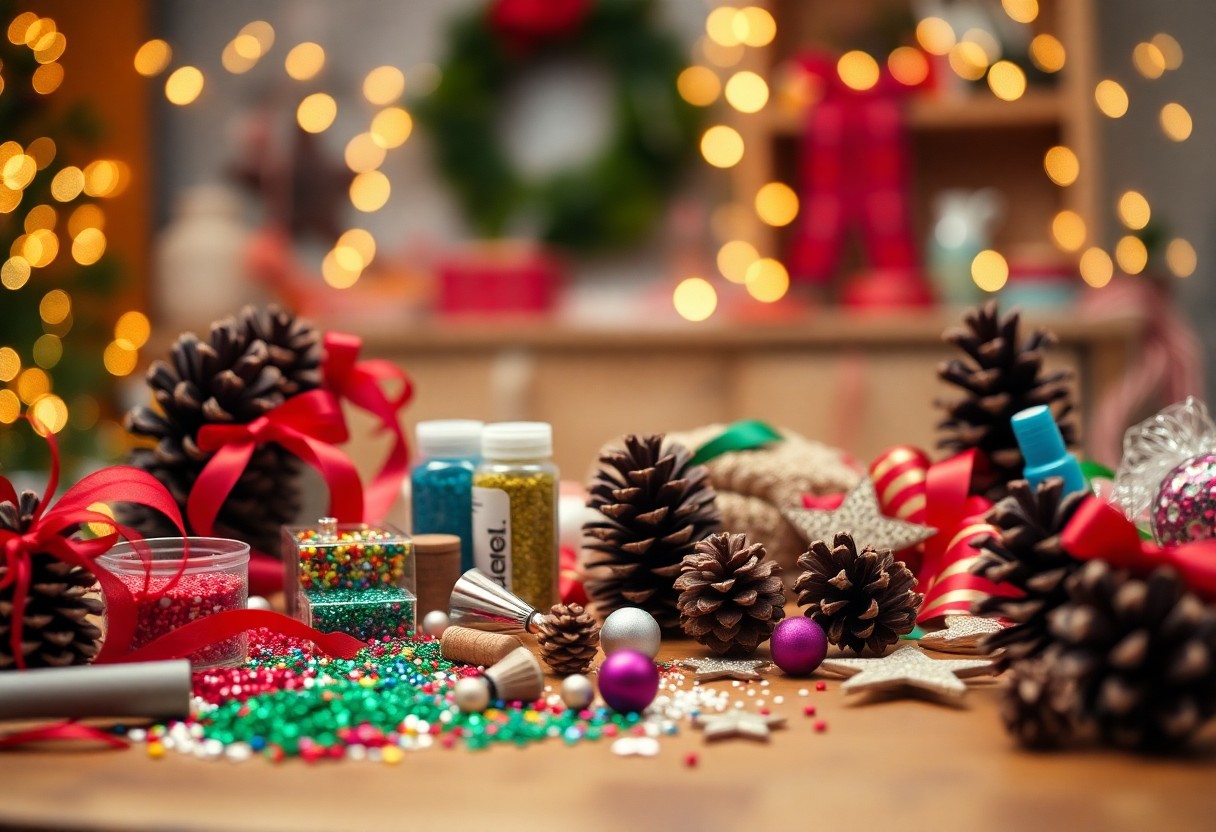
As you initiate on your jewelry making journey, you’ll want to ensure you have the right tools and materials to bring your creations to life. Your choice of supplies will significantly impact the quality and durability of your pieces. You need to select high-quality findings, beads, and wires that meet your specific needs and skill level. With the right supplies, you’ll be able to create unique and professional-looking jewelry that reflects your style and craftsmanship.

Key Takeaways:

To get started with jewelry making, it’s important to have the right materials. Here are the key points to consider:

  • Invest in high-quality findings, such as clasps, earring backs, and jump rings, as they provide a professional finish to your pieces.
  • Choose the right beads and materials for your project, considering factors such as color, texture, and durability to ensure your jewelry is long-lasting and visually appealing.
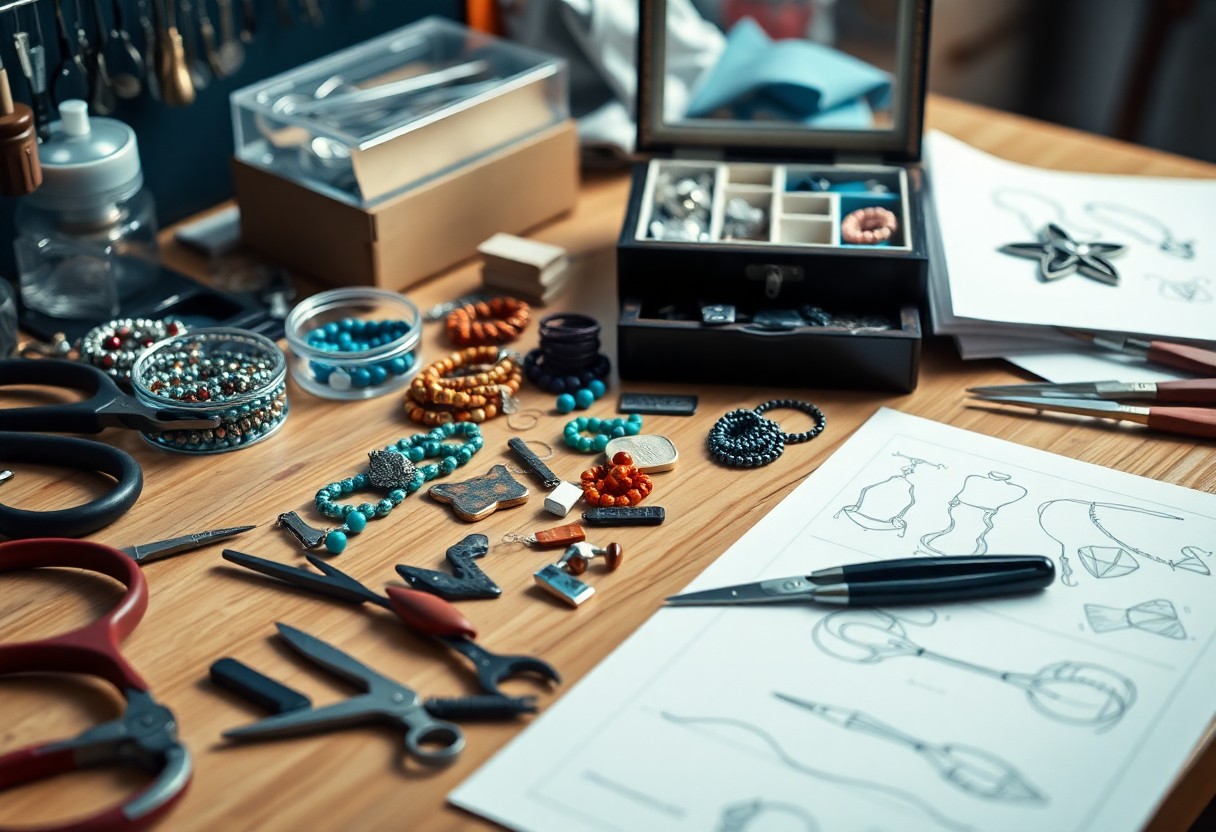
  • Have a well-organized workstation with the necessary tools, including wire cutters, pliers, and a work surface, to make the jewelry-making process more efficient and enjoyable.

Essential Tools

The fundamental tools for jewelry making include a variety of items that will help you create unique and professional-looking pieces. You will need to invest in a set of basic tools to get started with your jewelry making journey.

Wire cutters and pliers

Before you begin creating your jewelry pieces, you will need to have a good pair of wire cutters and pliers to shape and cut your wire and other materials, allowing you to achieve the desired shape and design.

Jewelry findings and beads

At the heart of every jewelry piece are the findings and beads, which come in a wide range of styles, materials, and sizes, giving you the opportunity to express your creativity and bring your designs to life with your choice of beads and findings.

To further enhance your jewelry making experience, you can explore various types of beads, such as seed beads, gemstone beads, and glass beads, and combine them with different findings like clasps, earring backs, and jump rings to create unique and intricate designs that reflect your personal style and aesthetic. You can experiment with different materials and techniques to develop your skills and create one-of-a-kind jewelry pieces.

Beads and Materials

If you’re looking to create unique jewelry pieces, you’ll need a variety of beads and materials.

Types of beads and their uses

You can choose from:

  • Seed beads
  • Crystal beads
  • Pearl beads
  • Ceramic beads
  • Wooden beads

This will help you create different designs.

Behind every beautiful piece of jewelry is a table of materials:

Material Use
Seed beads Jewelry making
Crystal beads Adding sparkle
Pearl beads Elegant designs
Ceramic beads Unique textures
Wooden beads Natural look

Alternative materials for unique designs

Against the ordinary, you can try using alternative materials like recycled glass or metal.

It is exciting to experiment with different materials, as you can create one-of-a-kind pieces that reflect your personality and style. You can use materials like leather, fabric, or even found objects to add an extra layer of meaning to your jewelry. As you explore these alternative materials, you’ll discover new ways to express yourself and push the boundaries of your creativity.

Stringing and Weaving

For jewelry making, having the right tools and materials is necessary. You will need a variety of supplies, including stringing materials, weaving needles, and other equipment to create your unique pieces.

Choosing the right stringing material

Striving for the perfect stringing material can be overwhelming, but you can choose from a range of options, including nylon, leather, and suede, to suit your jewelry design needs.

Basic weaving techniques for beginners

With basic knowledge of weaving techniques, you can create beautiful and intricate designs. You can start with simple patterns and gradually move on to more complex ones as you gain experience.

But as you explore deeper into weaving, you will discover that it requires patience and practice to master the various techniques, and you will need to experiment with different materials and patterns to find what works best for your jewelry making style, allowing you to create unique and stunning pieces that reflect your skill and creativity.

Adhesives and Finishing Touches

Once again, the right supplies can make all the difference in your jewelry making projects.

Types of adhesives for jewelry making

In the context of adhesives, you have several options, including:

  • Epoxy
  • Resin
  • Glue

Thou can choose the best one for your needs.

Type of Adhesive Use
Epoxy Strong bonding
Resin Clear finish
Glue Delicate pieces
Acrylic Fast drying
Silicone Flexible bonds

Adding a professional finish to your pieces

Similarly, adhesives play a significant role in adding a professional finish to your pieces, as you can use them to attach findings, secure beads, or add decorative elements.

Another aspect to consider when adding a professional finish is the overall aesthetic you want to achieve, as you can use adhesives to create intricate designs, patterns, or textures that enhance the beauty of your jewelry, and with the right adhesive, you can ensure that your pieces look polished and refined, making them truly special and unique.

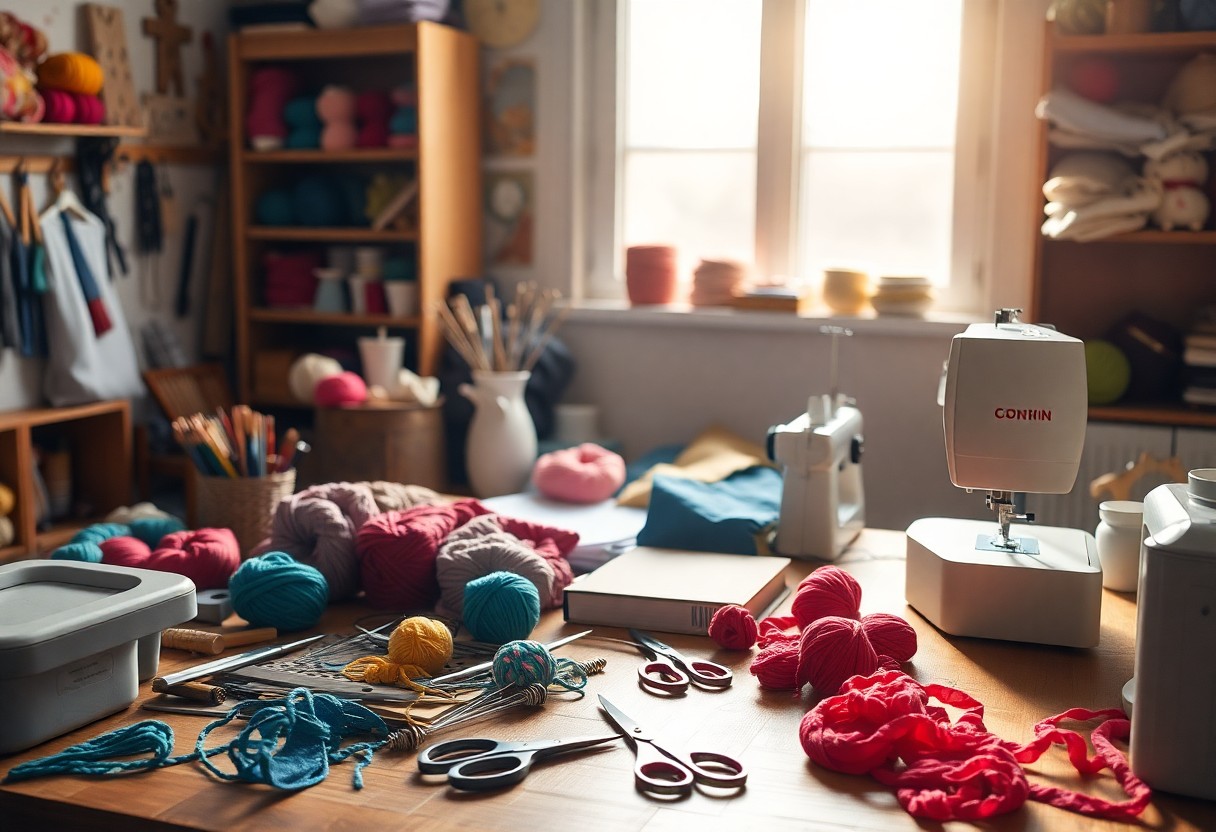
Workspace and Organization

All jewelry makers need a well-organized workspace to create their masterpieces. You can find a wide range of jewelry making supplies, including findings and tools, at Bonour Handmade – Jewelry Making Supplies, Findings and more.

Setting up a jewelry making station

One of the first steps in creating your workspace is setting up a dedicated station for jewelry making, where you can easily access your tools and supplies, allowing you to focus on your craft.

Tips for keeping your workspace organized

An organized workspace is vital for efficient jewelry making. You can achieve this by:

  • Using storage containers for beads and findings
  • Labeling your tools and supplies

, Any disorganization can lead to wasted time and frustration.

And to further optimize your workspace, consider investing in a jewelry making desk or workbench with built-in storage, and establish a routine for cleaning and maintaining your area, you can also:

  • Utilize a pegboard for hanging tools
  • Implement a “clean as you go” policy

, Any efforts you make to organize your workspace will pay off in the long run, allowing you to focus on creating beautiful jewelry pieces.

Safety Precautions

Your safety is paramount when working with jewelry making supplies, and taking necessary precautions can prevent accidents and injuries.

Safety measures for working with tools

Above all, you should handle tools with care, wearing protective gloves and eyewear to avoid cuts and eye damage.

Handling materials safely

Between different materials, you will find varying levels of toxicity and allergenic potential, so it’s vital to research and understand the properties of each material you work with.

But as you examine deeper into handling materials, you need to consider the potential risks associated with each one, such as skin irritation or respiratory issues, and take steps to mitigate these risks, like working in a well-ventilated area or wearing a mask.

Final Words

The best supplies for jewelry making are now at your fingertips, allowing you to create stunning pieces that reflect your unique style. You can confidently select your materials, knowing that you have the knowledge to make informed decisions. With your newfound understanding, you will be able to craft beautiful jewelry that showcases your skill and artistry, taking your creations to the next level and making your jewelry-making journey even more enjoyable.

FAQ

Q: What are the crucial tools for jewelry making?

A: The crucial tools for jewelry making include wire cutters, flat-nose pliers, round-nose pliers, and a work surface. These tools will allow you to cut, shape, and form various materials such as wire, beads, and metals. Additionally, having a good quality task light and a comfortable workspace can greatly improve your jewelry making experience.

Q: What types of materials are best for beginners to start with?

A: For beginners, it’s best to start with materials that are easy to work with and require minimal equipment. Beading is a great place to start, and materials like seed beads, crystal beads, and gemstone beads are popular choices. You can also experiment with different types of wire, such as copper, silver-plated, or gold-plated wire, to create unique and beautiful pieces.

Q: How do I choose the right findings for my jewelry projects?

A: Findings are the components that complete your jewelry piece, such as clasps, earring backs, and jump rings. When choosing findings, consider the type of jewelry you’re making, the materials you’re using, and the style you’re aiming for. Make sure the findings are compatible with the materials and are durable enough to withstand regular wear. You can also experiment with different types of findings to add a personal touch to your designs.

Q: What safety precautions should I take when working with jewelry making supplies?

A: When working with jewelry making supplies, it’s crucial to take safety precautions to avoid injuries and damage. Always wear protective eyewear and keep loose hair and clothing tied back. Use a well-ventilated workspace when working with materials like solder or chemicals, and keep a fire extinguisher nearby. Additionally, make sure to handle sharp objects and hot tools with care, and keep them out of reach of children and pets.

Q: Where can I find inspiration and tutorials for jewelry making projects?

A: There are many resources available for finding inspiration and tutorials for jewelry making projects. Online platforms like YouTube, Pinterest, and jewelry making communities are great places to start. You can also check out books and magazines from your local library or purchase them from craft stores. Additionally, consider taking classes or workshops to learn new techniques and get hands-on experience. Joining online forums or social media groups can also connect you with other jewelry makers and provide a wealth of inspiration and guidance.

The Joy of Holiday Crafting

As you approach the holiday season, you may find yourself seeking ways to add a personal touch to your celebrations. You can explore your creative side and make the most of this special time with holiday crafting. Your handmade decorations and gifts will not only reflect your personality, but also bring a sense of warmth and joy to your loved ones. You will discover the satisfaction of creating something unique and meaningful, making your holidays even more special.

Key Takeaways:

  • The happiness gained from holiday crafting can be a significant contributor to a person’s overall wellbeing, as it allows individuals to express their creativity and connect with loved ones.
  • Handmade gifts and decorations can add a personal touch to the holiday season, making it feel more meaningful and special.
  • Engaging in holiday crafting activities can be a great way to relax and unwind, providing a healthy distraction from the stress and pressure that can come with the holiday season.

Preparing for the Holiday Season

Before you investigate the world of holiday crafting, it’s important to get organized and plan ahead. You’ll want to make a list of the projects you want to tackle and the materials you’ll need to complete them. This will help you stay focused and ensure that you have everything you need to bring your creative vision to life.

Gathering Materials and Supplies

Above all, you’ll need to gather the necessary materials and supplies for your holiday crafts. You can start by checking what you already have at home and making a list of what you need to buy. Consider the type of crafts you want to make and the materials that will be required, such as paper, glue, scissors, and decorations.

Setting Up a Crafting Space

Similarly, supplies are just the beginning, and you’ll also need a dedicated space to work on your crafts. You’ll want to set up a comfortable and well-lit area where you can spread out your materials and focus on your projects. This could be a desk, table, or even a corner of your living room.

Hence, as you set up your crafting space, think about the tools and equipment you’ll need to have within easy reach. You may want to invest in a craft mat, a paper trimmer, or a storage bin to keep your supplies organized. By having a dedicated space and the right tools, you’ll be able to work efficiently and enjoy the process of creating your holiday crafts.

Decorations and Ornaments

While creating your holiday decorations, you can express your personal style and add a touch of warmth to your home. You can make your own decorations, such as wreaths, garlands, and ornaments, using various materials like paper, fabric, and natural elements.

Making Handmade Ornaments

Behind the joy of holiday crafting lies the pleasure of making handmade ornaments, which allows you to add a personal touch to your decorations. You can create unique and beautiful ornaments using materials like glass, metal, and ceramic, and customize them to fit your holiday theme.

Decorating the Christmas Tree

Around the holiday season, decorating the Christmas tree is a beloved tradition that brings you and your family together. You can decorating your tree with ornaments, lights, and garlands, and make it a reflection of your personal style and holiday spirit.

Also, as you decorate your Christmas tree, you can experiment with different themes, colors, and textures to create a unique and beautiful display. You can use your handmade ornaments, along with store-bought ones, to add depth and interest to your tree, and make it a stunning centerpiece for your holiday celebrations.

Gift Ideas and Presents

Not only can holiday crafting bring you joy, but it can also help you create unique and thoughtful gifts for your loved ones. You can make personalized items, such as ornaments, decorations, and gift tags, to add a special touch to your presents.

Crafting Personalized Gift Tags

Personalizing your gift tags can make your presents even more special. You can add the recipient’s name, a special message, or a festive design to make your tags stand out. This small touch can show your loved ones that you put extra thought and effort into your gifts.

Making Homemade Gifts

Gifts made with love and care, such as handmade jewelry, knitted items, or baked goods, can be truly meaningful to your loved ones. You can choose a project that fits your skills and interests, and customize it to the recipient’s tastes and preferences.

In fact, making homemade gifts can be a fun and rewarding experience for you, as you get to be creative and see the joy on the recipient’s face when they open their present. You can also involve your family and friends in the process, making it a fun and collaborative activity that brings you all closer together.

Holiday Cards and Invitations

Keep the spirit of the holiday season alive by creating your own unique cards and invitations. You can add a personal touch to your holiday greetings, making them extra special for your loved ones. With a few simple materials and some creativity, you can design and craft beautiful cards and invitations that reflect your personality and style.

Designing and Crafting Cards

Besides traditional store-bought cards, you can create your own unique designs using various materials like paper, glue, and glitter. You can choose from a wide range of themes, colors, and patterns to match your holiday decor and personality.

Creating Custom Invitations

On the other hand, custom invitations can set the tone for your holiday party or gathering. You can design your invitations to match your theme, and include all the important details, such as date, time, and location.

Understanding the importance of customization, you can take your invitations to the next level by adding photos, ribbons, or other embellishments. You can also choose from various shapes, sizes, and folds to create a unique and eye-catching design that will make your guests feel special and excited about your holiday celebration.

Cooking and Baking

Many of your favorite holiday traditions likely involve cooking and baking, and for good reason – the aromas and flavors of the season are a big part of what makes this time of year so special. You can create delicious treats that will impress your friends and family, and make your home feel cozy and inviting.

Holiday Recipes and Treats

Beneath the surface of every successful holiday gathering lies a collection of tried-and-true recipes that you’ve perfected over the years. You can try out new recipes, experiment with different flavors and ingredients, and find the perfect dishes to serve at your holiday gatherings.

Decorating Holiday Cookies

Foregrounding your creativity, you can turn ordinary cookies into stunning holiday treats with a few simple decorating techniques. You can use frosting, sprinkles, and other toppings to create beautiful and delicious cookies that will be the perfect addition to your holiday celebrations.

Holiday cookie decorating is a fun and creative activity that you can enjoy with your family and friends. You can make it a special event, complete with hot cocoa and holiday music, and create memories that will last a lifetime. As you decorate your cookies, you can experiment with different techniques and designs, and find the styles and methods that work best for you.

Preserving Memories

Your holiday crafting can be a great way to preserve memories of special times with family and friends, allowing you to cherish them for years to come.

Creating a Holiday Scrapbook

Around this time, you can start gathering materials to create a beautiful holiday scrapbook, filled with tickets, postcards, and other mementos from your holiday adventures, which you can then use to create a unique and personalized keepsake.

Taking Holiday Photos

After capturing the essence of your holiday, you can use your photos to create a stunning visual narrative of your experiences, which will help you to relive the magic of the season whenever you look at them.

Apart from being a great way to document your holiday, taking photos also allows you to slow down and appreciate the little moments, focusing on the details that make your holiday special, and you can use these photos to create beautiful holiday crafts, such as photo ornaments, gift tags, or even a holiday card.

Conclusion

Hence, as you engage in holiday crafting, you will discover the joy of creating something unique and meaningful. You will find that your efforts bring a personal touch to your celebrations, making them more special and memorable. Your handmade crafts will become treasured possessions, symbolizing your love and thoughtfulness, and you will cherish the process of creating them.

FAQ

Q: What is the main idea behind “The Joy of Holiday Crafting”?

A: The main idea behind “The Joy of Holiday Crafting” is to inspire and guide individuals in exploring their creativity during the holiday season. It’s about embracing the joy and warmth of crafting unique items that can be used to decorate homes, given as gifts, or used to create lasting memories with family and friends.

Q: What kind of crafts can I expect to learn from “The Joy of Holiday Crafting”?

A: “The Joy of Holiday Crafting” covers a wide variety of crafts tailored for the holiday season. This includes, but is not limited to, handmade ornaments, decorative wreaths, personalized gift tags, festive candles, and intricate gingerbread house designs. Each craft is designed to be fun, easy to make, and adaptable to suit different skill levels and interests.

Q: Do I need to have prior crafting experience to enjoy “The Joy of Holiday Crafting”?

A: Absolutely not! “The Joy of Holiday Crafting” is designed to be inclusive and accessible to everyone, regardless of their crafting background. Each project comes with detailed instructions and tips to help beginners get started. For those with more experience, there are also challenging projects that can help hone their skills and encourage creativity.

Q: Can I involve my family in holiday crafting, or is it more suited for individual activities?

A: “The Joy of Holiday Crafting” is perfect for family activities! Many of the projects are designed to be collaborative, making them ideal for spending quality time with your loved ones. From kids to adults, everyone can participate and enjoy the process of creating something together. It’s a great way to create lasting memories and start new family traditions.

Q: How can I make my holiday crafts more personalized and unique?

A: Personalizing your holiday crafts is what makes them truly special. “The Joy of Holiday Crafting” suggests various ways to add a personal touch to your creations, such as using family photos, personal symbols, or handmade elements. You can also experiment with different materials, colors, and themes that reflect your personality or match your home decor. The key is to let your imagination run wild and have fun with the process!

How to Craft Seasonal Wreaths

You can create beautiful, unique wreaths that reflect your personal style and the current season. With a few simple materials and some creativity, you can design stunning pieces to adorn your home. As you explore the world of seasonal wreath-making, you will discover the versatility of various materials and techniques. You will learn how to choose the perfect elements to bring your vision to life and make your home feel welcoming and festive throughout the year.

Key Takeaways:

To create beautiful and unique seasonal wreaths, consider the following points:

  • Use fresh materials such as flowers, leaves, and branches that are in season to create a wreath that reflects the current time of year and adds a touch of nature to your home decor.
  • Experiment with different textures and colors to add depth and visual interest to your wreath, such as combining smooth ribbons with rough twigs or pairing bright flowers with muted greens.
  • Don’t be afraid to get creative and think outside the box when it comes to materials and designs, such as using unusual items like pinecones, seashells, or fabric to create a one-of-a-kind seasonal wreath.

    Gathering Materials

    The first step in crafting seasonal wreaths is to gather your materials. You will need a wire or foam wreath frame, as well as an assortment of seasonal elements such as flowers, foliage, and decorative items.

    Selecting Seasonal Blooms

    Beneath the variety of seasonal blooms, you’ll find the perfect flowers and foliage to match your wreath’s theme. You can choose from a range of colors and textures to create a unique and beautiful arrangement.

    Choosing Ribbon and Embellishments

    Almost any type of ribbon or embellishment can be used to add a finishing touch to your wreath. You can select from a wide range of materials, including silk, burlap, and lace, to create a look that suits your style.

    In fact, when it comes to choosing ribbon and embellishments, you have endless options to enhance your wreath. You can add bows, flowers, or other decorative elements to give your wreath a personalized touch, making it a one-of-a-kind creation that reflects your personality and style.

    Designing Your Wreath

    There’s no one-size-fits-all approach to designing a wreath, as the possibilities are endless and depend on your personal style and preferences. You can choose to go for a classic and elegant look or a more modern and eclectic design, depending on the occasion and the season.

    Considering Color Palette and Theme

    Thematic elements will play a significant role in determining the overall aesthetic of your wreath, and you should consider the colors and themes that resonate with the current season and your personal taste. You can draw inspiration from nature, holidays, or your favorite colors to create a unique and cohesive look.

    Balancing Texture and Form

    An abundance of textures and forms can add depth and visual interest to your wreath, and you should aim to strike a balance between different elements to create a harmonious design. You can combine smooth and rough textures, as well as various shapes and sizes, to create a wreath that is visually appealing.

    Even as you experiment with different textures and forms, you should consider how they will work together to create a cohesive look. You can achieve this by selecting elements that complement each other, such as pairing smooth ribbons with rough twigs or combining circular and linear shapes. By doing so, you will create a wreath that is not only beautiful but also unique and reflective of your personal style.

    Preparing the Base

    For a beautiful and long-lasting wreath, you need to start with a solid foundation. You will be creating your seasonal wreath on a base, which can be made of various materials such as wire, foam, or grapevine. Choose a base that fits your desired shape and size, and make sure it is sturdy enough to hold your decorations.

    Selecting the Right Wreath Frame

    Fortunately, you have numerous options when it comes to selecting a wreath frame, ranging from modern to traditional designs. You can opt for a wire frame for a more versatile and flexible base, or choose a foam frame for a fuller and more voluminous look. Consider the theme and style of your wreath when making your selection.

    Adding Filler Greens and Foliage

    Right from the beginning, you want to add some depth and texture to your wreath with filler greens and foliage. You can use a variety of materials such as eucalyptus, ferns, or lemon leaves to create a lush and vibrant base for your decorations. This will help you achieve a more polished and professional look.

    This step is where you can get creative and experiment with different combinations of filler greens and foliage to find the perfect blend for your wreath. You can choose materials that complement your wreath’s theme and color scheme, or opt for a more traditional approach with classic evergreen branches and holly. As you add your filler greens and foliage, make sure to fluff and shape them to achieve a natural and balanced look, and you will be ready to start adding your decorations and embellishments to complete your seasonal wreath.

    Adding Decorative Elements

    Keep your wreath visually interesting by adding decorative elements that reflect the season and your personal style. You can choose from a variety of materials, such as flowers, fruits, ribbons, and garlands, to create a unique and beautiful wreath.

    Incorporating Flowers and Fruits

    Between the base of your wreath and the decorative elements, you’ll find a world of possibilities. You can use fresh or artificial flowers and fruits to add color, texture, and fragrance to your wreath, making it a stunning piece for your home.

    Using Ribbons and Garlands

    Any ribbon or garland can be used to add a pop of color and texture to your wreath. You can choose from a wide range of materials, such as silk, burlap, or velvet, to match your wreath’s theme and style.

    Indeed, using ribbons and garlands is an excellent way to finish your wreath and give it a polished look. You can tie a ribbon around the wreath form, or weave a garland through the base, to create a beautiful and cohesive design that reflects your creativity and style, allowing you to enjoy your seasonal wreath.

    Finishing Touches

    After completing your wreath, add a professional touch by learning more about How to Make a Wreath tutorials. You can find inspiration and tips to enhance your creation.

    Adding a Personalized Accent

    Accent your wreath with a personalized item, such as a monogram or a decorative pick, to give it a unique touch. You can choose an item that reflects your personal style or the season.

    Final Fluffing and Primping

    Finishing your wreath with a slight fluff and primp will make it look complete. You should adjust any stray elements and make sure everything is in place.

    Primping is an crucial step to ensure your wreath looks its best. You will notice the difference when you take a step back and admire your handiwork, and with a few final tweaks, your wreath is ready to be displayed, showcasing your creativity and style.

    Displaying Your Masterpiece

    To showcase your seasonal wreath, consider the overall aesthetic you want to achieve in your home. You can hang it on your front door, wall, or use it as a centerpiece, and adjust the surrounding decor to complement your wreath.

    Choosing the Perfect Location

    Besides the entrance, you can also place your wreath in a living room or dining area to add a pop of color and fragrance, making your space feel cozy and inviting, as you admire your handmade creation.

    Pairing with Other Seasonal Decor

    Across the room, you can combine your wreath with other seasonal decorations, such as candles, pumpkins, or holly, to create a cohesive and festive atmosphere that reflects your personal style, as you enjoy the beauty of your wreath.

    Hence, when pairing your wreath with other seasonal decor, you can experiment with different textures, colors, and themes to find the perfect balance that enhances the beauty of your wreath and showcases your creativity, allowing you to enjoy the fruits of your labor and the admiration of your guests.

    Final Words

    Conclusively, you have learned the basics of crafting seasonal wreaths, and now you can create your own unique designs. You have the skills to choose the right materials and decorate your wreath according to your style. With your newfound knowledge, you can make beautiful wreaths that reflect your personality and add a personal touch to your home decor, making your space feel welcoming and inviting throughout the year, with your stunning creations.

    FAQ

    Q: What materials do I need to craft a seasonal wreath?

    A: To craft a seasonal wreath, you will need a variety of materials depending on the theme and design you choose. Some common materials include evergreen branches, holly, mistletoe, pinecones, ribbons, flowers, and decorative items like bows, berries, and ornaments. You will also need a wire or foam wreath frame to serve as the base of your wreath. Additionally, you may need some floral wire, scissors, and a hot glue gun to assemble and secure your materials.

    Q: How do I choose the right theme for my seasonal wreath?

    A: Choosing the right theme for your seasonal wreath depends on the time of year, your personal style, and the decor of your home. For example, a winter wreath might feature evergreen branches, pinecones, and snowflakes, while a spring wreath might feature flowers, greenery, and pastel colors. Consider the colors, textures, and motifs that are associated with the current season and choose materials that fit with those themes. You can also draw inspiration from nature, holidays, or special events to create a unique and personalized wreath.

    Q: What is the best way to assemble a seasonal wreath?

    A: Assembling a seasonal wreath can be a fun and creative process. Start by preparing your materials, such as cutting and trimming your branches, flowers, and greenery. Then, begin attaching your materials to the wreath frame using floral wire, hot glue, or another strong adhesive. Work your way around the wreath, adding materials in a balanced and visually appealing way. Consider creating a focal point, such as a bow or a cluster of flowers, to draw the eye and add interest to your wreath. Finally, fluff out your materials and adjust your wreath as needed to achieve a full and lush appearance.

    Q: How can I add a personal touch to my seasonal wreath?

    A: There are many ways to add a personal touch to your seasonal wreath, depending on your interests, hobbies, and style. Consider incorporating personal items, such as photos, ribbons, or decorations that reflect your favorite colors or themes. You can also experiment with different textures, such as burlap, lace, or velvet, to add depth and interest to your wreath. Another idea is to use natural materials, such as pinecones, acorns, or shells, that you have collected on a walk or vacation. By adding personal touches, you can make your wreath truly unique and reflective of your personality and style.

    Q: How do I care for and store my seasonal wreath?

    A: To keep your seasonal wreath looking its best, it’s crucial to care for and store it properly. For fresh wreaths, keep them away from direct sunlight, heat, and moisture, which can cause the materials to dry out or become damaged. For artificial wreaths, dust them regularly with a soft brush or cloth to prevent dust buildup. When not in use, store your wreath in a cool, dry place, such as a closet or attic, and consider wrapping it in tissue paper or a breathable cloth to protect it from damage. By following these tips, you can enjoy your seasonal wreath for years to come and make it a cherished part of your holiday decor.

The Art of Sustainable Crafting

As you explore the world of crafting, you’re likely considering the environmental impact of your creative pursuits. You can make a positive difference by adopting sustainable practices in your craft room. To get started, you’ll need to source eco-friendly materials, and learning How To Get Materials For Sustainable Crafts is an necessary step. By doing so, you’ll be well on your way to reducing your carbon footprint and creating unique, environmentally conscious pieces that reflect your values.

Key Takeaways:

  • The practice of sustainable crafting involves being mindful of the environmental impact of our creative activities, and making conscious choices to reduce waste and minimize harm to the planet.
  • By adopting eco-friendly techniques and using recycled materials, crafters can create unique and beautiful pieces while also promoting sustainability and reducing their carbon footprint.
  • Embracing the slow crafting movement can help crafters develop a more thoughtful and intentional approach to their work, allowing them to create meaningful and lasting pieces that bring joy and fulfillment to both the maker and the user.

The Importance of Sustainable Crafting

Before you start your crafting journey, it’s crucial to consider the impact of your creative pursuits on the environment and society. By choosing sustainable crafting practices, you can significantly reduce your ecological footprint and contribute to a more responsible crafting community.

Environmental Benefits

Sensibly, you can make a significant difference by adopting eco-friendly crafting methods, such as using recycled materials, minimizing waste, and opting for sustainable supplies, which can help reduce your environmental impact and preserve natural resources for future generations.

Social Responsibility

Beyond your individual actions, you are part of a larger crafting community that can collectively make a positive impact on society, and by supporting fair trade practices, donating to charitable causes, and promoting inclusivity, you can help create a more equitable and compassionate crafting world.

For instance, when you choose to support local artisans and small businesses, you are directly contributing to the well-being of your community, and by doing so, you are also promoting cultural heritage and traditional craftsmanship, which can have a lasting impact on the social fabric of your society, and as you continue to craft, you can take pride in knowing that your hobby is not only a source of personal fulfillment but also a force for good.

Choosing Eco-Friendly Materials

Any craft project begins with selecting the right materials, and as someone who cares about the environment, you want to make choices that minimize your impact. You can start by exploring alternatives to traditional materials and considering the environmental effects of your selections.

Natural Fibers

Following your decision to go eco-friendly, you’ll find that natural fibers like cotton, hemp, and bamboo are excellent options for your crafting needs. You can use these materials to create a wide range of items, from clothing and accessories to home decor and furniture.

Recycled Resources

Beyond the obvious choices, you’ll discover that recycled resources can add a unique touch to your crafts. You can repurpose old items like plastic bottles, cardboard tubes, and fabric scraps to create innovative and eco-friendly pieces.

Indeed, using recycled resources in your crafting not only reduces waste but also allows you to get creative and think outside the box. You can transform old materials into new, functional items, such as turning old t-shirts into reusable bags or creating jewelry from recycled glass. As you explore the world of recycled resources, you’ll find that the possibilities are endless, and your crafting will become more sustainable and inspiring.

Minimal Waste Design

Now, as you commence on your sustainable crafting journey, consider the impact of your design choices. You can significantly reduce waste by selecting patterns and materials that generate minimal scraps, allowing you to create beautiful pieces while minimizing your environmental footprint.

Zero-Waste Patterns

Among the various strategies for reducing waste, zero-waste patterns are an excellent place to start. You can find or create patterns that use the entire piece of fabric, leaving no scraps behind, and enabling you to make the most of your materials.

Repurposing Old Materials

After mastering zero-waste patterns, you can take your sustainable crafting to the next level by repurposing old materials. You can breathe new life into old items, such as turning old t-shirts into reusable bags or transforming plastic containers into planters, giving you a sense of creativity and fulfillment.

Minimal waste is all about being mindful of your materials and finding innovative ways to reuse them. As you explore deeper into repurposing old materials, you’ll discover that your imagination is the only limit to what you can create. You’ll be able to transform old, discarded items into unique, functional pieces that not only reduce waste but also tell a story, making your crafting experience even more rewarding and enjoyable.

Community Involvement

Your involvement in the community can greatly impact the sustainability of your crafting practices, and there are many ways to get started, from participating in local crafting groups to supporting eco-friendly initiatives.

Collaborative Crafting

Similarly, one of the most effective ways to promote sustainability is by working together with others, sharing ideas and resources to minimize waste and maximize creativity in your crafting projects.

Supporting Local Artists

Anyway, an excellent way to contribute to the sustainability of your community is by supporting local artists and craftspeople, purchasing their handmade goods and promoting their work to others.

Even as you continue to support local artists, you’ll find that your actions have a positive impact on the local economy and help to preserve traditional crafting techniques, allowing you to feel more connected to your community and the items you craft and purchase.

Innovative Techniques

After exploring the basics of sustainable crafting, you can now examine innovative methods that will take your craft to the next level. You’ll discover new ways to transform materials and create unique pieces that showcase your skill and creativity.

Upcycling

Ingenious approaches to upcycling allow you to breathe new life into old materials, giving you the opportunity to create one-of-a-kind items that tell a story. You can turn discarded objects into functional pieces, reducing waste and adding character to your craft.

Eco-Dyeing

Inventive eco-dyeing techniques enable you to achieve vibrant colors while minimizing your environmental impact. You can experiment with natural dyes, such as plant-based extracts, to create a distinctive and sustainable palette for your craft projects.

Further exploration of eco-dyeing reveals a world of possibilities, as you can use various natural materials like leaves, flowers, and spices to create a wide range of colors and patterns. You can also experiment with different binding agents and mordants to achieve unique shades and hues, allowing you to develop your own signature style and take your sustainable crafting to new heights.

Preserving Traditional Crafts

To appreciate the value of sustainable crafting, you need to understand the importance of preserving traditional crafts. You can do this by learning about the history and techniques behind these crafts, and by supporting artisans who continue to practice them.

Heritage Skills

Protecting traditional crafts involves preserving heritage skills that have been passed down through generations. You can help by learning these skills yourself, or by supporting organizations that work to preserve them, allowing you to connect with your cultural heritage.

Cultural Significance

Towards understanding the cultural significance of traditional crafts, you should consider the role they play in your community and your life. You can explore how these crafts reflect the history and values of your culture, and how they contribute to your sense of identity.

Traditional crafts hold a special place in your cultural heritage, and by engaging with them, you can deepen your understanding of your roots. You can learn about the symbolism, myths, and legends surrounding these crafts, and appreciate the stories they tell about your ancestors and their way of life, enriching your connection to your cultural heritage.

Summing up

As a reminder, you now have the knowledge to begin on your sustainable crafting journey. You can apply your skills to reduce waste and create unique pieces. Your contribution to a more eco-friendly craft practice is valued, and you will see the positive impact on your surroundings. You will continue to learn and grow, shaping your craft into a reflection of your commitment to sustainability.

FAQ

Q: What is sustainable crafting and how does it benefit the environment?

A: Sustainable crafting refers to the practice of creating handmade products using eco-friendly materials, techniques, and processes that minimize waste and reduce environmental impact. This approach to crafting benefits the environment by conserving natural resources, reducing carbon footprint, and promoting the use of recycled or repurposed materials. By adopting sustainable crafting practices, individuals can contribute to a more environmentally conscious lifestyle and help mitigate the negative effects of climate change.

Q: What types of materials are used in sustainable crafting?

A: Sustainable crafting often involves the use of natural, biodegradable, and recycled materials, such as repurposed wood, bamboo, organic cotton, hemp, and plant-based dyes. Additionally, crafters may use materials that would otherwise be discarded, like old maps, book pages, and fabric scraps, to create unique and innovative products. The focus is on using materials that are gentle on the environment and can be sourced locally, reducing transportation emissions and supporting local economies.

Q: How can I get started with sustainable crafting and what skills do I need?

A: To get started with sustainable crafting, you don’t need to have extensive crafting experience, but rather a willingness to learn and experiment with new techniques and materials. Basic skills like sewing, knitting, or woodworking can be beneficial, but many sustainable crafting projects involve simple, low-tech methods that can be learned through online tutorials or workshops. Start by exploring different sustainable crafting techniques, such as upcycling, repurposing, or natural dyeing, and practice with readily available materials to develop your skills.

Q: Can sustainable crafting be a viable business or income source?

A: Yes, sustainable crafting can be a viable business or income source, as there is a growing demand for eco-friendly, handmade products. Many consumers are willing to pay a premium for unique, high-quality items that are made with sustainable materials and practices. To turn your sustainable crafting hobby into a business, focus on developing a distinctive brand, building a strong online presence, and engaging with customers who share your values. You can sell your products through online marketplaces, craft fairs, or local shops, and consider offering workshops or classes to teach others about sustainable crafting techniques.

Q: How can I ensure that my sustainable crafting practices are authentic and effective?

A: To ensure that your sustainable crafting practices are authentic and effective, it’s imperative to adopt a holistic approach that considers the entire lifecycle of your products, from sourcing to end-of-life. Be transparent about your materials, methods, and supply chain, and continuously assess and improve your practices to minimize waste and environmental impact. Stay informed about new sustainable materials, technologies, and techniques, and engage with the sustainable crafting community to share knowledge, resources, and best practices. By being committed to ongoing learning and improvement, you can create beautiful, functional products that not only delight your customers but also contribute to a more sustainable future.

How to Start Crafting

You stand at the threshold, eager to bring your ideas to life. Your hands itch to shape and mold, to create something from nothing. You’ve got the spark, now it’s time to fan the flames. Starting to craft can seem daunting, but with a few simple steps, you’ll be well on your way. You’ll learn to navigate the basics, gathering tools and materials, and uncover the joy of creating something with your own two hands.

Key Takeaways:

To get started with crafting, consider the following points:

  • Start by choosing a project that suits your skill level and interests, whether it’s knitting, painting, or woodworking, to ensure a enjoyable and rewarding experience.
  • Gather the necessary materials and tools for your chosen craft, and set up a dedicated workspace to stay organized and focused.
  • Don’t be afraid to experiment and try new techniques as you become more comfortable with your craft, and consider joining a community of fellow crafters for support and inspiration.

Gathering Materials

For every craft project, you’ll need to gather the right materials. This will depend on the type of craft you’re making, but generally, you’ll need a few basic supplies to get started.

Essential Tools

Before you begin, you’ll need to acquire the necessary tools for your craft. You’ll likely need items like scissors, glue, and a measuring tape to help you get the job done.

Optional Supplies

Behind the basic tools, you may find that you want additional supplies to enhance your craft. You can consider items like decorative paper, fabric, or embellishments to add a personal touch.

A key aspect of optional supplies is that they allow you to customize your project to your taste. You can experiment with different textures, colors, and patterns to create a unique piece that reflects your style. As you work on your craft, you’ll find that your vision begins to take shape, and the right supplies will help you bring it to life.

Setting Up Your Workspace

Assuming you have gathered all the necessary materials, it’s time to set up your workspace. You’ll need a comfortable and dedicated area to craft, free from distractions and clutter. Choose a spot with good lighting and ample space to work on your projects.

Organizing Your Area

Once you have your space, organize your area by sorting your materials into categories and storing them in labeled containers. This will help you quickly find what you need and keep your workspace tidy.

Maintaining Inspiration

Inspiring yourself to create is key to keeping your crafting momentum going. You’ll want to surround yourself with things that spark your imagination, such as art books, nature, or fellow crafters.

With your workspace set up, you can now focus on maintaining your creative spark. You can do this by trying new techniques, joining a crafting community, or exploring different materials and tools. This will keep your crafting fresh and exciting, and you’ll find yourself looking forward to each new project.

Learning Basic Techniques

Keep your foundation strong by developing fundamental skills. You can find guidance on crafting for beginners to get started.

Fundamental Skills

Among the first skills you will learn are basic stitches, knots, and material handling. You will need to master these to move forward with your crafting journey.

Practice Exercises

Behind every skilled crafter is a history of dedicated practice. You will need to set aside time to hone your skills through regular exercise.

This practice will help you develop muscle memory and improve your overall technique. As you work through exercises, you will begin to see improvement in your crafting, and your confidence will grow. You will be able to tackle more complex projects, and your skills will become more refined.

Creating Your First Project

Your first project is a milestone, a chance to put your skills to the test. You’ll learn by doing, making mistakes, and improving with each stitch, each cut, each brushstroke. Keep it simple, start small, and don’t be afraid to experiment.

Choosing a Pattern

Constructing a plan is key. You’ll find plenty of patterns online or in books, so pick one that suits your style and skill level. Consider the materials, the time it takes, and the outcome you want.

Executing the Design

Selecting the right tools and materials is vital. You’ll need to choose the best fabric, thread, or yarn for your project, and have the necessary tools to bring your design to life.

Even as you start to execute your design, you’ll find that things don’t always go as planned. You’ll make mistakes, but that’s where the learning happens. Don’t be too hard on yourself, and take your time to enjoy the process. You’ll get better with each attempt, and your project will start to take shape under your hands.

Troubleshooting Common Issues

Once again, you’ll encounter obstacles in your crafting journey. Don’t be discouraged, as these issues can be resolved with patience and practice. You’ll learn to identify and correct mistakes, refining your skills with each attempt.

Identifying Mistakes

Against all odds, you’ll make mistakes, but acknowledging them is the first step to improvement. You’ll develop a keen eye for detail, allowing you to pinpoint errors and take corrective action.

Correcting Errors

On the path to mastery, you’ll learn to correct errors with ease. You’ll develop techniques to rectify mistakes, saving your project from disaster and turning it into a success.

Identifying the root cause of the error is key to correcting it. You’ll need to analyze your work, determining where things went wrong and how to prevent it from happening again. By doing so, you’ll refine your technique, ensuring your crafts are of the highest quality, and you’ll take pride in your creations, knowing you’ve overcome obstacles to achieve perfection.

Advancing Your Skills

Not everyone will progress at the same pace, but with dedication, you will improve your crafting skills. You’ll find your hands moving more deftly, your creations taking shape with greater ease. Your confidence will grow, and so will your desire to try new things.

Exploring New Techniques

Contrary to what you might think, mastering new techniques is not as daunting as it seems. You’ll discover new methods and materials, expanding your creative possibilities. Your crafting will become more nuanced, more expressive, as you experiment with different approaches.

Improvising and Experimenting

Towards the end of your crafting journey, you’ll find yourself wanting to push boundaries, to test the limits of your skills. You’ll try new combinations, new patterns, and new materials, always seeking to innovate and improve. Your crafting will become more spontaneous, more dynamic.

In addition, as you improvise and experiment, you’ll develop a keener eye for detail, a better sense of what works and what doesn’t. You’ll learn to trust your instincts, to follow your intuition, and your crafting will flourish as a result. You’ll create unique, one-of-a-kind pieces that reflect your personality and style.

Summing up

Following this guide, you’ve laid the groundwork for your crafting journey. You’ve gathered your tools, chosen your project, and begun to create. Now, it’s up to you to keep your hands moving, your mind engaged, and your imagination fired up. As you work, your skills will grow, and your confidence will build. With each completed project, you’ll be one step closer to mastering your craft, and making something truly your own.

FAQ

Q: What are the basic materials I need to start crafting?

A: To start crafting, you will need a few basic materials, including scissors, glue, paper, and any specific tools related to the type of craft you want to make, such as a sewing machine for sewing or a paintbrush for painting. It’s also a good idea to have a dedicated workspace where you can spread out your materials and work comfortably.

Q: How do I choose the right type of craft for me?

A: Choosing the right type of craft for you involves considering your interests, skills, and the amount of time you have available. If you enjoy working with textiles, sewing or embroidery might be a good choice. If you prefer working with paper, card making or scrapbooking could be the way to go. You can also try out different types of crafts to see which one you enjoy the most.

Q: Where can I find inspiration and ideas for my crafts?

A: There are many places where you can find inspiration and ideas for your crafts. You can look at craft blogs, social media platforms like Pinterest and Instagram, and crafting books and magazines. You can also try visiting craft stores and looking at the displays and samples they have on show. Additionally, you can join a crafting community or take a class to get ideas and feedback from other crafters.

Q: How can I improve my crafting skills?

A: You can improve your crafting skills by practicing regularly, taking classes or workshops, and watching online tutorials. It’s also a good idea to start with simple projects and gradually work your way up to more complex ones. Don’t be afraid to make mistakes – they are an opportunity to learn and improve. You can also join a crafting community or find a crafting buddy to get feedback and support.

Q: What safety precautions should I take when crafting?

A: When crafting, it’s important to take a few safety precautions to avoid injury. This includes wearing protective gear such as gloves and safety glasses when working with sharp objects or hazardous materials, and making sure your workspace is well-ventilated and free from clutter. You should also follow the instructions carefully when using new materials or tools, and keep them out of the reach of children and pets.

Linearyazilim Skip to content