craft

How to Organize Craft Time

You’re about to launch on a creative journey, but first, you need to tame the chaos of your craft space. As you prepare to unleash your inner artist, your supplies are scattered everywhere, and your mind is a jumbled mess of ideas. You know that a organized craft time is key to unlocking your full potential, so let’s get started on setting up a system that will help you stay focused and inspired, and make the most of your creative time.
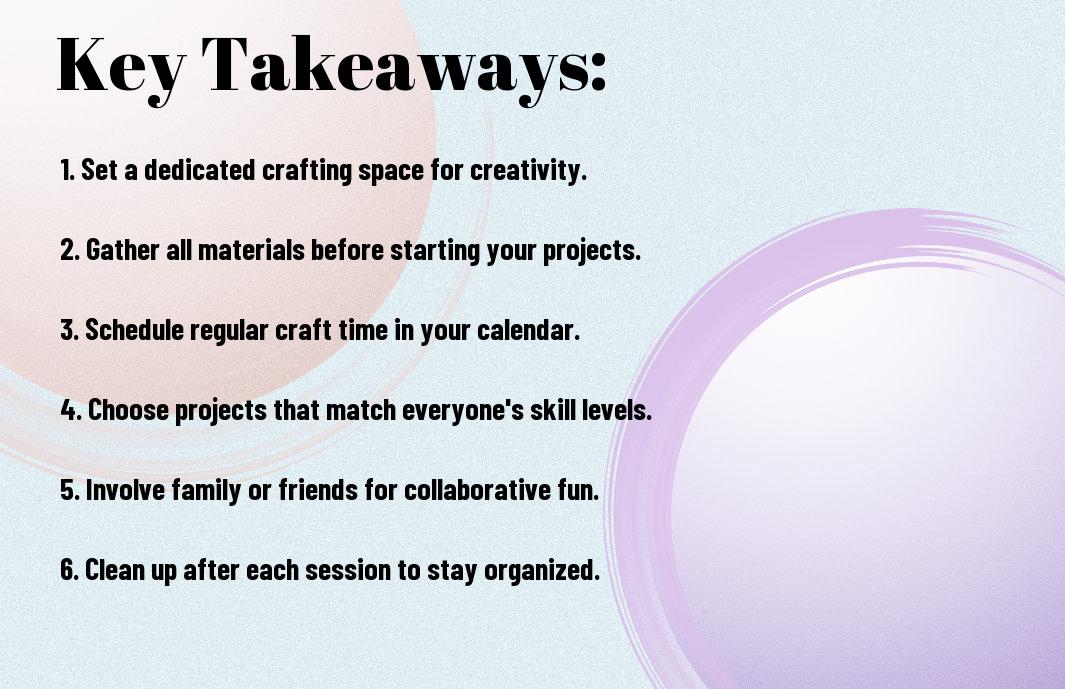
Key Takeaways:

To effectively manage and enjoy craft time, consider the following points:

  • Setting up a dedicated space is vital for organizing craft time, as it helps to keep all materials and tools in one place, making it easier to find what you need when you need it.
  • Establishing a schedule for craft time can help you stay on track and ensure that you have enough time to complete your projects, allowing you to make the most of your creative time.
  • Using storage solutions such as bins, baskets, and shelves can help to keep your craft space organized and clutter-free, making it a more enjoyable and productive environment to work in.

Preparation is Key

For a successful craft time, you need to lay the groundwork. This means taking the time to get everything just so, like a dark and stormy night waiting to unleash its creativity.
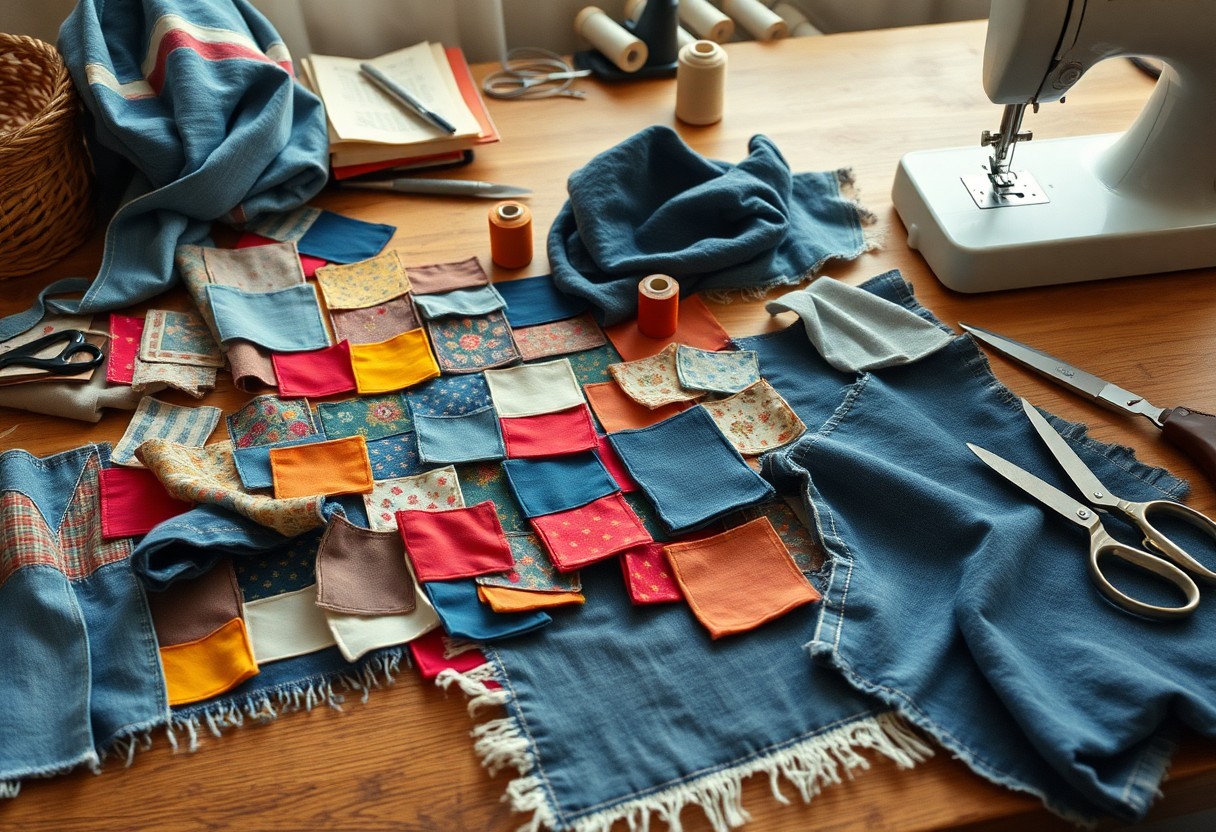
Gathering Materials

Must-haves are the foundation of your craft time. You’ll need to collect all the necessary supplies, from scissors to glue, and have them within easy reach, so you can focus on bringing your project to life.

Setting the Scene

Across the room, you want to create an atmosphere that fosters imagination and productivity. You’ll want to set up your workspace in a way that inspires you, with good lighting, comfortable seating, and minimal distractions.

Scene setting is where the magic begins. You get to transform your space into a creative haven, tailored to your unique needs and style. As you set the scene, you’ll start to feel your imagination spark, and your ideas will begin to take shape, waiting to be brought to life by your skilled hands.

Crafting with a Plan

If you want to make the most of your craft time, having a plan is important. You can start by checking out Make Time to Craft – Lazy Crafting to get inspired and find ways to prioritize your crafting. With a solid plan, you’ll be able to stay focused and achieve your crafting goals.

Setting Goals and Objectives

Across the board, setting specific goals and objectives is key to successful crafting. You need to define what you want to achieve, whether it’s completing a project or learning a new skill, and make a list of the steps you need to take to get there.

Creating a Schedule

Any serious crafter knows that having a schedule is vital to making progress. You should set aside dedicated time for crafting, free from distractions, and stick to it as much as possible. This will help you stay on track and make the most of your time.

Plus, when you create a schedule, you’ll find that you’re more motivated to show up and get started, even when you don’t feel like it. You’ll be able to break down larger projects into manageable chunks, and before you know it, you’ll be making progress and seeing your creations come to life. As you get into a rhythm, you’ll find that your crafting time becomes something you look forward to, a chance to unwind and express yourself creatively.

Staying Focused

Your ability to stay focused is key to a successful craft time. You’ll find that a clear mind and a dedicated space can help you achieve your creative goals.

Minimizing Distractions

Upon entering your craft space, you’ll want to eliminate any distractions that might derail your creative train. Turn off your phone, log out of social media, and find a quiet spot to work.

Using Time-Management Techniques

For the most part, using time-management techniques will help you stay on track. You can set a timer, create a schedule, or break your project into smaller tasks to help you stay focused.

At this point, you’re probably wondering how to apply these techniques to your craft time. You can start by setting a timer for a specific amount of time, say 25 minutes, and work on your project without any breaks or distractions. After the timer goes off, take a short break to stretch, grab a snack, or move around. This technique, known as the Pomodoro Technique, can help you stay focused and avoid burnout, allowing you to make the most of your craft time.

Exploring Creativity

Now that you’re ready to examine the world of crafting, it’s time to unleash your inner artist. You’ll find that exploring your creativity is a process that’s both thrilling and terrifying, but ultimately rewarding.

Trying New Things

Around every corner, a new technique or medium awaits, and you get to decide which path to take. You’ll discover that trying new things is where the magic happens, and your unique style begins to emerge.

Embracing Mistakes

Beneath the surface of every craft project lies a lesson in imperfection. You’ll learn to love the unexpected twists and turns that arise when you least expect them, and your craft will be all the better for it.

Mistakes will happen, and that’s where the real learning begins. You’ll find that your mistakes often lead to new ideas and innovations, and you’ll develop a sense of resilience that will serve you well in all your creative pursuits. As you continue to experiment and take risks, you’ll discover that your mistakes become an integral part of your creative journey, and you’ll learn to embrace them as a natural part of the process.

Organizing Your Space

Despite the chaos that can come with craft time, you can create a peaceful and productive environment by organizing your space. You’ll be amazed at how a tidy area can spark your creativity and help you focus on your projects.

Decluttering and Cleaning

Allying yourself with a clutter-free space is the first step to a successful craft time. You’ll need to get rid of any unnecessary items, dust, and dirt that may be hindering your creativity, and give your space a good clean to make it shine.

Setting Up a Dedicated Craft Area

After you’ve cleared the clutter, it’s time to set up a dedicated craft area that’s all your own. You’ll want to designate a specific spot for your crafts, where you can spread out your materials and work on your projects without distractions or interruptions.

Understanding how you work and what you need to stay focused is key to setting up a dedicated craft area that works for you. You’ll want to consider the type of crafts you’ll be doing, the tools and materials you’ll need, and the amount of space you have available, and then use that information to create a space that’s tailored to your unique needs and preferences.

Making it Fun

Unlike any other activity, craft time can be a thrilling experience if you approach it with the right mindset. You get to unleash your creativity, experiment with different materials, and witness your ideas take shape. As you examine into the world of crafting, you’ll discover that it’s not just about creating something, but also about the journey itself.

Inviting Friends Over

Across the room, you’ll find that sharing your craft time with friends can add a whole new level of excitement. You’ll learn from each other, exchange ideas, and enjoy the camaraderie that comes with creative collaboration. As you work together, you’ll find that your projects become more engaging and your friendships deepen.

Rewarding Yourself

Above all, you deserve to acknowledge your hard work and dedication to your craft. You’ve earned the right to treat yourself to something special, whether it’s a new tool, a book, or a relaxing afternoon. As you indulge in your reward, you’ll feel a sense of pride and satisfaction that will motivate you to continue exploring your creative side.

Achieving a sense of accomplishment is a great feeling, and rewarding yourself is a big part of that. As you look back on your finished projects, you’ll feel a sense of pride and satisfaction, knowing that you’ve created something with your own hands. You’ll be eager to start your next project, and the cycle of creativity and reward will continue, driving you to push your boundaries and explore new ideas.

Summing up

Now that you’ve tackled the chaos of your craft space, you’re ready to unleash your inner artist. You’ve got your supplies in check, your schedule is clear, and your creative juices are flowing. With these tips, you’ll be well on your way to making the most of your craft time, and who knows, you might just create something that’ll make the world take notice of your genius – or at least, your friends and family will be impressed by your handywork.

FAQ

Q: What are the benefits of organizing craft time for adults and children?

A: Organizing craft time provides numerous benefits, including improved focus, enhanced creativity, and increased productivity. It allows individuals to set aside dedicated time for creative pursuits, leading to a sense of accomplishment and relaxation. Moreover, a structured craft time helps to develop planning and time management skills, which can be applied to other areas of life. By prioritizing craft time, individuals can also explore their interests, develop new skills, and enjoy a refreshing break from daily routines.

Q: How can I create a dedicated craft space for efficient organization?

A: To create a dedicated craft space, start by designating a specific area for crafting, free from distractions and clutter. Invest in storage solutions such as shelves, drawers, and bins to keep supplies organized and easily accessible. Consider using a desk or table with ample workspace, and equip it with good lighting and necessary tools. Labeling storage containers and categorizing supplies will also help maintain a tidy and functional space. Additionally, establish a routine for cleaning and maintaining the craft space to ensure it remains organized and inspiring.

Q: What strategies can I use to plan and schedule craft time effectively?

A: To plan and schedule craft time effectively, start by setting realistic goals and deadlines for your projects. Break down larger projects into smaller, manageable tasks, and allocate specific time slots for each task. Consider using a calendar or planner to schedule craft time, taking into account other commitments and responsibilities. Prioritize projects based on deadlines, complexity, and personal interest, and establish a routine for regular craft sessions. It’s also crucial to be flexible and adapt to changes in your schedule, ensuring that craft time remains a consistent and enjoyable part of your routine.

Q: How can I minimize distractions and stay focused during craft time?

A: To minimize distractions and stay focused during craft time, identify potential distractions such as social media, email, or phone notifications, and eliminate them while you work. Create a conducive environment by playing soothing music, adjusting the lighting, and maintaining a comfortable temperature. Break tasks into smaller, manageable chunks, and set timers to help you stay on track. Avoid multitasking, and give your undivided attention to the craft project. Taking regular breaks can also help you recharge and maintain focus throughout your craft session.

Q: What are some tips for organizing and storing craft supplies to maintain a clutter-free space?

A: To organize and store craft supplies effectively, categorize and group similar items together, such as paints, papers, or threads. Use storage containers, bins, and baskets to keep supplies off the floor and out of sight. Label each container to facilitate easy identification and access. Consider using vertical storage solutions such as shelves or pegboards to maximize space. Establish a routine for cleaning and purging supplies, getting rid of unused or expired materials, and donating or repurposing items when possible. By maintaining a clutter-free and organized craft space, you can focus on your creative pursuits and enjoy a more productive and satisfying crafting experience.

How to Make Paper Flowers

You can create beautiful and delicate paper flowers with simple materials and techniques. As you follow the steps outlined in this post, you will learn how to transform plain paper into stunning blooms. Your creativity and patience will be rewarded with gorgeous flowers that can be used to decorate your space or given as gifts. With your own hands, you can craft unique and personalized paper flowers that reflect your style and flair.

Key Takeaways:

To create beautiful and realistic paper flowers, consider the following points:

  • Choose the right paper type and color to achieve the desired look and texture for your flowers, as different papers can greatly impact the final result.
  • Master the folding and shaping techniques to create realistic petals and give your flowers a natural appearance.
  • Pay attention to the assembly and arrangement of the flowers, as this can make or break the overall appearance of your paper flower arrangements.

Gathering Materials

A comprehensive collection of materials is necessary to create beautiful paper flowers. You will need a variety of papers, tools, and other supplies to achieve the desired outcome. Your selection of materials will greatly impact the overall appearance of your paper flowers.

Essential Tools

To get started, you will need a set of basic tools, including scissors, a craft knife, and a cutting mat. You will also need a pencil and a ruler to measure and mark your paper. Your tools should be of good quality to ensure precision and accuracy.

Quality Paper Selection

By choosing the right paper, you can create stunning and durable paper flowers. You should select papers that are suitable for the type of flower you want to make, considering factors such as color, texture, and weight. Your paper selection will greatly impact the overall appearance of your flowers.

Another aspect to consider when selecting paper is its durability and ability to hold its shape. You want your paper flowers to last and maintain their beauty over time. Consider using high-quality paper that is designed specifically for crafting, as it will be more resistant to tearing and fading, allowing your flowers to remain vibrant and beautiful for a longer period.

Preparing the Petals

One of the most necessary steps in making paper flowers is preparing the petals. You will need to cut out the petal shapes from your chosen paper, taking care to make them as uniform as possible. This will help your flower look realistic and professional.

Cutting Techniques

Beneath the surface of simple cutting lies a world of technique, and you’ll find that using the right tools and methods makes all the difference. You’ll want to use sharp scissors or a craft knife to cut out your petals, and consider using a template to get the shape just right.

Shaping and Smoothing

Approximately at this stage, you’ll need to shape and smooth your petals to give them a natural curve. You can use a variety of tools, including a stylus or a ball tool, to gentle shape your petals and remove any wrinkles or creases.

This stage of shaping and smoothing is where you can really bring your paper flowers to life. You’ll be able to add subtle curves and textures that will make your flowers look like they were freshly picked from the garden. As you work on shaping and smoothing your petals, you’ll start to see your flower take shape, and you can begin to imagine how it will look when it’s finished.

Creating the Center

Many paper flower designs begin with a central point, and you will find that this sets the tone for your entire creation. You can use a variety of materials, such as beads, stamens, or even small pieces of paper, to create the center of your flower.

Choosing the Right Color

Along with selecting the type of material, you should also consider the color of your center, as it will impact the overall appearance of your flower. You will want to choose a color that complements the rest of your design and adds depth and dimension to your creation.

Assembly Methods

By mastering various assembly methods, you can bring your paper flower to life. You will find that different techniques, such as gluing, taping, or shaping, can be used to secure the center and the surrounding petals.

And as you practice assembling your paper flower, you will develop the skills and techniques needed to create a lifelike and beautiful bloom. You will be able to experiment with different assembly methods, such as layering or shaping, to create a unique and realistic appearance, and your finished flower will be a testament to your patience and skill.

Building the Flower

Unlike other crafts, making paper flowers requires patience and attention to detail, as you carefully shape and assemble each petal to create a realistic bloom.

Petal Attachment

Following the design, you will attach each petal to the flower center, making sure to secure them firmly to create a sturdy base for your flower.

Stem Creation

Structuring your stem is the next step, where you will attach the flower to a wire or stick, allowing you to shape and pose your flower as desired.

Consequently, as you work on your stem, you will find that the type of material you choose will affect the overall appearance and durability of your paper flower, so choose wisely to ensure your flower lasts and looks its best, and you can use floral tape or glue to secure the stem in place, finishing your beautiful paper flower.

Adding Finishing Touches

After you have assembled your paper flower, it’s time to add the final details that will bring it to life. You can add a stem, leaves, and other embellishments to give your flower a more realistic look. Your creativity and attention to detail will make your paper flower truly unique.

Leaf Attachment

Among the various ways to attach leaves to your paper flower, using a small dot of glue or a thin stem wire is the most effective. You can shape the leaves to fit your flower and attach them securely, making sure they are evenly spaced and balanced.

Final Shaping

At this stage, you can make any necessary adjustments to the shape and form of your paper flower. You can gently bend and shape the petals to create a natural, organic look, and make sure all the elements are securely attached.

Consequently, as you work on the final shaping of your paper flower, you will notice how it starts to take on a life of its own. You can experiment with different shapes and forms, and make adjustments as needed to achieve the desired look, and with practice, you will develop the skills to create beautiful, realistic paper flowers that will impress anyone.

Displaying Your Creation

To show off your beautiful paper flowers, you can arrange them in a vase or container, or even use them as a decorative element in a wreath or garland. For more inspiration, check out DIY Paper Flowers: The Best Free Tutorials, Patterns, & Ideas to learn new techniques and ideas.

Arrangement Ideas

Displaying your paper flowers in a unique and creative way can elevate their beauty. You can mix and match different colors, shapes, and sizes to create a stunning arrangement that reflects your personal style.

Care and Maintenance

With proper care, your paper flowers can last for a long time. You can gently dust them with a soft brush and avoid exposing them to direct sunlight or moisture to keep them looking their best.

But to ensure your paper flowers remain vibrant and intact, you should also avoid touching them excessively, as the oils from your skin can cause them to deteriorate over time. By following these simple care and maintenance tips, you can enjoy your beautiful paper flowers for months to come.

Conclusion

The art of making paper flowers is now at your fingertips. You have learned the techniques to create beautiful, delicate flowers. With your skills and patience, you can craft your own paper flowers, adding a personal touch to your decorations. You will be able to design and make various types of flowers, enhancing your creativity and skills, and your handmade flowers will be a testament to your talent.

FAQ

Q: What materials do I need to make paper flowers?

A: To make paper flowers, you will need a few basic materials, including paper (preferably colored or patterned), scissors, a glue stick, a green wire (for the stem), and a pencil or a tool to shape the petals. You can also use other materials like floral tape, decorative items, or leaves to add a more realistic look to your flowers.

Q: What is the best type of paper to use for making paper flowers?

A: The best type of paper for making paper flowers is a lightweight, thin paper that can be easily shaped and molded. You can use crepe paper, tissue paper, or even thin cardstock. The color and pattern of the paper will depend on the type of flower you want to create, so choose a paper that matches your desired flower’s appearance.

Q: How do I shape and assemble the petals of a paper flower?

A: To shape and assemble the petals of a paper flower, start by cutting out the petal shapes from your paper. You can use a template or draw the shapes freehand. Then, use a pencil or a tool to gently curve and shape each petal, making sure to create a natural, curved shape. Once you have all your petals shaped, use a glue stick to assemble the flower, starting from the center and working your way outwards.

Q: Can I add details and textures to my paper flowers to make them more realistic?

A: Yes, you can add details and textures to your paper flowers to make them more realistic. You can use a pencil or a marker to add veins to the petals, or use a texture paste to create a raised, dimensional effect. You can also add stamens or centers to the flowers using small pieces of paper or thread, and use floral tape to attach the stem to the flower.

Q: How do I care for and store my paper flowers to keep them looking their best?

A: To keep your paper flowers looking their best, avoid exposing them to direct sunlight, moisture, or extreme temperatures. You can store them in a cool, dry place, away from dust and debris. If you need to clean your paper flowers, use a soft brush or a damp cloth to gently remove any dirt or dust. You can also use a hairspray to set the flowers in place and prevent them from wilting or losing their shape.

Top Paper Craft Ideas for Gifting

As you consider unique and thoughtful gift options, paper crafts can be a great way to show you care. You can create beautiful and personalized gifts using paper, making your presents even more special. Your loved ones will appreciate the effort you put into crafting something handmade, and with the right ideas, you can create stunning gifts that will be treasured for years to come. You’ll find inspiration in the paper craft ideas outlined in this post, helping you to get started on your gifting journey.

Key Takeaways:

To create thoughtful and personalized gifts, consider the following paper craft ideas:

  • Utilize Origami techniques to create intricate and delicate designs, such as boxes, flowers, or animals, that can be used as decorative gifts or gift wraps.
  • Design and print customized Gift Cards using paper craft techniques, allowing you to add a personal touch to your presents and make them more special.
  • Explore Collage Art to create unique and visually appealing gifts, such as framed pictures, cards, or gift tags, that showcase your creativity and attention to detail.

Simple yet Elegant Designs

To create a thoughtful gift, consider simple yet elegant paper craft designs that exude sophistication. You can choose from various techniques and materials to create a unique piece that reflects your personality and the recipient’s style.

Handmade Cards

Beneath paper crafts, you’ll find that handmade cards are a great way to show you care. You can design your own cards with personalized messages, making them extra special for your loved ones.

Paper Flowers

Along with other paper crafts, paper flowers are a popular choice for gifting. You can create beautiful blooms in various colors and patterns, adding a delicate touch to your gifts.

With paper flowers, you can create stunning arrangements and bouquets that are long-lasting and require minimal maintenance. You can also customize them to match your gift’s theme and style, making your present even more special and thoughtful, allowing you to showcase your creativity and attention to detail.

Creative Gift Wrapping Ideas

There’s an art to gift wrapping, and paper craft can elevate your presents to a whole new level. You can use various techniques to create unique and personalized wraps that reflect your personality and the occasion.

Paper Quilling

Paperlike designs can be created using quilling techniques, which involve rolling and shaping paper strips into intricate patterns. You can use these designs to add a decorative touch to your gifts, making them stand out.

Origami Gift Boxes

About making your gifts even more special, you can try creating origami gift boxes to hold small items. You can use colorful paper to create beautiful and intricate designs that will make your gifts truly unique.

At the heart of origami gift boxes is the art of paper folding, which requires patience and precision. You can find many tutorials and guides online to help you get started, and with practice, you can create beautiful and intricate designs that will make your gifts stand out. As you master the art of origami, you can experiment with different paper types and designs to create truly personalized gift boxes that reflect your style and the occasion.

Decorative Paper Crafts

Unlike other gift ideas, decorative paper crafts offer a unique and personalized touch. You can explore various designs and patterns on 170 Paper Gift Ideas to find inspiration for your next project.

Paper Lanterns

Among the various decorative paper crafts, paper lanterns are a popular choice. You can create beautiful lanterns in different shapes, sizes, and colors to add a touch of elegance to your gifts.

Paper Mache Vases

Crafts like paper mache vases are a great way to add a personal touch to your gifts. You can create unique and beautiful vases using paper mache techniques and decorate them with paint, glitter, or other embellishments.

And as you probe deeper into paper mache vases, you’ll discover the versatility of this craft. You can experiment with different shapes, sizes, and designs to create one-of-a-kind pieces that reflect your personality and style, making your gifts even more special and meaningful to the recipient.

Personalized Gifts

All paper craft gifts can be made special with a personal touch, making them extra thoughtful and unique. You can customize your gifts to fit the recipient’s style and interests, making it a one-of-a-kind present.

Monogrammed Paper Cutouts

Between the various options for personalized gifts, monogrammed paper cutouts stand out as a beautiful and delicate choice. You can create intricate designs and patterns with your recipient’s initials, making it a thoughtful and personalized gift.

Customized Paper Jewelry

Among the many paper craft ideas, customized paper jewelry is a popular choice for gifting. You can create stunning pieces with paper, from earrings to necklaces, and customize them to fit your recipient’s style and preferences.

Seasonal Paper Crafts

Now that you’re looking for unique gifting ideas, consider seasonal paper crafts that cater to various occasions, allowing you to create personalized and thoughtful presents for your loved ones.

Christmas Ornaments

Towards the holiday season, you can create beautiful paper Christmas ornaments, such as intricately cut snowflakes, pop-up trees, or 3D stars, to adorn your gifts or gift them as standalone items, adding a touch of your personal craftsmanship to your presents.

Halloween Decorations

Before the spooky season arrives, you can start crafting your own Halloween decorations, like paper bats, spiders, or witches, to create a haunted atmosphere, and gift them to friends and family, allowing them to decorate their homes with your handmade creations.

Another aspect of Halloween decorations is the ability to customize them according to your gifts’ themes, enabling you to create cohesive and impressive presents that your loved ones will appreciate, and with paper crafts, you can experiment with various designs, colors, and textures to make your gifts truly unique.

Tips and Tricks

Keep your paper craft gifts looking professional with these tips:

  • Use high-quality paper
  • Pay attention to details

. Thou can achieve a beautiful and personalized gift with a little practice and patience.

Choosing the Right Paper

Paper selection is vital for your project, you will want to choose papers that complement your gift’s theme and your recipient’s style, considering factors like texture, color, and pattern to create a unique and thoughtful gift.

Adding Embellishments

By adding a few well-placed embellishments, you can take your paper craft gift to the next level, making it extra special and showing your recipient that you put thought and effort into the gift.

To add embellishments effectively, you will want to consider the overall design and theme of your gift, selecting embellishments that complement and enhance your paper craft, such as ribbons, stamps, or die-cuts, and use them sparingly to add a touch of elegance and sophistication to your gift, making it a truly personalized and meaningful present for your loved ones.

To wrap up

With this in mind, you now have a variety of top paper craft ideas for gifting at your disposal. You can choose the one that suits your skills and your recipient’s taste, and create a unique and personalized gift. Your handmade paper craft will surely be appreciated, and you will enjoy the process of making it. You can experiment with different designs and techniques to make your gift even more special.

FAQ

Q: What are some popular paper craft ideas that can be used for gifting?

A: There are many popular paper craft ideas that can be used for gifting, such as handmade cards, origami figures, paper flowers, quilling art, and 3D paper sculptures. These ideas can be customized to fit any occasion, from birthdays and weddings to holidays and graduations. You can also add personal touches, such as photos or special messages, to make the gift even more meaningful.

Q: What kind of paper is best for paper crafting?

A: The type of paper best for paper crafting depends on the specific project. For example, cardstock or watercolor paper is great for making handmade cards, while thinner paper like tissue paper or crepe paper is better for making paper flowers. You can also use patterned paper, such as scrapbook paper, to add color and design to your projects. Experimenting with different types of paper can help you achieve the desired look and texture for your gift.

Q: How do I get started with paper crafting if I have no experience?

A: Getting started with paper crafting is easy, even if you have no experience. Start by choosing a simple project, such as making a handmade card or a paper flower. You can find many tutorials and instructions online, or take a class to learn the basics. Begin with basic tools, such as scissors, glue, and a craft mat, and gradually add more specialized tools as you become more comfortable with the craft. Don’t be afraid to experiment and try new things – it’s all part of the creative process.

Q: Can I customize paper craft gifts for specific occasions or recipients?

A: Yes, one of the best things about paper crafting is that it can be highly customized to fit the occasion and the recipient. For example, you can make a birthday card with the recipient’s name and age, or create a wedding gift with the couple’s special date and names. You can also choose paper and designs that fit the recipient’s interests or hobbies, making the gift even more personalized and meaningful. With a little creativity, you can create a one-of-a-kind gift that shows you care.

Q: How do I package and present a paper craft gift to make it look professional and special?

A: Presentation is everything when it comes to gifting paper crafts. Consider adding a ribbon or gift tag to the gift, or placing it in a decorative box or bag. You can also include a personalized note or card to explain the thought and effort behind the gift. To make the gift look professional, make sure it is neatly and carefully made, with no loose edges or rough spots. You can also add a clear coat of varnish or sealant to protect the paper and give it a glossy finish. With a little attention to detail, your paper craft gift is sure to impress.

How to Make Handmade Jewelry

As you commence on the journey of creating your own handmade jewelry, you’ll discover a world of creativity and self-expression. With a few simple tools and materials, you can craft unique pieces that reflect your personal style. You’ll learn to combine beads, wires, and other elements to create stunning accessories that make a statement. Your imagination will be the only limit as you explore the art of handmade jewelry making, and with these steps, you’ll be well on your way to designing beautiful pieces that are truly one-of-a-kind.

Key Takeaways:

To create unique and personalized handmade jewelry, consider the following points:

  • Start by selecting high-quality materials, such as gems, beads, and metals, that fit your design and budget, and ensure they are compatible with each other.
  • Develop your technical skills through online tutorials, classes, or practice, to master various techniques like wire wrapping, soldering, and beading, and to improve your overall craftsmanship.
  • Focus on attention to detail when assembling and finishing your handmade jewelry pieces, paying close attention to aspects like closure security, polish, and overall aesthetics to create professional-looking items.

Gathering Materials

Before you begin making your handmade jewelry, it’s imperative to gather all the necessary materials. This will ensure that you have everything you need to complete your project efficiently.

Essential Tools

Along with your creative vision, you’ll need a set of basic tools, such as wire cutters, pliers, and a work surface, to bring your jewelry design to life.

Beads and Findings

About the materials you’ll be working with, you’ll need to select beads, strings, and findings that fit your design aesthetic and skill level, considering factors like color, texture, and durability.

Gathering an assortment of beads and findings will allow you to experiment with different combinations, enabling you to create unique and personalized pieces that reflect your style and creativity, and as you collect your beads and findings, you’ll start to envision the beautiful jewelry you’ll be making with your own hands.

Designing Your Piece

There’s no denying that designing your handmade jewelry piece is an exciting part of the process. You get to unleash your creativity and bring your vision to life. As you start designing, consider what inspires you and what style you’re aiming for.

Choosing a Theme

The first step in designing your piece is to choose a theme or concept that sparks your imagination. Think about your personal style, favorite colors, and the occasion for which you’re creating the jewelry. This will help you narrow down your options and guide your design decisions.

Sketching Your Design

Behind every beautiful piece of handmade jewelry is a well-thought-out design. You’ll want to sketch out your ideas to visualize the final product and make any necessary adjustments before you start creating. This will save you time and materials in the long run.

Plus, as you sketch your design, you’ll have the opportunity to experiment with different shapes, colors, and textures. You can try out various combinations to see what works best for your piece, and make adjustments as needed. This is your chance to let your creativity shine and bring your unique vision to life, so don’t be afraid to try new things and have fun with the process.

Working with Beads

Your journey into handmade jewelry making begins with beads, and the possibilities are endless. You can choose from a variety of materials, shapes, and colors to create unique pieces that reflect your style.

Stringing Techniques

Almost any type of bead can be strung onto a cord or wire, allowing you to create simple yet elegant jewelry. You can experiment with different patterns and bead combinations to add visual interest to your designs.

Bead Weaving

Once you have mastered the basics, you can move on to more complex techniques like beading. You will need a loom or a needle and thread to weave your beads into intricate patterns and designs.

Weaving beads into complex patterns requires patience and practice, but the results are well worth the effort. You can create beautiful, intricate designs that showcase your skills and creativity, and with time, you will develop your own unique style and voice in the world of handmade jewelry making, allowing you to craft pieces that are truly one-of-a-kind and reflective of your personal aesthetic.

Adding Finishing Touches

Despite the complexity of your handmade jewelry design, the final details can make all the difference. You can find inspiration for your unique pieces on 360 Handmade Jewelry ideas and get creative with your finishing touches.

Closure Options

For a polished look, consider various closure options, such as clasps, toggles, or screws, to secure your handmade jewelry in place, ensuring your masterpiece stays intact.

Embellishments

The right embellishments can elevate your handmade jewelry, adding texture, color, and personality to your design, making it truly one-of-a-kind.

Even with simple embellishments like beads, sequins, or charms, you can create intricate patterns and designs that reflect your personal style, allowing you to express yourself through your handmade jewelry, and making the process of creating it even more enjoyable and rewarding for you.

Troubleshooting Common Issues

All handmade jewelry makers encounter challenges, and you are no exception. You’ll face issues, but with practice, you’ll learn to overcome them, creating unique and beautiful pieces.

Dealing with Knots

Along the way, you’ll encounter knots that can be frustrating, but you can learn to handle them with ease, using tools or your fingers to gently tease them out, and your jewelry will look professional.

Fixing Broken Pieces

Pieces of your jewelry may break, but you can fix them by reattaching or replacing the broken part, and your piece will be good as new, with a little patience and practice, you’ll master the technique.

Another aspect of fixing broken pieces involves being prepared with a well-stocked toolbox, you’ll have everything you need to mend your jewelry, and with a little creativity, you can even turn a broken piece into a new, unique design, adding character to your handmade jewelry, and making it truly special, just like you envisioned.

Displaying and Caring for Your Jewelry

Now that you’ve created your handmade jewelry, it’s time to think about displaying and caring for your pieces.

Storage Tips

You will need to consider how to store your jewelry to keep it looking its best. Here are a few tips:

  • Keep your jewelry in a cool, dry place
  • Avoid exposing your jewelry to direct sunlight

Perceiving the value of your handmade jewelry, you will want to take good care of it.

Showcasing Your Creations

Tips for showcasing your handmade jewelry abound, but you can start by considering your personal style and the style of your jewelry.

In addition to storing your jewelry properly, you can showcase your creations in a beautiful and creative way, such as on a decorative tray or in a lovely jewelry box, allowing you to enjoy your handmade pieces and share them with others.

Summing up

Following this guide, you’ll have created your own unique handmade jewelry. With your new skills, you can experiment with various materials and designs to craft one-of-a-kind pieces that reflect your personal style. As you continue to explore the world of jewelry making, you’ll discover new techniques to enhance your creations, and your jewelry box will soon be filled with beautiful, handmade treasures that showcase your creativity and flair.

FAQ

Q: What materials do I need to get started with making handmade jewelry?

A: To begin making handmade jewelry, you will need a variety of materials, including beads, wires, strings, and findings. Beads can be made of different materials such as glass, wood, or gemstones, and come in various shapes, sizes, and colors. Wires can be made of copper, silver, or gold, and are used to create the framework of your jewelry piece. Strings, such as leather or suede, can be used to add an organic touch to your designs. Findings, including clasps, earring backs, and jump rings, are necessary components that help complete your jewelry pieces.

Q: What are the basic tools required for making handmade jewelry?

A: The basic tools needed for making handmade jewelry include wire cutters, pliers, and flat-nose pliers. Wire cutters are used to cut wires to the desired length, while pliers and flat-nose pliers are used to shape, bend, and form wires into various shapes and designs. Additionally, a work surface, such as a bead mat or a jewelry-making board, can help keep your beads and findings organized and prevent them from getting lost.

Q: How do I design and plan my handmade jewelry piece?

A: To design and plan your handmade jewelry piece, start by brainstorming ideas and sketching out your design. Consider the theme, style, and purpose of your jewelry piece, as well as the materials and colors you want to use. Look for inspiration online, in books, or in nature, and take note of the colors, textures, and patterns that you like. You can also experiment with different bead combinations and wire shapes to create a unique and personalized design.

Q: What are some common techniques used in making handmade jewelry?

A: Some common techniques used in making handmade jewelry include stringing, wire wrapping, and beading. Stringing involves threading beads onto a string or wire, while wire wrapping involves shaping and forming wires to create intricate designs and patterns. Beading involves using a needle and thread to weave beads into complex patterns and designs. Other techniques, such as knotting and crimping, can also be used to add texture and interest to your jewelry pieces.

Q: How do I finish and care for my handmade jewelry piece?

A: To finish your handmade jewelry piece, make sure all the ends are securely closed, and the findings are tightly attached. You can also add a coating or sealant to protect your jewelry from tarnish or corrosion. To care for your handmade jewelry, avoid exposing it to water or harsh chemicals, and store it in a cool, dry place. Regularly clean your jewelry with a soft cloth and mild soap, and avoid stacking or tangling your jewelry pieces to prevent damage and breakage.

How to Craft with Recycled Fabric

You can breathe new life into old clothes and textiles by crafting with recycled fabric. As you explore this creative outlet, you’ll discover the potential to transform your old garments into unique pieces. Your imagination and creativity will guide you in turning discarded fabrics into functional items, such as bags, quilts, or home decor. By following simple steps, you can create one-of-a-kind projects that showcase your style and reduce waste.

Key Takeaways:

To get the most out of crafting with recycled fabric, consider the following points:

  • Start by collecting and sorting various types of recycled fabric, such as old clothes, linens, and textile scraps, to determine the best materials for your project.
  • Transform your recycled fabric into unique creations by applying different techniques, like dyeing, cutting, and stitching, to give new life to old materials.
  • Be creative and experiment with various designs and patterns to turn your recycled fabric into functional items, such as bags, quilts, or home decor accessories.

Preparing Recycled Fabric

To start crafting with recycled fabric, you need to prepare your materials. This involves several steps that will help you work efficiently and effectively with your fabric scraps.

Sorting and Cleaning Fabric

With a keen eye for detail, you will separate your fabric scraps into different categories based on their texture, color, and size, and then clean them to remove any dirt or debris.

Cutting and Processing Techniques

Sorting through your fabric scraps, you will identify the best cutting and processing techniques to use for your project, taking into account the type of fabric and the desired outcome.

It is necessary to consider the texture and stability of the fabric when cutting and processing, as some fabrics may fray or stretch more than others, and you will need to adjust your techniques accordingly to achieve the desired results for your craft project.

Choosing the Right Projects

Some of the most important decisions you’ll make when crafting with recycled fabric involve selecting the right projects for your skills and materials.

Considering Fabric Types and Texture

You’ll want to consider the types of fabric you have available and their textures, which can include:

  • Cotton
  • Polyester
  • Linen

. Any project you choose should be suitable for your fabric.

Fabric Type Project Ideas
Cotton Quilts, dresses
Polyester Upholstery, bags
Linen Home decor, accessories
Mixed Collage, patchwork
Silk Scarves, blouses

Selecting Patterns and Designs

Patterns are key to creating visually appealing projects. You can find inspiration in nature, art, or even your favorite clothes.
To get started, look for patterns that match your skill level and the type of fabric you’re using. You can find many free patterns online or create your own using graph paper and pencils. Consider the color palette and theme of your project, and don’t be afraid to experiment with different combinations of fabrics and textures.

Essential Tools and Materials

After gathering your recycled fabric, you’ll need to prepare your workspace with the necessary tools and materials to bring your project to life. You’ll be working with various textures and colors, so it’s crucial to have the right equipment on hand.

Basic Sewing Kit

Adeptly, you will need a basic sewing kit that includes a sewing machine, needles, threads, and scissors to help you cut and sew your recycled fabric into the desired shape and size.

Additional Crafting Supplies

Similarly, materials like fabric glue, buttons, and embroidery floss can add an extra touch to your project, allowing you to get creative with your recycled fabric crafting.

Tools like rotary cutters, cutting mats, and tape measures will also come in handy when working with your additional crafting supplies, enabling you to accurately measure and cut your fabric, and assemble your project with ease, as you work to transform your recycled fabric into a unique and personalized item that reflects your style and creativity.

Tips for Working with Recycled Fabric

For successful crafting with recycled fabric, consider the following:

  • Choose fabrics that are clean and dry
  • Sort fabrics by type and color

This will help you create beautiful and unique projects.

Handling Delicate or Thick Fabrics

Likewise, when working with delicate or thick fabrics, you need to handle them with care to avoid damage or distortion.

Minimizing Waste and Maximizing Usage

There’s always a way to minimize waste when working with recycled fabric, and you can get creative with even the smallest scraps.

With a little planning and strategy, you can maximize your usage of recycled fabric and reduce waste in your crafting projects. You can use small scraps to create patchwork designs, or cut them into strips for quilting or rug-making. By getting creative with your fabric scraps, you can create unique and eco-friendly crafts that showcase your resourcefulness and skill.

Factors to Consider in Crafting

Not all recycled fabrics are created equal, and you should consider several factors when choosing materials for your project. Some key considerations include:

  • Fabric type and weight
  • Color and texture
  • Thou should think about these factors to ensure your project turns out as desired.

    Color and Texture Combinations

    Equally important is selecting color and texture combinations that complement each other, as you want your finished project to be visually appealing, and you can achieve this by choosing fabrics that work well together.

    Durability and Longevity of Projects

    Equally, when working with recycled fabrics, you need to consider the durability and longevity of your projects, and you can do this by choosing fabrics that are sturdy and long-lasting, and will withstand use and washing.

    The durability and longevity of your projects will also depend on the techniques you use to construct them, and you should choose methods that will ensure your project remains intact over time, such as using strong stitches and reinforcing seams, and by doing so, you will create a beautiful and long-lasting piece from your recycled fabrics.

    Advanced Techniques and Ideas

    Now that you have mastered the basics, you can explore more complex projects, such as:

    1. Upcycling old clothes

    Visit 13 Ideas for Textile Recycling DIY and Fabric Scrap Crafts for inspiration.

    Technique Description

    Embellishments and Decorations

    Embellishing your projects with ribbons, buttons, or appliques can add a personal touch, allowing you to customize your creations to fit your style, and with your imagination, you can create unique pieces.

    Creating Complex Patterns and Designs

    Designing intricate patterns and motifs can elevate your crafts, and by experimenting with different colors, textures, and shapes, you can develop your own distinctive aesthetic.

    Ideas for complex patterns include combining disparate fabrics, playing with scale and proportion, and incorporating unexpected materials, which will help you to create visually striking and imaginative pieces, as you continue to experiment and innovate, you will develop your skills and style, enabling you to craft items that reflect your personality and creativity.

    Final Words

    Hence, you have learned the basics of crafting with recycled fabric, and now you can unleash your creativity to repurpose old materials into unique items. You will be reducing waste and creating something truly special with your own hands. As you continue to experiment with your craft, you will discover new ways to breathe new life into your recycled fabric, making your projects even more personalized and meaningful to you and your loved ones.

    FAQ

    Q: What are the best types of recycled fabric to use for crafting?

    A: The best types of recycled fabric to use for crafting include old t-shirts, denim jeans, cotton sheets, and felted wool sweaters. These fabrics are durable, easy to work with, and can be transformed into a variety of unique and creative projects, such as quilts, bags, and home decor items. You can also experiment with other recycled materials like plastic bags, old umbrellas, and fabric scraps to add an extra layer of eco-friendliness to your crafts.

    Q: How do I prepare recycled fabric for crafting?

    A: To prepare recycled fabric for crafting, start by washing and drying the fabric to remove any dirt, stains, or finishes that may affect the fabric’s texture or color. Then, iron the fabric to remove wrinkles and creases, and cut it into the desired shape and size for your project. If the fabric is particularly fragile or prone to fraying, you can stabilize it with a layer of interfacing or fusible web to make it easier to work with. Additionally, consider sorting and categorizing your recycled fabrics by color, texture, and weight to make it easier to find the perfect fabric for your next project.

    Q: What are some creative ways to craft with recycled fabric?

    A: There are many creative ways to craft with recycled fabric, including upcycling old clothing into new garments, such as turning old t-shirts into reusable bags or creating a quilt from vintage denim jeans. You can also use recycled fabric to make home decor items, like pillow covers, table runners, and wall hangings. Other ideas include creating stuffed animals or dolls from recycled fabric scraps, making fabric jewelry or accessories, and even crafting functional items like coasters, potholders, and market bags. The possibilities are endless, and the best part is that you can feel good about reducing waste and giving old fabrics a new life.

Skip to content