Basics

The Basics of Watercolor Painting

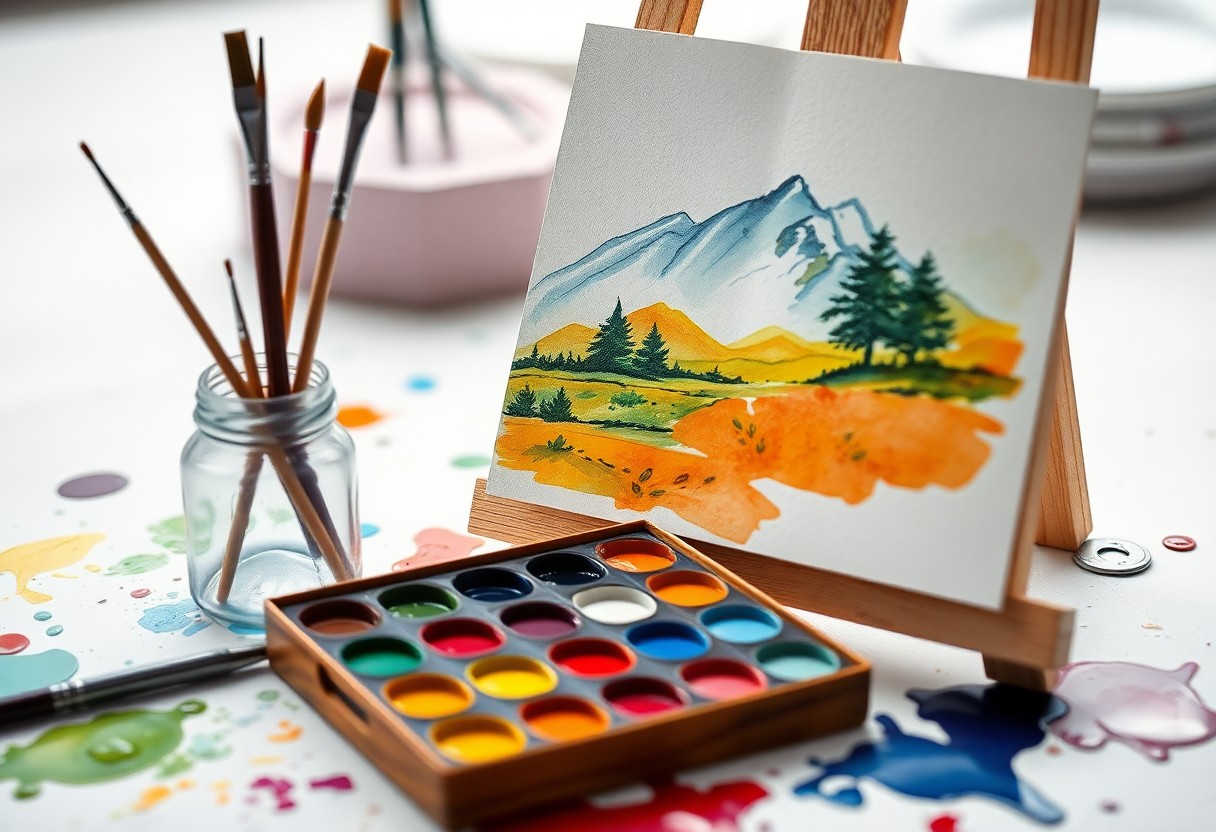
You’re about to explore the world of watercolor painting. Your journey starts with the fundamentals. You’ll learn to mix colors, handle brushes, and apply techniques. Your goal is to create something beautiful with water and pigment. You’ll begin with simple exercises, gradually building your skills. As you progress, your unique style will emerge, and you’ll bring your artistic vision to life.

Key Takeaways:

  • Understanding the fundamentals of watercolor painting is important to creating beautiful and harmonious artworks, including the basics of color theory and brushstrokes.
  • Mastering the techniques of watercolor painting, such as wash, drybrush, and glazing, allows artists to achieve a range of effects and textures in their work.
  • Choosing the right materials, including paper, pigments, and brushes, is vital to producing high-quality watercolor paintings that will last over time and showcase the artist’s skills.
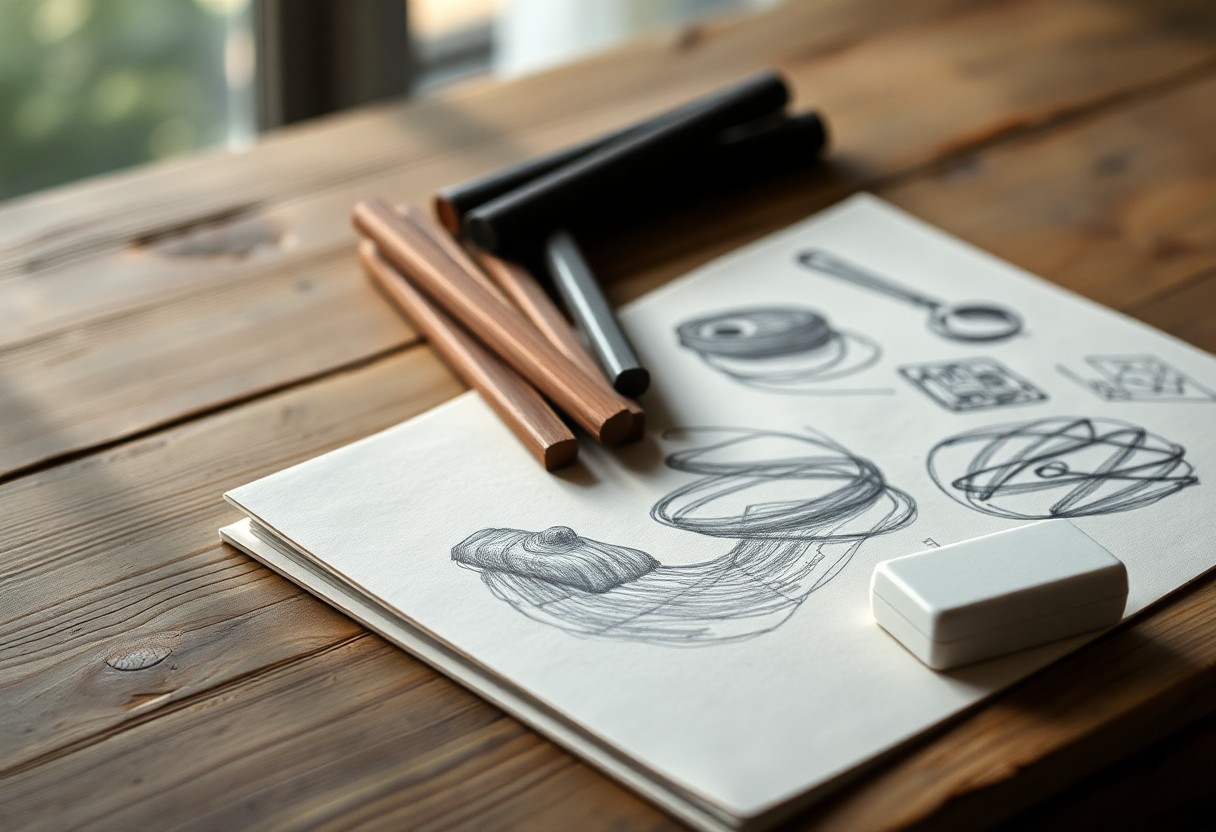
Materials

Before you start watercolor painting, you need to gather the right materials. This includes brushes, paints, and paper. You will also need a palette and a water container.

Brushes

The basics of brush selection are simple: choose brushes that feel right in your hand. You want brushes that move smoothly and evenly, applying the right amount of paint to your paper.

Paints

Beside your brushes, paints are the next vital tool. You can buy them in tubes or pans, and they come in a wide range of colors. You will need to choose a palette that suits your style.

Due to the wide range of watercolor paints available, you can experiment with different types to find what works best for you. You can try transparent, opaque, or mixed-media paints, depending on the effect you want to achieve in your painting. You will find that each type of paint has its own unique characteristics and uses.

Color Theory

If you want to master watercolor painting, understanding color theory is necessary. You need to know how colors interact with each other to create harmonious and balanced artworks.

Primary Colors

Around the core of color theory are primary colors: red, yellow, and blue. You’ll use these colors to create your palette and mix secondary colors.

Mixing Colors

Between the primary colors, you’ll find a world of possibilities. You can mix them to create secondary colors, such as green, orange, and purple, and develop your unique color palette.

At the heart of mixing colors is experimentation. You’ll discover that mixing colors is an art in itself, and the more you practice, the more you’ll understand how to create the colors you want. You can start by mixing equal parts of two primary colors and then adjusting the ratios to achieve the desired hue and shade.

Techniques

Your approach to watercolor painting will depend on the techniques you use. You’ll need to experiment with different methods to achieve the desired effects.

Wet-on-Wet

After applying wet paint to wet paper, you’ll create soft, blended edges. This technique allows you to merge colors and achieve subtle transitions.

Drybrushing

The drybrush technique involves dragging a almost-dry brush across dry paper, creating rough, textured effects. You’ll use this to suggest vegetation, tree bark, or rock surfaces.

Understanding drybrushing is key to adding depth and interest to your paintings. You’ll find that it’s particularly useful for creating detailed, high-contrast scenes, and with practice, you’ll master the subtle dance of brush and paper.

Composition

Unlike other art forms, watercolor painting relies heavily on composition to convey emotion and tell a story. You’ll need to consider the placement of elements, negative space, and visual flow to creating a cohesive piece.

Balance

By paying attention to balance, you can create a sense of stability in your painting. You’ll want to distribute visual weight evenly, using color, shape, and size to guide the viewer’s eye.

Harmony

Behind every great watercolor painting is a sense of harmony, achieved by selecting colors and elements that work together. You’ll want to choose colors that complement each other, creating a visually appealing and cohesive whole.

The key to achieving harmony in your watercolor painting is to experiment with different color combinations and techniques. You can try using analogous colors, complementary colors, or even a limited palette to create a sense of unity and coherence in your work. As you practice, you’ll develop an eye for what works and what doesn’t, and your paintings will become more balanced and harmonious.

Practice

To improve your watercolor skills, you need to practice regularly. Start with simple exercises and gradually move on to more complex ones.

Exercises

About the basics, you will learn various techniques, such as wet-on-wet and wet-on-dry. You will practice mixing colors and creating different hues.

Tips

Tips for better practice include:

  • using high-quality materials
  • watching online tutorials
  • Any practice is better than none, so keep at it.

    Tips like these will help you improve your skills. You can try:

    • practicing regularly
    • experimenting with different techniques
    • Any mistakes you make will be an opportunity to learn and grow.

      Also, as you practice, you will develop your own style and voice. You can try:

      • exploring different subjects
      • using your imagination
      • Any artist will tell you that practice is key to improving your watercolor painting skills.

        Common Mistakes

        For a beginner, watercolor painting can be a challenging medium to master. You’ll encounter mistakes, but learning from them is key to improving your skills.

        Overmixing

        With practice, you’ll find that overmixing your paints can lead to muddy, unappealing colors. You should aim to mix your colors just enough to achieve the desired hue.

        Incorrect Brushstrokes

        With a little patience, you’ll develop the right brushstrokes, but until then, you may struggle with inconsistent results. You need to apply gentle, smooth strokes to achieve the desired effect.

        Even when you’ve mastered the basic brushstrokes, you may still find that your paintings lack a certain finesse. You can improve this by paying attention to the pressure and speed of your brushstrokes, as these can greatly impact the final result of your painting.

        To wrap up

        Drawing together the basics of watercolor painting, you now have a solid foundation to build on. You’ve learned the fundamentals of materials, techniques, and color theory. Your understanding of this medium will continue to grow as you practice and experiment with your skills. With patience and dedication, you’ll master the art of watercolor painting and create beautiful pieces that reflect your unique style and vision.

        FAQ

        Q: What are the basic materials needed to start watercolor painting?

        A: To start watercolor painting, you will need a few basic materials, including watercolor paints, watercolor paper, a brush, a water container, and a palette. The quality of these materials can vary depending on your budget and personal preference. For instance, watercolor paints come in two forms: pan paints and tube paints. Watercolor paper is available in different weights and textures, and brushes come in various shapes and sizes. Understanding the characteristics of each material will help you make informed decisions when selecting your supplies.

        Q: How do I prepare my watercolor paper for painting?

        A: Preparing your watercolor paper is an important step before you begin painting. This typically involves stretching and securing the paper to a board using tape to prevent it from buckling when wet. You can also use watercolor paper that is already glued to a board or choose a heavy weight paper that does not require stretching. If you’re using a block of watercolor paper, it’s already glued on all sides, making it ready to use straight away. Proper preparation ensures your paper remains flat and stable throughout the painting process.

        Q: What is the difference between wet-on-wet and wet-on-dry watercolor techniques?

        A: In watercolor painting, two fundamental techniques are wet-on-wet and wet-on-dry. Wet-on-wet involves adding wet paint to wet paper, allowing for smooth blending and soft edges. This technique is great for creating subtle gradations of color and can be used for backgrounds or suggestive forms. On the other hand, wet-on-dry involves applying wet paint to dry paper, which produces sharper, more defined edges. This technique is ideal for details and creating contrast within a painting. Understanding and mastering these techniques can greatly expand your creative possibilities in watercolor.

        Q: How do I achieve vibrant colors in my watercolor paintings?

        A: Achieving vibrant colors in watercolor painting involves several factors, including the quality of your paints, the use of glazing techniques, and the amount of water used. High-quality watercolor paints will generally produce more vivid results. Glazing, which involves layering transparent washes, can deepen and enrich colors. It’s also important to use the right amount of water; too much can dilute the color, while too little can make it too opaque. Experimenting with different pigments and techniques will help you find the right balance to achieve the vibrant colors you desire.

        Q: Can I correct mistakes in a watercolor painting?

        A: While watercolor is a medium that can be unforgiving, there are several strategies for correcting mistakes. One approach is to lift off the color using a damp brush, which can remove some of the pigment from the paper. Another technique is to use masking fluid to protect areas you want to keep untouched before applying more paint. In some cases, you might need to start over, but this can also be an opportunity to explore new ideas or approaches. Practice and experience will help you navigate the challenges of correcting mistakes in watercolor painting, allowing you to make adjustments with confidence.

The Basics of Charcoal Drawing

As you begin to explore the world of charcoal drawing, you’ll discover a medium that offers expressive and versatile creative possibilities. You’ll learn to harness the unique characteristics of charcoal to bring your artwork to life. Your journey will start with understanding the fundamentals of charcoal, including the different types and tools available. You will learn how to handle the materials and techniques to achieve the desired effects, allowing you to unlock your full artistic potential and create stunning charcoal drawings.

Key Takeaways:

  • The fundamentals of charcoal drawing involve understanding the different types of charcoal, including vine charcoal, compressed charcoal, and white charcoal, and how to use them to achieve various effects.
  • Mastering techniques such as hatching, cross-hatching, and stippling is vital for creating texture, value, and depth in a charcoal drawing.
  • Practicing sketching and shading exercises can help artists develop their skills and learn to control the expressive qualities of charcoal, allowing them to create detailed and realistic drawings.

    Gathering Materials

    Before you begin charcoal drawing, it’s important to gather the necessary materials to ensure a smooth and successful creative process. You will need a range of tools and surfaces to achieve the desired effects and techniques.

    Essential Tools

    Across the spectrum of charcoal drawing, you’ll find various tools that will help you achieve your artistic vision. You’ll need charcoal pencils, sticks, and erasers to create a range of tones and textures in your artwork.

    Surface Preparation

    Tools aside, preparing your drawing surface is vital for a good start. You’ll want to choose a paper that suits your desired outcome, considering factors such as texture and tone to ensure your charcoal drawing turns out as envisioned.

    But as you prepare your surface, consider the specific qualities of the paper you’ve chosen, and how they will affect your charcoal marks. You’ll find that different papers respond uniquely to charcoal, offering varying levels of absorption and smudging, which will impact the overall look and feel of your artwork, allowing you to make informed decisions about your creative process.

    Basic Techniques

    While exploring charcoal drawing, you’ll discover various techniques to achieve desired effects. You’ll learn to manipulate charcoal to create unique textures and tones, enhancing your artwork.

    Hatching and Cross-Hatching

    Harmonizing lines and strokes, you’ll create depth and dimension in your drawings using hatching and cross-hatching techniques, allowing you to add volume and texture to your subjects.

    Blending and Shading

    Often, you’ll find that blending and shading are crucial for creating realistic and detailed drawings, as you learn to merge different tones and values to achieve a natural, three-dimensional appearance in your artwork.

    This technique allows you to soften harsh lines, creating subtle transitions between light and dark areas, and you can use your fingers, stumps, or blending tortillons to smooth out charcoal marks, achieving a more refined and polished look in your drawings.

    Value and Contrast

    All artworks rely on value and contrast to create visually appealing compositions. You will use charcoal to create a range of values, from light to dark, to add depth and interest to your drawings. By controlling the contrast between light and dark, you can guide the viewer’s eye through your artwork.

    Creating Depth and Dimension

    Around the subject, you will use varying degrees of value to create the illusion of depth and dimension. You can achieve this by applying different pressures and techniques to your charcoal, allowing you to convey volume and texture in your drawing.

    Balancing Light and Dark

    Across your composition, you will need to balance light and dark values to create a harmonious and engaging piece. You should consider the placement and proportion of light and dark areas, as this will affect the overall mood and impact of your artwork.

    The balance of light and dark is important to creating a compelling charcoal drawing. As you work, you will need to constantly evaluate your composition, making adjustments to ensure that the contrast between light and dark is effective in conveying your intended message. You can use your charcoal to make subtle adjustments, gradually building up or erasing values to achieve the desired balance, and ultimately, a stunning piece of art that draws the viewer in.

    Texture and Pattern

    For beginners, understanding texture and pattern is important in charcoal drawing, as it allows you to add depth and dimension to your artwork, making it more engaging and realistic.

    Renderings of Different Surfaces

    For instance, you can practice rendering different surfaces, such as wood, stone, or fabric, to develop your skills in capturing various textures and patterns, which will help you to create more realistic and detailed drawings.

    Expressive Mark-Making

    Before you start drawing, consider the type of marks you want to make, as expressive mark-making can add emotion and energy to your artwork, allowing you to convey your message more effectively through your charcoal drawings.

    A key aspect of expressive mark-making is experimentation, as you can try different techniques, such as hatching, cross-hatching, and stippling, to achieve unique textures and effects, and discover what works best for your style and the subject you are drawing, enabling you to refine your skills and develop your own unique voice in charcoal drawing.

    Composition and Placement

    Now that you have a good understanding of the basics of charcoal drawing, it’s time to think about composition and placement. You will learn how to arrange elements in your drawing to create a visually appealing piece of art.

    Rule of Thirds and Symmetry

    The way you divide your paper can greatly affect the overall composition of your drawing. You should consider using the rule of thirds and symmetry to create a balanced and harmonious piece.

    Negative Space and Focal Points

    The effective use of negative space and focal points can make or break your drawing. You need to think about what you want your viewer to focus on and use negative space to guide their eye.

    Even when working with a limited range of values, you can create a compelling drawing by using negative space to create contrast and define your focal points. You can use the white of the paper to create highlights and make your drawing pop, and your charcoal to create deep, rich shadows that add depth and dimension to your work.

    Practice and Development

    Not every artist starts out as a skilled charcoal drawer, but with dedication and persistence, you can develop your skills and style. As you continue to practice, you will become more comfortable with the medium and begin to see improvement in your work.

    Exercises for Skill-Building

    Exercising your drawing skills with charcoal can be done through simple gestures, such as quick sketches and still-life drawings, helping you to develop your technique and build confidence in your abilities, allowing you to tackle more complex subjects.

    Overcoming Common Challenges

    Any struggles you encounter while drawing with charcoal can be overcome with patience and practice, as you learn to control the medium and develop your skills, you will become more proficient in creating the effects you desire in your artwork.

    A key aspect of overcoming common challenges is analyzing your mistakes and understanding what went wrong, this will help you to identify areas for improvement and make adjustments to your technique, enabling you to produce high-quality charcoal drawings that reflect your artistic vision, and as you continue to work through challenges, you will develop your unique style and voice as an artist.

    Conclusion

    The basics of charcoal drawing are now at your fingertips, and you can enhance your skills by learning more about How To Draw with Charcoal – Charcoal Drawing Techniques. You will be able to create stunning artwork by mastering these techniques and practicing regularly. As you continue to explore your creativity, your charcoal drawings will become more expressive and detailed, allowing you to bring your unique vision to life.

    FAQ

    Q: What are the basic materials needed to start charcoal drawing?

    A: To start charcoal drawing, you’ll need a few important materials. These include a set of charcoal pencils or sticks, a sharpener, an eraser, and a sketchbook or paper specifically designed for charcoal drawing. It’s also helpful to have a blending stump and a tortillon for smoothing and blending your drawings. Additionally, investing in a fixative spray can help prevent smudging and preserve your work.

    Q: What are the different types of charcoal used in drawing?

    A: There are several types of charcoal used in drawing, each with its own unique characteristics. Vine charcoal is the most commonly used type and is known for its soft, expressive lines. Compressed charcoal is denser and produces darker, more detailed marks. Charcoal pencils offer more control and are often used for detail work and fine lines. Finally, white charcoal is used for highlighting and creating contrasting effects on dark paper.

    Q: How do I achieve different tones and values in charcoal drawing?

    A: Achieving different tones and values in charcoal drawing is done through varying the pressure and technique used when applying the charcoal. Light, gentle strokes can create soft, delicate lines and subtle shifts in tone, while applying more pressure can produce darker, richer values. Blending with a stump or tortillon can also help smooth transitions between different tones, creating a more nuanced and realistic representation of light and shadow.

    Q: Can I use charcoal on any type of paper, or are there specific requirements?

    A: While charcoal can be used on a variety of papers, the best results are typically achieved with papers specifically designed for charcoal or pastel drawing. These papers have a textured surface, often referred to as “tooth,” which helps the charcoal adhere and allows for better blending and layering. Smooth papers can also be used, but they may not hold the charcoal as well, potentially leading to smudging or difficulty in achieving detailed work.

    Q: How do I prevent smudging and protect my charcoal drawings?

    A: Preventing smudging and protecting your charcoal drawings can be achieved through a few simple steps. Working carefully and minimizing the amount of touching or handling of the drawing can reduce smudging. Regularly using a fixative spray can also help set the charcoal in place, preventing it from smearing. For long-term protection, consider framing your drawing behind glass or using a UV-filtering acrylic. Additionally, storing your drawings in a cool, dry place, away from direct sunlight, can help preserve them over time.

Skip to content