The Joy of Handmade Curtains

As you launch on the journey of adorning your abode, you’ll discover that handmade curtains can elevate your space with unparalleled elegance. You’ll find that the beauty of handmade craftsmanship brings a sense of sophistication to your windows. For a glimpse into the delight of bespoke window treatments, visit Jumping with JOY about the new curtains! – Karla’s Cottage, and let your senses be transported to a world of textile wonder, where your unique taste is reflected in every stitch.
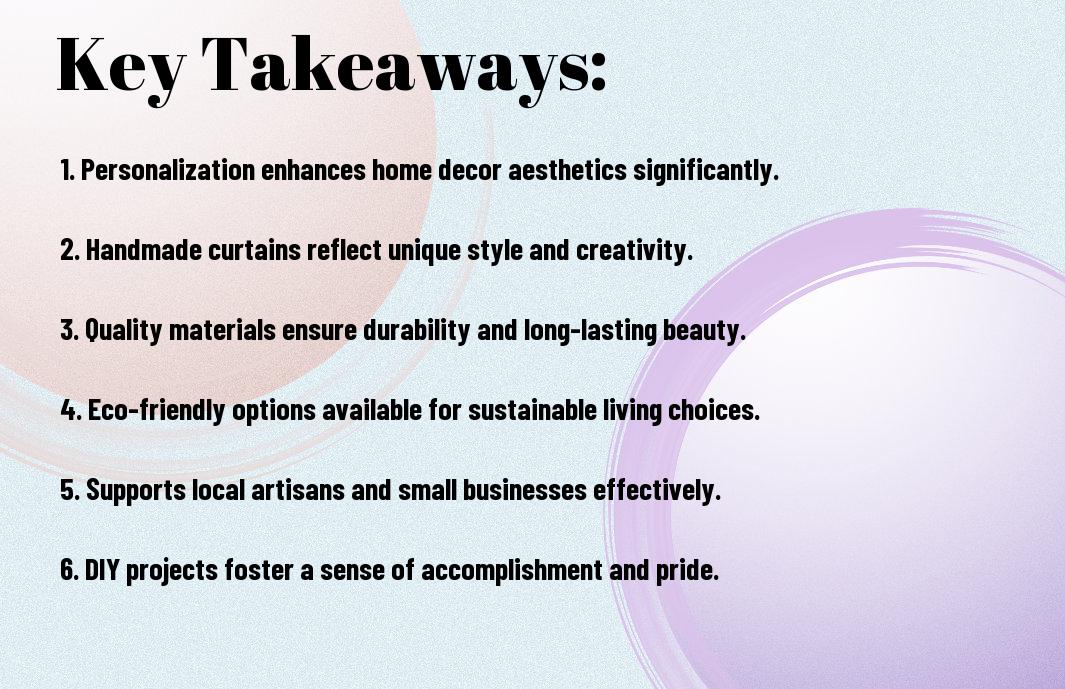
Key Takeaways:

  • Creating handmade curtains can add a personal touch to any room, making it feel more cozy and inviting.
  • Using natural fabrics and sustainable materials for handmade curtains can not only enhance the aesthetic appeal but also contribute to a more eco-friendly home.
  • Adding custom designs and patterns to handmade curtains allows homeowners to express their personal style and create a unique ambiance in their living space.

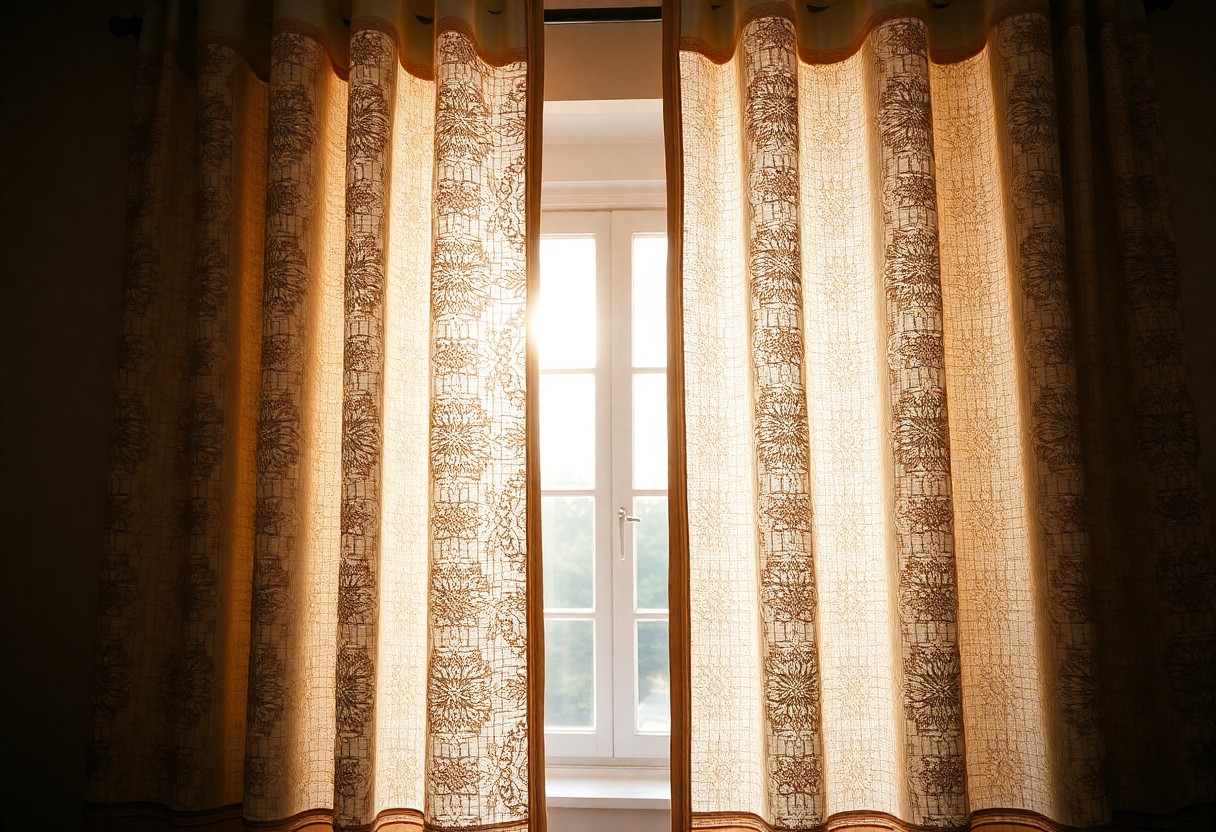
The Beauty of Handmade Curtains

Before you make a decision on window treatments, consider the allure of handmade curtains. They add a touch of elegance and sophistication to your space, setting it apart from the ordinary.

Unique Designs and Patterns

Along with the freedom to choose from a plethora of materials, you can select designs and patterns that reflect your personality, making your space truly unique and a testament to your refined taste.

Personalized Touch

By adding a personal touch to your handmade curtains, you can create a one-of-a-kind piece that speaks to your style and flair, making your home a genuine reflection of your inner self.

The personalized touch you bring to your handmade curtains allows you to imbue your space with a sense of warmth and character, inviting all who enter to experience the beauty and charm that you have so carefully curated, making your home a true sanctuary that reflects your exquisite taste and sensibilities.

Benefits of Handmade Curtains

Any homeowner seeking to elevate their living space can appreciate the unique charm of handmade curtains. They offer a level of customization and quality that mass-produced alternatives cannot match, making them a worthwhile investment for your home.

Energy Efficiency and Durability

For instance, handmade curtains can be crafted with energy-efficient materials and designs that help regulate the temperature in your home, thereby reducing your energy consumption and saving you money in the long run.

Aesthetic Appeal and Ambiance

Aesthetically, handmade curtains can add a touch of sophistication and elegance to your rooms, with their unique textures, patterns, and craftsmanship creating a truly inviting atmosphere that reflects your personal style.

Even as you decorate your home with handmade curtains, you’ll find that they become a conversation piece, allowing you to express your individuality and flair, and creating a space that is truly yours, where you can unwind and enjoy the beauty of handmade craftsmanship.

The Art of Creating Handmade Curtains

After delving into the world of handmade curtains, you will discover a realm of limitless possibility, where your creativity knows no bounds and your windows become a testament to your impeccable taste.

Choosing the Right Fabrics and Materials

For the discerning individual, selecting the perfect fabric and materials is an art form, one that requires attention to detail and a penchant for the exquisite, as you commence on this journey to create your own handmade curtains.

Techniques and Tips for Beginners

  • choose a simple pattern to start with
  • invest in quality sewing tools
  • , Knowing these basics will set you on the path to creating stunning handmade curtains that adorn your windows with elegance and sophistication.

    In addition to mastering the basics, as you hone your skills, you will find that the techniques and tips for creating handmade curtains are vast and varied, consider the following:

    • experiment with different folds and pleats
    • play with an array of colors and textures

    , Knowing these techniques will enable you to craft handmade curtains that are truly one-of-a-kind, reflecting your unique style and flair.

    Popular Styles and Trends

    Keep in mind that handmade curtains can be tailored to fit your personal style, and there are numerous designs to choose from, ensuring you find the perfect match for your home.

    Classic and Traditional Designs

    Across the spectrum of interior design, you’ll find that classic and traditional designs are timeless choices, evoking a sense of elegance and sophistication in your home, with intricate patterns and luxurious fabrics that you’ll adore.

    Modern and Contemporary Looks

    Following the latest trends, you’ll discover that modern and contemporary designs offer a fresh and sleek aesthetic, perfect for your modern abode, with bold colors and innovative textures that will leave you in awe.

    Designs that blend minimalism with functionality are particularly popular, allowing you to create a unique and personalized space that reflects your individuality, and with handmade curtains, you can experiment with various materials and styles to achieve the perfect blend of form and function in your home.

    The Therapeutic Aspect of Making Handmade Curtains

    Unlike other hobbies, creating handmade curtains offers a unique combination of physical activity and mental relaxation, allowing you to unwind and express your creativity.

    Relaxation and Stress Relief

    One of the most significant benefits of making handmade curtains is the sense of calm it brings, as you focus on the gentle rhythms of sewing and fabric manipulation, your mind quietens, and your worries slowly fade away, allowing you to find serenity in the process.

    Creativity and Self-Expression

    Before you begin, you may not realize the extent to which making handmade curtains can be a therapeutic outlet, but as you select fabrics, colors, and patterns, you’ll discover that it’s an opportunity to express your personality and style, bringing a sense of joy and fulfillment to your life.

    Handmade curtains are a reflection of your individuality, and as you hang them in your home, you’ll feel a deep sense of satisfaction, knowing that you’ve created something beautiful and unique, a true expression of your taste and character, which will bring you delight and pleasure every time you gaze upon your handiwork, and you’ll find that the process of creating them has been a truly transformative experience, one that has allowed you to tap into your creative potential and bring your vision to life.

    The Value of Handmade Curtains in Home Decor

    Your home is a reflection of your personality, and handmade curtains can add a touch of elegance and sophistication to your space, making it truly unique and inviting.

    Adding a Personal Touch to Your Space

    Aesthetically, an assortment of fabrics, colors, and patterns can be chosen to match your personal style, allowing you to create a one-of-a-kind masterpiece that sets your home apart.

    Enhancing the Overall Aesthetic

    Across the spectrum of interior design, beautifully crafted handmade curtains can elevate the ambiance of any room, creating a warm and welcoming atmosphere that you will cherish.

    And as you adorn your windows with these exquisite creations, you will notice how they harmoniously blend with your existing decor, accentuating the beauty of your home and making it a true haven that reflects your impeccable taste and refinement, allowing you to bask in the joy and serenity that only a perfectly designed space can provide.

    To wrap up

    From above, you can see that the joy of handmade curtains is a treat for your senses, elevating your home’s aesthetic with a touch of elegance. As you adorn your windows with these bespoke creations, you’ll find that your space is infused with a sense of refinement and poise, reflecting your unique taste and style, making your abode a true sanctuary, where you can bask in the beauty of handmade craftsmanship.

    FAQ

    Q: What are the benefits of choosing handmade curtains over machine-made ones?

    A: Handmade curtains offer a unique touch of personalization and customization, allowing you to choose from a wide range of fabrics, patterns, and styles to match your home decor. Additionally, handmade curtains are often made with higher quality materials and craftsmanship, resulting in a more durable and long-lasting product. The attention to detail and care that goes into making each curtain by hand also ensures a more precise fit and a more luxurious look.

    Q: How do I measure my windows to ensure a proper fit for my handmade curtains?

    A: To measure your windows for handmade curtains, start by measuring the width of the window from one side to the other, using a tape measure. Make sure to measure from the point where you want the curtain to hang, taking into account any obstructions such as handles or moldings. For the length, measure from the top of the window to the point where you want the curtain to fall, whether it’s just above the floor or to the windowsill. Consider adding a few inches to the width and length to ensure a proper fit and to allow for any variations in the handmade curtain’s size.

    Q: What types of fabrics are best suited for handmade curtains, and how do I choose the right one?

    A: The type of fabric to use for handmade curtains depends on the desired look, functionality, and the amount of light you want to filter through. Popular choices include cotton, linen, silk, and velvet, each with its own unique texture and characteristics. Consider the room’s purpose, the amount of sunlight it receives, and the style you’re aiming to achieve. For example, blackout curtains may require thicker, heavier fabrics, while sheer curtains can be made from lighter, more delicate materials. You can also consider factors such as durability, maintenance, and any allergies or sensitivities when selecting the perfect fabric for your handmade curtains.

    Q: Can I make handmade curtains myself, or do I need to hire a professional?

    A: With some basic sewing skills and patience, you can create your own handmade curtains. Start by choosing a pattern or design, selecting your fabric, and gathering the necessary tools and materials. Online tutorials and sewing guides can provide step-by-step instructions to help you through the process. However, if you’re short on time, lack sewing experience, or want a more complex design, consider hiring a professional seamstress or interior designer to create custom handmade curtains tailored to your needs and preferences.

    Q: How do I care for and maintain my handmade curtains to ensure they last for years to come?

    A: To keep your handmade curtains looking their best, start by checking the care label for specific instructions. Generally, handmade curtains can be cleaned by gentle hand washing or dry cleaning, depending on the fabric type. Avoid exposing them to direct sunlight for extended periods, as this can cause fading. Use a soft brush or vacuum cleaner to remove dust, and avoid wringing or twisting the fabric, which can cause damage or distortion. For stains, blot gently with a clean cloth and avoid using harsh chemicals or detergents. By following these care tips, you can enjoy your handmade curtains for years to come, and they will continue to be a beautiful addition to your home.

    How to Upcycle Old Furniture

    You have old furniture collecting dust, but you don’t want to throw it away. You can breathe new life into it. Start by assessing your pieces, and think about what you can reuse. For inspiration, check out How to Upcycle Wooden Furniture – Oak Dresser tutorials. With a little creativity, your old furniture can become unique and functional again, saving you money and reducing waste. You can transform your space with your own hands.

    Key Takeaways:

    To give your old furniture a new life, consider the following points:

    • Start by assessing the condition and structure of the furniture to determine the best approach for upcycling, whether it’s a simple refinish or a complete overhaul.
    • Choose the right materials and tools for the job, such as paint, varnish, or fabric, and invest in quality items that will withstand the test of time.
    • Get creative with your upcycling project by adding unique details and features, such as decorative hardware or upholstery, to give your old furniture a one-of-a-kind look.

    Gathering Materials

    Your upcycling project starts with gathering the right materials, including the old furniture you want to repurpose, new hardware, and any decorative items you want to add.

    Essential Tools

    Among the basic tools you’ll need are a hammer, screwdriver, and sandpaper, which will help you disassemble and refinish your old furniture.

    Creative Resources

    Essentially, your imagination is the limit when it comes to creative resources, but some ideas include paint, fabric, and reclaimed wood.

    A key part of upcycling is thinking creatively about how to reuse and repurpose different materials, so take some time to brainstorm and explore different options for your project, and you’ll be surprised at what you can come up with using your old furniture and a little bit of creativity.

    Preparing the Furniture

    Even the most neglected piece can be revitalized with some elbow grease. You’ll need to assess your furniture’s condition and decide what’s worth saving. Take note of any broken parts, scratches, or stains that need attention.

    Cleaning and Stripping

    Prior to starting, you’ll need to wipe down your furniture to remove dirt and grime. You’ll be amazed at how a simple cleaning can revive the surface. Remove old finishes, and take out any hardware.

    Sanding and Smoothing

    Frequently, your furniture will have a rough surface. You’ll need to sand it down to create a smooth base for your new finish. This step is where you’ll start to see your furniture transform.

    Sanding is where you put in the work to get your furniture ready for its new life. You’ll use progressively finer grits of sandpaper to smooth out the surface, removing any imperfections or old finish. As you sand, you’ll start to see the wood grain emerge, and your furniture will begin to take on a new character. You’ll be able to feel the difference under your hands, and you’ll know you’re on the right track.

    Design and Planning

    Not every old piece of furniture is a candidate for upcycling, but with a clear vision, you can turn many items into something new and functional. You’ll need to assess your skills, tools, and materials before starting the project.

    Measuring and Sketching

    On the path to creating something unique, you take precise measurements of your old furniture and sketch out ideas for its new life. You consider the space where the piece will go and how it will be used.

    Choosing Colors and Styles

    Along with thinking about the function of your upcycled furniture, you think about the aesthetic you want to achieve. You consider the colors and styles that fit with your home’s decor and your personal taste.

    In fact, selecting the right colors and styles can make or break your upcycling project. You look at the natural colors of the materials, the style of the original piece, and how you can enhance or change them to fit your vision. You think about the mood and atmosphere you want to create with your upcycled furniture, and choose colors and styles that evoke that feeling.

    Disassembling and Rebuilding

    Now that you’ve selected your old furniture, it’s time to give it new life. You’ll need to disassemble and rebuild it to create something unique.

    Taking Apart and Reusing

    Apart from the initial dismantling, you’ll find opportunities to reuse parts, reducing waste and adding character to your project. You’ll be surprised at what you can salvage and incorporate into your new design.

    Reconfiguring and Reinventing

    By breaking down the old piece, you’ll see new possibilities. You’ll start to envision a fresh purpose for your furniture, and your creativity will take over, guiding your hands as you work.

    The process of reconfiguring and reinventing is where your vision comes to life. You’ll take the old components and reshape them into something that reflects your style, making the piece truly yours. You’ll sand, paint, and reassemble, transforming the outdated into a one-of-a-kind treasure that tells a story of your craftsmanship and ingenuity.

    Decorating and Finishing

    All your hard work has led to this moment. You’re ready to add the final touches to your upcycled furniture. This stage is where you get to express your creativity and make your piece truly unique.

    Adding New Hardware

    For a fresh look, you’ll want to add new hardware to your furniture. You can choose from a variety of styles and finishes to match your design.

    Applying Final Coats

    Above all, you want your finish to be smooth and even. You apply a final coat of paint or varnish to protect your furniture and give it a professional look.

    In addition to applying a final coat, you should also consider adding a sealant to protect your furniture from spills and scratches. You can choose from a variety of sealants, including wax, polyurethane, or lacquer, depending on the type of finish you’ve used and the level of protection you need. You’ll want to apply the sealant according to the manufacturer’s instructions and make sure it’s fully dry before using your furniture.

    Safety Precautions

    Despite the excitement of upcycling old furniture, you must consider safety. You’ll be working with power tools, chemicals, and heavy objects, so it’s important to take precautions to avoid injuries.

    Protective Gear

    Gearing up with the right equipment is vital. You should wear safety glasses, gloves, and a mask to protect yourself from debris and harmful substances.

    Workspace Preparation

    Preventing accidents starts with a clean and clear workspace. You should remove any clutter, cover your floor, and ensure good ventilation to prevent accidents and exposure to harmful fumes.

    With your workspace prepared, you can focus on the task at hand. You’ll be able to move around safely, avoiding tripping hazards and other obstacles, and your work will be more efficient and enjoyable. Your prepared workspace will also help you stay organized, keeping your tools and materials within easy reach.

    To wrap up

    As a reminder, you’ve got the skills to breathe new life into your old furniture. You’ve learned to see past its worn surface and give it a fresh start. With your hands and some basic tools, you can turn your old pieces into something new and useful. You’ll save money and create something that’s truly your own, piece by piece, with your own two hands.

    FAQ

    Q: What is upcycling old furniture and how can I get started?

    A: Upcycling old furniture is the process of transforming outdated or discarded furniture into unique, functional, and aesthetically pleasing pieces. To get started, begin by scouting local thrift stores, garage sales, or your own home for pieces with potential. Consider the durability, material, and structural integrity of the item, and envision how it can be repurposed. Gather necessary tools and materials, such as sandpaper, paint, and fabric, and start brainstorming creative ways to breathe new life into your find.

    Q: What are some popular techniques for upcycling old furniture?

    A: Some popular techniques for upcycling old furniture include refinishing, repainting, reupholstering, and restructuring. Refinishing involves stripping and reapplying a new finish to the original surface, while repainting gives the piece a completely new look. Reupholstering involves replacing the old fabric with new, vibrant materials, and restructuring involves disassembling and reconfiguring the piece into a new form. Additional techniques include decoupage, stenciling, and adding hardware or decorative details.

    Q: How do I choose the right materials and tools for upcycling old furniture?

    A: The materials and tools needed for upcycling old furniture will depend on the specific project and desired outcome. Common materials include paint, stain, varnish, fabric, foam, and hardware. Essential tools may include sanders, drills, saws, and screwdrivers. Consider the type of material the furniture is made of, such as wood, metal, or plastic, and choose materials and tools accordingly. It’s also important to follow safety guidelines and use protective gear, such as gloves and a mask, when working with power tools and chemicals.

    Q: Can I upcycle any type of old furniture, or are some pieces better suited for the process?

    A: While many types of old furniture can be upcycled, some pieces are better suited for the process than others. Look for sturdy, well-made pieces with solid wood or metal frames, as these can be easily refinished or repurposed. Avoid pieces with broken or damaged structures, as these may be more difficult to work with. Consider the style and era of the piece, as well, and think about how it can be adapted to fit your desired aesthetic. Some popular pieces for upcycling include vintage dressers, chairs, tables, and desks.

    Q: How can I add a personal touch to my upcycled furniture and make it truly unique?

    A: Adding a personal touch to your upcycled furniture can make it truly one-of-a-kind. Consider incorporating personal items, such as family photos, heirlooms, or sentimental trinkets, into the design. You can also add unique hardware, such as custom knobs or handles, or incorporate unconventional materials, like vintage maps or book pages. Don’t be afraid to experiment and try new things – the beauty of upcycling lies in its creative freedom. Additionally, consider the overall aesthetic you want to achieve, such as rustic, modern, or bohemian, and choose elements that fit with that style.

    DIY Lighting Crafts for Homes

    You can elevate your home’s ambiance with unique lighting solutions. By creating your own DIY lighting crafts, you can add a personal touch to your space. Your home will reflect your style and personality through these handmade pieces. You will learn how to make beautiful and functional lighting fixtures that enhance your decor, making your home a reflection of your creativity and taste.

    Key Takeaways:

    To enhance your home decor with a personal touch, consider the following points about DIY lighting crafts:

    • Creating Unique Lamps can add a touch of personality to any room, allowing you to express your Personal Style through the choice of materials, shapes, and colors.
    • Upcycling old or discarded items into lighting fixtures is not only Eco-Friendly but also offers a creative way to reduce waste and give new life to forgotten pieces.
    • Experimenting with String Lights and Candles can introduce a warm and Cozy Ambiance to your home, making it feel more inviting and comfortable for both residents and guests.

    Basic Lighting Crafts

    Before exploring complex lighting projects, you’ll want to start with simple and easy-to-make crafts that can add a touch of warmth to your home. Basic lighting crafts are a great way to get started, and they can be customized to fit your personal style and decor.

    Simple Candle Holders

    Between the various types of lighting crafts, simple candle holders are a great place to begin. You can create your own unique holders using materials like glass, metal, or wood, and add a personal touch to your space with your favorite candles.

    Paper Lanterns

    Basically, paper lanterns are a fun and easy DIY project that can add a pop of color and light to your home. You can make your own paper lanterns using paper, glue, and a few basic tools, and hang them in your favorite spots.

    Lanterns can be made in various shapes, sizes, and colors, allowing you to customize them to fit your home’s decor and style. You can use your paper lanterns as a centerpiece, hang them from the ceiling, or place them on a table, and they will surely add a warm and cozy ambiance to your space, making it feel more inviting and comfortable for you and your guests.

    Advanced Lighting Projects

    Even if you have experience with DIY lighting, you can still challenge yourself with more complex projects.

    1. Mason Jar Chandeliers
    2. Recycled Bottle Lamps
    Project Difficulty Level
    Mason Jar Chandeliers Medium
    Recycled Bottle Lamps Hard

    Mason Jar Chandeliers

    For your next lighting project, consider creating a beautiful Mason Jar Chandelier, you can hang it in your dining room or living room, it will add a touch of elegance to your space.

    Recycled Bottle Lamps

    Against all odds, you can turn old bottles into stunning lamps, you will need some basic tools and materials, but the result will be worth your effort.

    Also, when working on Recycled Bottle Lamps, you should pay attention to the bottle’s shape and size, as it will affect the overall look of the lamp, you can add some decorative elements, such as ribbons or paint, to give it a personal touch, and with a little patience and creativity, you can create a unique and functional piece for your home.

    Decorative Lighting Ideas

    After exploring various lighting options, you’ll find that decorative lighting can elevate your home’s ambiance. You can choose from a range of ideas to create a unique atmosphere, from subtle to bold statements.

    Fairy Lights

    Around your home, you can wrap fairy lights around furniture or plants to add a touch of magic. You can place them in a vase or hang them from the ceiling to create a whimsical effect.

    String Lights

    One of the simplest ways to add warmth to your space is by using string lights. You can hang them in your backyard or indoors to create a cozy atmosphere, and they come in various colors and styles to match your decor.

    Even more interesting is the ability to customize string lights to fit your specific needs. You can choose from different lengths, bulb types, and colors to create a unique look that complements your home’s style, allowing you to tailor your lighting to your personal taste and preferences.

    Outdoor Lighting Crafts

    Now that you’re looking to illuminate your outdoor space, you can create your own unique lighting crafts. You can make your outdoor area more inviting and beautiful with DIY lighting.

    Solar-Powered Lights

    One of the easiest and most eco-friendly options is to make solar-powered lights. You can use solar panels and LED lights to create a sustainable lighting solution for your outdoor space.

    DIY Pathway Lights

    With a few simple materials, you can create your own pathway lights to guide you through your garden or yard. You can use glass jars, pebbles, and tea lights to make a beautiful and functional lighting feature.

    Due to the versatility of DIY pathway lights, you can customize them to fit your personal style and the theme of your outdoor space. You can experiment with different materials, such as metal lanterns, mason jars, or even seashells, to create a unique and eye-catching lighting display that reflects your personality and adds ambiance to your outdoor area.

    Lighting for Specific Rooms

    For each room in your home, you can create unique lighting effects that enhance the ambiance and functionality. You can tailor your DIY lighting crafts to fit the specific needs of each space, making your home more inviting and comfortable.

    Bedroom Lighting

    Specific to the bedroom, you want lighting that promotes relaxation and tranquility. You can create soft, warm glow with table lamps or string lights, making your bedroom a cozy retreat.

    Kitchen Lighting

    Above all, kitchen lighting should be bright and functional, allowing you to work efficiently. You can install under-cabinet lighting or use pendant lights to illuminate your kitchen counters and island.

    At the heart of your kitchen lighting design, consider the tasks you perform in each area, and adjust your lighting accordingly. You can use a combination of overhead lighting, task lighting, and ambient lighting to create a well-lit and functional kitchen that makes cooking and entertaining a pleasure.

    Safety Precautions

    Once again, as you commence on DIY lighting crafts for your home, it’s vital to consider the safety aspects to avoid any potential hazards. You must take necessary precautions to ensure your safety and the safety of your loved ones.

    Electrical Safety

    Around the time you start working with electrical components, you should be aware of the risks involved and take steps to mitigate them, such as turning off the power supply and using insulated tools, to prevent electrical shocks, which can be harmful to you.

    Fire Safety

    Between the various DIY lighting crafts you undertake, you should always be mindful of the fire hazards associated with them, such as using open flames or hot equipment, which can ignite nearby flammable materials and put your safety at risk.

    Avoiding fire hazards is a key aspect of DIY lighting crafts, and you should take extra precautions when working with materials that can catch fire easily, such as fabric, paper, or wood, and keep a fire extinguisher nearby, in case of an emergency, to protect yourself and your home.

    To wrap up

    Drawing together the various DIY lighting crafts for homes, you can now enhance your space with unique and personalized lighting solutions. You have the ability to create your own style, tailored to your taste and budget. By applying these DIY techniques, you can transform your home into a warm and inviting atmosphere, making it a perfect reflection of your personality and aesthetic, and ultimately, making your house truly your home.

    FAQ

    Q: What are some popular DIY lighting crafts for homes that can add a personal touch to my decor?

    A: Some popular DIY lighting crafts for homes include making your own string lights, creating a mason jar chandelier, or assembling a reclaimed wood lamp. You can also try making paper lanterns, glass bottle pendant lights, or a macrame plant hanger with a built-in light source. These projects can add a unique and personal touch to your home decor, and can be customized to fit your style and preferences.

    Q: What materials do I need to get started with DIY lighting crafts for my home?

    A: The materials needed for DIY lighting crafts can vary depending on the project, but some common supplies include wire, string, fabric, glass or plastic containers, wood, and lighting fixtures such as bulbs, sockets, and switches. You may also need basic crafting tools like scissors, glue, and a hot glue gun. Additionally, you can repurpose or upcycle old or recycled materials like mason jars, bottles, or cardboard tubes to create unique and eco-friendly lighting fixtures.

    Q: Are DIY lighting crafts safe and easy to make, or do I need to have prior experience with electrical work?

    A: While some DIY lighting crafts may require basic electrical knowledge, many projects are designed to be safe and easy to make, even for beginners. It’s always important to follow safety guidelines and precautions when working with electricity, and to use proper materials and techniques to avoid any risks. If you’re unsure about any aspect of a project, consider consulting with a professional or seeking guidance from a trusted resource. Many DIY lighting crafts also use battery-operated lights or low-voltage systems, which can be a safer and more beginner-friendly option.

    Q: Can I use DIY lighting crafts as a way to save energy and reduce my environmental impact?

    A: Yes, many DIY lighting crafts can be designed with energy efficiency and sustainability in mind. For example, you can use LED bulbs, which are energy-efficient and long-lasting, or create solar-powered lights that harness natural energy from the sun. You can also use recycled or repurposed materials to reduce waste and minimize your carbon footprint. Additionally, DIY lighting crafts can help reduce the demand for mass-produced, energy-intensive lighting products, making them a great way to add a personal touch to your home while also promoting sustainability.

    Q: How can I display and showcase my DIY lighting crafts in my home to maximize their impact and beauty?

    A: There are many creative ways to display and showcase your DIY lighting crafts in your home, depending on the type of project and your personal style. You can hang string lights or paper lanterns from the ceiling or a wall, place a mason jar chandelier above a dining table, or set a reclaimed wood lamp on a side table or shelf. You can also use DIY lighting crafts to add ambiance and warmth to outdoor spaces, such as patios or gardens. Consider experimenting with different arrangements and displays to find the perfect way to showcase your unique and handmade lighting creations.

    Fun Arts and Crafts for Kids

    You’re looking for ways to unleash your child’s creativity, and arts and crafts are an excellent way to do so. As you explore various activities, you’ll find that they not only foster imagination but also enhance your child’s fine motor skills and self-expression. Your child will have a blast creating something unique, and you’ll appreciate the opportunity to bond with them over a fun project, making it a great way to spend quality time together.

    Key Takeaways:

    • Engaging in creative activities like arts and crafts can help kids develop their problem-solving skills and hand-eye coordination, while also fostering self-expression and imagination.
    • DIY projects and crafting can be a great way to encourage kids to think outside the box and explore different artistic mediums, such as painting, drawing, and sculpting.
    • Providing kids with a variety of art supplies and materials, such as paper, glue, scissors, and paint, can help stimulate their creativity and inspire them to create unique and innovative art pieces.

    Painting Fun

    Before introducing your kids to the world of painting, make sure you have all the necessary supplies, such as paper, brushes, and paints. This will help them explore their creativity and have fun while making art.

    Finger Painting

    Altogether, finger painting is a great way to get your kids started with painting, as it allows them to express themselves freely and make unique artwork using their fingers.

    Watercolor Wonders

    Beneath the surface of watercolor painting lies a world of possibilities, and you can help your kids discover it by providing them with watercolor paints and paper, and letting them experiment with different techniques.

    Even as your kids become more confident in their painting skills, you can encourage them to try more complex watercolor techniques, such as layering and blending colors, to create beautiful and intricate artworks that they can be proud of.

    Crafting Delights

    Even the most simple materials can be used to create amazing arts and crafts projects with your kids. You can explore various techniques and mediums to stimulate their creativity and imagination.

    Paper Mache Magic

    Pastel colors and unique textures are characteristic of paper mache art, allowing you to create beautiful and intricate designs with your kids. You can make decorative items, such as vases or bowls, using this fun and easy technique.

    Popsicle Stick Creations

    Parallel to paper mache, popsicle stick crafts offer a world of creative possibilities for you and your kids. You can design and build various objects, such as picture frames or birdhouses, using popsicle sticks and other basic materials.

    For instance, you can start by gathering popsicle sticks, glue, and other craft supplies, and then let your imagination run wild as you and your kids design and build your own unique creations, from simple to complex projects, and enjoy the process of bringing your ideas to life.

    DIY Decorations

    Not only are DIY decorations a fun activity for kids, but they can also add a personal touch to your home. You can find inspiration and materials for your projects on websites like Fun Kid Crafts, where you can discover new ideas and supplies to get creative.

    Homemade Ornaments

    Toward creating unique decorations, you can make homemade ornaments with your kids using simple materials like paper, glue, and string. This activity allows you to spend quality time with your kids while creating something beautiful for your home.

    Handprint Art

    With a few simple materials like paint and paper, you can create adorable handprint art with your kids. This activity is a great way to capture their tiny handprints and create a keepsake that you will treasure for years to come.

    And as you explore handprint art, you’ll find that it’s not just limited to paper and paint. You can use different materials like clay, fabric, or even ceramics to create unique and personalized pieces that reflect your child’s personality and your family’s style.

    Recycled Crafts

    Keep your kids engaged with recycled crafts that help them develop creativity while promoting sustainability. You can make various items using household waste, teaching your kids the value of reuse and recycling.

    Bottle Cap Jewels

    Bottling up your child’s creativity, you can make beautiful jewelry using bottle caps, paint, and string. You can turn these caps into colorful pendants, earrings, or charms, encouraging your kids to think outside the box.

    Newspaper Flowers

    About to throw away old newspapers? You can use them to create stunning flowers, teaching your kids the art of paper crafting. You can make various types of flowers, from simple to complex designs, using just newspaper and glue.

    At this stage, you can get creative with your newspaper flowers by adding colors, textures, and patterns. You can decorate your home or gift these beautiful flowers to friends and family, making it a fun and satisfying project for your kids.

    Seasonal Crafts

    All year round, you can engage your kids in fun arts and crafts that celebrate the current season, making the experience more enjoyable and relevant to their lives. You can explore various projects that cater to different holidays and seasons.

    Christmas Tree Decorations

    With the festive season approaching, you can involve your kids in making Christmas tree decorations, such as ornaments, garlands, and angels, using materials like paper, glue, and glitter, allowing them to express their creativity.

    Halloween Costumes

    Costumes and accessories are a big part of Halloween, and you can encourage your kids to design and create their own spooky or funny costumes, using cardboard, paint, and fabric, making the experience a fun and creative activity.

    Another aspect of Halloween costumes is the ability to reuse and recycle old clothes and materials, teaching your kids the value of sustainability while having fun, and you can guide them in transforming old items into unique and creative Halloween costumes and accessories.

    Creative Expression

    After introducing your kids to various art forms, you’ll notice their imagination and creativity soaring. You can encourage this by providing a supportive environment where they feel free to express themselves.

    Storytelling Through Art

    Beneath the surface of art lies a world of storytelling, and you can help your kids tap into this by encouraging them to draw or paint stories that they’ve created.

    Imagination Stations

    Once you’ve set up art stations with various materials, you’ll see your kids’ creativity shine as they explore and express themselves in unique ways.

    A key aspect of imagination stations is that they allow you to tailor the experience to your kids’ interests, whether it’s painting, drawing, or building, and watch as they bring their ideas to life with your guidance and support.

    Final Words

    On the whole, you have discovered various fun arts and crafts for kids that can enhance your child’s creativity. You can choose the projects that suit your child’s interests and skills, and have fun together. As you engage your child in these activities, you will notice their imagination and self-expression flourish, and your bond will grow stronger. With your guidance, your child will develop their artistic side and create wonderful memories.

    FAQ

    Q: What are some fun and easy arts and crafts ideas for kids to enjoy at home?

    A: There are numerous fun and easy arts and crafts ideas that kids can enjoy at home, including painting, drawing, making collages, creating with playdough, and crafting with recycled materials. These activities help foster creativity and can be tailored to suit different ages and skill levels. For younger children, activities like finger painting and making handprint art are great options. Older kids might enjoy more complex projects like knitting, woodworking, or making jewelry.

    Q: What materials are needed for kids to start doing arts and crafts?

    A: The materials needed for kids’ arts and crafts can vary widely depending on the project. Basic supplies include paper, glue, scissors, paints, markers, and crayons. For more specific projects, additional materials might be required, such as yarn for knitting, clay for modeling, or fabric for sewing. It’s also a good idea to stock up on recyclable materials like cardboard, egg cartons, and newspaper, as these can be used in a variety of creative ways….

    Q: How can parents encourage their children to engage in arts and crafts?

    A: Encouraging kids to engage in arts and crafts can be as simple as setting aside dedicated time for these activities and providing them with the necessary materials. Creating a craft-friendly space where children feel comfortable making a mess can also be very motivating. Displaying their artwork proudly in the home can boost their confidence and encourage them to continue exploring their creativity. Additionally, participating in arts and crafts alongside them can make the experience more enjoyable and foster a sense of bonding.

    Q: Are arts and crafts activities beneficial for children’s development?

    A: Yes, arts and crafts activities are highly beneficial for children’s development. They help improve fine motor skills through the use of tools like scissors, brushes, and pencils. Arts and crafts also enhance creativity, problem-solving skills, and hand-eye coordination. Furthermore, these activities can aid in emotional development by providing an outlet for self-expression and a means to process feelings. Engaging in arts and crafts can also boost a child’s self-esteem as they achieve and complete projects, giving them a sense of accomplishment.

    Q: How can arts and crafts be adapted for children with different abilities and needs?

    A: Adapting arts and crafts for children with different abilities and needs involves considering their individual requirements and interests. For children with physical disabilities, using adaptive tools such as larger grips on crayons or scissors, or providing materials that are easier to manipulate, can be helpful. For children with sensory issues, offering a variety of textures and materials can be stimulating, while also allowing them to avoid anything that might cause distress. For children with learning disabilities, breaking down complex crafts into simpler steps or providing additional support and guidance can make arts and crafts more accessible and enjoyable.

    How to Inspire Kids’ Creativity

    As you navigate the world of parenting, you’re likely to encounter a plethora of ways to inspire your child’s creativity. You want to nurture their imagination, to watch them blossom into innovative thinkers and dreamers. Your role is to provide the spark that sets their creative journey ablaze, and with the right approaches, you can help them unlock a world of possibilities, where art, imagination, and innovation know no bounds, and their unique voice can shine through.

    Key Takeaways:

    To inspire kids’ creativity, consider the following points:

    • Encourage Imagination and Exploration by providing a supportive environment that allows children to express themselves freely and try new things without fear of failure.
    • Foster Creative Thinking by engaging kids in activities that promote Problem-Solving and Artistic Expression, such as painting, drawing, or building with blocks.
    • Emphasize the Process over the end result, praising kids for their Effort and Originality, and encouraging them to view mistakes as opportunities for growth and learning.

    Fostering Imagination

    A key aspect of inspiring kids’ creativity is to provide them with the freedom to explore and express their thoughts and ideas. You can achieve this by creating a safe and supportive environment that encourages imagination and creativity, allowing your child to grow and develop their unique perspective.

    Encouraging Curiosity

    For your child to develop their imagination, you need to encourage their curiosity, asking open-ended questions that spark their interest and motivate them to seek answers, helping you to understand their thoughts and ideas.

    Exploring Creative Interests

    Beside traditional arts, your child may have other creative interests, such as music, dance, or writing, and you should provide them with opportunities to explore these interests, allowing them to express themselves in their own unique way.

    Plus, as you explore your child’s creative interests, you’ll discover new ways to nurture their imagination, whether through enrolling them in classes, providing them with creative materials, or simply engaging in creative activities together, and this will help you to deepen your understanding of their creative needs and desires.

    Creative Expression

    Clearly, creative expression is the foundation of inspiring kids’ imagination, and it’s up to you to provide the spark that sets their minds ablaze. By encouraging your child to explore their artistic side, you’ll be helping them develop a sense of self-expression and confidence that will serve them well throughout their lives.

    Art and Craft Activities

    Prior to introducing any new activities, consider your child’s interests and passions, and use these as a starting point for art and craft projects that will engage and inspire them, allowing you to nurture their creative spirit and watch them flourish.

    Storytelling and Role-Playing

    Similarly, activities like storytelling and role-playing are fantastic ways to inspire your child’s creativity, as they allow them to explore different characters, scenarios, and worlds, using their imagination to guide them on incredible journeys of discovery and adventure.

    Another way to encourage creative storytelling and role-playing is to provide your child with a range of props, costumes, and backdrops, and then step back and let them take the lead, using their imagination to weave intricate tales and bring their characters to life, as you watch and guide them with a sense of wonder and awe, marveling at the incredible stories they create.

    Nurturing Innovation

    After laying the groundwork for creativity, you’ll want to nurture innovation in your kids. This means giving them the freedom to explore and express themselves in their own unique way. By doing so, you’ll help them develop a sense of confidence and self-expression that will serve them well in all areas of life.

    Embracing Failure and Mistakes

    Beneath the surface of every successful creative endeavor lies a trail of failures and mistakes. Beneath this reality, you’ll find that your kids are more likely to take risks and try new things when they feel safe to do so. As you guide them, encourage them to view mistakes as opportunities for growth and learning.

    Encouraging Experimentation and Risk-Taking

    Exploring the world of creativity, you’ll find that experimentation is key to fostering innovation. As you encourage your kids to try new things, they’ll begin to develop a sense of curiosity and wonder that will serve them well in all areas of life. Give them the space to try, to fail, and to learn from their mistakes.

    Consequently, as you encourage experimentation and risk-taking, you’ll notice your kids becoming more confident and self-assured. They’ll begin to see the value in trying new things, even if they don’t always succeed. You can help them along the way by asking open-ended questions, providing guidance and support, and celebrating their efforts, rather than just their successes. By doing so, you’ll help them develop a growth mindset that will serve them well throughout their lives.

    Creating a Supportive Environment

    Not every child is born with an innate sense of creativity, but with the right encouragement, you can help your kids develop their imagination. Visit 12 ways to encourage creativity in children to learn more about fostering their artistic side.

    Setting Up a Creative Space

    Above all, your goal is to create a space that inspires your kids to think outside the box. You can do this by designating a specific area for arts and crafts, filled with colorful supplies and imaginative toys.

    Providing Resources and Materials

    Before you begin, consider what materials your kids will need to express themselves. You’ll want to provide a variety of art supplies, such as paints, markers, and glue, to help spark their creativity.

    At this point, you may be wondering what specific resources will be most effective. Consider your child’s interests and personality when selecting materials, and don’t be afraid to think outside the box – perhaps a musical instrument or a building set will be just the thing to inspire their imagination. As you provide your kids with the tools they need, you’ll be amazed at the incredible things they can create.

    Encouraging Collaboration

    Unlike traditional learning methods, encouraging collaboration allows kids to share ideas and learn from each other, fostering a sense of creativity and teamwork. You can facilitate this by providing opportunities for kids to work together on creative projects, sharing ideas and building on each other’s strengths.

    Group Projects and Activities

    The key to successful collaboration is to provide a supportive environment where kids feel comfortable sharing their thoughts and ideas. You can achieve this by assigning group projects and activities that promote teamwork and creativity, such as brainstorming sessions, art projects, or writing exercises.

    Building a Community of Creators

    Against the backdrop of a busy and often competitive world, you have the power to create a nurturing space where kids can explore their creativity without fear of judgment. You can do this by encouraging open communication, active listening, and mutual respect among kids, allowing them to feel comfortable sharing their ideas and learning from each other.

    In fact, as you build a community of creators, you’ll notice kids becoming more confident, motivated, and inspired to pursue their passions. You’ll see them learn to give and receive constructive feedback, developing crucial skills that will benefit them throughout their lives, and you’ll be amazed at the incredible ideas and projects that emerge from their collaborative efforts.

    Celebrating Creativity

    Now that you’ve encouraged your kids to express themselves, it’s time to celebrate their creativity. You can do this by acknowledging their efforts and showcasing their work, which will help build their confidence and motivation to continue exploring their imagination.

    Recognizing Achievements and Efforts

    Across various aspects of their creative journey, you’ll find opportunities to praise your kids’ progress and accomplishments, no matter how small they may seem, and offer constructive feedback to help them grow.

    Displaying and Sharing Creative Work

    Working together with your kids to create a dedicated space for their artwork, writing, or other creative projects will allow them to see their progress and feel a sense of pride in their achievements.

    This approach not only helps to reinforce their self-expression but also provides an opportunity for you to engage with your kids on a deeper level, discussing their inspirations and ideas, and learning more about their unique perspective on the world, which can be a truly enriching experience for both of you.

    Summing up

    Presently, you’ve unlocked the secrets to inspiring kids’ creativity, and with these tools, you’ll nurture your child’s imagination. As you guide them, your role is to encourage, to support, and to let their minds soar. By embracing their unique perspectives, you’ll help them grow into innovative thinkers, and your guidance will shape their creative voices, allowing them to express themselves in wondrous ways, limited only by the boundaries of their own imagination, and empowered by the freedom to dream.

    FAQ

    Q: What are some ways to encourage kids to think creatively?

    A: Encouraging kids to think creatively can be achieved through various activities such as providing them with a variety of art supplies, like paints, markers, and colored pencils, and giving them the freedom to express themselves without judgment. You can also engage them in imaginative play, such as building with blocks, playing dress-up, or creating a pretend scenario. Additionally, asking open-ended questions that prompt them to think outside the box can also foster creativity.

    Q: How can I help my child develop their problem-solving skills through creative activities?

    A: Helping your child develop problem-solving skills through creative activities can be accomplished by presenting them with challenges that require innovative solutions. For instance, you can provide them with a set of materials, like cardboard, glue, and scissors, and ask them to build a specific object, such as a bridge or a house. This encourages them to think creatively and come up with unique solutions. You can also engage them in brain teasers, puzzles, or games that require critical thinking and creativity.

    Q: What role does praise and feedback play in inspiring kids’ creativity?

    A: Praise and feedback are imperative in inspiring kids’ creativity. When praising your child’s creative work, focus on the effort they put into it, rather than just the outcome. You can say something like, “I can see that you worked very hard on this picture, the colors are great!” This encourages them to continue exploring their creativity. Feedback should be constructive and specific, guiding them to think about what they could do differently next time, without being too critical. This helps build their confidence and motivates them to continue expressing themselves creatively.

    Q: Can technology be a tool for inspiring kids’ creativity, or does it hinder it?

    A: Technology can be both a tool and a hindrance to inspiring kids’ creativity. On one hand, there are numerous apps, software, and online platforms designed to foster creativity in children, such as digital painting programs, animation software, and coding games. These can provide kids with new and innovative ways to express themselves. On the other hand, excessive screen time can limit their imagination and outdoor play, which are also vital for creative development. It’s about finding a balance and using technology in a way that complements other creative activities.

    Q: How can parents and educators create an environment that supports creative development in kids?

    A: Creating an environment that supports creative development in kids involves several key elements. Firstly, provide them with a dedicated space for creative activities, free from clutter and distractions. Secondly, expose them to a wide range of experiences, including visits to museums, theaters, and outdoor activities, to broaden their horizons and inspire new ideas. Thirdly, model creative behavior yourself, as kids often learn by observing. Lastly, allow for freedom and flexibility in their daily routine, giving them time to explore and express their creativity without feeling rushed or constrained.

    Skip to content