DIY Bracelets for All Occasions

As you explore the world of jewelry making, you’ll discover that creating your own DIY bracelets can be a fun and rewarding experience. With a few simple materials and some basic techniques, you can craft unique and stylish bracelets to suit any occasion, from casual everyday wear to special events. You’ll be able to personalize your accessories to reflect your own taste and style, making each piece truly special. Get ready to unleash your creativity and make beautiful bracelets that will elevate your wardrobe and make you feel confident and stylish.

Key Takeaways:

To make the most out of DIY Bracelets, consider the following points:

  • Creating Customized bracelets allows you to personalize your accessories according to the Occasion, whether it’s a formal event or a casual gathering, giving you a unique and Stylish look.
  • Using various Materials, such as beads, strings, and charms, can add a Creative touch to your DIY bracelets, making them stand out and reflect your Personal Style.
  • Making Handmade bracelets can be a Fun and Relaxing activity, allowing you to express your Artistic side and create Meaningful gifts for friends and family on Special Occasions.
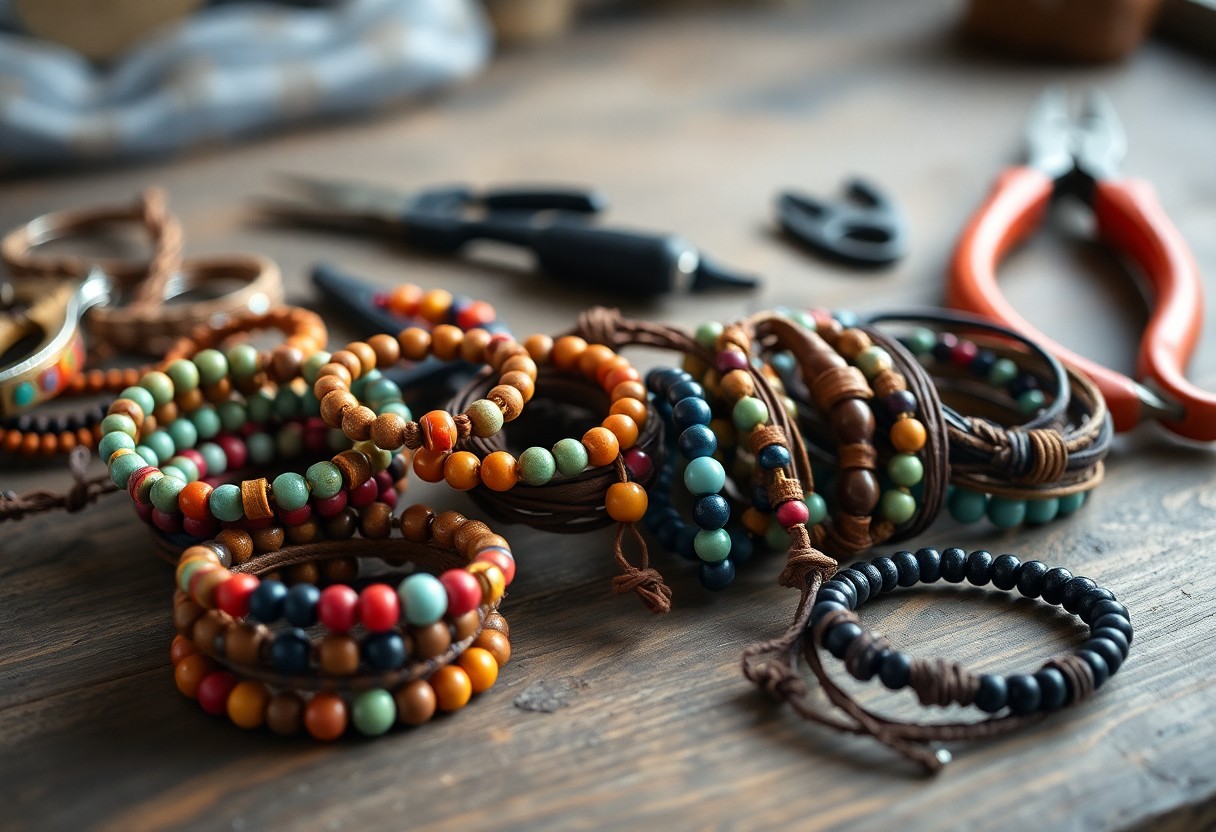
Materials and Tools

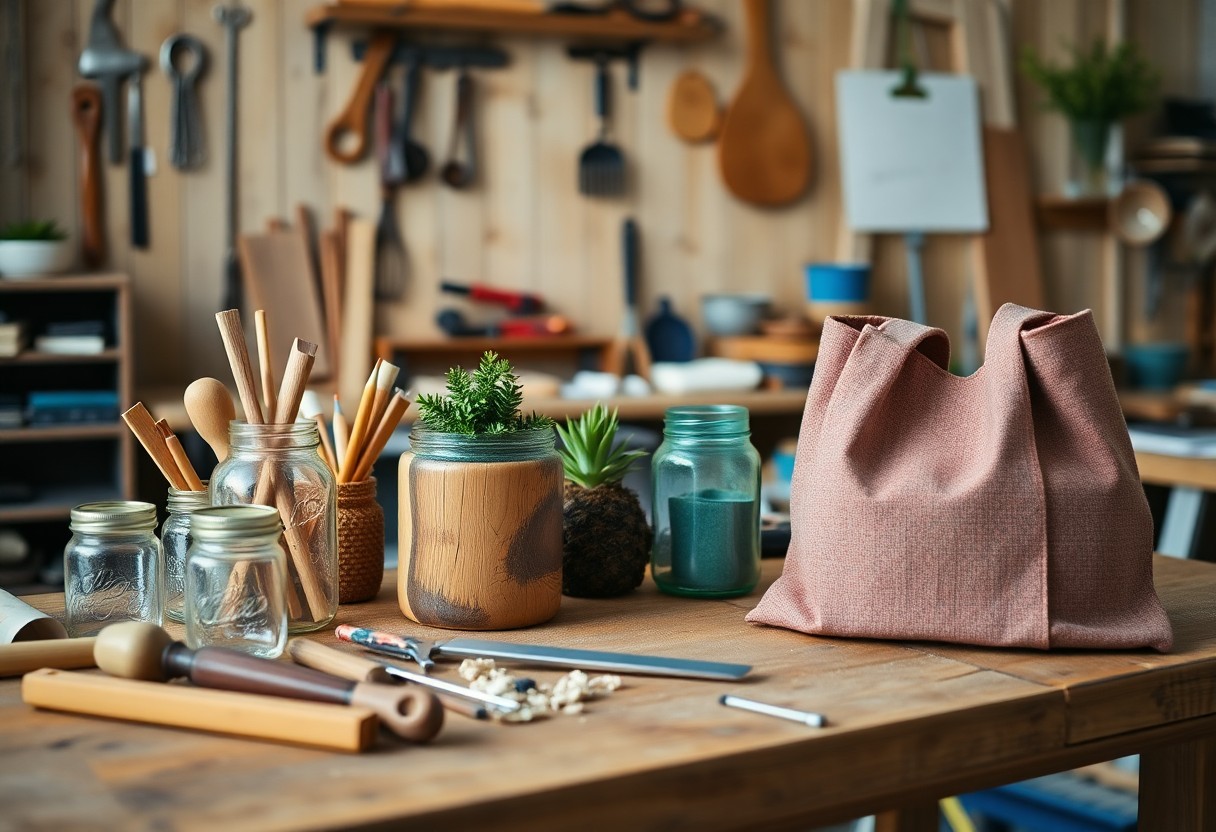
Before you start making your DIY bracelets, gather the necessary materials and tools to ensure a fun and successful experience. You’ll need beading supplies, such as threads, wires, and findings, as well as basic tools like scissors, pliers, and cutters.

Essential Beading Supplies

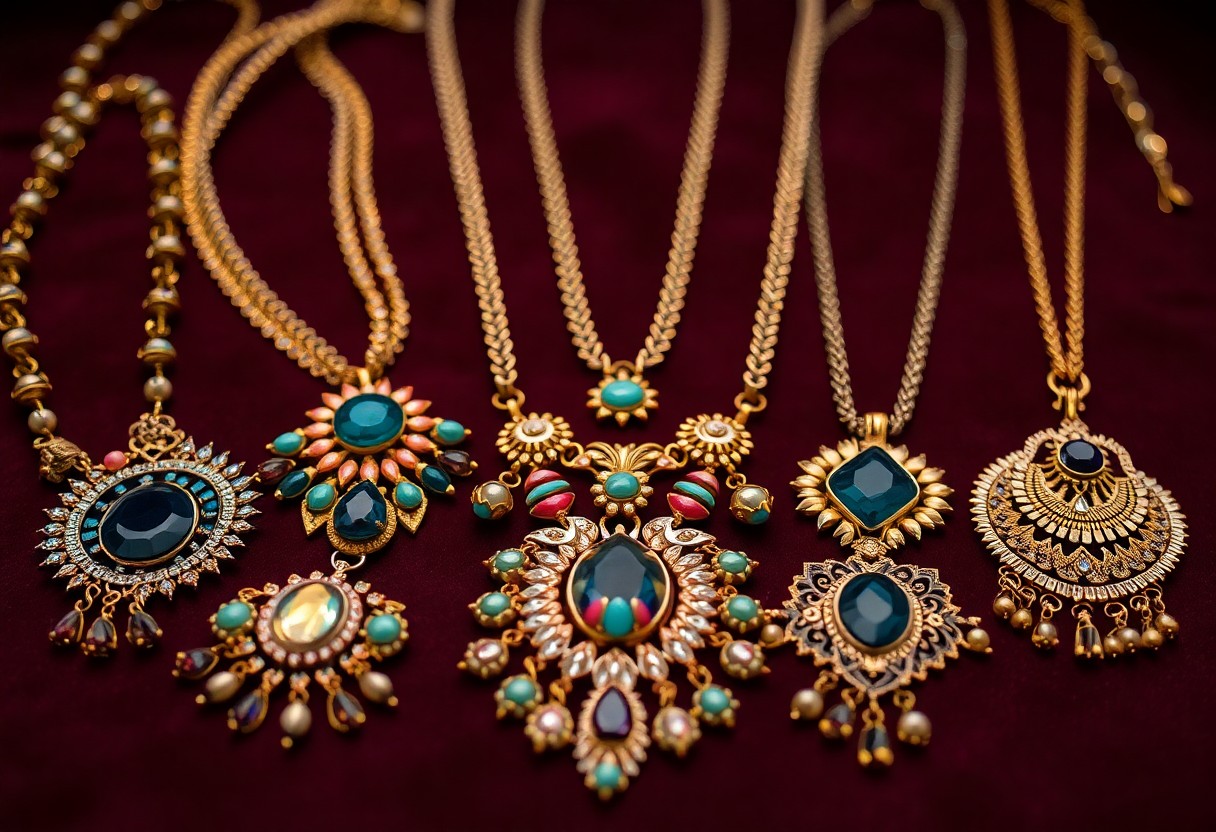
Normally, you will need basic beading supplies, including beads, threads, and findings, to create your unique DIY bracelets. You can choose from a variety of beads, such as gemstones, crystals, or glass beads, to match your desired style and occasion.

Additional Embellishments

Alternatively, you can add extra flair to your DIY bracelets with additional embellishments, such as charms, tassels, or pendants, to give them a personalized touch. You can experiment with different combinations to create one-of-a-kind accessories.

But what’s exciting about additional embellishments is that they allow you to take your DIY bracelets to the next level. You can use them to add a pop of color, create texture, or even convey a meaningful message. As you explore the world of DIY bracelet-making, you’ll find that the right embellishments can make all the difference in creating a truly special and eye-catching piece that reflects your personal style.

Basic Beading Techniques

Even if you’re new to beading, you can create beautiful DIY bracelets with ease. Start by learning the basics, and then explore more complex techniques. For inspiration, visit DIY Bracelets: 50 Projects for Gifts or to Sell to get started on your beading journey.

Knotting and Threading

Technically, knotting and threading are fundamental skills you’ll use to create your DIY bracelets. You’ll learn how to securely attach beads to your thread or string, and finish your bracelet with a professional-looking knot.

Simple Patterns and Designs

Designs can be as simple or complex as you like, depending on your skill level and personal style. You can create classic single-strand bracelets or more intricate multi-strand designs, using a variety of beads and materials.

This simple pattern is a great way to begin, as it allows you to practice your beading skills while creating a beautiful piece of jewelry. As you become more confident, you can experiment with different patterns and designs to create unique and personalized DIY bracelets that reflect your style and personality.

DIY Bracelet Ideas for Special Occasions

All you need is a little creativity to create beautiful DIY bracelets for special occasions. You can make them to give as gifts or to wear yourself, and they’re a great way to add a personal touch to any event.

Birthday and Holiday Gifts

One of the best ways to show you care is by giving a handmade gift, like a DIY bracelet. You can customize it with your recipient’s favorite colors or charm to make it extra special.

Wedding and Anniversary Accessories

Around this special time, you’ll want to create something truly unforgettable, like a custom DIY bracelet to commemorate the occasion. You can use pearls, lace, or other materials to make it elegant and sophisticated.

To add an extra touch to your wedding or anniversary DIY bracelet, you can incorporate personal elements, such as a charm with your anniversary date or a special message. You can also experiment with different materials and designs to make it truly unique and meaningful to you and your loved one.

Customizing Your Bracelets

Now that you have the basics of DIY bracelets down, it’s time to think about customizing them to fit your personal style and the occasion. You can experiment with different materials, colors, and charms to create unique and meaningful pieces.

Choosing Colors and Themes

For a beautiful and cohesive look, consider selecting colors and themes that reflect your personality or the occasion you’re celebrating. You can choose colors that match your favorite outfit or theme, and add beads, threads, or other embellishments to give your bracelet a personalized touch.

Adding Personalized Charms and Symbols

Similarly, symbols and charms can add an extra layer of meaning to your DIY bracelets. You can add charms that represent your interests, hobbies, or values, making your bracelet a truly one-of-a-kind piece.

Hence, as you investigate into the world of personalized charms and symbols, you’ll find that the possibilities are endless. You can choose from a wide range of charms, from simple letters and shapes to intricate designs and pendants, and add them to your bracelet to make it even more special and meaningful to you.

Tips and Tricks for Beginners

For a successful DIY bracelet-making experience, consider the following:

  • choose quality materials
  • follow instructions carefully

. Assume that with practice, you will become more confident in your abilities.

Avoiding Common Mistakes

Before you start, take a moment to plan your design and gather all necessary tools. This will help you avoid errors and ensure a smooth process.

Troubleshooting and Repairing Breaks

Around the time you encounter a break, stay calm and assess the damage. You can often fix issues with a few simple steps.

Consequently, you will find that troubleshooting and repairing breaks is an important part of the DIY bracelet-making process. You will learn to identify common problems, such as broken threads or faulty clasps, and develop the skills to fix them. With patience and practice, you will become proficient in repairing your DIY bracelets, allowing you to enjoy your creations for years to come.

Advanced Beading Techniques

To take your beading skills to the next level, you’ll want to master some advanced techniques. Here are a few to get you started:

  1. Wire wrapping
  2. Metal stamping
Technique Description
Wire wrapping Shaping wire into intricate designs
Metal stamping Stamping letters or patterns onto metal

Wire Wrapping and Metal Stamping

Tackling these techniques will allow you to create unique and personalized pieces. You’ll be able to shape wire into beautiful forms and stamp meaningful messages onto metal, making your jewelry truly special.

Incorporating Unconventional Materials

Alongside traditional beads, you can also experiment with unusual materials to add an extra layer of interest to your designs. You’ll discover that everyday objects can become stunning components in your jewelry.

Incorporating unconventional materials into your beading practice will help you develop a distinctive style. You can use items like vintage buttons, fabric, or even found objects from nature to create one-of-a-kind pieces that reflect your personality and creativity. As you explore these new materials, you’ll find that your jewelry-making possibilities will expand, and you’ll be able to craft truly remarkable accessories that showcase your unique vision.

Conclusion

Summing up, you now have the skills to create DIY bracelets for all occasions. With your newfound knowledge, you can design your own unique accessories, perfect for dressing up or adding a personal touch to your outfits. You can experiment with various materials and styles to make your bracelets truly special, and have fun while doing it – happy crafting!

FAQ

Q: What materials do I need to make a DIY bracelet?

A: To make a DIY bracelet, you will need a variety of materials, including beads, string or wire, clasps, and decorative elements such as charms or pendants. The specific materials you need will depend on the type of bracelet you are making and the design you want to achieve. You can find these materials at craft stores, online marketplaces, or specialty bead stores. Some common materials used to make DIY bracelets include seed beads, gemstone beads, leather cord, and metal wire.

Q: How do I choose the right beads for my DIY bracelet?

A: Choosing the right beads for your DIY bracelet depends on the occasion, your personal style, and the theme of the bracelet. Consider the color scheme, texture, and size of the beads, as well as their durability and quality. For a formal occasion, you may want to choose beads that are more elegant and sophisticated, such as pearls or crystal beads. For a casual occasion, you may want to choose beads that are more playful and fun, such as bright-colored glass beads or wooden beads.

Q: What are some popular DIY bracelet designs for different occasions?

A: There are many popular DIY bracelet designs that are suitable for different occasions. For a wedding or formal event, you may want to make a beaded bracelet with pearls, crystals, or other elegant materials. For a birthday or holiday gift, you may want to make a colorful and playful bracelet with glass beads, seed beads, or charms. For a everyday wear, you may want to make a simple and elegant bracelet with leather cord, metal wire, or a minimalist beaded design.

Q: How do I care for and maintain my DIY bracelet?

A: To care for and maintain your DIY bracelet, you should avoid exposing it to water, extreme temperatures, or harsh chemicals. You should also store your bracelet in a cool, dry place, away from direct sunlight. For beaded bracelets, you can use a soft cloth to wipe away dirt and dust, and for metal or leather bracelets, you can use a gentle cleaning solution. Regularly checking and adjusting the clasp and any other moving parts can also help to extend the life of your DIY bracelet.

Q: Can I make DIY bracelets as gifts for others?

A: Yes, DIY bracelets make great gifts for friends and loved ones. You can customize the design and materials to fit the recipient’s style and interests, and add a personal touch with a special message or charm. Consider making a DIY bracelet for a birthday, holiday, or special occasion, or as a thoughtful gesture to show you care. You can also make DIY bracelets in bulk and sell them at craft fairs or online, or use them as a fun and creative activity for parties or events.

How to Create Statement Necklaces

As you commence on the delightful journey of adorning your neck with a touch of elegance, you’ll discover that crafting statement necklaces is an art form that requires a dash of creativity and a pinch of flair. You’ll learn to weave together disparate elements, transforming them into a masterpiece that showcases your unique taste and sophistication. With your innate sense of style as your guide, you’ll navigate the world of textures, colors, and shapes, ultimately giving birth to a true showstopper that elevates your entire ensemble.

Key Takeaways:

  • To create a dramatic statement necklace, focus on combining bold pieces such as large beads, pendants, or tassels to make a eye-catching centerpiece that draws attention to the necklace.
  • Experiment with mixing and matching different textures, like smooth and rough, or colors, such as brights and neutrals, to add depth and visual interest to your statement necklace.
  • When designing a statement necklace, consider the overall aesthetic you want to achieve, such as bohemian, glamorous, or minimalist, and choose materials and elements that fit with your desired style to create a cohesive and polished look.

    Section

    For the discerning individual, crafting a statement necklace is an art form that requires finesse and flair. You will begin on a journey of self-expression, as you carefully select and combine materials to create a masterpiece that reflects your personality.

    Choosing the Right Materials

    Beneath the surface of a stunning statement necklace lies a thoughtful selection of materials. You will discover that the right combination of textures, colors, and shapes can elevate your piece from ordinary to extraordinary, as you experiment with various elements to find the perfect harmony.

    Essential Tools for Crafting

    Approximately every skilled artisan surrounds themselves with the necessary instruments to bring their vision to life. You will find that having the right tools at your disposal will make the crafting process infinitely more enjoyable, as you research into the world of statement necklace creation with ease and confidence.

    This arsenal of crucial tools will become your trusted companion as you navigate the creative process. You will use them to shape, mold, and assemble your materials into a breathtaking work of art, and as you work, you will develop a deeper understanding of the craftsmanship that goes into creating a truly show-stopping statement necklace, one that will undoubtedly become a testament to your impeccable taste and style.

    Section

    Assuming you have a flair for the dramatic, creating a statement necklace can be a thrilling venture. You’ll need to gather an assortment of materials, including beads, chains, and pendants, to bring your vision to life.

    Designing Your Statement Necklace

    Across the spectrum of jewelry design, statement necklaces stand out for their boldness and creativity. You can draw inspiration from various sources, such as nature, art, or architecture, to craft a unique piece that reflects your personality.

    Considering Color and Texture

    By exploring different color palettes and textures, you can add depth and visual interest to your statement necklace. You may opt for a monochromatic scheme or a kaleidoscope of hues, depending on the style you aim to achieve.

    Your choice of color and texture will greatly impact the overall aesthetic of your statement necklace. You should consider how the various elements will work together to create a harmonious and eye-catching piece, taking into account the interplay of light, shadow, and movement as you wear it, ensuring that your creation is a true masterpiece that showcases your impeccable taste and style.

    Section

    After selecting the perfect components, you are now ready to move on to the next step in creating your statement necklace. Your creativity and imagination will shine as you bring your design to life.

    Assembling the Necklace

    Nimbly, you will begin to assemble the various elements of your necklace, carefully considering the placement of each piece to create a harmonious and visually stunning whole.

    Tips for Working with Different Materials

    Around the world of jewelry making, you will encounter a vast array of materials, each with its own unique characteristics and challenges. You will work with:

    • Delicate fabrics
    • Exquisite beads
    • Luxurious metals
      Recognizing the properties of each material will help you to create a truly exceptional piece.

      To further master the art of working with different materials, you will want to experiment with various techniques and tools. You will discover that:

      • Wire wrapping is ideal for delicate chains
      • Beading is perfect for creating intricate patterns
      • Metals can be shaped and molded to create dramatic effects
        Recognizing the potential of each material and technique will elevate your statement necklace to new heights, and you will be delighted with the outcome of your creative endeavors.

        Section

        All that glitters is not gold, but with the right techniques, your statement necklace can shine like treasure. You’ll be amazed at how easily you can create a stunning piece with a few simple steps.

        Adding the Finishing Touches

        Augmenting your necklace with a few final flourishes can elevate it from ordinary to extraordinary. You’ll find that a well-placed clasp or a sprinkling of beads can make all the difference in your design.

        Embellishments and Details

        With a keen eye for detail, you can transform your necklace into a true showstopper. You’ll delight in the process of selecting the perfect embellishments to add a touch of personality to your piece.

        Finishing your statement necklace with intricate details will leave you feeling like a true artisan. You’ll take pride in knowing that every element, from the delicate chain to the daring pendant, was carefully chosen by you to create a one-of-a-kind masterpiece that showcases your unique sense of style.;

        Section

        Not every necklace is created equal, and when it comes to statement pieces, the right design can elevate your entire wardrobe. You will find that a well-crafted statement necklace can add a touch of sophistication to even the simplest of outfits, making it a must-have in your jewelry collection.

        Styling Your Statement Necklace

        Besides the inherent beauty of the piece itself, the way you style your statement necklace can greatly impact its overall effect. You should consider the length, texture, and color of the necklace when deciding how to wear it, as these factors will influence the overall aesthetic you wish to achieve.

        Pairing with Outfits and Accessories

        Outside of the necklace’s individual characteristics, you must also consider the outfits and accessories with which you will pair it. You will want to balance your look, ensuring that your statement necklace is the focal point, while your other accessories and clothing complement its beauty.

        Due to the versatility of statement necklaces, you will find that they can be paired with a wide range of outfits, from elegant evening gowns to more casual, everyday attire. As you experiment with different combinations, you will discover that your statement necklace can be dressed up or down, making it a valuable addition to your wardrobe, and a testament to your impeccable taste and style.

        Section

        Many talented individuals have managed to create statement necklaces that are truly breathtaking. You will be delighted to discover that making your own unique piece is quite straightforward, requiring only a few basic materials and some creativity. With a bit of practice, you will be able to craft stunning necklaces that will undoubtedly turn heads.

        Troubleshooting Common Issues

        Apart from the initial excitement, you may encounter a few challenges while creating your statement necklace. You will find that patience and attention to detail are crucial in overcoming these obstacles, and with time, you will develop the skills necessary to tackle even the most complex designs.

        Caring for Your Statement Necklace

        Naturally, your exquisite statement necklace will require some maintenance to retain its beauty. You should handle it with care, avoiding exposure to harsh chemicals or extreme temperatures, and store it in a safe place when not in use.

        Consequently, your statement necklace will remain a treasured possession for years to come, a true reflection of your impeccable taste and style. You will be able to wear it on special occasions, and it will undoubtedly become a conversation starter, drawing admiring glances and compliments from all who lay eyes on it, and you will take great pleasure in the knowledge that you created this masterpiece yourself.

        Conclusion

        As a reminder, you now possess the skills to craft your own statement necklaces. With these tips, you can create a masterpiece that showcases your personality. For further inspiration, visit How to Make a Statement Necklace – Katherine Dedul to explore your creativity and make your jewelry dreams a reality, elevating your style with your unique, handmade pieces.

        FAQ

        Q: What materials do I need to create a statement necklace?

        A: To create a statement necklace, you will need a variety of materials, including beads, wire, stringing material, findings, and embellishments. Beads can be made of various materials, such as glass, crystal, or stone, and come in different shapes, sizes, and colors. Wire can be used to create intricate designs and patterns, while stringing material, such as cord or chain, is used to connect the beads. Findings, like clasps and jump rings, are used to finish the necklace, and embellishments, such as charms or tassels, can add a decorative touch.

        Q: What are the basic steps to create a statement necklace?

        A: The basic steps to create a statement necklace include planning and designing your necklace, selecting and preparing your materials, and assembling the necklace. First, sketch out your design and choose the materials and colors that fit your concept. Next, cut and prepare your materials, such as cutting wire or stringing material to the desired length. Finally, assemble the necklace by threading the beads onto the stringing material, adding embellishments, and attaching the findings to complete the necklace.

        Q: How do I choose the right beads for my statement necklace?

        A: Choosing the right beads for your statement necklace depends on the style and theme you are trying to achieve. Consider the color, shape, size, and material of the beads, as well as their texture and finish. You can also consider the focal point of the necklace, such as a large pendant or a bold bead, and choose beads that complement it. Additionally, think about the overall aesthetic you want to create, such as a bold and eclectic look or a more delicate and elegant one, and choose beads that fit with that vision.

        Q: What are some popular techniques for creating statement necklaces?

        A: There are several popular techniques for creating statement necklaces, including wire wrapping, bead weaving, and stringing. Wire wrapping involves shaping and bending wire to create intricate designs and patterns, while bead weaving involves using a needle and thread to weave beads into complex patterns. Stringing involves threading beads onto a stringing material, such as cord or chain, to create a classic and elegant look. You can also experiment with mixed media techniques, such as combining different materials and textures to create a unique and eye-catching design.

        Q: How do I finish and secure my statement necklace?

        A: To finish and secure your statement necklace, you will need to attach findings, such as clasps and jump rings, to the ends of the necklace. Make sure the clasp is secure and comfortable to wear, and consider adding a safety catch to prevent the necklace from coming undone. You can also add a finishing touch, such as a charm or a tassel, to the end of the necklace. Finally, inspect the necklace for any loose threads or beads and make any necessary adjustments to ensure that it is secure and durable. With proper finishing and securing, your statement necklace will be ready to wear and enjoy.

DIY Projects for Reducing Waste

is not allowed inside p, here is the answer>

As you strive to live a more self-sufficient lifestyle, you’ll find that reducing waste is a significant step towards a simpler, more eco-friendly existence. You can start by taking matters into your own hands with DIY projects that help minimize your impact on the environment. Your efforts will not only benefit the planet, but also inspire others to join you in this journey towards a more sustainable future, allowing you to make a positive change in your daily life.

Key Takeaways:

To minimize waste, consider the following sustainable practices:

  • Start by repurposing old items, such as turning old jars into planters or using old t-shirts as cleaning rags, to reduce the amount of waste sent to landfills.
  • Implement composting to turn food scraps and yard trimmings into nutrient-rich soil, reducing the need for synthetic fertilizers and minimizing greenhouse gas emissions.
  • Engage in upcycling projects, such as transforming old pallets into furniture or creating bags from plastic bottles, to give new life to discarded materials and decrease pollution.

Simple Swaps

Before making any significant changes, you can start by incorporating simple swaps into your daily life to reduce waste. You can begin by replacing disposable items with reusable alternatives, which will not only reduce your environmental footprint but also save you money in the long run.

Reusable Bags and Containers

Bags made of cloth or canvas are excellent alternatives to plastic bags. You can use them for grocery shopping, carrying lunch, or storing items at home. By switching to reusable bags and containers, you will significantly reduce the amount of plastic waste you generate.

Refusable Water Bottles and Coffee Cups

To reduce your reliance on single-use plastics, consider investing in refillable water bottles and coffee cups. You can fill them up at home, at work, or at public water fountains, and they are perfect for daily use.

Understanding the benefits of refillable water bottles and coffee cups can motivate you to make this simple swap. By using them, you will not only reduce plastic waste but also save money on buying bottled water and coffee. You can choose from a variety of materials, such as stainless steel, glass, or silicone, to find the one that suits your needs and preferences.

Creative Repurposing

Even with a little creativity, you can breathe new life into old items, reducing waste and living more sustainably. You’ll find that creative repurposing can be a fun and rewarding way to rethink your belongings.

Turning Old Clothes into New Items

By reimagining your old clothes, you can create unique and useful items, such as quilts, bags, or cleaning rags, giving your old favorites a new purpose and keeping them out of landfills.

Upcycling Furniture and Home Decor

Any old furniture or decor can be transformed into something new and beautiful, saving you money and reducing waste. You can turn old pallets into planters or create a headboard from an old door, giving your home a personalized touch.

Decor items, such as vases, lamps, or picture frames, can also be upcycled, allowing you to add a personal touch to your space while reducing waste. As you explore the world of upcycling, you’ll discover that the possibilities are endless, and you can create a beautiful, eco-friendly home that reflects your values and style, inspiring you to live a more self-sufficient lifestyle.

Reducing Paper Waste

Your daily habits can significantly impact the environment, and reducing paper waste is a great place to start, allowing you to live a more simple and sustainable lifestyle.

Digital Documents and Bills

Physically, paper clutter can be overwhelming, so switching to digital documents and bills is a simple step towards a more organized and eco-friendly you, helping you to minimize your paper usage.

Homemade Paper Products

Around your home, you can create your own paper products, such as notebooks and cards, using recycled materials and natural ingredients, which will help you to reduce your reliance on store-bought items.

Consequently, as you begin to make your own paper products, you will find that you are not only reducing waste but also cultivating a sense of self-sufficiency and creativity, allowing you to live a more intentional and environmentally conscious life, where you can take pride in the things you make with your own hands.

Eco-Friendly Cleaning

Once again, you can make a significant impact by adopting eco-friendly cleaning habits, and you can find more ideas on 20 Easy Zero Waste DIY Ideas + Projects to get started.

Natural Cleaning Agents

Against the tide of harsh chemicals, you can opt for natural cleaning agents like baking soda and vinegar to clean your home.

DIY Cleaning Solutions

For a more sustainable approach, you can create your own DIY cleaning solutions using simple ingredients like lemon juice and water.

According to your-specific needs, you can experiment with different combinations of natural ingredients to create effective cleaning solutions, allowing you to take control of the cleaning products you use in your home and reduce your environmental footprint.

Composting and Gardening

To reduce waste, you can start by transforming your backyard into a sustainable oasis, where you can practice composting and gardening, reducing your reliance on industrial agriculture and minimizing your environmental footprint.

Starting a Compost Bin

Similarly, one effective way to begin is by creating a compost bin, where you can turn food scraps and yard waste into nutrient-rich soil, perfect for nurturing your garden and reducing the amount of waste sent to landfills.

Growing Your Own Food

Concurrently, cultivating your own food can be a liberating experience, allowing you to harvest fresh produce right in your own backyard, while also reducing your dependence on packaged and transported goods.

To take your gardening to the next level, you can start by selecting a variety of easy-to-grow plants, such as tomatoes, herbs, or leafy greens, and invest in a few basic tools, like a shovel, watering can, and gardening gloves, enabling you to tend to your garden with ease and enjoy the many rewards of homegrown produce.

Community Involvement

Despite the individual efforts you make to reduce waste, your impact can be amplified by involving your community. By working together, you can create a significant difference in your neighborhood and inspire others to adopt eco-friendly practices.

Participating in Local Recycling Programs

Beyond your own recycling habits, you can encourage your community to participate in local recycling programs, making a collective impact on reducing waste and promoting sustainability.

Organizing Community Clean-Up Events

Cleaning up your local environment can be a great way to bring your community together and promote a sense of responsibility towards the planet. You can start by organizing a clean-up event in your neighborhood or a nearby park, and invite your friends and family to join in.

Community efforts like these can have a profound impact on the environment, and as you take the lead in organizing such events, you will not only be contributing to a cleaner community, but also inspiring others to take action and make a positive change in their own lives, ultimately creating a ripple effect of sustainability and environmental stewardship.

To wrap up

Conclusively, as you launch on these DIY projects for reducing waste, you’ll find that simple actions can greatly impact your footprint on the earth. By implementing your newfound skills, you’ll not only reduce your waste but also cultivate a more self-sufficient lifestyle, just as nature intended. You’ll be inspired to continue exploring ways to live in harmony with your environment, and your efforts will contribute to a more sustainable future for all.

FAQ

Q: What are some easy DIY projects for reducing waste at home?

A: There are several easy DIY projects that can help reduce waste at home. One project is to create a compost bin using an old plastic container or wooden pallets. Simply drill holes in the bottom and sides, add food scraps and yard waste, and turn the compost regularly. Another project is to make reusable bags from old t-shirts or cloth scraps. Cut the shirts into squares, sew the sides and bottom together, and add some straps made from ribbon or twine. You can also repurpose old jars and containers to store food, cleaning supplies, or office materials.

Q: How can I get started with DIY projects for reducing waste, and what materials do I need?

A: Getting started with DIY projects for reducing waste is easy and fun. Begin by assessing what you already have at home that can be repurposed or reused. Old containers, cardboard boxes, fabric scraps, and plastic bottles can be transformed into many useful items. You may also need some basic craft supplies like scissors, glue, tape, and sewing needles. Look for tutorials and instructions online, and start with simple projects like making a bird feeder from a plastic bottle or creating a planter from an old boot. As you become more confident, you can move on to more complex projects like building a raised garden bed or creating a worm composter.

Q: What are the benefits of doing DIY projects for reducing waste, and how can they make a positive impact on the environment?

A: DIY projects for reducing waste have numerous benefits for the environment. By repurposing and reusing materials, you can significantly reduce the amount of waste sent to landfills, conserve natural resources, and decrease greenhouse gas emissions. Additionally, DIY projects can help you save money by reducing your need to purchase new products, and they can also promote a sense of community and creativity. By adopting a DIY approach to reducing waste, you can contribute to a more sustainable lifestyle, help protect the environment, and inspire others to do the same. As more people participate in DIY projects for reducing waste, it can lead to a significant positive impact on the environment and promote a culture of sustainability and environmental stewardship.

How to Repurpose Old Glass Jars

You can breathe new life into your old glass jars by transforming them into unique and functional items. Your empty jars can become beautiful vases, pen holders, or storage containers with a little creativity. You will learn how to clean, decorate, and repurpose your old glass jars into useful and decorative pieces for your home, reducing waste and showcasing your resourcefulness.

Key Takeaways:

To give old glass jars a new life, consider the following points:

  • Use creative painting techniques to transform the appearance of old glass jars, making them suitable for decorative purposes or as unique gift containers.
  • Apply upcycling methods to convert old glass jars into functional items such as planters, candle holders, or storage containers.
  • Embed DIY skills to turn old glass jars into beautiful centerpieces or lighting fixtures by adding elements like twine, ribbons, or small decorative items.

Preparing Old Glass Jars

A good starting point for repurposing old glass jars is to prepare them for their new use. You will need to give your jars a thorough cleaning and removal of any labels or residue to ensure they are ready for their new purpose.

Cleaning and Sterilizing

To begin the preparation process, you should wash your jars in warm soapy water to remove any dirt or debris. You can then sterilize them in a pot of boiling water or in the dishwasher to kill any bacteria.

Removing Labels and Residue

Removing the labels from your jars can be a bit tricky, but you can use a variety of methods such as soaking them in water or using a label remover. You will also need to scrape off any remaining residue to leave the jars smooth and clean.

Cleaning the area where the label was can be a bit challenging, but using a mixture of soap and water or a specialized cleaner can help to break down the adhesive, making it easier for you to remove any remaining residue from your jars.

Creative Repurposing Ideas

There’s no limit to the creative ways you can repurpose old glass jars, from making beautiful centerpieces to storing kitchen utensils. You can turn them into stunning vases, pen holders, or even a unique wind chime.

Tips for Home Decor

Ideally, you’ll want to consider the style and theme of your home when repurposing old glass jars for decorative purposes. You can:

  • Paint them in bold colors
  • Add decorative labels or stickers

After selecting the perfect design, you can display your repurposed jars proudly in your home.

Factors to Consider for Kitchen Use

To get the most out of your repurposed glass jars in the kitchen, you should consider a few factors. You can:

  • Use them for storing spices or coffee
  • Make a DIY kitchen organizer

Perceiving the potential uses for your jars will help you create a more functional kitchen.

Another aspect of repurposing old glass jars for kitchen use is thinking about how you can make them more functional. You can:

  • Add airtight lids for storing food
  • Label them for easy identification

Perceiving the potential benefits of repurposed glass jars will help you maximize their use in your kitchen, making your cooking and food storage tasks easier and more efficient.

DIY Projects Using Glass Jars

Despite their simple appearance, old glass jars can be transformed into beautiful and functional items for your home. You can use them as vases, candle holders, or even as a unique way to store your kitchen utensils.

How-to Guide for Crafting

To get started with your DIY project, you will need to clean and prepare your glass jars. You can then decorate them using paint, glue, and other craft supplies to give them a personalized touch, making them a reflection of your style and creativity.

Safety Precautions and Materials

Guided by your imagination, you will need a few basic materials to start crafting with glass jars, including a clean workspace, gloves, and safety goggles to protect yourself from any potential hazards.

Glass jars can be sharp and fragile, so you should handle them with care to avoid injuries. As you work on your project, you will need to take necessary precautions to ensure your safety, such as wearing protective gear and working in a well-ventilated area, allowing you to focus on bringing your creative ideas to life.

Organizing and Storage Solutions

For a clutter-free space, repurposed glass jars can be used to store various items, keeping your area tidy and organized. You can use them to store kitchen utensils, cleaning supplies, or office materials, making it easy to find what you need when you need it.

Maximizing Space with Glass Jars

Some of the most effective ways to use glass jars for storage involve placing them in a row on a shelf or in a cabinet, allowing you to make the most of your vertical space and keep your countertops clear. You can also use adhesive hooks to hang them from the ceiling or a wall.

How-to Implement a Jar Organization System

The key to a successful jar organization system is to label each jar clearly, so you can easily identify what’s inside. You can use a marker or stickers to label the jars, and consider grouping similar items together, such as all your baking supplies in one area.

Plus, as you implement your jar organization system, you’ll find that you can customize it to fit your specific needs and preferences. You can choose jars of different sizes and shapes to fit different items, and add decorative touches, such as ribbons or paint, to make your storage system more visually appealing, allowing you to enjoy the benefits of a clutter-free and organized space that reflects your personal style.

Upcycling and Decorating

All sorts of creative possibilities open up when you start thinking about upcycling and decorating old glass jars, from simple storage solutions to beautiful decorative pieces for your home.

Techniques for Painting and Designing

The key to achieving a professional-looking finish is to prepare the surface of the jar properly before painting or designing, and to use the right materials and techniques to bring your vision to life, as you experiment with different methods to find what works best for you.

Tips for Adding Embellishments

If you’re looking to add a personal touch to your upcycled jars, consider adding embellishments such as ribbons, labels, or decoupage, and some popular options include:

  • using twine or ribbon to create a rustic look
  • adding a handmade label or tag
  • applying decoupage cutouts or stickers

Knowing these techniques will help you take your upcycled jars to the next level, as you create unique and personalized pieces for your home.

Understanding the basics of embellishing your jars is important to achieving the desired look, and you can choose from a variety of techniques, including:

  • using glue or a hot glue gun to attach decorations
  • applying paint or varnish to protect the surface
  • adding decorative items like buttons or beads

Knowing the right techniques and materials to use will give you the confidence to experiment and come up with your own unique designs, as you continue to explore the world of upcycling and decorating old glass jars.

Troubleshooting Common Issues

Once again, you’ll encounter problems when repurposing old glass jars, but don’t worry, they can be easily solved. You can fix leaks, cracks, and other issues with simple techniques and materials, ensuring your jars remain functional and safe to use.

How-to Fix Leaks and Cracks

Any attempt to fix a leak or crack in your glass jar requires patience and the right tools. You can use epoxy or silicone sealant to repair small cracks, while larger cracks may need more extensive repair or even replacement, depending on the severity of the damage.

Factors Affecting Jar Longevity

Clearly, your jar’s longevity depends on several factors, including:

  • Material quality
  • Usage patterns
  • Storage conditions

. This understanding will help you take better care of your jars and extend their lifespan.

Common issues that affect the longevity of your glass jars include exposure to extreme temperatures, physical stress, and poor cleaning habits. You can take steps to mitigate these factors by:

  • Storing jars in a dry, cool place
  • Avoiding sudden temperature changes
  • Handling jars with care

. This knowledge will enable you to enjoy your repurposed jars for a longer period.

To wrap up

As a reminder, you can breathe new life into old glass jars by repurposing them. You can explore various ideas, and for more inspiration, visit Everyone tell me how you reuse your glass jars to discover creative ways to reuse your glass jars, making your home more sustainable and beautiful with your own unique touch.

FAQ

Q: What are some creative ways to repurpose old glass jars?

A: There are several creative ways to repurpose old glass jars. You can use them as vases for flowers, pen holders for your desk, or as a unique centerpiece for your dining table. You can also use them to store small items like buttons, safety pins, or beads. Additionally, you can transform them into beautiful candle holders or soap dispensers with a little bit of crafting. The possibilities are endless, and it’s up to your imagination to find new uses for old glass jars.

Q: How do I clean and prepare old glass jars for repurposing?

A: To clean and prepare old glass jars for repurposing, start by washing them thoroughly with soap and warm water. Remove any labels and residue using a mixture of equal parts water and white vinegar or a label remover. Then, rinse the jars with clean water and dry them completely. If there are any stubborn stains or odors, you can soak the jars in a mixture of baking soda and water for a few hours before cleaning. Once the jars are clean and dry, you can start decorating or using them for your chosen purpose.

Q: What are some tips for decorating and customizing repurposed glass jars?

A: There are many ways to decorate and customize repurposed glass jars. You can paint them using glass paint or acrylics, or add decorative stickers or decals. You can also wrap twine, ribbon, or yarn around the jar to give it a rustic or bohemian look. Another idea is to add a layer of glue and glitter to the jar for a sparkly effect. If you want to add a more personal touch, you can write or paint the jar’s new purpose or a special message on it. Regardless of the method you choose, make sure the decorations are safe and durable, especially if you plan to use the jar for storing food or other items.

The Joy of Trash-to-Treasure Crafts

As you explore the world of crafting, you’ll discover the satisfaction of transforming discarded items into unique treasures. You can breathe new life into old materials, reducing waste and creating something truly special. Your creativity will shine as you repurpose everyday objects, turning them into functional or decorative pieces that reflect your personal style. By embracing trash-to-treasure crafts, you’ll not only produce innovative items, but also contribute to a more sustainable lifestyle.

Key Takeaways:

  • The creative process of transforming discarded items into unique pieces can be a fun and rewarding experience, allowing individuals to express their imagination and creativity.
  • Upcycling and repurposing old items can help reduce waste and promote sustainability, making it an environmentally friendly hobby.
  • Engaging in trash-to-treasure crafts can also be a great way to develop problem-solving skills and resourcefulness, as individuals must think outside the box to turn discarded items into something new and useful.

Benefits of Trash-to-Treasure Crafts

Before venturing into the world of trash-to-treasure crafts, consider the advantages they offer. You’ll not only create unique items, but also contribute to a sustainable lifestyle.

Environmental Benefits

Transforming trash into treasure helps reduce waste, conserving natural resources and decreasing pollution, which benefits your community and the environment.

Cost-Effective and Creative

By embracing trash-to-treasure crafts, you’ll discover innovative ways to reuse materials, fostering your creativity while saving money on art supplies and decorative items.

But as you explore this creative world, you’ll find that the cost-effectiveness of trash-to-treasure crafts extends beyond saving money. You’ll also develop a sense of pride and accomplishment, as you breathe new life into discarded items, making them truly one-of-a-kind treasures that reflect your personal style and creativity.

Popular Trash-to-Treasure Crafts

Any crafty person knows that turning trash into treasure can be a fun and creative activity. You can turn old items into unique pieces that reflect your personality and style. From upcycled jewelry to repurposed home decor, the possibilities are endless.

Upcycled Jewelry

To transform old materials into stunning jewelry, you can use items like bottle caps, fabric scraps, or old keys. You can turn these items into beautiful necklaces, earrings, or bracelets that showcase your creativity.

Repurposed Home Decor

For a unique touch, you can repurpose old items into decorative pieces for your home. You can turn old mason jars into vases, or use old pallets to create a coffee table.

And as you explore the world of repurposed home decor, you’ll find that the possibilities are vast. You can turn old windows into mirrors, or use old maps to create a unique wallpaper. Your creativity and imagination are the only limits to what you can create, and with a little practice, you can turn any old item into a beautiful piece of home decor that reflects your personal style.

Materials and Supplies

Once again, you’ll find that your creative journey is full of possibilities when exploring trash-to-treasure crafts, and for inspiration, you can visit Trash to Treasure tutorials to get started.

Common Household Items

Items such as old jars, cardboard tubes, and fabric scraps can be transformed into unique pieces, allowing you to unleash your creativity and personalize your projects.

Thrift Store Finds

Any trip to a thrift store can yield a plethora of materials, from vintage clothing to old furniture, waiting for you to breathe new life into them.

Thrift stores offer a treasure trove of possibilities for your trash-to-treasure crafts, and as you browse the shelves, you’ll discover that with a little imagination, you can turn someone’s discarded items into your own unique creations, giving you a sense of satisfaction and pride in your work.

Tips and Tricks

Despite the initial chaos, turning trash to treasure can be a breeze with the right approach. Consider the following:

  • Sort and categorize materials
  • Experiment with different techniques
  • Knowing these basics will help you create unique pieces.

    Getting Started

    Once you begin, you’ll find that your creative potential is endless, and you’ll be excited to see your projects take shape as you explore various materials and techniques.

    Overcoming Creative Blocks

    Across the board, you’ll encounter moments where inspiration is scarce, but don’t worry, this is a normal part of the process, and taking a break can help you regain your creative spark.

    Tips for tackling creative blocks include changing your environment, seeking inspiration from others, and giving yourself time to relax and recharge, allowing you to approach your project with fresh eyes and a newfound sense of excitement, helping you to overcome obstacles and bring your unique vision to life, as you continue to develop your skills and explore the world of trash-to-treasure crafts, you’ll find that your confidence and creativity will continue to grow.

    Showcase of Unique Creations

    To take your trash-to-treasure crafts to the next level, consider showcasing your unique creations in a dedicated space. This will allow you to appreciate your finished projects and inspire you to create more.

    Quirky Art Pieces

    Among the most exciting aspects of trash-to-treasure crafts are the quirky art pieces you can create. You can turn old items into stunning works of art that reflect your personality and style.

    Functional Items

    The most practical aspect of trash-to-treasure crafts is creating functional items for your daily life. You can turn old items into useful objects that serve a purpose in your home.

    A key benefit of creating functional items is that you can customize them to fit your specific needs and preferences. As you investigate into the world of functional trash-to-treasure crafts, you’ll find that you can create everything from storage containers to home decor items, all while reducing waste and exercising your creativity. You’ll be amazed at how your unique creations can enhance your daily life and add a personal touch to your living space.

    Community and Inspiration

    After discovering the world of trash-to-treasure crafts, you’ll find that being part of a community can enhance your experience. You’ll get to share your creations, learn from others, and stay updated on the latest trends and techniques.

    Online Forums and Groups

    Besides the wealth of information available online, you can join forums and groups to connect with like-minded individuals who share your passion for trash-to-treasure crafts. You can showcase your projects, ask for feedback, and get inspiration from others.

    Local Workshops and Classes

    About the time you think you’ve learned it all, you can take your skills to the next level by attending local workshops and classes. You’ll have the opportunity to learn from experienced instructors and network with fellow crafters in your area.

    Indeed, local workshops and classes offer a unique chance to explore different techniques and mediums, and you’ll be able to see the transformation of trash into treasure firsthand. You’ll gain hands-on experience, get feedback from instructors, and take home your finished projects, feeling proud of your accomplishments and eager to start your next trash-to-treasure craft.

    Final Words

    So, as you conclude your journey through the world of trash-to-treasure crafts, you’ll find that your creativity has been sparked and your perspective on waste has shifted. You’ll begin to see potential in your discarded items, and your imagination will turn them into unique treasures. With your newfound skills, you’ll be able to breathe new life into old objects, reducing waste and creating something truly special with your own hands.

    FAQ

    Q: What is the main idea behind The Joy of Trash-to-Treasure Crafts?

    A: The main idea behind The Joy of Trash-to-Treasure Crafts is to inspire individuals to transform discarded materials into unique and functional items, promoting creativity, sustainability, and waste reduction. This approach encourages people to think outside the box and explore the potential of everyday objects that would otherwise end up in landfills, giving them a new life and purpose.

    Q: What kinds of materials can be used for Trash-to-Treasure Crafts?

    A: A wide variety of materials can be used for Trash-to-Treasure Crafts, including but not limited to, old jars, cardboard tubes, fabric scraps, plastic containers, wooden pallets, and newspaper. The possibilities are endless, and the choice of material often depends on the desired outcome and the individual’s imagination. Getting creative with materials that are readily available can lead to innovative and personalized crafts.

    Q: Can anyone engage in The Joy of Trash-to-Treasure Crafts, regardless of their crafting experience?

    A: Yes, The Joy of Trash-to-Treasure Crafts is accessible to everyone, regardless of their level of crafting experience. It’s an activity that can be enjoyed by people of all ages and skill levels. Beginners can start with simple projects and gradually move on to more complex ones as they gain confidence and experience. Moreover, the nature of trash-to-treasure crafts often involves experimenting and learning as you go, making it a fun and educational hobby for everyone involved.

Skip to content