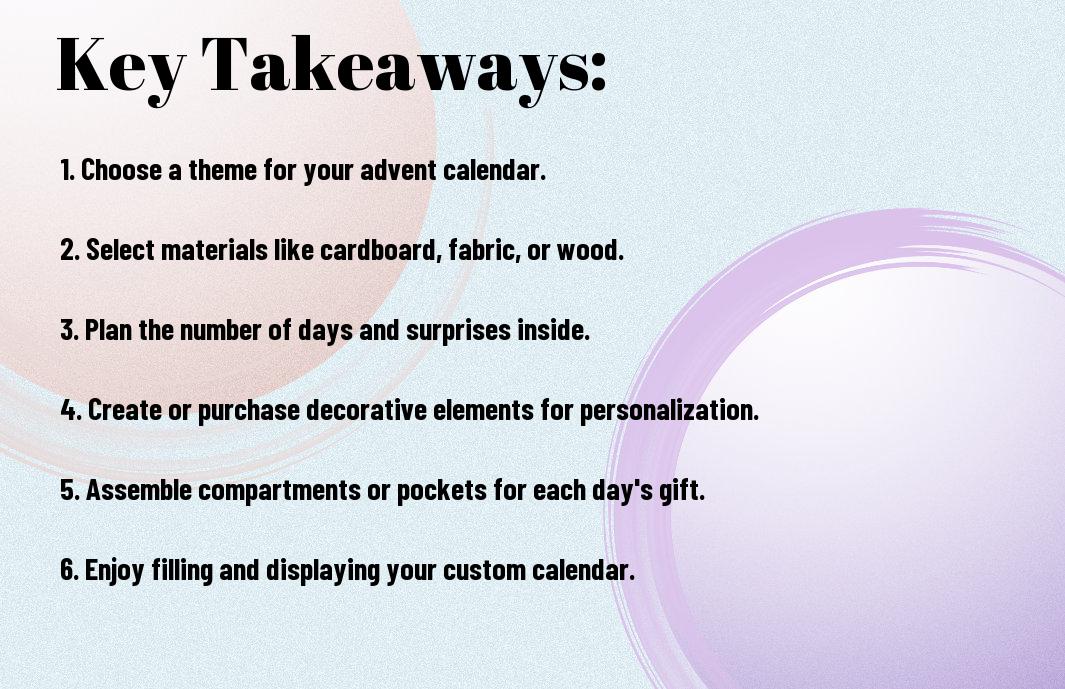
Seasonal and Holiday Crafts

How to Make Handmade Advent Calendars

Key Takeaways:

To create a unique and exciting handmade advent calendar, consider the following points:

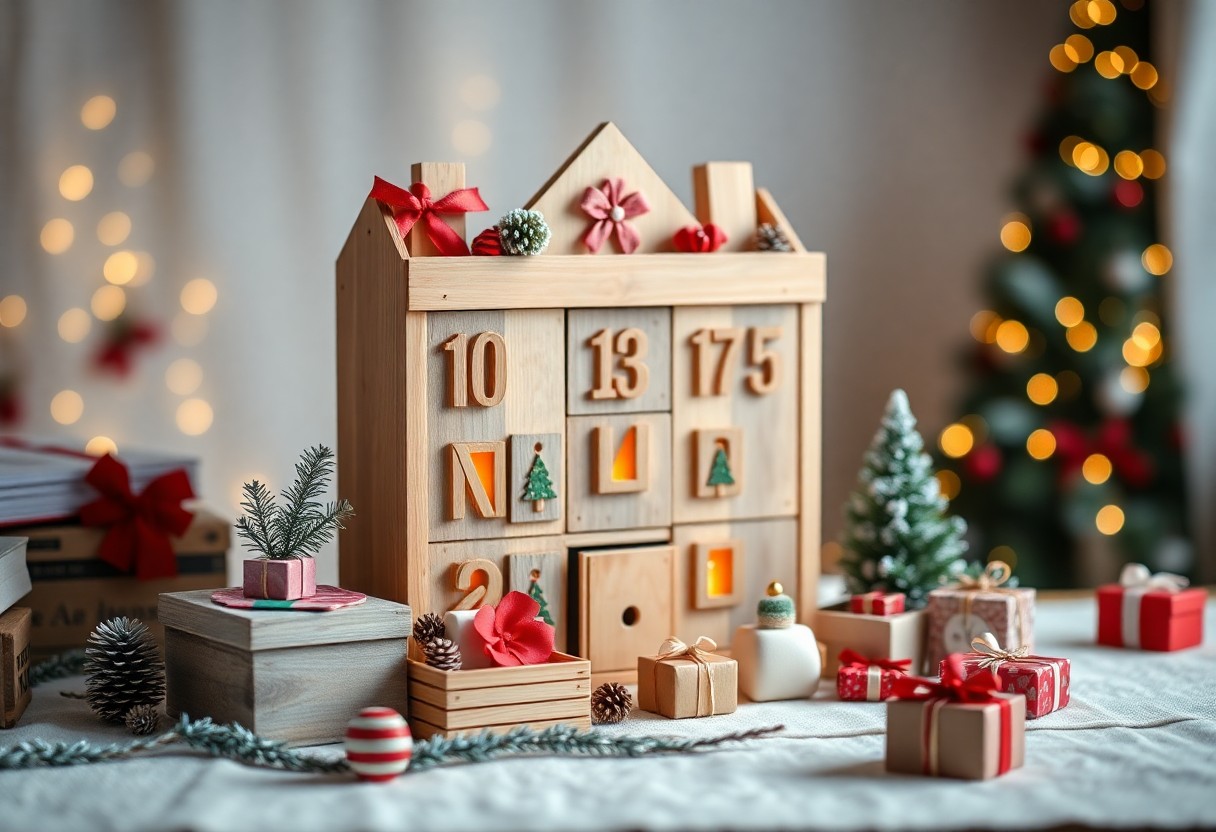
  • Start by planning the design and theme of your calendar, taking into account the number of days you want to cover and the type of activities or treats you want to include.
  • Choose a variety of materials and crafting techniques to add depth and visual interest to your calendar, such as paper, fabric, or wood, and consider adding decorations like ribbons or buttons.
  • Make the experience even more special by filling your calendar pockets or compartments with treats and activities that cater to the interests and preferences of the person using it, such as chocolates, stickers, or small toys.

Planning Your Calendar

A well-planned advent calendar will make the holiday season even more special. You’ll want to consider the overall design and functionality of your calendar to ensure it meets your needs.

Choosing a Theme

Besides the traditional Christmas theme, you can choose a variety of themes for your advent calendar, such as winter wonderland, snowflakes, or even a favorite hobby. You can let your imagination run wild and pick a theme that reflects your personality.

Selecting Materials

At this stage, you’ll need to gather materials that fit your theme and design. You’ll want to choose materials that are durable and easy to work with, such as paper, fabric, or wood.

Another important aspect of selecting materials is considering the size and shape of your calendar. You’ll want to ensure that your materials are proportional to the size of your calendar and that you have enough to complete the project. You can visit craft stores or browse online to find the perfect materials for your handmade advent calendar, and don’t hesitate to get creative and mix different textures and colors to make it truly unique.

Designing Your Calendar

Clearly, the design of your handmade advent calendar is where you can let your creativity shine. You’ll want to consider the theme, colors, and overall aesthetic you want to achieve, as well as the number of days you want to include.

Creating a Template

Across the board, a well-planned template is necessary for a beautiful and functional calendar. You can sketch out a rough design on paper or use a digital tool to create a more precise template, taking into account the size and shape of your calendar.

Adding Decorative Elements

Essentially, embellishments can make or break the look of your calendar. You can add ribbons, bows, or other decorative elements to give your calendar a personalized touch, and make it more visually appealing to you and your loved ones.

Hence, as you start adding decorative elements, think about the style and theme you want to convey. You can choose elements that match your home decor or favorite holiday decorations, and have fun experimenting with different combinations to find the perfect look for your handmade advent calendar.

Building Your Calendar

Not every handmade advent calendar is the same, and you can customize yours to fit your style and preferences. You will start by planning the layout and design of your calendar.

Assembling the Calendar Base

Before you begin assembling the base, gather all your materials and tools. You will need a piece of cardboard or wood to serve as the base, as well as any decorative elements you want to include.

Attaching the Doors or Compartments

Calendar construction involves attaching doors or compartments to the base. Here is a breakdown of the steps:

Steps | Description
———|————
1 | Cut out doors or compartments
2 | Attach doors or compartments to base

You can use glue, nails, or another strong adhesive to secure the doors or compartments.

A thorough approach to attaching the doors or compartments is necessary for a polished finish. Here is a more detailed guide:

Techniques | Tools
—————|———-
Measuring | Ruler
Cutting | Scissors or craft knife

As you work on attaching the doors or compartments, you will see your calendar start to take shape, and you can begin to envision the finished product.

Filling Your Calendar

Many of the joys of a handmade advent calendar lie in the surprises that await you each day. As you fill your calendar, consider the treats and activities that will bring delight to your loved ones.

Selecting Treats and Surprises

Beneath the surface of a great advent calendar are thoughtful selections that cater to your family’s interests. You can choose from a variety of small toys, chocolates, and other goodies to fill each day’s compartment.

Adding Personalized Touches

Filling your calendar with personalized touches makes it extra special. You can add notes, drawings, or small mementos that are meaningful to your loved ones, making each day a unique experience.

Another way to make your advent calendar even more personal is to tailor the activities and treats to your family’s traditions and hobbies. You can include coupons for activities like baking cookies, going on a winter walk, or having a movie night, making the countdown to the holiday season a fun and engaging experience for everyone involved.

Decorating Your Calendar

Despite the simplicity of a handmade advent calendar, you can still make it look stunning with the right decorations. You can add ribbons, bows, and other embellishments to give it a personal touch. Your calendar will be a beautiful reflection of your personality and style.

Adding Embellishments

Your creativity will shine when adding embellishments to your calendar. You can use stickers, stamps, or drawings to make each day’s box unique and exciting. You can also add photos or small mementos to make it extra special.

Finishing Touches

Below the surface of your calendar, you’ve added a beautiful design, now it’s time to add the final details. You can add a hanger or a string to hang your calendar, making it easy to display in your home.

Even after you’ve completed the finishing touches, you can still make adjustments to your calendar. You can fill each box with treats or activities, and you can also add a personal message or a fun surprise to make the countdown to the holiday season even more exciting for you and your loved ones.

Tips and Variations

To make your handmade advent calendar even more special, consider the following ideas:

  • add a personal touch with photos or names

. You can customize it to fit your style and interests. Recognizing your creativity will make it a unique and meaningful project.

Making it a Family Affair

Across the holiday season, you’ll find that involving your loved ones in the process can be a fun and rewarding experience. You can assign tasks to each family member, making it a collaborative effort.

Creating a Themed Calendar

Across various styles and designs, you can choose a theme that suits your taste and preference. You can select a winter wonderland, a festive holiday, or a favorite hobby as your theme.

Affair with a themed calendar will add an extra layer of excitement to your countdown. You can decorate your calendar with elements that match your chosen theme, such as snowflakes, holly, or tiny ornaments, making each day’s surprise a delight to discover, and you’ll enjoy the process of creating a one-of-a-kind advent calendar that reflects your personality and style.

Summing up

Summing up, you’ve now learned the basics of creating your own handmade advent calendar. With these simple steps, you can craft a unique and personalized countdown to the holiday season. For more inspiration, visit Inexpensive Way to Make a DIY Advent Calendar to explore new ideas and make your holiday season even more special with your handmade creation. You can now enjoy your beautifully crafted calendar with your loved ones.

FAQ

Q: What materials do I need to make a handmade advent calendar?

A: To make a handmade advent calendar, you will need a variety of materials, including cardboard or cardstock for the base, 24 small boxes or envelopes, decorative paper or fabric, glue, scissors, and any other embellishments you’d like to add, such as ribbons, buttons, or stickers. You’ll also need a pen or pencil to mark the dates and a calendar or planner to plan out your design.

Q: How do I design my handmade advent calendar?

A: Designing your handmade advent calendar is a fun and creative process. Start by deciding on a theme, such as a winter wonderland or a festive holiday scene. Then, sketch out a rough design on paper, considering the size and shape of your calendar, as well as the placement of the 24 small boxes or envelopes. You can also look for inspiration online or in craft books to get ideas for your design. Once you have a plan, you can start cutting out your materials and assembling your calendar.

Q: What can I put inside each day’s compartment of my handmade advent calendar?

A: The possibilities are endless when it comes to filling each day’s compartment of your handmade advent calendar. You can include small toys, candies, or treats, as well as fun activities or challenges, such as puzzles, games, or crafts. You can also include notes or messages of encouragement, or small mementos, such as stickers, stamps, or temporary tattoos. The key is to make each day’s surprise fun and exciting, and to tailor the contents to the interests and personality of the person using the calendar.

Q: How do I assemble my handmade advent calendar?

A: Assembling your handmade advent calendar is a bit like building a puzzle. Start by gluing the small boxes or envelopes to the base, making sure to leave enough space between each one for easy access. Then, decorate the outside of the calendar with your chosen materials, such as paper, fabric, or ribbons. Next, fill each compartment with the treats or activities you’ve chosen, and finally, add any finishing touches, such as a ribbon or bow to hang the calendar. Make sure everything is securely attached and the calendar is sturdy enough to hold all the contents.

Q: Can I make a handmade advent calendar with my family or kids?

A: Making a handmade advent calendar is a great activity to do with your family or kids. You can involve them in the design and planning process, and have them help with tasks such as cutting, gluing, and decorating. This can be a fun and collaborative project that everyone can enjoy, and it’s a great way to spend quality time together during the holiday season. You can also make it a tradition to make a new handmade advent calendar together each year, using different themes and materials to keep it exciting and fresh.

The Best Winter Craft Projects

You step into your workshop, surrounded by snow outside, and your hands itch to create. You’ve got the time, now you need the ideas. Your winter crafting journey starts here. You’ll find projects to repurpose old items, to make your home cozier, and to give as gifts. You’ll get your hands on materials, follow simple steps, and make something with your own hands, feeling the satisfaction of creating something from scratch.

Key Takeaways:

To make the most out of your winter crafting experience, consider the following points:

  • Engage in Knitting or Crochet projects to create warm and cozy items like hats, gloves, and scarves, which make perfect gifts or personal accessories for the cold season.
  • Explore Paper Crafting techniques, such as card making, gift tagging, and scrapbooking, to add a personal touch to your winter gifts and decorations, using materials like glitter, snowflake patterns, and festive colors.
  • Try your hand at Upcycled or Repurposed craft projects, transforming old items like mason jars, twine, and pinecones into unique decorative pieces, such as candle holders, wreaths, and centerpieces, to add a touch of warmth and personality to your home.

Selecting Materials

A good winter craft project starts with the right materials. You’ll need to consider what you want to create and what supplies you’ll need to get started.

Choosing the Right Fabrics

For those who enjoy sewing, picking the right fabrics is key. You’ll want to select materials that are warm and durable, such as wool or fleece, to create a cozy winter project.

Essential Crafting Tools

An assortment of basic tools will get you started on your winter craft project. You’ll need items like scissors, glue, and yarn to bring your idea to life.

For instance, having a good pair of scissors will make cutting through thick fabrics easier, while a reliable glue gun will help you bond materials together quickly. You’ll find that with the right tools, your project will come together smoothly and efficiently, allowing you to enjoy the process of creating something with your own hands.

Winter-themed Crafts

Any craft project that captures the essence of winter can be a great way to get into the holiday spirit. You can make decorations, gifts, and other items that reflect the season’s magic.

Snowflake Decorations

With simple materials like paper and glue, you can create beautiful snowflake decorations to hang in your windows or from your ceiling. You’ll find that the intricate patterns and delicate designs add a touch of winter wonder to your home.

Handmade Ornaments

Ornate or simple, handmade ornaments can be a great way to personalize your holiday tree. You can make them from various materials like wood, metal, or glass, and customize them to fit your style.

Due to their unique nature, handmade ornaments make great gifts for friends and family. You can create a set of ornaments that reflect your loved ones’ interests or hobbies, making them a thoughtful and personalized present. As you work on your ornaments, you’ll find that the process is just as enjoyable as the end result, allowing you to relax and get into the holiday spirit. You’ll be able to treasure your handmade ornaments for years to come, and they will serve as a reminder of the time and effort you put into creating something special.

Cozy Home Decor

After a long day, you want your home to feel warm and inviting. You can achieve this with simple winter craft projects that add a personal touch to your space.

Knitted Blankets

Opposite to store-bought blankets, knitted ones provide a sense of comfort and coziness, and you can make them yourself with some yarn and a few basic stitches.

Winter-inspired Centerpieces

Above all, your coffee table or dining table needs a centerpiece that reflects the season, and you can create one using pinecones, twigs, and candles.

The key to a beautiful winter-inspired centerpiece is to keep it simple and natural, using elements like pine, holly, or frosted glass to create a warm and inviting ambiance, and you can arrange them in a way that suits your style and decor, making your home feel cozy and welcoming during the cold winter months.

Gift Ideas

Not every gift has to be expensive or store-bought. You can create something special with your own hands. Winter is the perfect time to get crafty and make gifts for your loved ones.

Personalized Mugs

With a few simple materials, you can create personalized mugs that show you care. You can paint or decoupage your favorite designs onto the mug, making it a unique gift for friends and family.

Handmade Candles

For a cozy and thoughtful gift, consider making handmade candles. You can customize the color and scent to fit your loved one’s style, making it a truly personal present.

In addition, making handmade candles allows you to control the ingredients and quality, ensuring a high-quality gift that will be appreciated. You can experiment with different waxes, fragrances, and dyes to create a one-of-a-kind candle that reflects your personality and style, making it a special and meaningful gift for your loved ones.

Tips and Tricks

To get the most out of your winter craft projects, consider the following:

  • Use high-quality materials
  • Follow patterns carefully

. You’ll find that your projects turn out better. Recognizing your mistakes is key to improving your craft.

Working with Yarn

Techniques for handling yarn are imperative. You’ll need to know how to knit, purl, and cast on to create something worthwhile. Your weaving will be tighter, your stitches even.

Adding a Personal Touch

Opposed to mass-produced items, your crafts will have character. You can add your own style, making each piece unique. Your touch will make it special.

Further, when adding a personal touch, you’ll want to think about what makes your craft distinct. You can experiment with different colors, textures, and patterns to create something that reflects your personality. Your winter craft project will be a one-of-a-kind item that you can be proud of, and it will make a great gift for someone special.

Seasonal Inspiration

Your winter craft projects start with the season’s inspiration, drawing from its unique landscapes and emotions.

Winter Wonderland Scenes

Any moment you step outside, you’re surrounded by snow-covered trees, frozen lakes, and frosty air, all begging to be captured in your crafts.

Frosty Morning Crafts

Along with the cold comes a stillness, a quiet that sparks creativity, and you can harness this to create beautiful, delicate pieces that evoke the chill of a winter morning.

Crafts like knitting, painting, and pottery can help you express the serene beauty of frosty mornings, and as you work, you’ll find that the calm and tranquility of the season seep into your creations, making them truly special and reflective of your winter experience.

To wrap up

Conclusively, you’ve now got your hands on the best winter craft projects. You can put your skills to the test, and in no time, your home will be filled with your creations. You’ll find that these projects bring a sense of warmth and coziness to your space, and you’ll be proud to showcase your handmade work to your loved ones. Your winter will be filled with joy and creativity, and that’s all that matters.

FAQ

Q: What are some popular winter craft projects that can be made at home?

A: Some popular winter craft projects that can be made at home include knitting or crocheting warm clothing and accessories, such as hats, scarves, and gloves, as well as making decorations like snowflakes, wreaths, and ornaments. You can also try your hand at making candles, soaps, and other home fragrances to create a cozy atmosphere. Additionally, you can make winter-themed crafts like snow globes, pinecone bird feeders, and handmade cards to give as gifts or use to decorate your home.

Q: What materials are needed for a winter craft project?

A: The materials needed for a winter craft project vary depending on the specific project. For knitting or crocheting, you will need yarn, knitting needles or a crochet hook, and scissors. For making decorations, you may need materials like paper, glue, scissors, and string or twine. For making candles and soaps, you will need wax, vital oils, and molds. You may also need additional materials like fabric, felt, or ribbons to add embellishments to your projects. It’s always a good idea to check the specific instructions for the project you want to make to ensure you have all the necessary materials.

Q: How can I make my winter craft projects more environmentally friendly?

A: There are several ways to make your winter craft projects more environmentally friendly. One way is to use recycled or repurposed materials, such as old sweaters or fabric scraps, to make new items like hats, scarves, or bags. You can also use natural materials like pinecones, twigs, and leaves to make decorations. Additionally, you can choose to use eco-friendly materials like soy wax or beeswax to make candles, and opt for vital oils that are sustainably sourced. You can also try to reduce waste by using up leftover materials and avoiding single-use plastics.

Q: Can I make winter craft projects with my kids?

A: Yes, winter craft projects can be a fun and creative activity to do with your kids. Many winter craft projects, such as making snowflakes, decorating ornaments, or making handmade cards, are easy and safe for kids to do with minimal supervision. You can also adapt more complex projects, like knitting or crocheting, to make them kid-friendly by using larger needles or hooks and simpler patterns. Making winter crafts with your kids can be a great way to spend quality time together, teach them new skills, and create lasting memories. Just be sure to supervise your kids when using materials like scissors, glue, or hot wax.

Q: How can I display and store my winter craft projects?

A: There are many ways to display and store your winter craft projects, depending on the type of project and the space you have available. You can display your projects on a mantel, shelf, or side table, or hang them on the wall or in a window. For smaller projects like ornaments or decorations, you can store them in a decorative box or container when not in use. For larger projects like knitted or crocheted items, you can store them in a closet or on a shelf in a cool, dry place. You can also consider giving your projects as gifts or donating them to a local charity or community organization.

How to Craft Seasonal Wreaths

You can create beautiful, unique wreaths that reflect your personal style and the current season. With a few simple materials and some creativity, you can design stunning pieces to adorn your home. As you explore the world of seasonal wreath-making, you will discover the versatility of various materials and techniques. You will learn how to choose the perfect elements to bring your vision to life and make your home feel welcoming and festive throughout the year.

Key Takeaways:

To create beautiful and unique seasonal wreaths, consider the following points:

  • Use fresh materials such as flowers, leaves, and branches that are in season to create a wreath that reflects the current time of year and adds a touch of nature to your home decor.
  • Experiment with different textures and colors to add depth and visual interest to your wreath, such as combining smooth ribbons with rough twigs or pairing bright flowers with muted greens.
  • Don’t be afraid to get creative and think outside the box when it comes to materials and designs, such as using unusual items like pinecones, seashells, or fabric to create a one-of-a-kind seasonal wreath.

    Gathering Materials

    The first step in crafting seasonal wreaths is to gather your materials. You will need a wire or foam wreath frame, as well as an assortment of seasonal elements such as flowers, foliage, and decorative items.

    Selecting Seasonal Blooms

    Beneath the variety of seasonal blooms, you’ll find the perfect flowers and foliage to match your wreath’s theme. You can choose from a range of colors and textures to create a unique and beautiful arrangement.

    Choosing Ribbon and Embellishments

    Almost any type of ribbon or embellishment can be used to add a finishing touch to your wreath. You can select from a wide range of materials, including silk, burlap, and lace, to create a look that suits your style.

    In fact, when it comes to choosing ribbon and embellishments, you have endless options to enhance your wreath. You can add bows, flowers, or other decorative elements to give your wreath a personalized touch, making it a one-of-a-kind creation that reflects your personality and style.

    Designing Your Wreath

    There’s no one-size-fits-all approach to designing a wreath, as the possibilities are endless and depend on your personal style and preferences. You can choose to go for a classic and elegant look or a more modern and eclectic design, depending on the occasion and the season.

    Considering Color Palette and Theme

    Thematic elements will play a significant role in determining the overall aesthetic of your wreath, and you should consider the colors and themes that resonate with the current season and your personal taste. You can draw inspiration from nature, holidays, or your favorite colors to create a unique and cohesive look.

    Balancing Texture and Form

    An abundance of textures and forms can add depth and visual interest to your wreath, and you should aim to strike a balance between different elements to create a harmonious design. You can combine smooth and rough textures, as well as various shapes and sizes, to create a wreath that is visually appealing.

    Even as you experiment with different textures and forms, you should consider how they will work together to create a cohesive look. You can achieve this by selecting elements that complement each other, such as pairing smooth ribbons with rough twigs or combining circular and linear shapes. By doing so, you will create a wreath that is not only beautiful but also unique and reflective of your personal style.

    Preparing the Base

    For a beautiful and long-lasting wreath, you need to start with a solid foundation. You will be creating your seasonal wreath on a base, which can be made of various materials such as wire, foam, or grapevine. Choose a base that fits your desired shape and size, and make sure it is sturdy enough to hold your decorations.

    Selecting the Right Wreath Frame

    Fortunately, you have numerous options when it comes to selecting a wreath frame, ranging from modern to traditional designs. You can opt for a wire frame for a more versatile and flexible base, or choose a foam frame for a fuller and more voluminous look. Consider the theme and style of your wreath when making your selection.

    Adding Filler Greens and Foliage

    Right from the beginning, you want to add some depth and texture to your wreath with filler greens and foliage. You can use a variety of materials such as eucalyptus, ferns, or lemon leaves to create a lush and vibrant base for your decorations. This will help you achieve a more polished and professional look.

    This step is where you can get creative and experiment with different combinations of filler greens and foliage to find the perfect blend for your wreath. You can choose materials that complement your wreath’s theme and color scheme, or opt for a more traditional approach with classic evergreen branches and holly. As you add your filler greens and foliage, make sure to fluff and shape them to achieve a natural and balanced look, and you will be ready to start adding your decorations and embellishments to complete your seasonal wreath.

    Adding Decorative Elements

    Keep your wreath visually interesting by adding decorative elements that reflect the season and your personal style. You can choose from a variety of materials, such as flowers, fruits, ribbons, and garlands, to create a unique and beautiful wreath.

    Incorporating Flowers and Fruits

    Between the base of your wreath and the decorative elements, you’ll find a world of possibilities. You can use fresh or artificial flowers and fruits to add color, texture, and fragrance to your wreath, making it a stunning piece for your home.

    Using Ribbons and Garlands

    Any ribbon or garland can be used to add a pop of color and texture to your wreath. You can choose from a wide range of materials, such as silk, burlap, or velvet, to match your wreath’s theme and style.

    Indeed, using ribbons and garlands is an excellent way to finish your wreath and give it a polished look. You can tie a ribbon around the wreath form, or weave a garland through the base, to create a beautiful and cohesive design that reflects your creativity and style, allowing you to enjoy your seasonal wreath.

    Finishing Touches

    After completing your wreath, add a professional touch by learning more about How to Make a Wreath tutorials. You can find inspiration and tips to enhance your creation.

    Adding a Personalized Accent

    Accent your wreath with a personalized item, such as a monogram or a decorative pick, to give it a unique touch. You can choose an item that reflects your personal style or the season.

    Final Fluffing and Primping

    Finishing your wreath with a slight fluff and primp will make it look complete. You should adjust any stray elements and make sure everything is in place.

    Primping is an crucial step to ensure your wreath looks its best. You will notice the difference when you take a step back and admire your handiwork, and with a few final tweaks, your wreath is ready to be displayed, showcasing your creativity and style.

    Displaying Your Masterpiece

    To showcase your seasonal wreath, consider the overall aesthetic you want to achieve in your home. You can hang it on your front door, wall, or use it as a centerpiece, and adjust the surrounding decor to complement your wreath.

    Choosing the Perfect Location

    Besides the entrance, you can also place your wreath in a living room or dining area to add a pop of color and fragrance, making your space feel cozy and inviting, as you admire your handmade creation.

    Pairing with Other Seasonal Decor

    Across the room, you can combine your wreath with other seasonal decorations, such as candles, pumpkins, or holly, to create a cohesive and festive atmosphere that reflects your personal style, as you enjoy the beauty of your wreath.

    Hence, when pairing your wreath with other seasonal decor, you can experiment with different textures, colors, and themes to find the perfect balance that enhances the beauty of your wreath and showcases your creativity, allowing you to enjoy the fruits of your labor and the admiration of your guests.

    Final Words

    Conclusively, you have learned the basics of crafting seasonal wreaths, and now you can create your own unique designs. You have the skills to choose the right materials and decorate your wreath according to your style. With your newfound knowledge, you can make beautiful wreaths that reflect your personality and add a personal touch to your home decor, making your space feel welcoming and inviting throughout the year, with your stunning creations.

    FAQ

    Q: What materials do I need to craft a seasonal wreath?

    A: To craft a seasonal wreath, you will need a variety of materials depending on the theme and design you choose. Some common materials include evergreen branches, holly, mistletoe, pinecones, ribbons, flowers, and decorative items like bows, berries, and ornaments. You will also need a wire or foam wreath frame to serve as the base of your wreath. Additionally, you may need some floral wire, scissors, and a hot glue gun to assemble and secure your materials.

    Q: How do I choose the right theme for my seasonal wreath?

    A: Choosing the right theme for your seasonal wreath depends on the time of year, your personal style, and the decor of your home. For example, a winter wreath might feature evergreen branches, pinecones, and snowflakes, while a spring wreath might feature flowers, greenery, and pastel colors. Consider the colors, textures, and motifs that are associated with the current season and choose materials that fit with those themes. You can also draw inspiration from nature, holidays, or special events to create a unique and personalized wreath.

    Q: What is the best way to assemble a seasonal wreath?

    A: Assembling a seasonal wreath can be a fun and creative process. Start by preparing your materials, such as cutting and trimming your branches, flowers, and greenery. Then, begin attaching your materials to the wreath frame using floral wire, hot glue, or another strong adhesive. Work your way around the wreath, adding materials in a balanced and visually appealing way. Consider creating a focal point, such as a bow or a cluster of flowers, to draw the eye and add interest to your wreath. Finally, fluff out your materials and adjust your wreath as needed to achieve a full and lush appearance.

    Q: How can I add a personal touch to my seasonal wreath?

    A: There are many ways to add a personal touch to your seasonal wreath, depending on your interests, hobbies, and style. Consider incorporating personal items, such as photos, ribbons, or decorations that reflect your favorite colors or themes. You can also experiment with different textures, such as burlap, lace, or velvet, to add depth and interest to your wreath. Another idea is to use natural materials, such as pinecones, acorns, or shells, that you have collected on a walk or vacation. By adding personal touches, you can make your wreath truly unique and reflective of your personality and style.

    Q: How do I care for and store my seasonal wreath?

    A: To keep your seasonal wreath looking its best, it’s crucial to care for and store it properly. For fresh wreaths, keep them away from direct sunlight, heat, and moisture, which can cause the materials to dry out or become damaged. For artificial wreaths, dust them regularly with a soft brush or cloth to prevent dust buildup. When not in use, store your wreath in a cool, dry place, such as a closet or attic, and consider wrapping it in tissue paper or a breathable cloth to protect it from damage. By following these tips, you can enjoy your seasonal wreath for years to come and make it a cherished part of your holiday decor.

Top DIY Projects for Holidays

As you prepare for the holiday season, you’re likely looking for ways to make your celebrations more personal and meaningful. You can add a touch of warmth and personality to your holidays with your own DIY projects. Your creativity and skills will shine through in these unique and thoughtful projects, making your holidays even more special. You will find inspiration in the following DIY projects to make your holiday season truly unforgettable.

Key Takeaways:

To make your holidays more enjoyable and personalized, consider the following DIY projects:

  • Creating handmade decorations such as wreaths, garlands, and ornaments can add a unique touch to your holiday decorations and make your home feel more festive.
  • Making homemade gifts like cookies, candies, and crafts can be a thoughtful and budget-friendly way to show your loved ones you care, and can also be a fun family activity.
  • Setting up a holiday-themed DIY photo booth with props and backdrops can be a great way to capture memories and create a fun and interactive experience for your guests.

Easy Decorations

Before starting your holiday DIY projects, consider easy decorations that can add a touch of warmth to your home. You can create a welcoming atmosphere with simple and elegant decor, making your space feel cozy and inviting.

Simple Centerpieces

One of the easiest ways to add a personal touch to your holiday table is by creating simple centerpieces using items like pinecones, candles, and evergreen branches. You can arrange these items in a decorative bowl or vase, adding a pop of color and fragrance to your table.

Handmade Ornaments

One way to make your holiday decorations more personal is by creating handmade ornaments. You can use materials like felt, glitter, and ribbons to create unique and beautiful ornaments that reflect your personal style.

A key aspect of handmade ornaments is the ability to customize them to fit your holiday theme and color scheme. You can make ornaments in various shapes, sizes, and colors, allowing you to add a personal touch to your holiday decorations. As you create your handmade ornaments, you can experiment with different materials and techniques, making the process a fun and creative experience.

Gift Ideas

Clearly, creating your own gifts is a thoughtful way to show you care. You can make personalized items that reflect your relationship with the recipient, making the gift even more special.

Personalized Photo Frames

These photos can be placed in beautifully crafted frames, making a lovely gift for your loved ones. You can add your personal touch to make it extra special.

Homemade Cookies

Similarly, framing your baking skills into delicious treats is a great idea. You can bake your favorite cookies and package them in decorative jars or boxes, making a sweet gift for your friends and family.

Another advantage of making homemade cookies as gifts is that you can customize them to your recipient’s tastes. You can choose their favorite flavors and toppings, and even create special shapes using cookie cutters, making your gift truly unique and personalized, showing you put thought into your gift.

Holiday Crafts

Keep your holiday season creative and fun with various DIY projects that you can make with your family and friends. You can create beautiful decorations, gifts, and cards that reflect your personal style and add a touch of warmth to your home.

Paper Snowflakes

Crafting paper snowflakes is a classic holiday activity that you can enjoy with your loved ones. You can create intricate designs and patterns using paper and scissors, and decorate your windows, walls, and trees with your unique creations.

Pinecone Decorations

Before you start decorating your home for the holidays, consider using pinecones to add a natural and rustic touch. You can paint, glue, or decorate pinecones in various ways to create beautiful ornaments, centerpieces, and wreaths that reflect your personal style.

Hence, as you explore the world of pinecone decorations, you will discover numerous ways to incorporate them into your holiday decor. You can use pinecones to create a stunning centerpiece for your dining table, or as a unique ornament for your Christmas tree, giving your home a cozy and inviting atmosphere that you and your guests will cherish.

Outdoor Projects

Despite the cold weather, you can still create a warm and inviting atmosphere in your outdoor space with DIY projects. You can decorate your porch, patio, or yard with festive decorations, lights, and plants to make it a winter wonderland.

Christmas Light Displays

Among the most popular outdoor DIY projects are Christmas light displays. You can create your own unique light display using string lights, net lights, or icicle lights to decorate your house, tree, or yard.

Winter Planters

For a beautiful and festive touch, you can create winter planters using evergreen branches, holly, and pinecones. You can fill your planters with these materials and add some decorative ribbons or bows to give it a personal touch.

And as you create your winter planters, you can experiment with different combinations of plants, branches, and decorations to find the perfect look for your outdoor space. You can place them on your porch, patio, or even along your walkway to add a warm and welcoming ambiance to your home.

Indoor Projects

For a festive and cozy atmosphere, indoor DIY projects are a great way to get your home holiday-ready. You can create beautiful decorations, personalize your space, and make it feel more welcoming to your guests.

Holiday-themed Wall Art

To add a personal touch to your walls, you can create your own holiday-themed wall art using materials like paint, glue, and glitter. You can make a beautiful centerpiece for your living room or a festive decoration for your hallway.

Seasonal Candle Holders

Inside your home, you can create a warm and inviting ambiance with seasonal candle holders. You can use materials like pinecones, twigs, and evergreen branches to create unique and fragrant holders for your candles.

Considering your personal style and the overall aesthetic of your home, you can choose the type of candle holders that fit best with your decor. You can place them on your mantel, coffee table, or dining table to add a warm glow to your holiday gatherings, and with your creativity, you can make your home feel cozier and more festive.

Budget-friendly Ideas

To save money on holiday decorations and gifts, consider DIY projects that are easy on the wallet. You can create beautiful and unique items without breaking the bank.

Repurposing Old Items

Adeptly, you can turn old items into new treasures, giving your holidays a personal touch. You can upcycle old jars, bottles, and other containers to create unique decorations.

DIY Gift Wrapping

Immediately, you’ll notice the impact of beautifully wrapped gifts. You can use items like paper, fabric, and ribbons to create stunning presentations.

Understanding the art of DIY gift wrapping, you can add a personal touch to your gifts. You can choose papers and materials that match your holiday theme, and add embellishments like bows and tags to make your gifts stand out.

Conclusion

Summing up, you now have a plethora of DIY projects to tackle during the holidays. With your creativity and skills, you can create stunning decorations and gifts. For more inspiration, visit 80 Easy Christmas Crafts to Bring on the Holiday Cheer to explore unique ideas, and make your holiday season even more special with your own handmade touches.

FAQ

Q: What are some popular DIY projects for the holidays that can add a personal touch to my celebrations?

A: There are many DIY projects that can add a personal touch to your holiday celebrations. Some popular ideas include handmade ornaments, customized gift wrap, and DIY decorations such as wreaths, garlands, and centerpieces. You can also try making your own holiday-themed crafts, such as snow globes, votive candles, and photo displays. These projects can be made with a variety of materials, including paper, fabric, glue, and natural elements like pinecones and holly.

Q: What DIY projects can I make as gifts for my loved ones during the holidays?

A: There are many DIY projects that make great gifts, such as handmade jewelry, customized mugs, and personalized photo albums. You can also try making homemade treats, such as cookies, fudge, and candies, and package them in decorative jars or tins. Other ideas include handmade soaps, lotions, and candles, as well as knitted or crocheted items like scarves, hats, and blankets. Consider the interests and preferences of the recipient when choosing a DIY gift project.

Q: What are some easy and budget-friendly DIY projects for the holidays that can be completed in a short amount of time?

A: There are many easy and budget-friendly DIY projects that can be completed in a short amount of time, such as making paper snowflakes, creating a handmade holiday card, or decorating a small vase or jar with paint, glue, and glitter. You can also try making a simple wreath using evergreen branches, holly, or mistletoe, or creating a centerpiece using candles, pinecones, and ribbons. These projects can be made with materials you may already have on hand, and can be completed in under an hour.

Q: How can I make my DIY holiday projects more eco-friendly and sustainable?

A: There are several ways to make your DIY holiday projects more eco-friendly and sustainable, such as using recycled or repurposed materials, choosing natural and biodegradable materials, and avoiding single-use plastics. You can also try using energy-efficient crafting methods, such as using a sewing machine instead of glue, and making projects that can be reused or repurposed in future years. Consider using materials like old maps, music sheets, and fabric scraps to create unique and eco-friendly decorations.

Q: What are some safety precautions I should take when working on DIY holiday projects, especially if I’m working with children or pets?

A: When working on DIY holiday projects, it’s always a good idea to take safety precautions to avoid accidents and injuries. If you’re working with children or pets, make sure to supervise them closely and keep hazardous materials out of reach. Use protective gear like gloves and goggles when necessary, and follow instructions carefully. Also, make sure your workspace is well-ventilated and free from clutter and tripping hazards. If you’re using materials like glue, paint, or sharp objects, be sure to follow the manufacturer’s instructions and take regular breaks to avoid fatigue and strain.

How to Craft Decorative Wreaths

FAQ

Q: What materials do I need to get started with crafting decorative wreaths?

A: To craft decorative wreaths, you will need a variety of materials depending on the type of wreath you want to make. Basic materials include a wire or foam wreath frame, decorative items such as flowers, leaves, ribbons, and ornaments, a hot glue gun, scissors, and any other specific materials required for your chosen design. It’s also helpful to have a workspace covered with paper or a cloth to protect it from glue and other materials.

Q: How do I choose the right wreath frame for my project?

A: Choosing the right wreath frame depends on the style and size of wreath you want to create. Wire frames are ideal for more structured designs and can be shaped easily, while foam frames are better suited for softer, more rounded designs. Consider the size of the space where the wreath will be displayed and the type of decorations you plan to use. For example, a larger wreath might be more suitable for a front door, while a smaller one could be better for a wall or table decoration.

Q: What are some tips for attaching decorations to my wreath frame?

A: Attaching decorations securely to your wreath frame is important for a professional-looking result. For lightweight items like ribbons and small ornaments, you can often use floral wire or a hot glue gun. For heavier items, such as large bows or thick flowers, ensure you use a sufficient amount of hot glue or consider wiring them directly to the frame for extra support. Start by adding decorations to the bottom of the wreath and work your way up to prevent them from falling off as you add more.

Q: How can I ensure my wreath looks balanced and visually appealing?

A: Achieving balance in your wreath design is key to its visual appeal. Start by creating a focal point, such as a large bow or a significant decorative piece, and then balance it with smaller items on the opposite side of the wreath. Consider the rule of thirds when placing your decorations – dividing your wreath into thirds both horizontally and vertically and placing important elements along these lines. Also, step back periodically as you work to evaluate the wreath’s appearance and make adjustments as needed.

Q: Can I make wreaths for different seasons and occasions, and how do I store them when not in use?

A: Yes, wreaths can be made for any season or occasion by changing the colors, themes, and materials used. For example, you might use pastel colors and flowers for spring, or red and green for Christmas. When not in use, wreaths should be stored in a dry, cool place to prevent damage. For wreaths made with organic materials like flowers or greenery, it’s best to dispose of them after the season to prevent mold and decay. Synthetic or dried material wreaths can be stored in boxes or bags, protected from dust and moisture. Consider taking photos of your wreaths for future reference or inspiration for new designs.

Skip to content