Jewelry Making

How to Make Handmade Jewelry

As you commence on the journey of creating your own handmade jewelry, you’ll discover a world of creativity and self-expression. With a few simple tools and materials, you can craft unique pieces that reflect your personal style. You’ll learn to combine beads, wires, and other elements to create stunning accessories that make a statement. Your imagination will be the only limit as you explore the art of handmade jewelry making, and with these steps, you’ll be well on your way to designing beautiful pieces that are truly one-of-a-kind.

Key Takeaways:

To create unique and personalized handmade jewelry, consider the following points:

  • Start by selecting high-quality materials, such as gems, beads, and metals, that fit your design and budget, and ensure they are compatible with each other.
  • Develop your technical skills through online tutorials, classes, or practice, to master various techniques like wire wrapping, soldering, and beading, and to improve your overall craftsmanship.
  • Focus on attention to detail when assembling and finishing your handmade jewelry pieces, paying close attention to aspects like closure security, polish, and overall aesthetics to create professional-looking items.
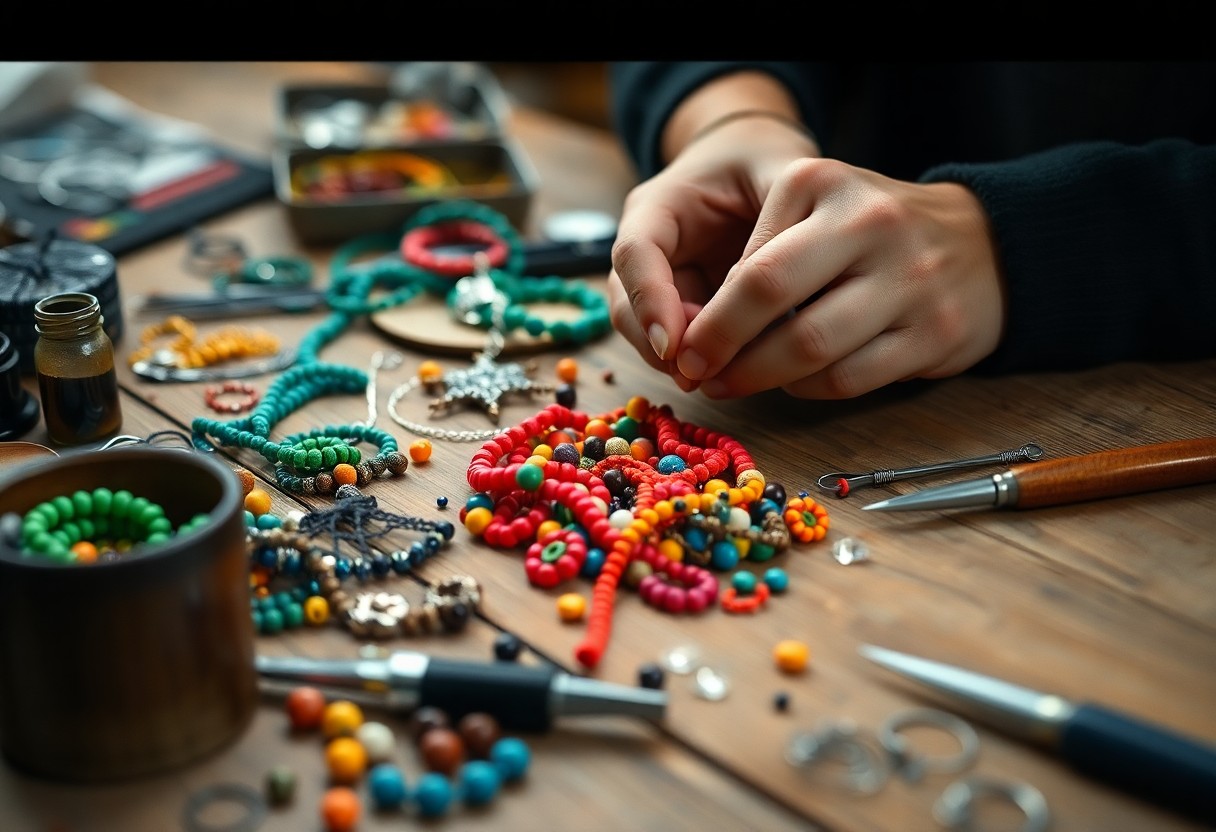
Gathering Materials

Before you begin making your handmade jewelry, it’s imperative to gather all the necessary materials. This will ensure that you have everything you need to complete your project efficiently.

Essential Tools

Along with your creative vision, you’ll need a set of basic tools, such as wire cutters, pliers, and a work surface, to bring your jewelry design to life.
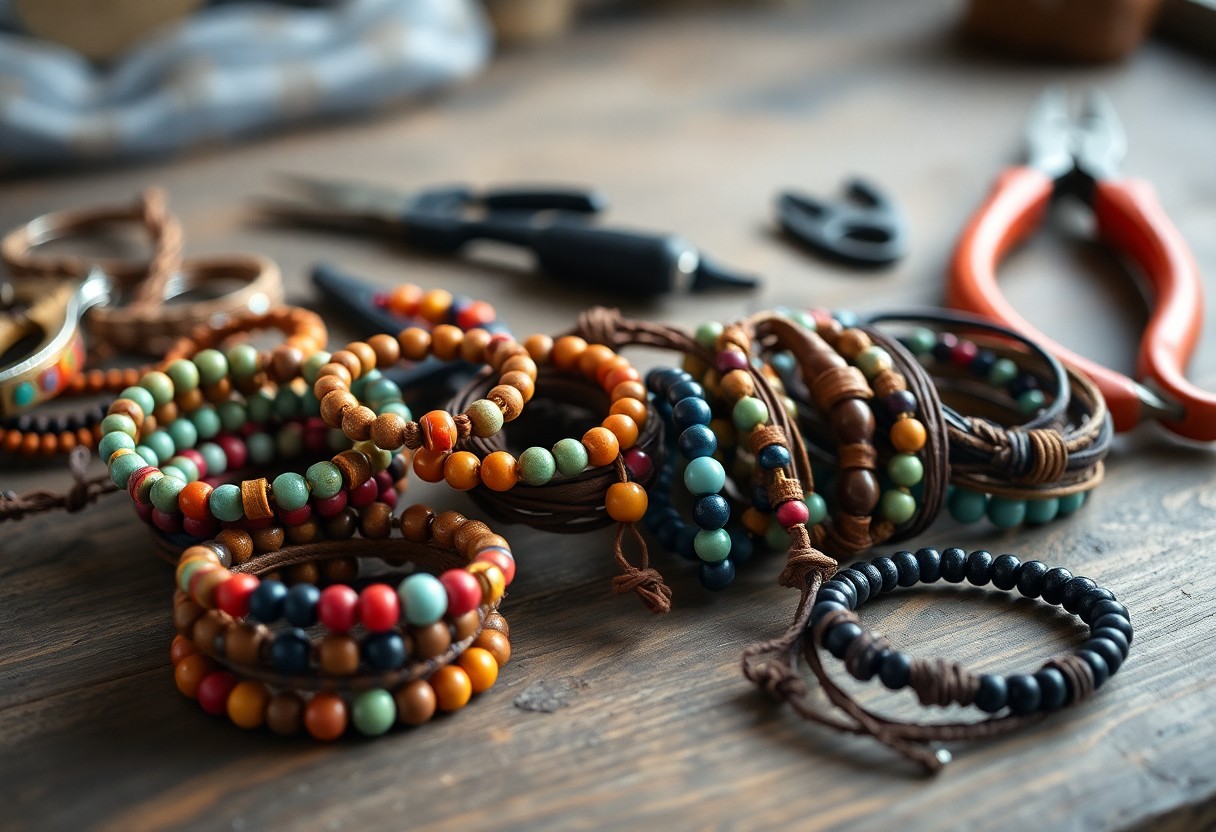
Beads and Findings

About the materials you’ll be working with, you’ll need to select beads, strings, and findings that fit your design aesthetic and skill level, considering factors like color, texture, and durability.

Gathering an assortment of beads and findings will allow you to experiment with different combinations, enabling you to create unique and personalized pieces that reflect your style and creativity, and as you collect your beads and findings, you’ll start to envision the beautiful jewelry you’ll be making with your own hands.

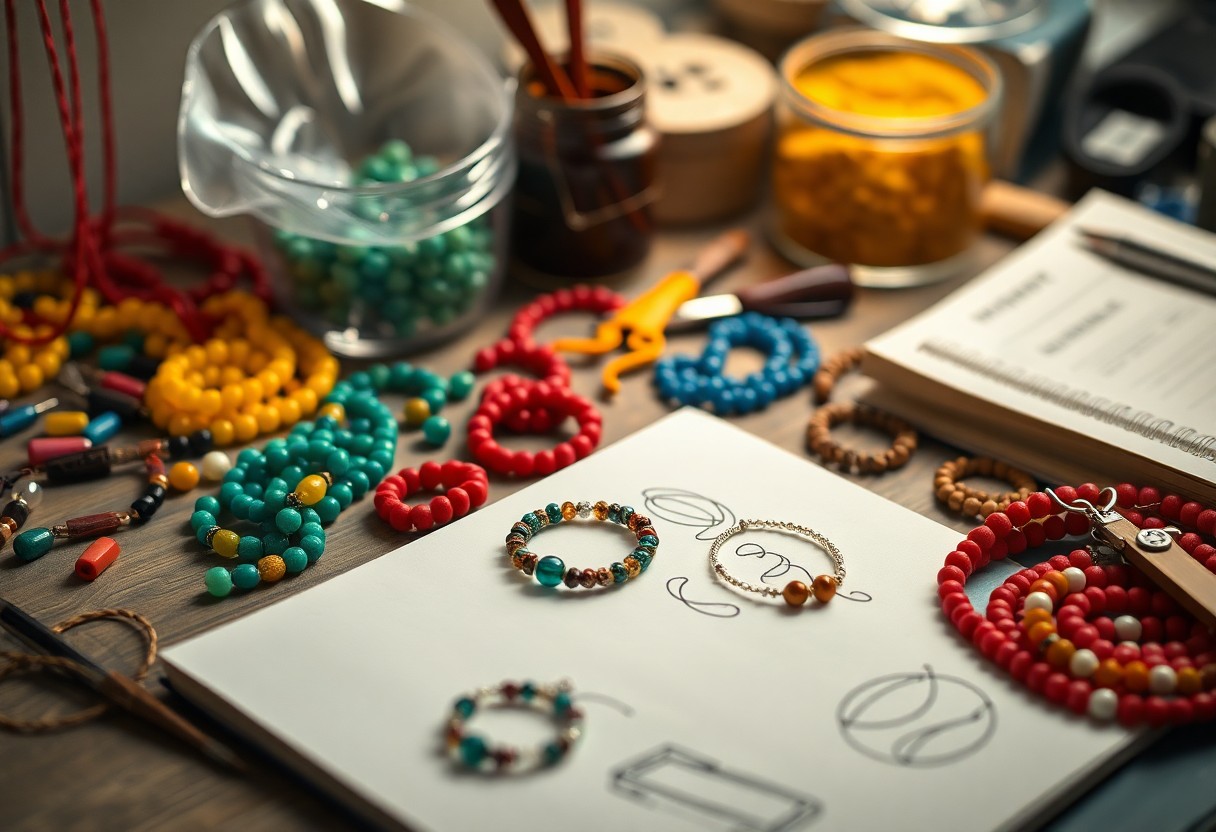
Designing Your Piece

There’s no denying that designing your handmade jewelry piece is an exciting part of the process. You get to unleash your creativity and bring your vision to life. As you start designing, consider what inspires you and what style you’re aiming for.

Choosing a Theme

The first step in designing your piece is to choose a theme or concept that sparks your imagination. Think about your personal style, favorite colors, and the occasion for which you’re creating the jewelry. This will help you narrow down your options and guide your design decisions.

Sketching Your Design

Behind every beautiful piece of handmade jewelry is a well-thought-out design. You’ll want to sketch out your ideas to visualize the final product and make any necessary adjustments before you start creating. This will save you time and materials in the long run.

Plus, as you sketch your design, you’ll have the opportunity to experiment with different shapes, colors, and textures. You can try out various combinations to see what works best for your piece, and make adjustments as needed. This is your chance to let your creativity shine and bring your unique vision to life, so don’t be afraid to try new things and have fun with the process.

Working with Beads

Your journey into handmade jewelry making begins with beads, and the possibilities are endless. You can choose from a variety of materials, shapes, and colors to create unique pieces that reflect your style.

Stringing Techniques

Almost any type of bead can be strung onto a cord or wire, allowing you to create simple yet elegant jewelry. You can experiment with different patterns and bead combinations to add visual interest to your designs.

Bead Weaving

Once you have mastered the basics, you can move on to more complex techniques like beading. You will need a loom or a needle and thread to weave your beads into intricate patterns and designs.

Weaving beads into complex patterns requires patience and practice, but the results are well worth the effort. You can create beautiful, intricate designs that showcase your skills and creativity, and with time, you will develop your own unique style and voice in the world of handmade jewelry making, allowing you to craft pieces that are truly one-of-a-kind and reflective of your personal aesthetic.

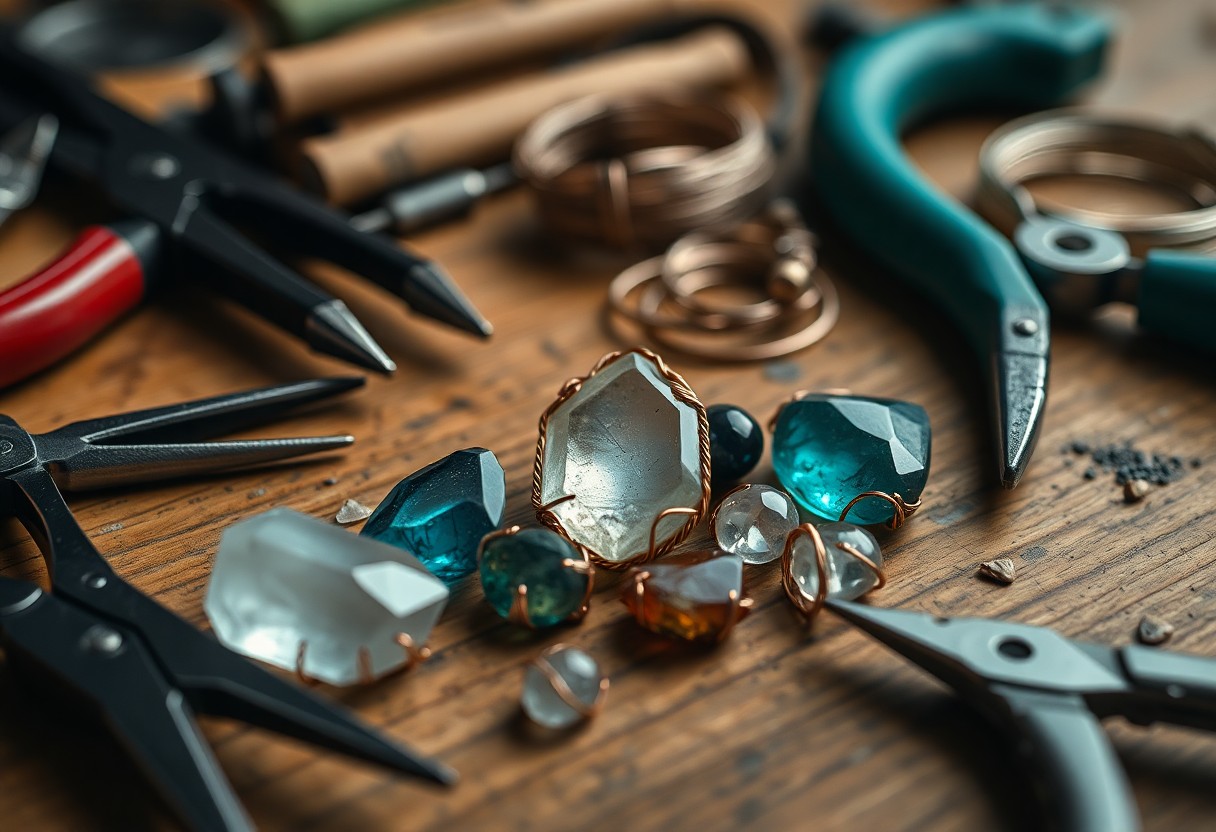
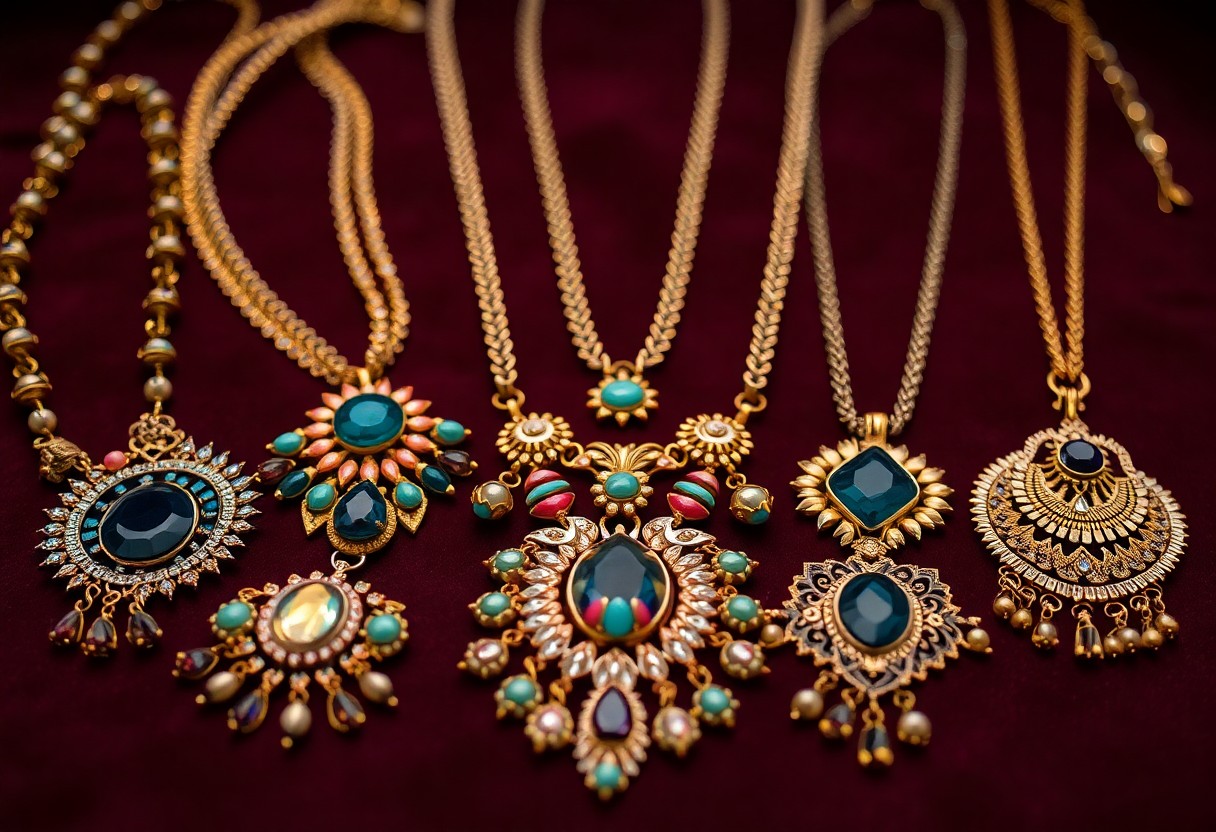
Adding Finishing Touches

Despite the complexity of your handmade jewelry design, the final details can make all the difference. You can find inspiration for your unique pieces on 360 Handmade Jewelry ideas and get creative with your finishing touches.

Closure Options

For a polished look, consider various closure options, such as clasps, toggles, or screws, to secure your handmade jewelry in place, ensuring your masterpiece stays intact.

Embellishments

The right embellishments can elevate your handmade jewelry, adding texture, color, and personality to your design, making it truly one-of-a-kind.

Even with simple embellishments like beads, sequins, or charms, you can create intricate patterns and designs that reflect your personal style, allowing you to express yourself through your handmade jewelry, and making the process of creating it even more enjoyable and rewarding for you.

Troubleshooting Common Issues

All handmade jewelry makers encounter challenges, and you are no exception. You’ll face issues, but with practice, you’ll learn to overcome them, creating unique and beautiful pieces.

Dealing with Knots

Along the way, you’ll encounter knots that can be frustrating, but you can learn to handle them with ease, using tools or your fingers to gently tease them out, and your jewelry will look professional.

Fixing Broken Pieces

Pieces of your jewelry may break, but you can fix them by reattaching or replacing the broken part, and your piece will be good as new, with a little patience and practice, you’ll master the technique.

Another aspect of fixing broken pieces involves being prepared with a well-stocked toolbox, you’ll have everything you need to mend your jewelry, and with a little creativity, you can even turn a broken piece into a new, unique design, adding character to your handmade jewelry, and making it truly special, just like you envisioned.

Displaying and Caring for Your Jewelry

Now that you’ve created your handmade jewelry, it’s time to think about displaying and caring for your pieces.

Storage Tips

You will need to consider how to store your jewelry to keep it looking its best. Here are a few tips:

  • Keep your jewelry in a cool, dry place
  • Avoid exposing your jewelry to direct sunlight

Perceiving the value of your handmade jewelry, you will want to take good care of it.

Showcasing Your Creations

Tips for showcasing your handmade jewelry abound, but you can start by considering your personal style and the style of your jewelry.

In addition to storing your jewelry properly, you can showcase your creations in a beautiful and creative way, such as on a decorative tray or in a lovely jewelry box, allowing you to enjoy your handmade pieces and share them with others.

Summing up

Following this guide, you’ll have created your own unique handmade jewelry. With your new skills, you can experiment with various materials and designs to craft one-of-a-kind pieces that reflect your personal style. As you continue to explore the world of jewelry making, you’ll discover new techniques to enhance your creations, and your jewelry box will soon be filled with beautiful, handmade treasures that showcase your creativity and flair.

FAQ

Q: What materials do I need to get started with making handmade jewelry?

A: To begin making handmade jewelry, you will need a variety of materials, including beads, wires, strings, and findings. Beads can be made of different materials such as glass, wood, or gemstones, and come in various shapes, sizes, and colors. Wires can be made of copper, silver, or gold, and are used to create the framework of your jewelry piece. Strings, such as leather or suede, can be used to add an organic touch to your designs. Findings, including clasps, earring backs, and jump rings, are necessary components that help complete your jewelry pieces.

Q: What are the basic tools required for making handmade jewelry?

A: The basic tools needed for making handmade jewelry include wire cutters, pliers, and flat-nose pliers. Wire cutters are used to cut wires to the desired length, while pliers and flat-nose pliers are used to shape, bend, and form wires into various shapes and designs. Additionally, a work surface, such as a bead mat or a jewelry-making board, can help keep your beads and findings organized and prevent them from getting lost.

Q: How do I design and plan my handmade jewelry piece?

A: To design and plan your handmade jewelry piece, start by brainstorming ideas and sketching out your design. Consider the theme, style, and purpose of your jewelry piece, as well as the materials and colors you want to use. Look for inspiration online, in books, or in nature, and take note of the colors, textures, and patterns that you like. You can also experiment with different bead combinations and wire shapes to create a unique and personalized design.

Q: What are some common techniques used in making handmade jewelry?

A: Some common techniques used in making handmade jewelry include stringing, wire wrapping, and beading. Stringing involves threading beads onto a string or wire, while wire wrapping involves shaping and forming wires to create intricate designs and patterns. Beading involves using a needle and thread to weave beads into complex patterns and designs. Other techniques, such as knotting and crimping, can also be used to add texture and interest to your jewelry pieces.

Q: How do I finish and care for my handmade jewelry piece?

A: To finish your handmade jewelry piece, make sure all the ends are securely closed, and the findings are tightly attached. You can also add a coating or sealant to protect your jewelry from tarnish or corrosion. To care for your handmade jewelry, avoid exposing it to water or harsh chemicals, and store it in a cool, dry place. Regularly clean your jewelry with a soft cloth and mild soap, and avoid stacking or tangling your jewelry pieces to prevent damage and breakage.

Top Beading Projects for Beginners

Key Takeaways:

  • For beginners, it’s best to start with simple beading projects that require minimal materials and techniques, such as making a bracelet or a pair of earrings.
  • Practice is key to improving beading skills, and starting with small projects allows beginners to develop their techniques and build confidence before moving on to more complex projects.
  • Using online tutorials and beading patterns can be extremely helpful for beginners, as they provide step-by-step instructions and visual guidance to ensure that the project turns out as expected.

Getting Started

The world of beading is exciting and creative, and as a beginner, you’re about to initiate on a journey that will bring you joy and fulfillment. You’ll discover the basics of beading and learn how to create beautiful pieces that reflect your personal style.

Choosing the Right Beads

With so many types of beads available, you’ll want to select the ones that suit your project and skill level. You’ll find that different beads have unique characteristics, and choosing the right ones will make your project more enjoyable and successful.

Essential Tools for Beginners

To get started with beading, you’ll need a few basic tools that will make the process easier and more efficient. You’ll need a good pair of scissors, a beading needle, and a beading board, which will help you organize your beads and threads.

Beads are just the beginning, and having the right tools will help you to handle and manipulate them with ease. As you progress in your beading journey, you’ll find that investing in good quality tools will save you time and frustration, allowing you to focus on creating beautiful and intricate designs that reflect your unique style and creativity, and you will be able to make the most of your beading experience.

Basic Beading Techniques

If you’re new to beading, it’s imperative to start with the fundamentals. You’ll need to learn various techniques to create beautiful pieces, and with practice, you’ll develop your skills and confidence.

Stringing and Threading

Upon beginning your beading journey, you’ll discover that stringing and threading are basic techniques. You’ll learn to navigate beads onto a thread or wire, creating a foundation for your projects, and as you practice, you’ll find it becomes second nature.

Knotting and Weaving

Woven into the fabric of beading, knotting and weaving are techniques that add texture and visual interest. You’ll use these methods to secure beads, create patterns, and add depth to your designs, allowing you to express your creativity.

For instance, as you master knotting and weaving, you’ll be able to create intricate patterns and designs, and you’ll find that your beading projects take on a new level of sophistication, allowing you to personalize your jewelry and make it truly unique, reflecting your style and flair.

Popular Beading Projects

Your introduction to beading can be exciting and creative, with various projects to choose from, allowing you to explore different techniques and styles, and find what suits you best.

Simple Jewelry Making

Around the world of beading, you’ll find that making simple jewelry is a great way to start, as it requires minimal materials and tools, and you can create beautiful pieces to wear or gift, enhancing your skills and confidence.

Decorative Items for the Home

Beading can also be used to create stunning decorative items for your home, such as beaded curtains, ornaments, and wall hangings, which can add a personal touch and unique style to your space, showcasing your creativity.

Due to the versatility of beading, you can create a wide range of decorative items that reflect your personal taste and style, from elegant and sophisticated to playful and whimsical, allowing you to express yourself and add a personal touch to your home decor, making it truly special and meaningful to you.

Bead Types and Materials

For your beading projects, you’ll encounter various materials. Consider:

  • Seed beads
  • Gemstones
Type Description
Seed Beads Small, uniform beads
Gemstones Natural, colorful stones
Crystal Sparkling, faceted beads
Metal Durable, versatile beads
Wood Natural, earthy beads

Recognizing your options will help you choose the best beads for your projects.

Seed Beads and Gemstones

Above all, after selecting your beads, you’ll find seed beads and gemstones are popular choices, offering a range of colors and textures to enhance your designs.

Shaping and Coloring Beads

Beside the type of bead, you’ll also consider shaping and coloring, which can greatly impact the overall look of your beading project, allowing you to add unique touches and personality.

Types of shaping and coloring techniques include etching, painting, and applying finishes, allowing you to customize your beads and create distinctive, one-of-a-kind pieces that reflect your style and creativity, as you work with different materials and explore various methods to achieve the desired effects for your beading projects.

Tips and Tricks

Not every beading project will turn out as expected, but with practice, you’ll improve. Some tips to keep in mind:

  • Use good quality beads
  • Follow patterns carefully
  • The key to success lies in patience and attention to detail.

    Avoiding Common Mistakes

    These are common pitfalls that you should be aware of when starting your beading journey. You can avoid mistakes by double-checking your work and using the right tools.

    Enhancing Your Beading Skills

    For you to become proficient in beading, practice is vital. You’ll develop your skills and style with time and experience, allowing you to take on more complex projects.

    This skill enhancement process involves trying new techniques, experimenting with different materials, and learning from your mistakes. As you progress, you’ll find that your beading skills improve, and you’ll be able to create more intricate and beautiful pieces, reflecting your unique personal style and flair, which will make your beading journey even more enjoyable and rewarding for you.

    Beading Community and Resources

    Keep in mind that as a beginner, you’ll need guidance and support to improve your beading skills. You’ll find numerous online resources, beading communities, and local classes that can help you learn and grow as a beader.

    Online Forums and Tutorials

    Besides the wealth of information available online, you can join forums and watch tutorials to learn new techniques and get inspired by other beaders’ projects. You can find tutorials on various platforms, including YouTube and craft websites.

    Local Beading Classes and Workshops

    Before you start beading, consider taking a local class or workshop to get hands-on experience and feedback from an instructor. You’ll learn from experienced beaders and get to practice your skills in a supportive environment.

    Tutorials and hands-on practice will help you master various beading techniques, and local classes will give you the opportunity to network with other beaders, learn about new trends, and get feedback on your projects, helping you to improve your skills and build your confidence as a beader.

    To wrap up

    Considering all points, you now have a solid foundation to start your beading journey. You can explore various techniques and projects, from simple jewelry to complex designs, to enhance your skills. As you progress, your creations will reflect your unique style, and you’ll be able to showcase your artistic side through your beading projects, taking your hobby to the next level with practice and patience, and making the most of your newfound hobby.

    FAQ

    Q: What are the best beading projects for beginners to start with?

    A: The best beading projects for beginners include simple jewelry making projects such as a basic beaded necklace, earrings, and bracelets. These projects require minimal materials and techniques, making them perfect for those new to beading. Some popular projects for beginners include a single-strand bead necklace, a pair of beaded earrings, and a simple beaded cuff. These projects are great for practicing basic beading skills and building confidence in your abilities.

    Q: What materials do I need to get started with beading?

    A: To get started with beading, you will need a few basic materials, including beads, beading thread or wire, scissors, and a clasp. You may also want to invest in a beading board, beading needles, and a pair of beading pliers. The type of beads and thread you choose will depend on the specific project you want to make. For example, if you are making a seed bead project, you will need seed beads and a beading needle, while a wire working project will require wire and wire cutters.

    Q: What are some common beading techniques that beginners should learn?

    A: There are several common beading techniques that beginners should learn, including stringing, wire working, and weaving. Stringing involves threading beads onto a length of thread or wire, while wire working involves shaping and forming wire into various shapes and designs. Weaving involves using a needle and thread to weave beads into a fabric-like texture. These techniques are the foundation of most beading projects and are necessary for creating beautiful and professional-looking jewelry.

    Q: How do I choose the right beads for my beading project?

    A: Choosing the right beads for your beading project involves considering several factors, including the color, shape, size, and material of the beads. You should also consider the theme and style of the project, as well as the level of difficulty. For example, if you are making a delicate, elegant necklace, you may want to choose small, shimmering beads, while a bold, statement piece may call for larger, more dramatic beads. It’s also important to choose beads that are compatible with the type of thread or wire you are using.

    Q: What are some tips for improving my beading skills and avoiding common mistakes?

    A: To improve your beading skills and avoid common mistakes, it’s a good idea to start with simple projects and gradually work your way up to more complex ones. You should also practice regularly to develop your skills and build your confidence. Additionally, make sure to follow patterns and instructions carefully, and don’t be afraid to experiment and try new things. It’s also a good idea to join a beading community or take a class to learn from experienced beaders and get feedback on your work. By following these tips, you can improve your beading skills and create beautiful, professional-looking jewelry.

The Art of Wire Wrapping

You’re about to discover a timeless craft that requires patience and skill. As you probe into the world of wire wrapping, you’ll learn to shape and mold metal into intricate designs. Your hands will move deftly, twisting and turning wire into beautiful pieces of art. With each twist, you’ll uncover the simplicity and elegance of this ancient technique, and your creations will reflect your unique touch.

Key Takeaways:

To master wire wrapping, consider the following key points:

  • The technique of shaping and bending wire into various forms is a fundamental aspect of wire wrapping, allowing artists to create intricate designs and patterns.
  • Choosing the right materials, such as wire type and gauge, is crucial to achieving the desired look and durability of the final piece, whether it’s a piece of jewelry or a decorative item.
  • Practice and patience are key to developing the skills and precision needed to create beautiful and intricate wire-wrapped designs, as it requires a great deal of attention to detail and manual dexterity.

Fundamentals

While exploring the art of wire wrapping, you’ll discover the importance of mastering the basics. Your foundation in wire wrapping will set the stage for more complex designs, and it’s crucial to understand the principles that guide this craft.

Materials and Tools

One of the first steps in wire wrapping is gathering the necessary materials and tools. You’ll need wire, pliers, and other basic supplies to get started, and your choice of tools will depend on the type of wire and design you’re working with.

Basic Techniques

Along with mastering materials and tools, you’ll need to learn basic wire wrapping techniques. You’ll start by shaping and forming the wire into various patterns and designs, and your skills will improve with practice and patience.

At the heart of basic techniques is the ability to manipulate the wire into the desired shape. You’ll learn to bend, twist, and shape the wire to create intricate designs, and as you practice, you’ll develop the skills and confidence to take on more complex projects, allowing you to express your creativity and bring your unique vision to life.

Design Principles

It is the foundation of wire wrapping, guiding your creative process. You will explore the elements that make a piece visually appealing.

Balance and Proportion

Blending shapes and sizes, you achieve harmony in your wire-wrapped designs, creating a sense of stability and visual flow.

Color and Texture

Texturing your wire and combining colors, you add depth and interest to your pieces, making them more engaging.

And as you experiment with different colors and textures, you will discover how they interact and enhance your overall design, allowing you to refine your unique style and express your artistic vision through wire wrapping.

Wire Wrapping Styles

Now that you’ve got the basics down, it’s time to explore the various wire wrapping styles that will take your craft to the next level. You’ll find that different styles can completely change the look and feel of your pieces, allowing you to create unique and personalized items.

Traditional Methods

The most common traditional methods involve using simple tools and techniques to shape and mold the wire into intricate designs. You can use these methods to create classic pieces that evoke a sense of timeless elegance.

Modern Approaches

Approaching wire wrapping with a modern mindset allows you to experiment with new materials and techniques. You can incorporate unconventional items into your designs, giving your pieces a fresh and contemporary feel.

Wrapping your mind around modern wire wrapping techniques takes practice, but the results are well worth the effort. You’ll be able to create complex, three-dimensional designs that showcase your skill and creativity, and you’ll have the freedom to push the boundaries of what’s possible with wire wrapping, making each piece truly your own.

Tips and Tricks

For a successful wire wrapping project, consider the following:

  • use the right tools
  • choose suitable wire

. After mastering these basics, your designs will flourish.

Working with Different Wires

Fortunately, you have various wire types to experiment with, including copper, silver, and gold, each offering unique properties to enhance your work.

Troubleshooting Common Issues

With patience and practice, you’ll identify and solve problems, such as tangled wires or imperfect wraps, to achieve professional-looking results.

But as you overcome these challenges, you’ll develop the skills to diagnose and fix issues efficiently, allowing you to focus on the creative aspects of wire wrapping, and your projects will improve significantly as a result of your newfound expertise and attention to detail.

Projects and Inspiration

Not every project requires intricate details, as you can start with simple designs and build your way up to more complex ones, discovering your unique style in the process.

Simple Projects for Beginners

Straightforward techniques can help you get started with wire wrapping, allowing you to create elegant pieces with minimal equipment and experience, and as you progress, you’ll find that your skills will improve, enabling you to take on more challenging projects.

Advanced Designs for Experienced Artists

Beside the basic techniques, you’ll find more complex designs that require patience and practice, including:

  1. Twisted wire pendants
  2. Intricate beadwork
Wire Wrapping Techniques

Technique Description
Coiling Creating coils to form a design

With experience, you’ll be able to create stunning pieces, and as you explore advanced designs, consider the following:

  1. Experimenting with different materials
  2. Pushing the boundaries of traditional wire wrapping
Advanced Wire Wrapping

Design Characteristics
Torched wire Using heat to shape and form wire

You’ll find that your creativity will flourish as you master new techniques and apply them to your work, allowing you to produce unique and captivating pieces that reflect your artistic vision.

Safety and Best Practices

Keep your workspace clean and organized to avoid accidents and ensure your safety while wire wrapping. This will help you stay focused on your craft and produce high-quality work.

Handling Sharp Objects

Against the risk of injury, you must handle sharp objects with care, always cutting away from your body and keeping your fingers clear of the cutting edge.

Working in a Safe Environment

Behind every successful wire wrapping project is a well-planned workspace, where you can work comfortably without distractions or hazards, allowing you to concentrate on your craft.

But as you set up your workspace, you’ll find that a safe environment is not just about the physical space, it’s also about your mental state – you need to be patient, calm, and fully engaged in the process to create something truly beautiful and meaningful, so take your time and let your creativity flow.

Conclusion

Upon reflecting on the art of wire wrapping, you see the skill in your hands. You’ve learned to shape and mold metal into unique pieces. Your creations are a testament to your patience and dedication. As you continue to hone your craft, you’ll find your own style emerging, setting your work apart from others. With each piece, you’ll grow more confident in your ability to create something truly beautiful and lasting.

FAQ

Q: What is the art of wire wrapping and how did it originate?

A: The art of wire wrapping is an ancient technique that involves shaping and molding wire into intricate designs and patterns to create unique pieces of jewelry and decorative items. This art form has its roots in various cultures, including ancient Egypt, Greece, and Rome, where wire was used to create elaborate jewelry and adornments. Over time, wire wrapping has evolved and branched out into various styles and techniques, with modern artists experimenting with different types of wire, tools, and methods to create innovative and stunning pieces.

Q: What types of wire are commonly used in wire wrapping, and what are their characteristics?

A: The most common types of wire used in wire wrapping are copper, silver, and gold-filled or gold-plated wire. Copper wire is a popular choice due to its malleability, affordability, and attractive reddish-orange color. Silver wire is also widely used, offering a bright, white finish and a higher level of durability than copper. Gold-filled or gold-plated wire provides a luxurious, high-end look and is often used for more intricate and complex designs. Each type of wire has its unique properties and requirements, and the choice of wire depends on the desired outcome, skill level, and personal preference of the artist.

Q: What are the basic tools required to start wire wrapping, and how do I choose the right ones?

A: To start wire wrapping, you will need a few basic tools, including round-nose pliers, flat-nose pliers, wire cutters, and a work surface. Round-nose pliers are used to shape and form loops, while flat-nose pliers are used to grip and bend the wire. Wire cutters are necessary for cutting the wire to the desired length. Additionally, a work surface, such as a jewelry-making mat or a wooden board, provides a comfortable and stable area to work on. When choosing tools, consider the quality, comfort, and ergonomics of the tools, as well as your budget and the specific type of wire wrapping you plan to do.

Q: What are some common wire wrapping techniques and patterns, and how do I learn them?

A: Some common wire wrapping techniques include the basic wrap, the spiral, the coil, and the weave. These techniques can be combined and varied to create intricate patterns and designs. To learn these techniques, you can start with online tutorials, classes, or workshops, where experienced instructors can guide you through the process. You can also practice with different types of wire and tools to develop your skills and experiment with new designs. Additionally, there are many wire wrapping books, videos, and online communities available, offering a wealth of information, tips, and inspiration for wire wrappers of all levels.

Q: How do I care for and maintain my wire-wrapped jewelry to ensure its longevity and durability?

A: To care for your wire-wrapped jewelry, avoid exposing it to harsh chemicals, extreme temperatures, or heavy wear and tear. Regularly clean your jewelry with a soft cloth and mild soap, and store it in a cool, dry place. For copper and silver wire, apply a clear coat of wax or sealant to protect against tarnish and corrosion. For gold-filled or gold-plated wire, avoid exposing it to water or moisture, as this can cause the gold layer to wear off. With proper care and maintenance, your wire-wrapped jewelry can last for years to come, retaining its beauty and charm.

DIY Bracelets for All Occasions

As you explore the world of jewelry making, you’ll discover that creating your own DIY bracelets can be a fun and rewarding experience. With a few simple materials and some basic techniques, you can craft unique and stylish bracelets to suit any occasion, from casual everyday wear to special events. You’ll be able to personalize your accessories to reflect your own taste and style, making each piece truly special. Get ready to unleash your creativity and make beautiful bracelets that will elevate your wardrobe and make you feel confident and stylish.

Key Takeaways:

To make the most out of DIY Bracelets, consider the following points:

  • Creating Customized bracelets allows you to personalize your accessories according to the Occasion, whether it’s a formal event or a casual gathering, giving you a unique and Stylish look.
  • Using various Materials, such as beads, strings, and charms, can add a Creative touch to your DIY bracelets, making them stand out and reflect your Personal Style.
  • Making Handmade bracelets can be a Fun and Relaxing activity, allowing you to express your Artistic side and create Meaningful gifts for friends and family on Special Occasions.

Materials and Tools

Before you start making your DIY bracelets, gather the necessary materials and tools to ensure a fun and successful experience. You’ll need beading supplies, such as threads, wires, and findings, as well as basic tools like scissors, pliers, and cutters.

Essential Beading Supplies

Normally, you will need basic beading supplies, including beads, threads, and findings, to create your unique DIY bracelets. You can choose from a variety of beads, such as gemstones, crystals, or glass beads, to match your desired style and occasion.

Additional Embellishments

Alternatively, you can add extra flair to your DIY bracelets with additional embellishments, such as charms, tassels, or pendants, to give them a personalized touch. You can experiment with different combinations to create one-of-a-kind accessories.

But what’s exciting about additional embellishments is that they allow you to take your DIY bracelets to the next level. You can use them to add a pop of color, create texture, or even convey a meaningful message. As you explore the world of DIY bracelet-making, you’ll find that the right embellishments can make all the difference in creating a truly special and eye-catching piece that reflects your personal style.

Basic Beading Techniques

Even if you’re new to beading, you can create beautiful DIY bracelets with ease. Start by learning the basics, and then explore more complex techniques. For inspiration, visit DIY Bracelets: 50 Projects for Gifts or to Sell to get started on your beading journey.

Knotting and Threading

Technically, knotting and threading are fundamental skills you’ll use to create your DIY bracelets. You’ll learn how to securely attach beads to your thread or string, and finish your bracelet with a professional-looking knot.

Simple Patterns and Designs

Designs can be as simple or complex as you like, depending on your skill level and personal style. You can create classic single-strand bracelets or more intricate multi-strand designs, using a variety of beads and materials.

This simple pattern is a great way to begin, as it allows you to practice your beading skills while creating a beautiful piece of jewelry. As you become more confident, you can experiment with different patterns and designs to create unique and personalized DIY bracelets that reflect your style and personality.

DIY Bracelet Ideas for Special Occasions

All you need is a little creativity to create beautiful DIY bracelets for special occasions. You can make them to give as gifts or to wear yourself, and they’re a great way to add a personal touch to any event.

Birthday and Holiday Gifts

One of the best ways to show you care is by giving a handmade gift, like a DIY bracelet. You can customize it with your recipient’s favorite colors or charm to make it extra special.

Wedding and Anniversary Accessories

Around this special time, you’ll want to create something truly unforgettable, like a custom DIY bracelet to commemorate the occasion. You can use pearls, lace, or other materials to make it elegant and sophisticated.

To add an extra touch to your wedding or anniversary DIY bracelet, you can incorporate personal elements, such as a charm with your anniversary date or a special message. You can also experiment with different materials and designs to make it truly unique and meaningful to you and your loved one.

Customizing Your Bracelets

Now that you have the basics of DIY bracelets down, it’s time to think about customizing them to fit your personal style and the occasion. You can experiment with different materials, colors, and charms to create unique and meaningful pieces.

Choosing Colors and Themes

For a beautiful and cohesive look, consider selecting colors and themes that reflect your personality or the occasion you’re celebrating. You can choose colors that match your favorite outfit or theme, and add beads, threads, or other embellishments to give your bracelet a personalized touch.

Adding Personalized Charms and Symbols

Similarly, symbols and charms can add an extra layer of meaning to your DIY bracelets. You can add charms that represent your interests, hobbies, or values, making your bracelet a truly one-of-a-kind piece.

Hence, as you investigate into the world of personalized charms and symbols, you’ll find that the possibilities are endless. You can choose from a wide range of charms, from simple letters and shapes to intricate designs and pendants, and add them to your bracelet to make it even more special and meaningful to you.

Tips and Tricks for Beginners

For a successful DIY bracelet-making experience, consider the following:

  • choose quality materials
  • follow instructions carefully

. Assume that with practice, you will become more confident in your abilities.

Avoiding Common Mistakes

Before you start, take a moment to plan your design and gather all necessary tools. This will help you avoid errors and ensure a smooth process.

Troubleshooting and Repairing Breaks

Around the time you encounter a break, stay calm and assess the damage. You can often fix issues with a few simple steps.

Consequently, you will find that troubleshooting and repairing breaks is an important part of the DIY bracelet-making process. You will learn to identify common problems, such as broken threads or faulty clasps, and develop the skills to fix them. With patience and practice, you will become proficient in repairing your DIY bracelets, allowing you to enjoy your creations for years to come.

Advanced Beading Techniques

To take your beading skills to the next level, you’ll want to master some advanced techniques. Here are a few to get you started:

  1. Wire wrapping
  2. Metal stamping
Technique Description
Wire wrapping Shaping wire into intricate designs
Metal stamping Stamping letters or patterns onto metal

Wire Wrapping and Metal Stamping

Tackling these techniques will allow you to create unique and personalized pieces. You’ll be able to shape wire into beautiful forms and stamp meaningful messages onto metal, making your jewelry truly special.

Incorporating Unconventional Materials

Alongside traditional beads, you can also experiment with unusual materials to add an extra layer of interest to your designs. You’ll discover that everyday objects can become stunning components in your jewelry.

Incorporating unconventional materials into your beading practice will help you develop a distinctive style. You can use items like vintage buttons, fabric, or even found objects from nature to create one-of-a-kind pieces that reflect your personality and creativity. As you explore these new materials, you’ll find that your jewelry-making possibilities will expand, and you’ll be able to craft truly remarkable accessories that showcase your unique vision.

Conclusion

Summing up, you now have the skills to create DIY bracelets for all occasions. With your newfound knowledge, you can design your own unique accessories, perfect for dressing up or adding a personal touch to your outfits. You can experiment with various materials and styles to make your bracelets truly special, and have fun while doing it – happy crafting!

FAQ

Q: What materials do I need to make a DIY bracelet?

A: To make a DIY bracelet, you will need a variety of materials, including beads, string or wire, clasps, and decorative elements such as charms or pendants. The specific materials you need will depend on the type of bracelet you are making and the design you want to achieve. You can find these materials at craft stores, online marketplaces, or specialty bead stores. Some common materials used to make DIY bracelets include seed beads, gemstone beads, leather cord, and metal wire.

Q: How do I choose the right beads for my DIY bracelet?

A: Choosing the right beads for your DIY bracelet depends on the occasion, your personal style, and the theme of the bracelet. Consider the color scheme, texture, and size of the beads, as well as their durability and quality. For a formal occasion, you may want to choose beads that are more elegant and sophisticated, such as pearls or crystal beads. For a casual occasion, you may want to choose beads that are more playful and fun, such as bright-colored glass beads or wooden beads.

Q: What are some popular DIY bracelet designs for different occasions?

A: There are many popular DIY bracelet designs that are suitable for different occasions. For a wedding or formal event, you may want to make a beaded bracelet with pearls, crystals, or other elegant materials. For a birthday or holiday gift, you may want to make a colorful and playful bracelet with glass beads, seed beads, or charms. For a everyday wear, you may want to make a simple and elegant bracelet with leather cord, metal wire, or a minimalist beaded design.

Q: How do I care for and maintain my DIY bracelet?

A: To care for and maintain your DIY bracelet, you should avoid exposing it to water, extreme temperatures, or harsh chemicals. You should also store your bracelet in a cool, dry place, away from direct sunlight. For beaded bracelets, you can use a soft cloth to wipe away dirt and dust, and for metal or leather bracelets, you can use a gentle cleaning solution. Regularly checking and adjusting the clasp and any other moving parts can also help to extend the life of your DIY bracelet.

Q: Can I make DIY bracelets as gifts for others?

A: Yes, DIY bracelets make great gifts for friends and loved ones. You can customize the design and materials to fit the recipient’s style and interests, and add a personal touch with a special message or charm. Consider making a DIY bracelet for a birthday, holiday, or special occasion, or as a thoughtful gesture to show you care. You can also make DIY bracelets in bulk and sell them at craft fairs or online, or use them as a fun and creative activity for parties or events.

How to Create Statement Necklaces

As you commence on the delightful journey of adorning your neck with a touch of elegance, you’ll discover that crafting statement necklaces is an art form that requires a dash of creativity and a pinch of flair. You’ll learn to weave together disparate elements, transforming them into a masterpiece that showcases your unique taste and sophistication. With your innate sense of style as your guide, you’ll navigate the world of textures, colors, and shapes, ultimately giving birth to a true showstopper that elevates your entire ensemble.

Key Takeaways:

  • To create a dramatic statement necklace, focus on combining bold pieces such as large beads, pendants, or tassels to make a eye-catching centerpiece that draws attention to the necklace.
  • Experiment with mixing and matching different textures, like smooth and rough, or colors, such as brights and neutrals, to add depth and visual interest to your statement necklace.
  • When designing a statement necklace, consider the overall aesthetic you want to achieve, such as bohemian, glamorous, or minimalist, and choose materials and elements that fit with your desired style to create a cohesive and polished look.

    Section

    For the discerning individual, crafting a statement necklace is an art form that requires finesse and flair. You will begin on a journey of self-expression, as you carefully select and combine materials to create a masterpiece that reflects your personality.

    Choosing the Right Materials

    Beneath the surface of a stunning statement necklace lies a thoughtful selection of materials. You will discover that the right combination of textures, colors, and shapes can elevate your piece from ordinary to extraordinary, as you experiment with various elements to find the perfect harmony.

    Essential Tools for Crafting

    Approximately every skilled artisan surrounds themselves with the necessary instruments to bring their vision to life. You will find that having the right tools at your disposal will make the crafting process infinitely more enjoyable, as you research into the world of statement necklace creation with ease and confidence.

    This arsenal of crucial tools will become your trusted companion as you navigate the creative process. You will use them to shape, mold, and assemble your materials into a breathtaking work of art, and as you work, you will develop a deeper understanding of the craftsmanship that goes into creating a truly show-stopping statement necklace, one that will undoubtedly become a testament to your impeccable taste and style.

    Section

    Assuming you have a flair for the dramatic, creating a statement necklace can be a thrilling venture. You’ll need to gather an assortment of materials, including beads, chains, and pendants, to bring your vision to life.

    Designing Your Statement Necklace

    Across the spectrum of jewelry design, statement necklaces stand out for their boldness and creativity. You can draw inspiration from various sources, such as nature, art, or architecture, to craft a unique piece that reflects your personality.

    Considering Color and Texture

    By exploring different color palettes and textures, you can add depth and visual interest to your statement necklace. You may opt for a monochromatic scheme or a kaleidoscope of hues, depending on the style you aim to achieve.

    Your choice of color and texture will greatly impact the overall aesthetic of your statement necklace. You should consider how the various elements will work together to create a harmonious and eye-catching piece, taking into account the interplay of light, shadow, and movement as you wear it, ensuring that your creation is a true masterpiece that showcases your impeccable taste and style.

    Section

    After selecting the perfect components, you are now ready to move on to the next step in creating your statement necklace. Your creativity and imagination will shine as you bring your design to life.

    Assembling the Necklace

    Nimbly, you will begin to assemble the various elements of your necklace, carefully considering the placement of each piece to create a harmonious and visually stunning whole.

    Tips for Working with Different Materials

    Around the world of jewelry making, you will encounter a vast array of materials, each with its own unique characteristics and challenges. You will work with:

    • Delicate fabrics
    • Exquisite beads
    • Luxurious metals
      Recognizing the properties of each material will help you to create a truly exceptional piece.

      To further master the art of working with different materials, you will want to experiment with various techniques and tools. You will discover that:

      • Wire wrapping is ideal for delicate chains
      • Beading is perfect for creating intricate patterns
      • Metals can be shaped and molded to create dramatic effects
        Recognizing the potential of each material and technique will elevate your statement necklace to new heights, and you will be delighted with the outcome of your creative endeavors.

        Section

        All that glitters is not gold, but with the right techniques, your statement necklace can shine like treasure. You’ll be amazed at how easily you can create a stunning piece with a few simple steps.

        Adding the Finishing Touches

        Augmenting your necklace with a few final flourishes can elevate it from ordinary to extraordinary. You’ll find that a well-placed clasp or a sprinkling of beads can make all the difference in your design.

        Embellishments and Details

        With a keen eye for detail, you can transform your necklace into a true showstopper. You’ll delight in the process of selecting the perfect embellishments to add a touch of personality to your piece.

        Finishing your statement necklace with intricate details will leave you feeling like a true artisan. You’ll take pride in knowing that every element, from the delicate chain to the daring pendant, was carefully chosen by you to create a one-of-a-kind masterpiece that showcases your unique sense of style.;

        Section

        Not every necklace is created equal, and when it comes to statement pieces, the right design can elevate your entire wardrobe. You will find that a well-crafted statement necklace can add a touch of sophistication to even the simplest of outfits, making it a must-have in your jewelry collection.

        Styling Your Statement Necklace

        Besides the inherent beauty of the piece itself, the way you style your statement necklace can greatly impact its overall effect. You should consider the length, texture, and color of the necklace when deciding how to wear it, as these factors will influence the overall aesthetic you wish to achieve.

        Pairing with Outfits and Accessories

        Outside of the necklace’s individual characteristics, you must also consider the outfits and accessories with which you will pair it. You will want to balance your look, ensuring that your statement necklace is the focal point, while your other accessories and clothing complement its beauty.

        Due to the versatility of statement necklaces, you will find that they can be paired with a wide range of outfits, from elegant evening gowns to more casual, everyday attire. As you experiment with different combinations, you will discover that your statement necklace can be dressed up or down, making it a valuable addition to your wardrobe, and a testament to your impeccable taste and style.

        Section

        Many talented individuals have managed to create statement necklaces that are truly breathtaking. You will be delighted to discover that making your own unique piece is quite straightforward, requiring only a few basic materials and some creativity. With a bit of practice, you will be able to craft stunning necklaces that will undoubtedly turn heads.

        Troubleshooting Common Issues

        Apart from the initial excitement, you may encounter a few challenges while creating your statement necklace. You will find that patience and attention to detail are crucial in overcoming these obstacles, and with time, you will develop the skills necessary to tackle even the most complex designs.

        Caring for Your Statement Necklace

        Naturally, your exquisite statement necklace will require some maintenance to retain its beauty. You should handle it with care, avoiding exposure to harsh chemicals or extreme temperatures, and store it in a safe place when not in use.

        Consequently, your statement necklace will remain a treasured possession for years to come, a true reflection of your impeccable taste and style. You will be able to wear it on special occasions, and it will undoubtedly become a conversation starter, drawing admiring glances and compliments from all who lay eyes on it, and you will take great pleasure in the knowledge that you created this masterpiece yourself.

        Conclusion

        As a reminder, you now possess the skills to craft your own statement necklaces. With these tips, you can create a masterpiece that showcases your personality. For further inspiration, visit How to Make a Statement Necklace – Katherine Dedul to explore your creativity and make your jewelry dreams a reality, elevating your style with your unique, handmade pieces.

        FAQ

        Q: What materials do I need to create a statement necklace?

        A: To create a statement necklace, you will need a variety of materials, including beads, wire, stringing material, findings, and embellishments. Beads can be made of various materials, such as glass, crystal, or stone, and come in different shapes, sizes, and colors. Wire can be used to create intricate designs and patterns, while stringing material, such as cord or chain, is used to connect the beads. Findings, like clasps and jump rings, are used to finish the necklace, and embellishments, such as charms or tassels, can add a decorative touch.

        Q: What are the basic steps to create a statement necklace?

        A: The basic steps to create a statement necklace include planning and designing your necklace, selecting and preparing your materials, and assembling the necklace. First, sketch out your design and choose the materials and colors that fit your concept. Next, cut and prepare your materials, such as cutting wire or stringing material to the desired length. Finally, assemble the necklace by threading the beads onto the stringing material, adding embellishments, and attaching the findings to complete the necklace.

        Q: How do I choose the right beads for my statement necklace?

        A: Choosing the right beads for your statement necklace depends on the style and theme you are trying to achieve. Consider the color, shape, size, and material of the beads, as well as their texture and finish. You can also consider the focal point of the necklace, such as a large pendant or a bold bead, and choose beads that complement it. Additionally, think about the overall aesthetic you want to create, such as a bold and eclectic look or a more delicate and elegant one, and choose beads that fit with that vision.

        Q: What are some popular techniques for creating statement necklaces?

        A: There are several popular techniques for creating statement necklaces, including wire wrapping, bead weaving, and stringing. Wire wrapping involves shaping and bending wire to create intricate designs and patterns, while bead weaving involves using a needle and thread to weave beads into complex patterns. Stringing involves threading beads onto a stringing material, such as cord or chain, to create a classic and elegant look. You can also experiment with mixed media techniques, such as combining different materials and textures to create a unique and eye-catching design.

        Q: How do I finish and secure my statement necklace?

        A: To finish and secure your statement necklace, you will need to attach findings, such as clasps and jump rings, to the ends of the necklace. Make sure the clasp is secure and comfortable to wear, and consider adding a safety catch to prevent the necklace from coming undone. You can also add a finishing touch, such as a charm or a tassel, to the end of the necklace. Finally, inspect the necklace for any loose threads or beads and make any necessary adjustments to ensure that it is secure and durable. With proper finishing and securing, your statement necklace will be ready to wear and enjoy.

Linearyazilim Skip to content